Super Hedge Fighter MT5
- Experts
-
AL MOOSAWI ABDULLAH JAFFER BAQER
 To trade successfully we need to go through the proven path that others had gone and reached!
Here are 17 quotes from such successful investors:
1- Limit your size in any position so that fear does not become the prevailing instinct guiding your judgment.
Joe Vidich - Versione: 1.3
- Aggiornato: 4 aprile 2025
- Attivazioni: 5
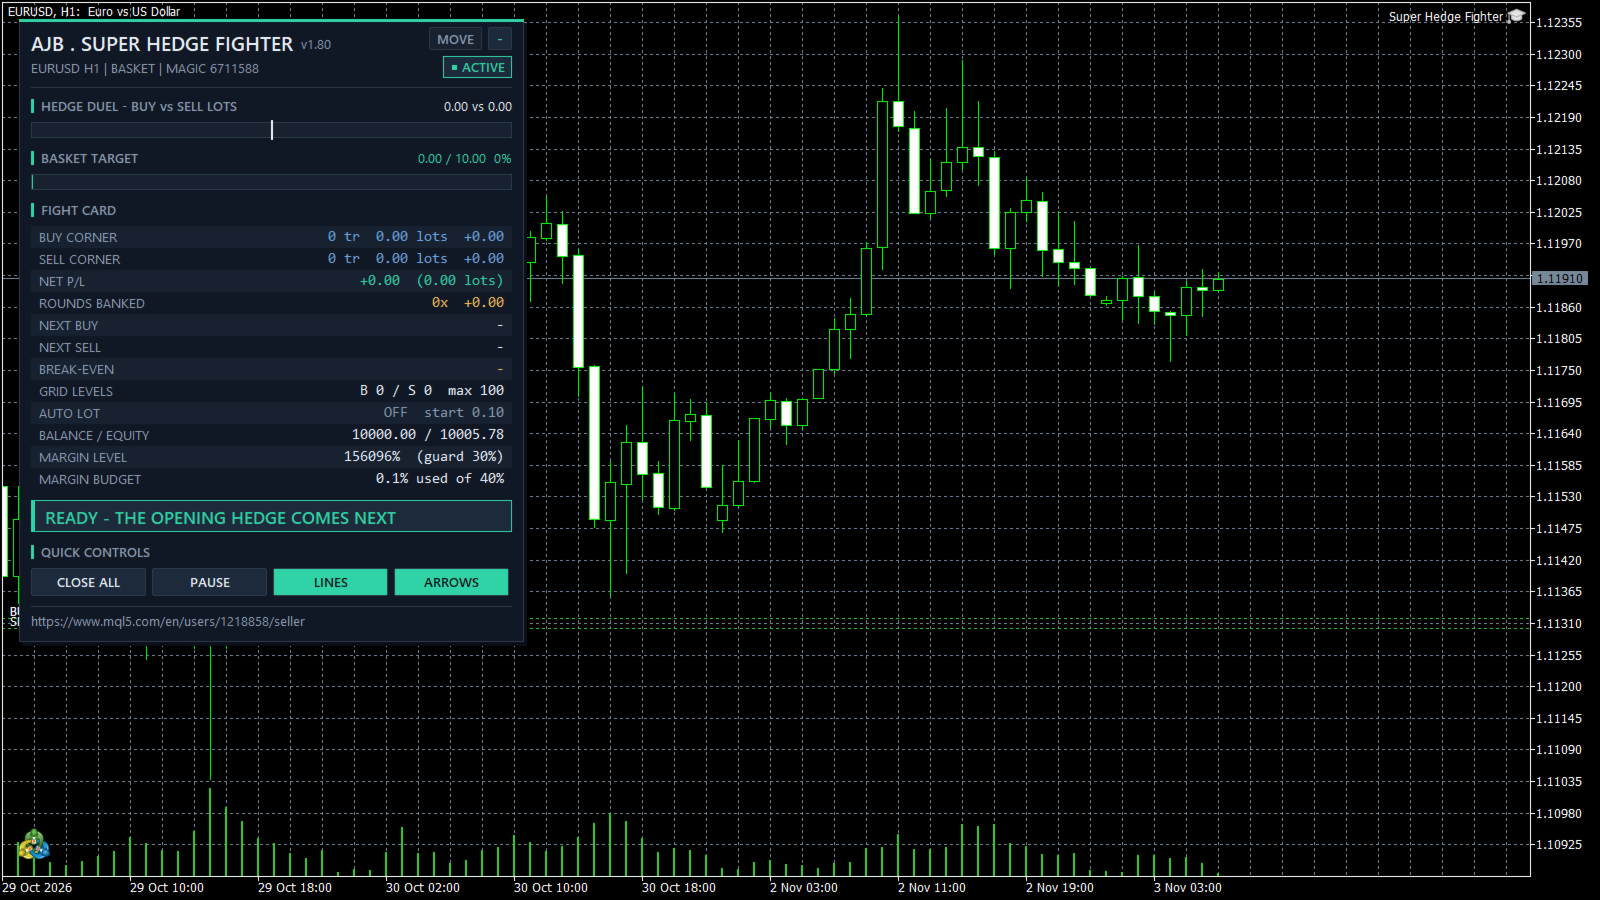
See it fight before you trust it: open the Strategy Tester, choose Super Hedge Fighter, EURUSD H1, visual mode on, and watch the two corners of the hedge build their ladders while the Fight Card counts every lot, every banked round and the margin you still have in reserve.
TWO CORNERS, ONE BASKET, AND A REFEREE THAT WATCHES YOUR MARGIN.
Super Hedge Fighter is a dual-side hedge grid Expert Advisor for MetaTrader 5. It opens a buy and a sell together, lets the market show which way it wants to go, adds grid levels as price travels, and closes the work with one of two exit engines that you choose: the whole basket at one money target, or fragment by fragment while the rest keeps running.
At a glance
• Opening hedge with both legs every cycle, then grid additions on the side the market pushes.
• Two exit engines: BASKET (one target for everything) and FRAGMENT (bank oldest + newest grid orders as a pair, hedge recycled after each round).
• Optional direction lock: the first side that price triggers becomes the only side that adds for that cycle.
• Six lot methods: multiplier, martingale, add fixed amount, reduce fixed amount, largest first, smallest first.
• Auto Lot that scales lots and every money target by the same factor, so the risk shape stays the same as the account grows.
• New in this version: Margin Budget guard, a maximum number of grid levels per side, verified fills and closes, a calm retry pause, and a new GPT-style on-chart panel.
• Needs a hedging account. No DLLs, no extra files.
QUICK START
Attach Super Hedge Fighter to an EURUSD H1 chart on a hedging account and keep the defaults: Basket exit, target 10 in account money, manual lot 0.1, grid distance 50 with distance multiplier 2.0, lot multiplier 1.2, max 1 lot per order, Margin Budget 40 percent, 100 levels per side at most. Switch on Algo Trading. The panel in the top-left corner says READY, then the opening hedge is placed and the Fight Card starts counting. On a small account lower the manual lot first; the Margin Budget will refuse anything your margin cannot carry, but a smaller lot keeps the ladder longer.
Why a hedge needs a fighter
A plain grid picks one side and hopes. A plain hedge sits still and pays the spread. Super Hedge Fighter puts both corners in the ring at once. The opening buy and sell neutralise the first move, and every level added afterwards goes to the side the market is actually pushing. When the basket as a whole reaches its target, everything closes and a fresh round starts. When the market goes far against the ladder, the Fragment engine can take the round apart piece by piece instead of waiting for one big recovery.
What is new in version 1.8
Margin Budget. Before every order the EA calculates the margin of that order with the broker's own formula and adds it to the margin already in use. If the total would pass your chosen share of equity (40 percent by default), the order is skipped and the reason is shown on the panel. This keeps the account far from the stop-out zone even on small deposits, and it is a visible input, not a hidden ceiling.
Verified trading. A "done" answer from the server is no longer trusted on its own: after every open the EA checks that a new position of its magic number really exists on the symbol, and after every close it checks that the position is gone or smaller. Refused filling modes are switched instead of repeated.
Calm retries. When an order is refused, that side waits a number of seconds before it tries again, so the journal does not fill with the same error on every tick.
Level limit. A maximum number of grid levels per side, and the lot ladder stops growing at that limit.
Safer controls. CLOSE ALL now needs a second click within six seconds.
New panel. The Fight Deck was rebuilt in the GPT panel style: clean dark cards, an accent spine for every section, self-measuring text and a layout that shrinks on small charts. Nothing is drawn in a non-visual backtest.
One round in the ring
1. The bell. With no positions open and the EA not paused, a buy and a sell are opened together. Both legs are tagged as level zero, the hedge.
2. The push. When price travels the grid distance beyond the furthest order on a side, a new order is added on that side with the next lot of your lot method. The distance can grow with every level through the distance multiplier.
3. The lock (optional). With "Lock to the direction price moves", the first side that price triggers becomes the only side allowed to add for the rest of the round.
4. The referee. Before each order, free margin, the Margin Budget, the order limits, the lot limits and the broker volume limit are checked. Anything that does not fit is reduced or skipped.
5. The score. Basket mode closes everything when the net result reaches the target. Fragment mode banks the whole basket if it is already above the fragment target, otherwise the oldest and newest grid orders as a pair, recycles the hedge after each banked fragment, and closes the hedge itself last.
6. The corner men. Stop-out protection trims the worst position when the margin level falls under your level, max-loss protection closes everything and waits before a new round, and an optional stop loss in money or percent ends a round that went too far.
The panel
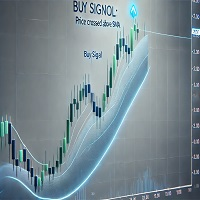
The panel sits in the top-left corner and leaves the right side and the price scale clear. The header shows the product name, the version, symbol and timeframe, the exit engine, the magic number and a status pill: ACTIVE, PAUSED, LOCK BUY, LOCK SELL, COOLING or BLOCKED. HEDGE DUEL is a split bar with the buy share of lots in blue and the sell share in red around a centre mark. BASKET TARGET or NEXT FRAGMENT TARGET is a progress bar with the live money figure and the percent. The FIGHT CARD lists each corner with trades, lots and result, net P/L, rounds banked with the money banked, the next buy and next sell price, break-even of the basket, grid levels per side, the Auto Lot factor and start lot, balance and equity, margin level next to the protection level, and the Margin Budget in use. A coloured banner states the situation in one line, including the reason of the last refused order. Four buttons: CLOSE ALL (click twice), PAUSE / RESUME new entries, LINES on the chart, ARROWS at entries. The panel can be dragged with MOVE and minimised with the small button.
Safety you control
Only positions with this EA's magic number on the chart symbol are counted, managed or closed. Other trades and other symbols are left alone.
The EA refuses to trade on a netting account and says so on the panel, because a hedge cannot exist there.
Every limit is an input you can see: Margin Budget, free-margin buffer, levels per side, orders, lots per order, lots per chart.
Paused means no new entries; exits and protection keep running.
Every setting explained
Core
Magic Number (MagicNumber) - identifies this EA's positions; use a different one for every chart (6711588).
Exit Engine (ExitMethod) - Basket closes everything at one target; Fragment banks pairs one by one.
Max slippage (MaxSlippagePoints) - allowed deviation in points for every order (30).
Direction
Direction mode (TradeDirectionMode) - add to both sides, or lock to the side price triggers first.
Up = Buy (UpIsBuy) - on: price going up adds buys and down adds sells; off: the reverse mapping.
Lot size
Auto Lot by percentage (AutoLot_WithPercentage) - start lot from a percentage of balance instead of a fixed lot (off).
Manual Lot Size (LotSize_Manual) - the start lot (0.1).
Lot size Percentage (LotSize_Percentage) - percentage used when the option above is on (1).
Different lot for the first hedge (Use_DifferentInitialHedgeLots) - give the opening hedge its own lot (off).
First hedge lot size (InitialHedgeLotSize) - lot of that hedge (0.2).
Auto lot scaling
Enable Auto Lot (UseAutoLot) - scale lots and money targets together by balance divided by the reference (off).
Reference balance (AutoLotBaseBalance) - balance at which the factor is 1.0 (1000).
Allow decrease (AutoLotAllowDecrease) - let the factor fall below 1.0 when the balance is under the reference (off).
Basket exit
Target as percentage (PercentageTP) - use a percent of the round's start balance instead of money (off).
Target in money (TakeProfit_Manual) - basket target, scaled by Auto Lot (10).
Target percentage (TakeProfit_Percentage) - basket target as percent of balance (1).
Fragment exit
Profit per closure (Fragment_ProfitPerClosure) - money a fragment must clear after costs (2.0).
Pair reverse orders (Fragment_CloseReversePair) - close oldest and newest grid orders together; off closes the newest alone (on).
Count full commission (Fragment_UseFullCommission) - include the exit commission in the fragment result (on).
Commission per lot fallback (Fragment_CommissionPerLot) - used when the broker reports none; 0 means automatic.
Also use basket target (Fragment_AlsoUseBasketTP) - close the whole basket at the basket target as well (off).
Recycle the hedge (Fragment_RecycleHedge) - close and reopen the opening hedge after every banked fragment (on).
Stop loss
Enable Stop Loss (EnableStopLoss) - close the round at a money or percent loss (off).
Stop as percentage (PercentageSL) - percent instead of money (off).
Stop in money (StopLoss_Manual) - scaled by Auto Lot (1000).
Stop percentage (StopLoss_Percentage) - percent of the start balance (5).
Grid
Distance (GridDistance) - distance between orders in pips-style units of the symbol (50).
Distance multiplier (DistanceMultiplier) - each level multiplies the distance by this value; 1.0 keeps it constant (2.0).
Lot method (LotMethod) - multiplier, martingale, add, reduce, largest first, smallest first.
Multiplier (Multiplier) - growth factor for the multiplier and martingale methods (1.2).
Add or reduce value (LotAddValue) - step for the add and reduce methods (0.01).
Largest lot (LargestLotSize) - first lot of the largest-first method (1.0).
Smallest lot (SmallestLotSize) - first lot of the smallest-first method (0.01).
Lot step (LotStepValue) - step for largest-first and smallest-first (0.01).
Limits
Max orders (MaxOrders) - total orders of this EA; 0 = no limit.
Max lots per chart (MaxOrdersLotsPerChart) - total lots of this EA on the chart; 0 = no limit.
Max lots per order (MaxLotsPerOrder) - no single order is larger than this, scaled by Auto Lot (1).
Symbol handling
Gold trading (IsGoldTrading) - use gold point handling for the distance (off; detected automatically for XAU and GOLD names).
Protection
Margin safety buffer (EnableMarginSafetyBuffer / MarginSafetyPercent) - require this extra percent of free margin above the order margin (on, 10).
Stop-out protection (EnableStopOutProtection / StopOutProtectionLevel) - when the margin level falls under this percent, half of the worst position is closed, at most once a minute (on, 30).
Max loss protection (EnableMaxLossProtection / MaxLossAmount) - close everything at this money loss, scaled by Auto Lot (off, 2000).
Wait after loss (WaitMinutesAfterLoss) - minutes before a new round after a max-loss close (30).
Margin Budget (MarginBudgetPercent) - an order is skipped if the margin in use after it would pass this percent of equity; 0 switches it off (40).
Max grid levels per side (MaxGridLevelsPerSide) - no more additions on a side beyond this level, and the lot ladder stops growing there; 0 = no limit (100).
Retry pause (RetryPauseSeconds) - seconds a side waits after a refused order (15).
Fight Deck
Show panel (ShowPanel) - on or off.
Panel X / Panel Y (PanelX, PanelY) - distance from the left and top edge in pixels (16, 16).
Chart map (ShowChartMap) - lines at every entry, break-even, next levels and the price band of the basket (on).
Arrows (ShowArrows) - an arrow at every entry (on).
Trade comments (ShowTradeComments) - readable order comments with side and level, also used to rebuild levels after a restart (on).
Panel font size (PanelFontSize) - base size; the panel shrinks itself on small charts (9).
How to use it well
Start on a demo hedging account with a small manual lot and the Basket engine; it is the easiest to read.
Move to Fragment when you want closed volume while the market ranges; keep Recycle the hedge on.
Keep the distance multiplier above 1.0 on trending symbols so the ladder spreads out as it grows.
Lower the Margin Budget to 25 or 30 percent on accounts below 1000 in account money.
Use one magic number per chart if you run several symbols.
Test it in the Strategy Tester
Choose Super Hedge Fighter, EURUSD, H1, "1 minute OHLC" or "Every tick", a deposit of 10000 and visual mode. You will see the hedge open, levels added on the side price travels to, the duel bar tilt, the target bar fill and rounds being counted. Change the exit engine, the lot method and the Margin Budget and compare; it costs nothing and shows how it behaves on your broker's data.
Your honest review helps
If Super Hedge Fighter works for you, or if something could be clearer, please leave an honest review on the product page. Every review is read and helps shape the next version.
A grid manages positions; it does not know the future. A long one-way move can take a basket deep into drawdown, so choose a lot size your account can carry and test first.