Noise Gate Trend System
- Indicateurs
-
Minh Truong Pham
 Hello, my name is Pham and I am a programmer and trader! At here, I create amazing forex indicators and expert advisors for Metatrader.
I will try:
+ Provide best tools base on my 5 years experience as a trader and 10 years as a programmer. - Version: 1.0
- Activations: 20
# Noise Gate Trend System
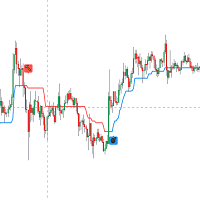
**Noise Gate Trend System** does exactly what its name says: it gates out market noise and only lets the real swings through. Around that gate it builds a complete, self-contained trading workstation — it tells you three things at a glance: *what the trend is*, *when to enter*, and *where your stop and targets are* — without a single extra indicator on the chart.
The gate itself is a **twin adaptive volatility range filter**. Price has to travel further than the market's own recent noise before the filter moves at all, so choppy ticks, wicks and micro-pullbacks simply never generate a signal.
Two gates run in parallel: a **narrow one** that produces the regular **Buy (L) / Sell (S)** signals, and a **wide one** that only opens on major volatility expansions and prints the rare **Strong** signals. Every regular signal automatically draws a full trade plan on the chart: **Entry, Stop Loss and five Take-Profit levels**. A multi-timeframe dashboard shows the trend of 10 timeframes at once, so you always know whether your signal is with or against the bigger picture.
Tuned on **XAUUSD (Gold)** intraday charts, it works on **any symbol and any timeframe** — Forex, metals, indices, crypto, stocks.
---
## What it does
- **The noise gate** — a fast (13-period) and a slow (200-period) volatility range are blended into one adaptive filter, so the gate tightens in quiet markets and widens automatically when volatility explodes. Anything smaller than the current noise level is ignored completely.
- **Buy / Sell signals ("L" / "S")** — printed only when the filter flips direction, so you get **one clean signal per swing**, never a stream of repeated arrows.
- **Strong signals** — a second gate, ~6× wider, marks the major reversals worth holding for a bigger move.
- **Automatic trade plan** — Entry, Stop Loss and **TGT 1–5** lines with price labels are drawn for the most recent signal and follow it until the next one appears.
- **Trend-coloured candles** — cyan while the filter is rising, magenta while it is falling (MT5). The MT4 version shows the same information as a colour-changing filter line.
- **Trend EMA** (default 200) plus the optional classic **EMA 9 / 21 / 55 / 100 / 200** ribbon, and an option to **only take signals in the direction of the Trend EMA**.
- **MTF dashboard** — current position, current trend, volume, and the bull/bear state of **10 timeframes** (M1 → D1) in one compact panel that you can dock to any chart corner. *(The MT4 build covers the 9 timeframes MT4 supports: M1 → MN.)*
- **Alerts** — pop-up, mobile push, e-mail or **Telegram** on every signal, in *instant* or *confirmed (bar-close)* mode.
- Available for both **MetaTrader 5** and **MetaTrader 4**. No DLL, no external dependency.
---
## Inputs
### Signals
| Input | Default | Meaning |
|-------|---------|---------|
| **Buy/Sell signals on/off** | true | Show the L / S labels |
| **Sensitivity (1-6)** | 1.5 | Width of the regular filter. **Lower = more signals**, higher = fewer and stronger |
| **Signal offset** | 1.0 | Distance of the labels from the candle, in % of the last 300-bar range |
| **Strong signals on/off** | true | Show the "Strong" labels |
| **Strong sensitivity** | 20 | Width of the strong filter — keep it well above *Sensitivity* |
### Smoothing
| Input | Default | Meaning |
|-------|---------|---------|
| **Smoothing source** | Close | Price used by both filters |
| **Smoothing range 1 period / sensitivity** | 13 / 8.0 | The fast range |
| **Smoothing range 2 period** | 200 | The slow range (shared by both filters) |
### Exit & entry levels
| Input | Default | Meaning |
|-------|---------|---------|
| **Show Entry/SL/TGT of the last signal** | true | Draw the trade plan |
| **SL %** | 0.25 | Stop distance, in **% of price** |
| **TGT 1…5 %** | 0.2 / 0.4 / 0.6 / 0.8 / 1.0 | The five target distances, in % of price |
| **Colours** | — | Entry / SL / TGT line colours |
### Trend & display
| Input | Default | Meaning |
|-------|---------|---------|
| **Only signal with the Trend EMA** | false | Filters out every signal that fights the Trend EMA slope |
| **Trend EMA length** | 200 | The thick blue trend line |
| **Show EMA 9/21/55/100/200** | false | The classic EMA ribbon |
| **Colour bars by trend** | true | Cyan / magenta candles (MT5) |
| **Show range filter lines** | false | Plot the raw filter and strong filter |
| **Bars back to draw signals** | 1000 | Keeps the chart light on long histories (0 = full history) |
### Dashboard & alerts
| Input | Default | Meaning |
|-------|---------|---------|
| **Show dashboard / Corner / Shift x,y** | true / bottom-left | Panel position, works in all four corners |
| **Background / Text / Bullish / Bearish colour, Text size** | — | Panel styling |
| **Alert only after the signal bar closes** | false | `false` = instant alert on the live bar; `true` = confirmed, non-repainting |
| **Notification type** | Alert | None / Telegram / Alert / Mobile push / E-mail |
> **The two knobs that matter most:** *Sensitivity* controls how many signals you get, and *SL % / TGT %* must match the volatility of your symbol and timeframe. Everything else can stay on default.
---
## How to read & trade the signals
### 1. Reading the chart
| What you see | What it means |
|--------------|---------------|
| **Cyan candles** | The filter is rising — bullish regime. Only look for longs |
| **Magenta candles** | The filter is falling — bearish regime. Only look for shorts |
| **Green "L" below a candle** | Regular **Buy** signal — the filter just flipped up |
| **Red "S" above a candle** | Regular **Sell** signal — the filter just flipped down |
| **"Strong" label** | The wide filter flipped too — a major reversal, not a scalp |
| **Blue "Ent:" line** | Entry price of the live trade plan (close of the signal bar) |
| **Dark red "SL:" line** | Suggested stop loss |
| **Green "TGT 1…5" lines** | The five scale-out targets |
| **Thick blue line** | Trend EMA (200) — the slow-money bias |
| **Dashboard → Current Position** | The side the filter is currently on (**Buy** or **Sell**) |
| **Dashboard → Current Trend** | Price vs EMA 144 on the **current** timeframe |
| **Dashboard → M1 … Daily rows** | Price vs EMA 144 on each timeframe — your multi-timeframe bias |
### 2. The three-step routine before every trade
**Step 1 — Bias (dashboard).** Look at the timeframe rows *above* the one you trade. Trading M5? Check M15, M30, H1, H4. If most of them are **Bullish**, take longs only. If they conflict (half green, half red), the market is rotating — expect chop and reduce size or stand aside.
**Step 2 — Regime (candle colour + Trend EMA).** The candles must already be the colour of the trade you want, and price should be on the correct side of the thick blue Trend EMA. A Buy signal printed under a falling Trend EMA is a counter-trend scalp — valid, but treat it as a quick trade to TGT 1–2, not a runner.
**Step 3 — Trigger (the label).** Only then act on the **L** or **S** label. The trade plan is drawn for you the moment the signal fires.
### 3. Long playbook (Buy — "L")
1. **Trigger:** a green **L** appears and the candles turn cyan.
2. **Entry:** at the close of the signal bar (the **Ent:** line), or on a shallow pullback toward the filter/Ent line. If you want confirmation, wait for the next candle to close above the signal candle's high.
3. **Stop loss:** the **SL:** line. If the recent swing low sits further away than the SL line and you have room in your risk budget, use the swing low instead — it is the structural invalidation.
4. **Position size:** calculate lots from the distance *Entry → SL* so the loss equals a fixed % of your account (1–2 % maximum). The SL is a **percentage of price**, so its pip value changes with the instrument — always size from the actual distance, never from a fixed lot.
5. **Targets:**
- **TGT 1** — take 30–50 % off, move the stop to break-even. From here the trade cannot hurt you.
- **TGT 2** — take another 25 %, trail the stop under the previous swing low or under the filter line.
- **TGT 3–5** — let the remainder run. These are only reached in a strong trend day; if the dashboard has 4+ higher timeframes bullish, they are realistic.
6. **Hard exit:** close everything when the opposite **S** label prints, whatever the P/L. The filter has flipped and the reason for the trade is gone.
### 4. Short playbook (Sell — "S")
Exactly mirrored:
1. **Trigger:** a red **S** appears and the candles turn magenta.
2. **Entry:** at the close of the signal bar (**Ent:** line) or on a small pullback up toward it.
3. **Stop loss:** the **SL:** line above price, or the recent swing high if it is close by.
4. **Targets:** TGT 1 → 30–50 % off + stop to break-even; TGT 2 → another 25 % + trail; TGT 3–5 → runner.
5. **Hard exit:** on the opposite **L** label.
### 5. Trading the "Strong" signals
The Strong gate is roughly six times wider, so it only flips after a genuine volatility expansion — typically once or twice a week on an intraday chart.
- **Strong in the same direction as a fresh L/S** → the highest-conviction setup in the tool. Take the full plan and aim for TGT 3–5, not TGT 1.
- **Strong against your open position** → the swing you were riding is over. Exit, do not "wait for it to come back".
- **Strong alone (no regular signal on that bar)** → treat it as a **regime change warning**: from now on, prefer signals in the Strong direction and skip the counter-trend ones.
- Note that the Entry/SL/TGT lines are drawn for **regular** signals only, by design — the Strong marker is a bias tool, not a separate trade plan.
### 6. Managing the target ladder
The five targets are fixed percentages of price, which is what makes them work across instruments: 0.2 % is a normal scalp on gold, a solid intraday move on EURUSD, and small change on BTC.
- **Scalping:** trade TGT 1 and TGT 2 only. Anything beyond is statistically rare on M1–M5.
- **Intraday:** TGT 1–3, with the last third trailed by the filter line.
- **Swing:** ignore the first targets as exits, use them as milestones for tightening the stop, and hold for TGT 4–5 or the opposite signal.
- If price hits TGT 1 within **one or two candles**, momentum is strong — widen your ambition, not your risk.
### 7. Session & instrument notes for gold
- The best signals on XAUUSD come during the **London and New York sessions**. The Asian session produces narrow ranges where the filter flips back and forth — either raise *Sensitivity*, or simply don't trade it.
- Around **high-impact news** (NFP, CPI, FOMC), switch **Alert only after the signal bar closes = true** and let the first spike candle close before acting.
- On a 3300 gold price, the default 0.25 % stop is about **$8.25 (825 points)** — that is an H1-sized stop. For M5 scalping use 0.08–0.12 % instead (see presets below).
### 8. Signals to skip
- **Flat filter, alternating L and S every few bars** — that is a range, not a trend. Every signal there is a loss waiting to happen.
- **Signal against 3+ higher-timeframe rows** on the dashboard. The odds are simply not on your side.
- **A signal whose distance to SL is far larger than usual** (very wide range after a spike) — the % stop stays the same, but the market's noise has grown; either skip it or wait for the next pullback entry.
- **The very first signal of the session after a long gap or weekend** — the filter needs live volatility data to be meaningful.
- **A signal that appears when price is already at TGT-distance from the Trend EMA** — you are entering where others take profit.
### 9. Worked example
> Gold, M15. The dashboard shows M30, H1 and H4 all **Bullish**, price is above the blue Trend EMA, candles are cyan. A green **L** prints at 3312.40 and the plan appears: **Ent 3312.40 / SL 3304.12 / TGT1 3319.02 / TGT2 3325.65 / TGT3 3332.27**.
> You risk 1 % of the account over the 8.28-dollar stop distance. TGT 1 is hit 20 minutes later — you close half and move the stop to 3312.40 (break-even). Price grinds up, TGT 2 fills, you take another quarter and trail the rest under the filter line. Two hours later a red **S** prints at 3329 — you close the remaining quarter. Net: roughly 2.5 R with zero risk after the first target.
---
## Parameter presets
Start with the defaults, then choose the row that matches your style. **Adjust the SL/TGT percentages together with the timeframe** — they are the part that must fit your instrument's volatility.
### By trading style
| Style | Sensitivity | Strong sens. | SL % | TGT 1…5 % | Confirmed alerts |
|-------|:-----------:|:------------:|:----:|:---------:|:----------------:|
| **Scalping (M1–M5)** | 1.0 – 1.3 | 15 | 0.10 | 0.08 / 0.16 / 0.24 / 0.32 / 0.40 | ON |
| **Intraday (M15–M30)** | 1.5 (default) | 20 | 0.25 | 0.2 / 0.4 / 0.6 / 0.8 / 1.0 | ON |
| **Swing (H1–H4)** | 2.0 – 2.5 | 25 | 0.6 | 0.5 / 1.0 / 1.5 / 2.0 / 2.5 | OFF |
| **Position (H4–D1)** | 3.0 | 30 | 1.5 | 1.0 / 2.0 / 3.0 / 4.0 / 5.0 | OFF |
### By instrument
| Instrument | Suggested tweak |
|------------|-----------------|
| **XAUUSD (Gold)** | Defaults are tuned for this. On M5 use the scalping row |
| **Major FX** (EURUSD, GBPUSD) | Percentages are smaller in FX terms — halve the SL/TGT values (SL 0.12 % on M15) |
| **Indices** (US30, NAS100) | Keep the defaults, raise *Sensitivity* to 2.0 for fewer signals in the open |
| **Crypto** (BTCUSD, ETHUSD) | Very volatile — *Sensitivity* 2.5–3.0 and double the SL/TGT percentages |
> **Rule of thumb:** too many flip-flop signals → **raise Sensitivity**. Signals arriving too late → **lower it**. Change one value at a time and re-check on your own symbol before going live.
---
## Recommended usage
- **Stand-alone system:** dashboard for bias → candle colour for regime → L/S label for entry → the drawn plan for management. Nothing else needed.
- **Confluence tool:** use the MTF dashboard and the Strong signals as a filter for your existing strategy.
- **Automation:** all values (filter, trend state, signals) are exposed through indicator buffers, so an EA can read them with `iCustom`.
---
## Notes
- **Repaint behaviour:** with *Alert only after the signal bar closes = false*, the forming bar updates on every tick, so a label can appear and disappear until the candle closes — normal for any real-time signal tool. Set it to **true** for fully confirmed, non-repainting signals.
- The indicator needs at least **~400 bars of history** on the chart before the filter becomes valid.
- Everything drawn is removed cleanly when you detach the indicator.
- Works on any account type, any broker, any symbol. **MT5 and MT4 versions available.**