Trend Exhaustion Radar
- 指标
- 版本: 1.0
- 激活: 5

Trend Exhaustion Radar answers one question that every trader asks in a strong move: is this trend running out of strength? Instead of watching three oscillators at the same time and missing the moment, the indicator reads DI+ / DI-, ADX and RSI for you, finds the classic warning signs - extreme zones, divergences, ADX hooks - and combines them into one traffic light with a rule score from 0 to 6.
You get three windows in one product: the price chart with a 9/21 EMA cloud, warning markers and divergence brackets, the STRENGTH window (ADX white, DI+ green, DI- red, power zone 40) and the EXTREMES window (RSI with the 75 / 25 zones). Both oscillator windows are attached automatically - you load one indicator, the rest is done.
| ✔ One traffic light instead of three oscillators | Green = QUIET, yellow = BUILDING UP / WARNING, red = EXHAUSTED. TOP = the bulls lose strength, BOTTOM = the bears lose strength. |
| ✔ Two stages per rule | Stage 1 = strength starts to fade (first warning), stage 2 = loss of strength confirmed (divergence / hook). Marked ◆1 and ◆2 on the chart. |
| ✔ Never repaints | Closed bars only. A marker, a divergence, a score or an arrow never moves or disappears - live and in the Strategy Tester. Verified bar by bar against an independent reference implementation. |
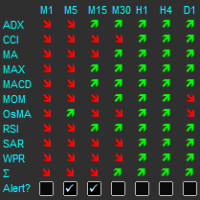
| ✔ Multi-timeframe matrix | The traffic light of four more timeframes in the dashboard - use H1 / H4 as navigation while you trade M5 / M15. One click opens a timeframe. |
| ✔ Honest history check | The dashboard measures on your chart how often the move really stalled after a red light and how the EMA confirmations performed. No hidden numbers. |
■ The idea in 30 seconds
A strong trend does not end out of nowhere. Before it turns or goes sideways, the power behind it fades: the trend strength (ADX) reaches an extreme and hooks down, the side that drives the move (DI+ in a rise, DI- in a fall) peaks and then makes a lower peak while price still makes a new high (divergence), and the RSI reaches an extreme zone and then fails to confirm the next extreme. Each of these signs alone is weak. When several of them appear within a short window, the probability that the move stalls rises clearly. That is exactly what the traffic light counts.
■ The three rules (each gives 1 or 2 points)
| DI (power of one side) | Stage 1: DI+ (top) or DI- (bottom) forms a peak at or above the DI zone (30) - a filled dot in the STRENGTH window. Stage 2: price makes a new high (low) beyond the price of that peak, but the DI is at least 2 points weaker = DI divergence - a line to a "D" in the STRENGTH window and a "DI+" / "DI-" bracket on the price chart. |
| ADX (strength of the trend) | Stage 1: ADX climbs into the power zone (40 or more) - the trend is at its limit; the side is the stronger DI. Stage 2: ADX forms a peak inside the power zone and hooks down - a cyan circle in the STRENGTH window. |
| RSI (overbought / oversold) | Stage 1: an RSI peak at or above 75 (top) or a trough at or below 25 (bottom) - a green / pink dot in the EXTREMES window. Stage 2: the next RSI peak is lower (trough higher) while price makes a new extreme = RSI divergence - a line to a "D" in the EXTREMES window and a dotted "RSI" line on the price chart. |
Every event counts for 20 bars (window). The score of a side is the sum of the three rules: 0 / 1 / 2 points each, maximum 6/6.
■ The traffic light
| QUIET (0/6, green) | No warning in the last 20 bars. The trend or range is healthy. |
| BUILDING UP (1-2/6, yellow) | First signs: strength starts to fade. No action yet - keep watching. |
| WARNING (3/6, yellow) | Several rules agree. Trend followers tighten the stop. |
| EXHAUSTED (4-6/6, red) | Most rules agree. Reduce or exit a trend trade, watch for a reversal or a sideways phase. Alert by default. |
■ What you see on the chart
| EMA cloud 9 / 21 | Green when the fast EMA is above the slow one, purple when below. The candles are drawn in front of the cloud. |
| ◆1 (gold) | A side starts to count: the first warning of a new cycle ("strength fading"). |
| ◆2 (cyan) | The first stage-2 event of the cycle ("loss of strength confirmed"). Above the high = TOP, below the low = BOTTOM. |
| DI+ / DI- bracket | The price extreme of the DI peak, the horizontal line to the new extreme where the DI diverged. |
| RSI dotted line | The two price extremes of an RSI divergence. |
| Arrow + CONFIRMED | Reversal confirmation: the 9 EMA crossed the 21 EMA against the exhausted side within 30 bars after the score reached 4/6 or more. |
■ The two oscillator windows
STRENGTH: ADX (white), DI+ (green), DI- (red), dashed power zone at 40, filled dots = DI peaks in the zone, cyan circles = ADX hooks, small marks = DI crosses, lines with "D" = DI divergences. At the top edge 1↑ / 2↑ mark the TOP stages, at the bottom edge 1↓ / 2↓ the BOTTOM stages.
EXTREMES: RSI (white) with the zones 75 / 25 and the middle line 50, green dots = RSI peaks in the upper zone, pink dots = troughs in the lower zone, lines with "D" = RSI divergences.
The windows are attached when you load the indicator and removed when you remove it. The WINDOWS button in the dashboard switches them off and on.
■ The dashboard (animated, drag it anywhere)
| Header | Timeframe buttons M1 - D1, layer buttons CLOUD / CANDLES / MARKERS / DIVERG. / CONFIRM / WINDOWS, reference line: symbol, leading side, last stage 2. |
| Exhaustion light | The traffic light, the state, the leading side, the score bars of TOP and BOTTOM and three cards (DI / ADX / RSI) with their stage lamps and live values. |
| Multi-timeframe | Chart timeframe + four input timeframes: side, score, state, bars since the last stage 2. Click a timeframe to open it. |
| Reversal confirmation | Cloud state and age, distance of the price to the slow EMA in ATR, which side is armed and how many bars are left, the last confirmation. |
| History check | Red lights on this chart, the share where the move stalled (no extension of more than 1 ATR within 20 bars), confirmations and the share in favour after 20 bars. |
X closes the dashboard to a small pill (click to open again), the square button switches between the full dashboard and the compact traffic light. Position and state are saved per chart. If another Quant Series panel is on the chart, the dashboard moves out of its way. Every element explains itself on mouse over (can be switched off).
■ How to use it - step by step
1. Load the indicator on any chart (forex, gold, indices, crypto, stocks; every timeframe). The two oscillator windows appear below the chart. During the first 250 bars of the history the light shows WARM-UP.
2. Navigate with the higher timeframe. Look at the multi-timeframe matrix: an EXHAUSTED H1 or H4 in the direction of your trade is a serious warning; an exhausted M5 against a QUIET H1 is often just a pause.
3. In a trend trade (long in a rise): BUILDING UP = keep going; WARNING = tighten the stop; EXHAUSTED TOP = take profit or reduce, at least move the stop behind the last swing. The same mirrored for a short and BOTTOM.
4. Looking for a reversal: wait for EXHAUSTED on the side of the old move and then for the confirmation (arrow + CONFIRMED, alert). The confirmation is later and therefore safer, but the reward / risk is smaller - the market has already done part of the move. Place the stop behind the extreme of the exhausted move.
5. Illustration: Gold rises strongly on M5. DI+ peaks at 41 (◆1, TOP 1/6, BUILDING UP). Twelve bars later price makes a higher high while DI+ only reaches 33 (DI+ divergence, ◆2), ADX climbs above 40 and RSI prints a dot above 75: TOP 5/6, EXHAUSTED, red light, alert. A long is closed; four bars later the 9 EMA crosses below the 21 EMA - SELL CONFIRMED.
■ Inputs
| ADX / DI length (14) | Wilder DMI length. |
| RSI length (14) | Wilder RSI length. |
| Window (20) | A warning counts for N bars. |
| DI peak zone (30) | Stage 1 of the DI rule: DI peak at or above. |
| ADX power zone (40) | Stage 1: ADX enters, stage 2: ADX hooks down from a peak in the zone. |
| ADX trend level (25) | Panel text TREND / RANGE. |
| RSI upper / lower zone (75 / 25) | Stage 1 of the RSI rule. |
| Divergence minimum (2.0) | The oscillator must be at least X points weaker for a divergence. |
| Pivot bars left / right (3 / 2) | Peak detection. Right = confirmation delay: a peak is known 2 bars after it formed, the marker is placed on the peak bar. |
| Warm-up bars (250) | History before the first warning. |
| Fast / slow EMA (9 / 21) | Cloud and confirmation cross. |
| Confirmation score / bars (4 / 30) | The cross confirms a reversal if it comes within N bars after the score reached at least X/6. |
| Windows and drawing | Oscillator windows, cloud, candles, markers, divergence brackets, confirmation arrows on / off, number of bars with markers (1500), all colours. |
| Multi-timeframe | On / off, four timeframes (M5, M15, H1, H4), bars per timeframe (600). |
| Alerts | Stage 1 (off), stage 2, red light (EXHAUSTED), confirmation; popup, sound, push, e-mail, on-chart toast. |
| Display | Full / compact, automatic placement next to other Quant Series panels, start position, tooltips. |
■ Buffers for Expert Advisors (iCustom)
| 9 / 10 | Confirmation arrow buy / sell (price, else EMPTY_VALUE) |
| 11 / 12 | TOP score / BOTTOM score (0-6) |
| 13 | Warning marker: +1 / +2 TOP stage, -1 / -2 BOTTOM stage, 0 none |
| 14 | Confirmation: +1 buy, -1 sell, 0 none |
| 15 - 18 | ADX, DI+, DI-, RSI |
| 19 | Traffic light: side (+1 top / -1 bottom) x state (0 quiet, 1 building up, 2 warning, 3 exhausted) |
Read shift 1 (the last closed bar). All values are final when the bar closes.
■ Facts from the history check (no promise)
On XAUUSD M5 (123,000 bars) the move stalled - no extension of more than 1 ATR within 20 bars - after 56 % of the red lights (4/6 or more) and after 64 % of the 5/6 lights, against about 39 % at ordinary new highs / lows without a warning. On EURUSD H1: 53 % / 64 % against 41 %. The more rules agree, the more often the move stalls. The confirmation arrow is a late, conservative signal and not a stand-alone trading system - use it together with your own entry and risk management. Past results do not guarantee future results.
■ FAQ
Does it repaint? No. Everything is calculated on closed bars. Peaks need 2 bars to be confirmed; the marker then appears on the peak bar and never moves again. The EA buffers belong to the confirmation bar.
Which markets and timeframes? All. The rules are universal; on D1 / W1 the window covers a long time, so the signals are rarer.
Do I need the two windows? No - the traffic light and the dashboard work without them (WINDOWS button). They show you why the light changed.
Does it trade? No. It is an indicator. Use the buffers if you want to build an EA.
Can I use it in the Strategy Tester? Yes, including the dashboard in visual mode.