JSL Orderflow Footprint
- Göstergeler
-
J Lucky Anugraha
 I build trading systems the way I build with precision, control loops, and zero tolerance for failure.
By education: B.Tech. Scholar in Industrial Biotechnology | Associate Engineer in Instrumentation & Control.
By blood: Classical market research passed down through my family. - Sürüm: 1.0
- Etkinleştirmeler: 20
JSL Orderflow Footprint turns every candle into a price ladder that shows how much volume traded on the bid and on the ask at each price level. It highlights diagonal imbalances, stacked imbalance zones, absorption at candle extremes, cumulative delta (CVD), delta divergence and the daily session volume profile, then combines five of these order-flow conditions into a 0–100 confluence score. A signal is only issued on bar close when the score is high, clearly one-sided and confirmed by the candle's own direction, and it is announced by an on-chart banner, arrow, popup, sound and optional push/email.
Standard candles show only open, high, low and close. A footprint opens the candle up and shows who was aggressive at each price: buyers lifting the ask or sellers hitting the bid. JSL Orderflow Footprint builds this footprint directly from ticks, draws it as a clean dark-theme dashboard directly on the chart, and scores every closed bar for buy and sell confluence.
The screen has seven parts:
- Dashboard panel (top-left) — live bar volume, ask/bid split, bar delta, cumulative delta, imbalance ratio; session POC, value area high/low, latest stacked imbalance, latest absorption, divergence; a 10-segment signal-strength bar with the 0–100 score; a 5-point confluence checklist; the last signal.
- Footprint candles (centre) — each row shows bid x ask volume. Dark green cells are buy imbalances, dark red cells are sell imbalances, a yellow outline marks the candle POC, a dashed cyan outline marks the absorption cell. A thin body and wick sit on the left edge of each candle.
- Per-candle statistics — delta (Δ) and total volume under each candle, plus a green/red delta histogram strip.
- Stacked imbalance zones — translucent green (support) or red (resistance) boxes projected to the right until price closes through them.
- Signal arrows and tags — ▲ BUY xx% below the candle or ▼ SELL xx% above it; ABS tags show absorbed volume.
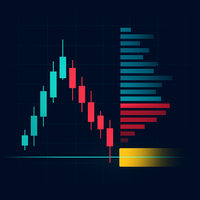
- Session volume profile (right) — horizontal bars per price row; yellow = session POC (also drawn as a dashed yellow line across the chart), blue = 70% value area, grey = outside value area; a live price tag on the price scale.
- Alert banner (bottom) — side, price, score, reasons and time of the latest signal; flashes for 20 seconds when a new signal fires; shows "WAIT — Scanning order flow" when no signal exists yet.