Failed Engulfing Zone MT5
- Göstergeler
- Sürüm: 1.1
- Güncellendi: 6 Mayıs 2026
- Etkinleştirmeler: 9

Failed Engulfing Zone MT5: The Ultimate SMC Breaker Block Tracker
Stop Trading the Fakeouts. Start Trading the Traps.
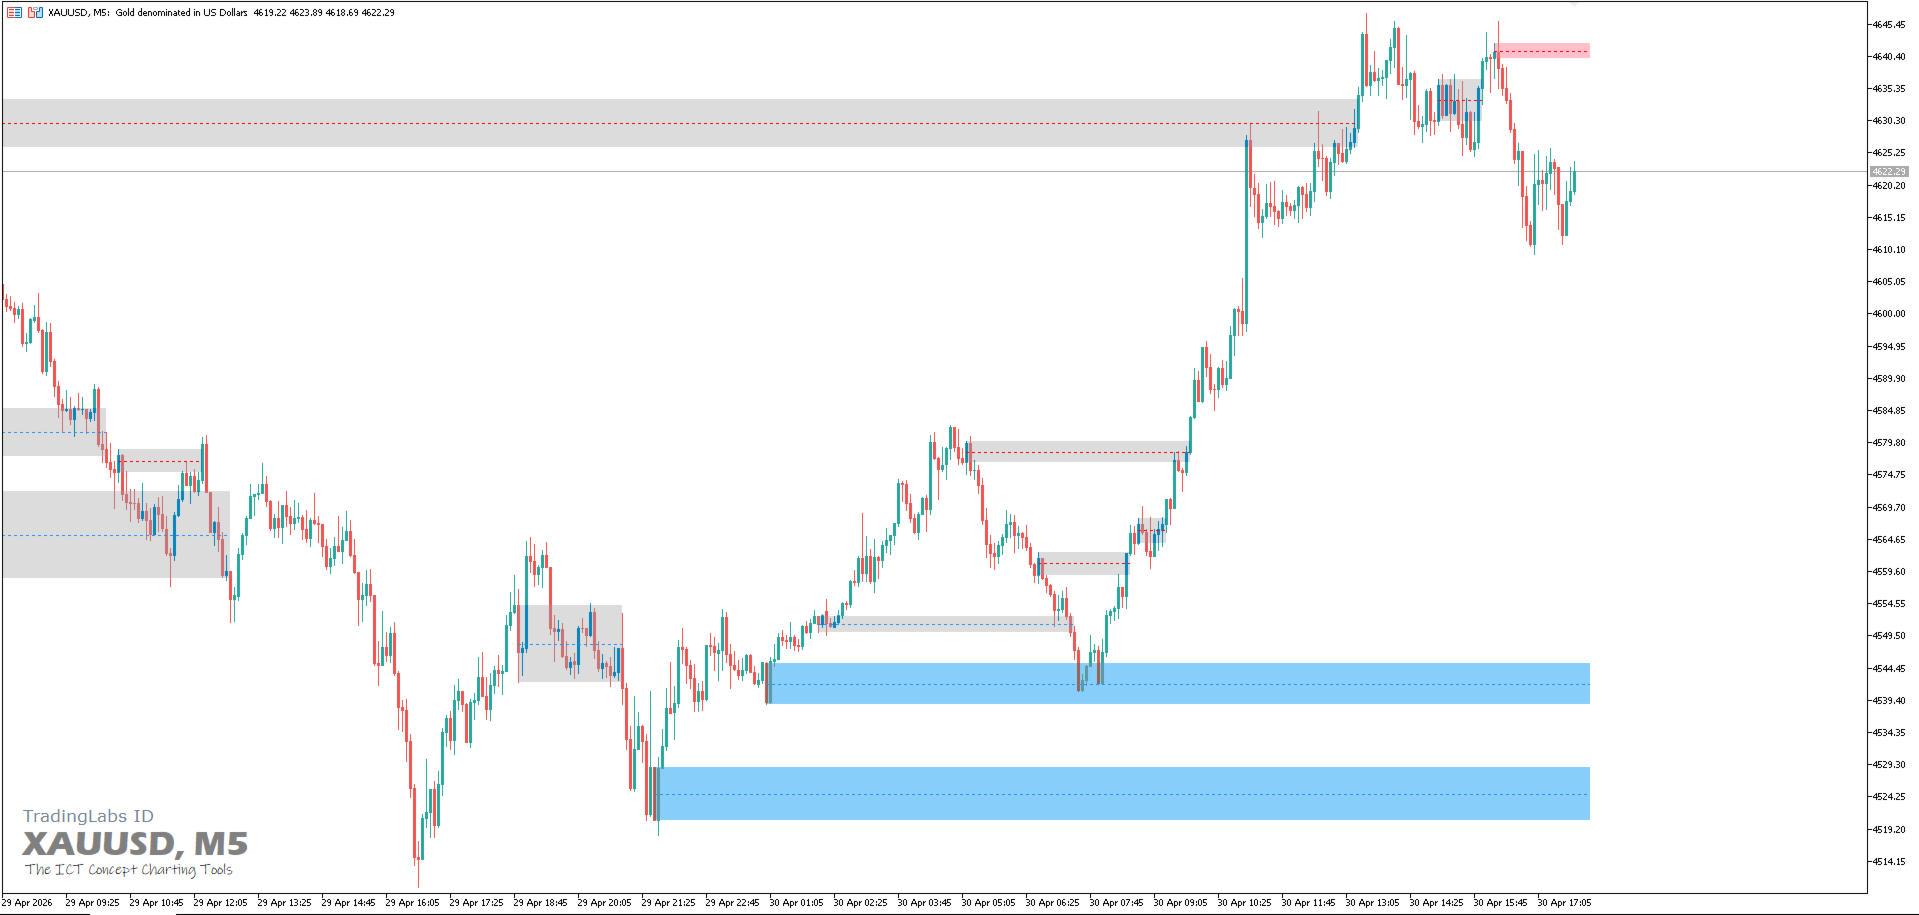
How many times have you entered a trade based on a "perfect" Bullish or Bearish Engulfing candle, only to watch the price instantly reverse and hit your Stop Loss? In the retail trading world, this is a failed signal. But in the Smart Money Concepts (SMC) world, this is an engineered liquidity trap—and one of the most highly probable setups in the market.
The Failed Engulfing Zone is an advanced analytical tool designed to automatically detect and map these institutional traps, turning retail failures into high-precision entry zones.
The Core Logic: Why Does It Work?
When a massive Engulfing candle forms, retail traders rush in to buy or sell. If the market makers immediately reverse the price and break the opposite side of that engulfing candle, those retail traders are now trapped.
-
Bullish Engulfing Fails: Buyers are trapped. The failed demand zone instantly flips into a highly reactive Supply Zone (Breaker Block).
-
Bearish Engulfing Fails: Sellers are trapped. The failed supply zone instantly flips into a highly reactive Demand Zone (Breaker Block).
This indicator mathematically identifies this exact Change in State of Delivery (CISD) and automatically plots the exact price zones where institutional algorithms will likely return to mitigate their positions.
Key Features & Advantages
-
Precision Zone Mapping: Automatically draws Support (Demand) and Resistance (Supply) zones the exact moment an engulfing structure is invalidated.
-
Equilibrium Mid-Line: Displays the 50% middle line of the breaker block, a crucial level for precise sniper entries with minimal drawdown.
-
"Done Box" Mitigation System: Clean charts are profitable charts. Once a zone is fully mitigated or broken, the indicator automatically changes its color to a "Done" state (fully customizable or hideable).
-
Advanced Overlap Filter: Prevents messy, overlapping zones on your chart. It calculates internal touches to keep your workspace pristine.
-
Volatility & Size Filters: Fully customizable Minimum and Maximum Box Range (in Pips) for every timeframe from M1 to Monthly. Filter out the market noise and only trade the blocks that matter.
-
Ultra-Lightweight Engine: Built entirely on a Memory-Driven Array Struct rather than heavy visual object scanning. This MT5 version runs flawlessly fast without freezing your terminal, even when loading thousands of historical bars.
-
Smart Alert System: Never miss a retest. Receive instant alerts (Terminal, Push, etc.) exactly when the price touches your high-probability cluster zones. Features a customizable "Touch Candle Delay" to prevent alert spam.
How to Trade with This Indicator
-
Identify: Let the indicator find the Failed Engulfing (Breaker Block) and plot the new Supply/Demand zone.
-
Wait: Do not chase the price. Wait for the inevitable pullback (Retest) back into the newly plotted zone.
-
Execute: Enter your trade when the price taps the zone or the 50% Mid-Line. Place your Stop Loss slightly above/below the zone box. Target the next opposing liquidity pool.
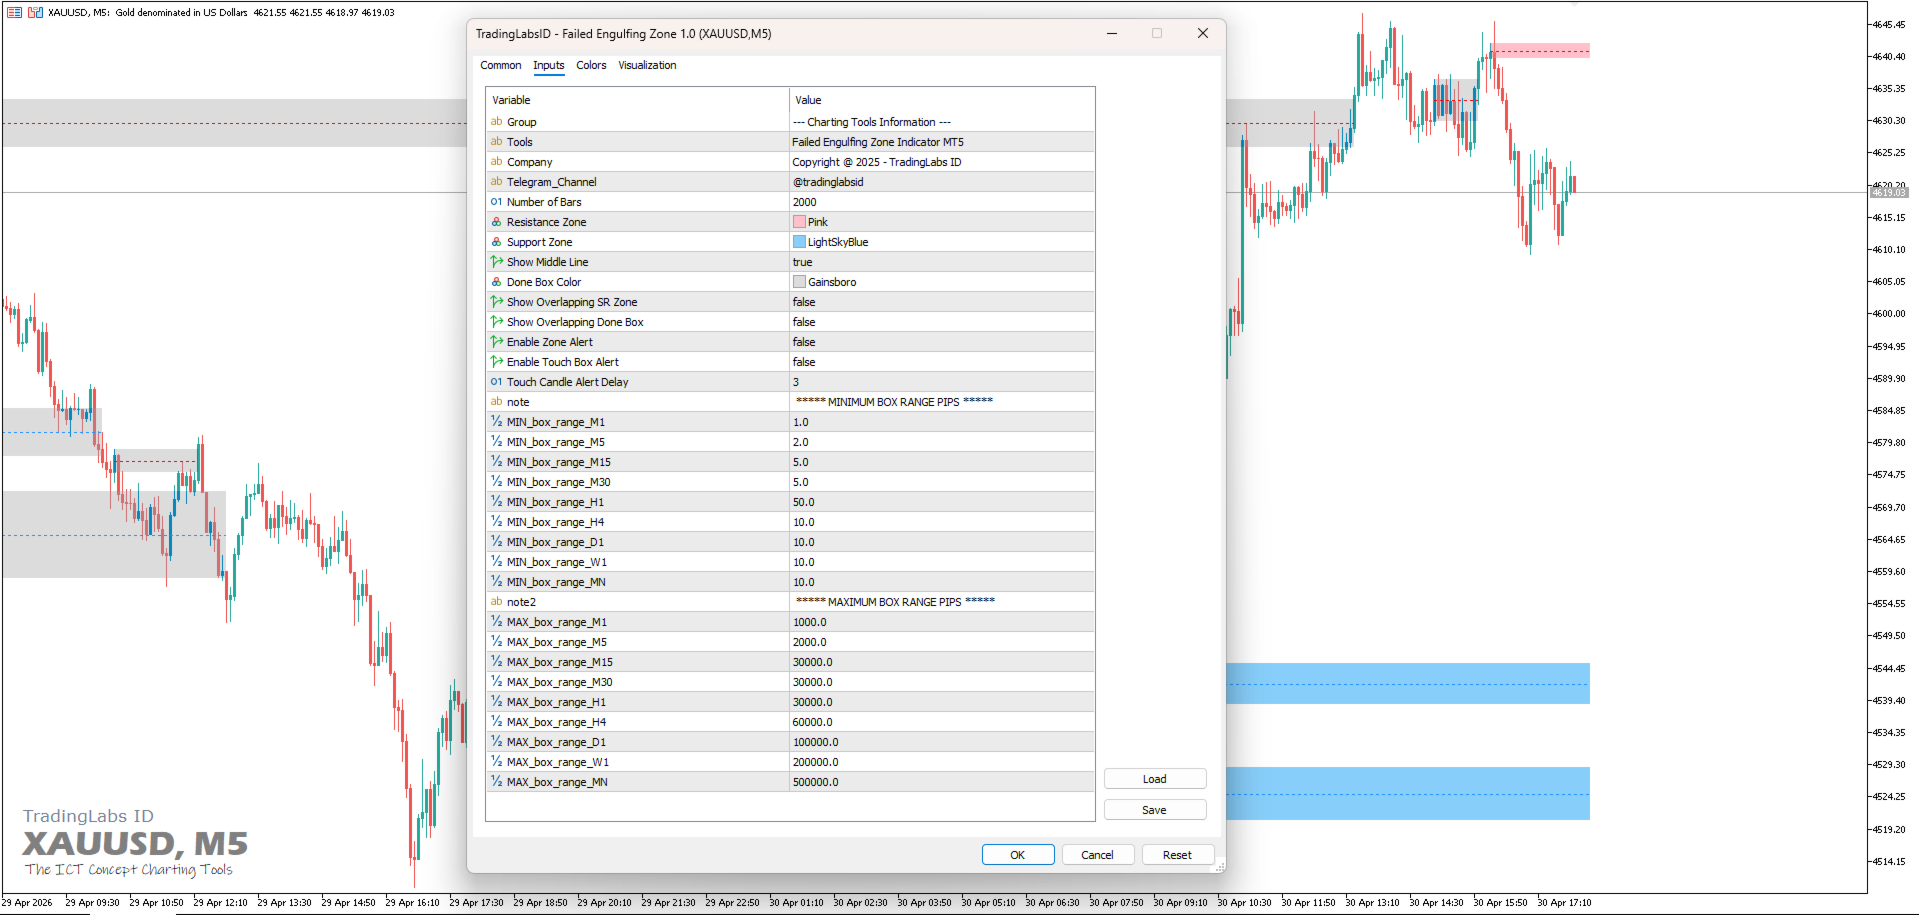
Indicator Parameters
-
Bars Count: Number of historical bars to calculate (Default: 2000).
-
Supply / Demand Colors: Fully customizable colors for your Resistance and Support breaker zones.
-
Show Middle Line: Toggle the 50% Equilibrium line on/off.
-
Engulfing Done Color: Set the color for mitigated zones (Set to 'None' to hide them entirely).
-
Alert Touch & Delay: Enable alerts upon zone touch, with a built-in candle delay to avoid continuous spamming.
-
Min/Max Box Range (Pips): Deep customization to restrict box sizes across all 9 timeframes independently.
Take advantage of institutional liquidity traps today. Upgrade your chart analysis with the Failed Engulfing Zone and trade alongside the Smart Money!
ATTENTION! Download the free demo before purchasing. Backtesting is mandatory before trading on a REAL account.
--- MT4 Version is here ---
https://www.mql5.com/en/market/product/175082
SUPPORT & REVIEWS
Your success is my priority. If you love this product, I would greatly appreciate a 5-star review! If you need any assistance with setup or have feature requests, please send me a direct message before leaving feedback. I am always here to help.
Subscribe to TradingLabs ID Channel: https://www.mql5.com/en/channels/tradinglabsid
Check out all my premium trading tools: https://www.mql5.com/en/users/suhendrawan/seller
Contact me for fast support: https://www.mql5.com/en/users/suhendrawan