Smart M Concepts Suite MT4
- Indicatori
-
Minh Truong Pham
 Hello, my name is Pham and I am a programmer and trader! At here, I create amazing forex indicators and expert advisors for Metatrader.
I will try:
+ Provide best tools base on my 5 years experience as a trader and 10 years as a programmer. - Versione: 1.0
- Attivazioni: 20
Smart Money Concepts Suite — Structure, Volumetric Order Blocks & Liquidity
One indicator that maps the whole Smart Money picture: where structure broke, which order block caused it, and which pool of liquidity price is hunting next.
Most SMC tools give you one piece. This one draws the complete sequence a Smart Money move is built from — the liquidity grab, the break of structure, the order block left behind, and the imbalance price has to come back for — on a single chart, in a single indicator, with a single set of colours.
What is inside
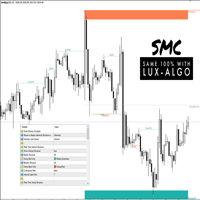
1. Market Structure (BOS / CHoCH) with sweep detection Adaptive swing engine that labels every BOS (Break of Structure — trend continuation) and CHoCH (Change of Character — trend reversal). When price pierces a structure level with the wick but closes back inside, it is not a break — it is a sweep, and the indicator marks it with a dotted line and an x instead of falsely printing a BOS. Two algorithm modes:
- Extreme Points — raw swing highs/lows, reacts fastest
- Adjusted Points — re-anchors the level to the nearest confirmed pivot, far fewer noise breaks
2. Volumetric Order Blocks Not just a box. Every order block carries its volume footprint:
- The block is split into a buy-activity and sell-activity half, sized by the participation on the origin candle
- Each block is labelled with its absolute volume and its share of the total volume across all displayed blocks — so you instantly see which zone is the heavy one
- ATR-sized construction (clean, uniform boxes) or full-candle construction
- Three mitigation methods: Close / Wick / Avg — you decide what counts as "used up"
- Breaker mode: instead of deleting a mitigated block, flip it and keep trading it from the other side
- Automatic overlap removal so the chart never turns into a stack of duplicate zones
3. Fair Value Gaps & Breakers Three-candle imbalances with an ATR threshold filter that removes insignificant gaps, overlap hiding, mid-line, and optional raid tracking that shows where price dipped into the gap and rejected.
4. Swing Failure Pattern (SFP) with deviation projection Volume-confirmed liquidity grabs above/below a swing. When an SFP prints, the indicator projects the 200% / 250% / 400% deviation levels — the statistical extension targets measured from the failed swing — with a shaded target zone.
5. Liquidity Concepts
- EQH / EQL — equal highs and lows (Short / Mid / Long-Term sensitivity), the resting liquidity pools
- Liquidity grab prints — the exact wick that took out a pivot and closed back inside, highlighted in colour
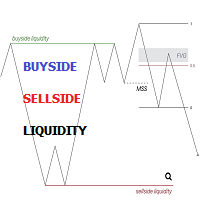
- Buyside / Sellside liquidity zones with their volume share
- Sweep liquidation zones — the range that got flushed after a structure break
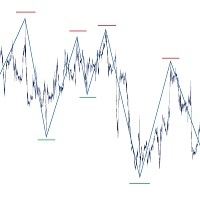
6. Mapping Structure An optional zigzag overlay that reduces the chart to its pure swing skeleton when you want to see the wood, not the trees.
How to trade / read signals with it
Reading the chart
| What you see | What it means | What to do |
|---|---|---|
| CHoCH (solid, bull colour) | First higher-high break after a downtrend — character has changed | Trend bias flips bullish. Stop looking for shorts. |
| CHoCH (solid, bear colour) | First lower-low break after an uptrend | Trend bias flips bearish. Stop looking for longs. |
| BOS (solid) | Trend continued in the existing direction | Bias confirmed. Trade the pullback, not the breakout. |
| Dotted line + x | Sweep — the level was pierced by wick only, close rejected | No break. Liquidity was taken. Expect a move the opposite way. |
| Green box (bullish OB) | Demand zone that produced the last bullish break | Buy interest area. Wait for price to return. |
| Red box (bearish OB) | Supply zone that produced the last bearish break | Sell interest area. |
| Split colour inside a box | Buy vs sell activity on the origin candle | The larger half tells you who was in control. |
| 1.23K (46%) label | This block holds 46% of the volume across all displayed blocks | The high-percentage block is the one that matters. Fade the small ones. |
| Dark/inverted box (breaker) | The order block was mitigated and flipped | Old demand is now supply (and vice versa). |
| FVG box | Unfilled 3-candle imbalance | Price tends to return here. Magnet, then reaction. |
| EQH / EQL dotted line | Equal highs / lows — resting stop orders | This is where price is likely headed before it reverses. |
| Coloured wick print | A pivot was swept and rejected within the same candle | Early reversal warning, one candle before structure confirms. |
| SFP label + deviation lines | Volume-confirmed swing failure with projected targets | Reversal setup; the 200% level is target 1. |
Long playbook
- Bias — wait for a bullish CHoCH or a bullish BOS. No long trades while structure is bearish.
- Liquidity first — the highest-probability longs come after a sellside sweep: an EQL taken out, or a x sweep on the bearish structure line, or a blue liquidity-grab wick print.
- Entry — let price return into the top bullish order block, preferably the one carrying the largest volume percentage. Enter on the touch, or wait for a lower-timeframe CHoCH inside the block for confirmation.
- Stop — below the order block low (the box bottom), not below the candle. If the box is mitigated by close, the idea is invalidated anyway.
- Targets — the next EQH or the next unfilled bearish FVG above. If the entry came from an SFP, use the 200% → 250% → 400% deviation levels.
Short playbook
Mirror image:
- Bearish CHoCH or BOS for bias.
- Wait for buyside liquidity to be taken — EQH swept, x on the bullish structure line, or an orange wick print.
- Enter at the bearish order block with the highest volume share.
- Stop above the box top.
- Target the next EQL / unfilled bullish FVG / deviation levels.
Signals to skip
- A break with no liquidity taken first. If price breaks structure without sweeping an EQH/EQL or a prior high/low, the move is far more likely to be a fakeout. Wait.
- Order blocks with a small volume share. A block holding 6% of the displayed volume is not where institutions filled. Trade the 30%+ blocks.
- Any zone entered against a fresh CHoCH. A bullish OB tested after a bearish CHoCH has already lost its context — the market has changed character.
- The very first structure leg after attaching the indicator or changing the window size. The engine needs one full swing to calibrate; ignore the seed leg at the left edge.
- Sweeps during dead sessions. Low-volume Asian-session wicks trigger the same geometry with none of the follow-through. The SFP module has a volume threshold for exactly this — leave it at 1.0 or raise it.
- FVGs below the threshold. If you are getting flooded with tiny gaps, raise FVG threshold to 0.3–0.5 and only significant imbalances survive.
Recommended settings
| Style | Timeframe | Structure length | OB shown | Notes |
|---|---|---|---|---|
| Scalping | M5 – M15 | 3 – 5 | 3 | Enable liquidity prints, disable FVG |
| Intraday | M30 – H1 | 5 (default) | 5 | Default preset, add EQH/EQL |
| Swing | H4 – D1 | 8 – 15 | 5 – 8 | Enable FVG + buyside/sellside zones |
Works on any symbol — forex, indices, metals, crypto, stocks — and any timeframe. On forex the volume metrics use tick volume (the standard broker-side proxy); on exchange-traded symbols real volume is used automatically when the broker provides it.
Alerts
Push notification, e-mail, terminal alert or Telegram on:
- Bullish / bearish CHoCH
- Bullish / bearish BOS
- Structure sweep ( x )
- Price entering the most recent order block
Each alert type can be switched on independently, so you are not woken up by events you do not trade.
Technical notes
- Non-repainting. The model advances only on closed bars. A BOS, CHoCH, order block or SFP that has printed will not be removed or moved by later ticks on the same candle.
- Calculation window. By default the engine builds from the last 5000 bars (configurable). This keeps a heavy structural model responsive even on M1 charts with deep history.
- Performance. Boxes and lines are rebuilt once per closed bar, not per tick. Max bars scanned per structure leg gives you a hard ceiling if you run very long histories on low timeframes.
- Everything is optional. Every module — order blocks, FVG, SFP, EQH/EQL, liquidity zones, sweep zones, mapping, candle colouring — has its own on/off switch and its own colours. Turn on the two you trade and the chart stays clean.
Compatibility
MetaTrader 5, all account types, all brokers. Works in the Strategy Tester in visual mode. An MT4 build is available.
Questions or a setting you would like added? Send a message — support is included.