FluidTrades SMC MT4
- Indicatori
-
Minh Truong Pham
 Hello, my name is Pham and I am a programmer and trader! At here, I create amazing forex indicators and expert advisors for Metatrader.
I will try:
+ Provide best tools base on my 5 years experience as a trader and 10 years as a programmer. - Versione: 1.0
- Attivazioni: 20
FluidTrades SMC — Liquidity Sweeps, Structure & Multi-Timeframe Trend in One Preset
Sixteen Smart Money tools in one indicator — and a preset switch so you only ever see the three or four that matter for the trade in front of you.
Most "all-in-one" indicators fail the same way: they turn everything on at once and hand you a chart you cannot read. FluidTrades SMC ships the full toolkit, but it opens on a Signal preset that draws only what you act on — structure, swings, the liquidity sweep, the entry and the targets. Everything else is one dropdown away when you actually want it.
What is inside
The core — what you see on the default preset
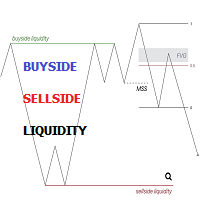
1. Liquidity Sweep / Swing Failure Pattern The engine tracks a 20-bar swing on both sides. When price pushes through the swing low, closes back above it, and then holds above it for three consecutive candles, the level is marked as a swept liquidity zone ( LIQUZ ) with the sweep rail drawn back to the pivot that created it. A cooldown period stops the same pool being printed over and over.
2. Swing High / Swing Low rails The live swing high and swing low are drawn forward as dashed rails with a SwH / SwL marker. A rail stops extending once price has closed through it and stayed through it for five bars — so the chart shows you the levels that are still live, not a museum of every old pivot.
3. Market Structure — BOS / CHoCH Every structural break is labelled BOS (Break of Structure — the trend continued) or CHoCH (Change of Character — the trend flipped), with the current live structure drawn as an accent-coloured box around the working high and low. Break confirmation by candle body or by wick is your choice.
4. Structure Fibonacci The 0.618 and 0.5 retracements of the current structure leg are drawn automatically and re-anchor on every new break — the discount / premium zone, without you drawing a single fib by hand. The 0.786, 0.705 and 0.382 levels are available too.
5. Buy / Sell signals A SuperTrend flip filtered by a 13-period mean. Three sensitivity settings (Low / Medium / High) change how much noise gets through.
6. Entry / TP1 / TP2 / TP3 / SL rails Every signal projects a complete trade skeleton at the right edge: entry price, an ATR-derived stop, and the 1R / 2R / 3R targets measured from it. No mental arithmetic mid-trade.
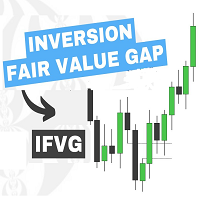
7. Fair Value Gaps Three-candle imbalances, auto-extended to the right, greyed out the moment price trades into them and removed once they are fully filled — with an optional "shrink to the unfilled part" mode.
8. Multi-timeframe trend table Six timeframes, one row: Up or Down per timeframe, from EMA cross or SuperTrend. It tells you in one glance whether your entry is with or against the higher timeframes.
The rest of the toolkit — one preset away
| Module | What it draws |
|---|---|
| Supply / Demand zones | ATR-sized zones from confirmed swings, with a POI mid-line, overlap filtering, and automatic conversion to a BOS marker when broken |
| Order Blocks | MSB-triggered blocks that dim when tested and close off when filled |
| Support / Resistance | Pivot-clustering S/R with strength filtering, zone bands and price labels |
| Multi-timeframe S/R | The same clustering run on a higher timeframe and projected onto your chart |
| Trendlines | Two engines: LuxAlgo-style decaying trendlines with break markers, and classic pivot-to-pivot lines |
| Volume Profile | Price-by-volume with Point of Control, up/down split and bull/bear strength bars |
| Volume Histogram | Per-bar volume with a moving average overlay |
| VWAP | Session-anchored |
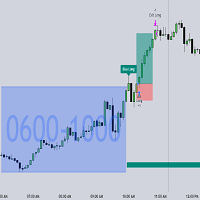
| Opening Range Breakout | Configurable session window |
| Inside Bar / Breakout | Inside-bar range rails plus breakout / breakdown markers, with an optional volume filter |
| EMA Energy | Two fast means coloured by price position |
| Channel Balance | A wide Keltner ribbon for stretch / exhaustion context |
| RSI bar colouring | Highlights overbought / oversold bars in place |
| HH / LH / HL / LL labels and ZigZag | The pure swing skeleton |
The preset system
This is the part that makes the toolkit usable.
| Preset | What is drawn | Use it for |
|---|---|---|
| Clean | Swing rails, current structure, 0.618 / 0.5, trend table | Reading the market. Maximum chart, minimum ink. |
| Signal (default) | Clean + liquidity sweeps, Buy/Sell, FVG, Entry/TP/SL | Actually taking trades. |
| SMC | Signal + supply/demand, order blocks, S/R | Full zone-to-zone analysis. |
| Custom | Whatever you tick | Building your own layout from all 16 modules. |
One palette, two themes. Every module reads its colour from a single six-role palette — bullish, bearish, zone fill, accent, alert, neutral — with a Dark and a Light variant. There are no per-module colour settings to drift out of sync, and nothing on the chart clashes with anything else. Markers and their captions are offset so they never overlap, and every rail is drawn thin so your candles stay the brightest thing on screen.
How to trade / read signals with it
Reading the chart
| What you see | What it means | What to do |
|---|---|---|
| CHoCH (amber line + label) | First opposite-direction structure break — character has changed | Bias flips. Stop taking trades in the old direction. |
| BOS (grey line + label) | Structure broke in the direction it was already going | Bias confirmed. Trade the pullback, not the break. |
| Accent box around price | The current live structure leg (working high and low) | This is the range you are trading inside. |
| 0.618 / 0.5 line | Discount / premium of the current leg | Longs belong below 0.5, shorts above it. |
| Dashed rail + SwH / SwL | Live swing high / low — resting liquidity | This is where price is likely headed before it reverses. |
| LIQUZ + rail back to the pivot | A liquidity pool was taken and rejected — a swept level | Reversal fuel. Expect continuation away from the swept side. |
| ▲ BUY / ▼ SELL marker | SuperTrend flip confirmed by the mean filter | A trigger, not a trade. It still needs the checklist below. |
| ENTRY / TP1-3 / SL rails | The trade skeleton of the most recent signal | Your levels are already measured. |
| FVG box (green / red) | Unfilled 3-candle imbalance | Magnet first, reaction second. Good target, good re-entry. |
| Greyed FVG box | Price has traded into the gap | Partially used. Weaker as a reaction zone. |
| Trend table all one colour | Every timeframe agrees | Highest-conviction environment. Size normally. |
| Trend table split | Timeframes disagree | Range conditions. Cut size or stand aside. |
| .. in the trend table | That timeframe is still downloading | Wait a few seconds; it fills itself in. |
Long playbook
- Bias — a bullish CHoCH, or a bullish BOS in an established uptrend. No longs while structure is bearish.
- Context — check the trend table. If the higher rows are Down , you are counter-trend: take it smaller or skip it.
- Liquidity first — the best longs come after the downside is cleared. Wait for a LIQUZ print below, or for the SwL rail to be taken and rejected. Buying before the sweep is buying into someone else's stop hunt.
- Location — price should be at or below the 0.5 of the current structure leg. Below the 0.618 is better. Buying into premium is the single most common way to lose with this tool.
- Trigger — the ▲ BUY marker, or price returning into a bullish FVG / demand zone inside the discount area.
- Stop — use the plotted SL rail, or the low of the swept swing. Not the low of the entry candle.
- Targets — TP1 / TP2 / TP3 are already drawn. Structurally, the natural destinations are the SwH rail above and the nearest unfilled bearish FVG.
Short playbook
Mirror image. Bearish CHoCH or continuation BOS; trend table rows reading Down ; a LIQUZ print above or the SwH rail swept and rejected; price at or above the 0.5 of the leg (premium); ▼ SELL trigger or a return into a bearish FVG / supply zone; stop above the swept swing; targets at SwL and the nearest unfilled bullish FVG.
Signals to skip
- A BUY / SELL marker with no structure behind it. The marker is a SuperTrend flip. Without a CHoCH or a BOS in the same direction, it is a mean reversion inside a range — the lowest-quality version of the signal.
- Longs in premium, shorts in discount. If price is above the 0.618 of the leg and you are looking to buy, you are late. Wait for the pullback or wait for the next leg.
- Entries taken before the sweep. If the SwH / SwL rail is still untouched and sitting right above/below your entry, that liquidity will very likely be taken first. Let it happen, then trade the rejection.
- Anything while the trend table is split three-and-three. That is a range. The structure module will keep printing CHoCH in both directions and chop you out.
- A CHoCH printed on a single spike candle. Switch "Break with candle's body" on and it will not qualify — a body close through the level is a much harder filter than a wick.
Recommended settings
| Style | Timeframe | Preset | Sensitivity | Notes |
|---|---|---|---|---|
| Intraday scalping | M5 – M15 | Signal | Medium | Set the trend table to M1/M5/M15/M30/H1/H4 |
| Intraday swing | M30 – H1 | Signal or SMC | Low | Turn Supply/Demand on for zone-to-zone targets |
| Swing trading | H4 – D1 | SMC | Low | Add MTF S/R for the weekly picture |
| Pure chart reading | any | Clean | — | Structure and swings only |
Works on any symbol and any timeframe — FX, metals, indices, crypto. Nothing in the calculation is instrument-specific.
Alerts
Four independent alert switches — liquidity sweep, Buy/Sell signal, FVG mitigation, and BOS / CHoCH — delivered as terminal popup, mobile push, email, or Telegram (bot token and channel id are inputs). Alerts fire on the closed bar.
Honest notes
- Signals evaluate on bar close. Levels built from swing pivots need their right-hand lookback to complete before the pivot is confirmed — that is how pivots work, in every indicator that uses them, and it is why the swing rails appear a fixed number of bars after the actual high or low.
- This is a toolkit, not a black box. The Buy/Sell arrows are a trigger inside a process. The value is in the structure, the swept liquidity and the discount/premium location — the checklist above is the product.
- Object counts are bounded on every module, and the calculation window is configurable, so the indicator stays responsive on long histories.
Compatibility
- MetaTrader 5 and MetaTrader 4 — feature-identical builds.
- MT4 has no native gradient fills or coloured candles, so the Keltner ribbon is drawn as its eight rails and highlighted bars are drawn as coloured segments behind the candle. Everything else is the same.
Have a question about a setting or want a layout suggestion for your instrument? Send a message — happy to help.