Zone Limite: how to place a ladder of limit orders in one click

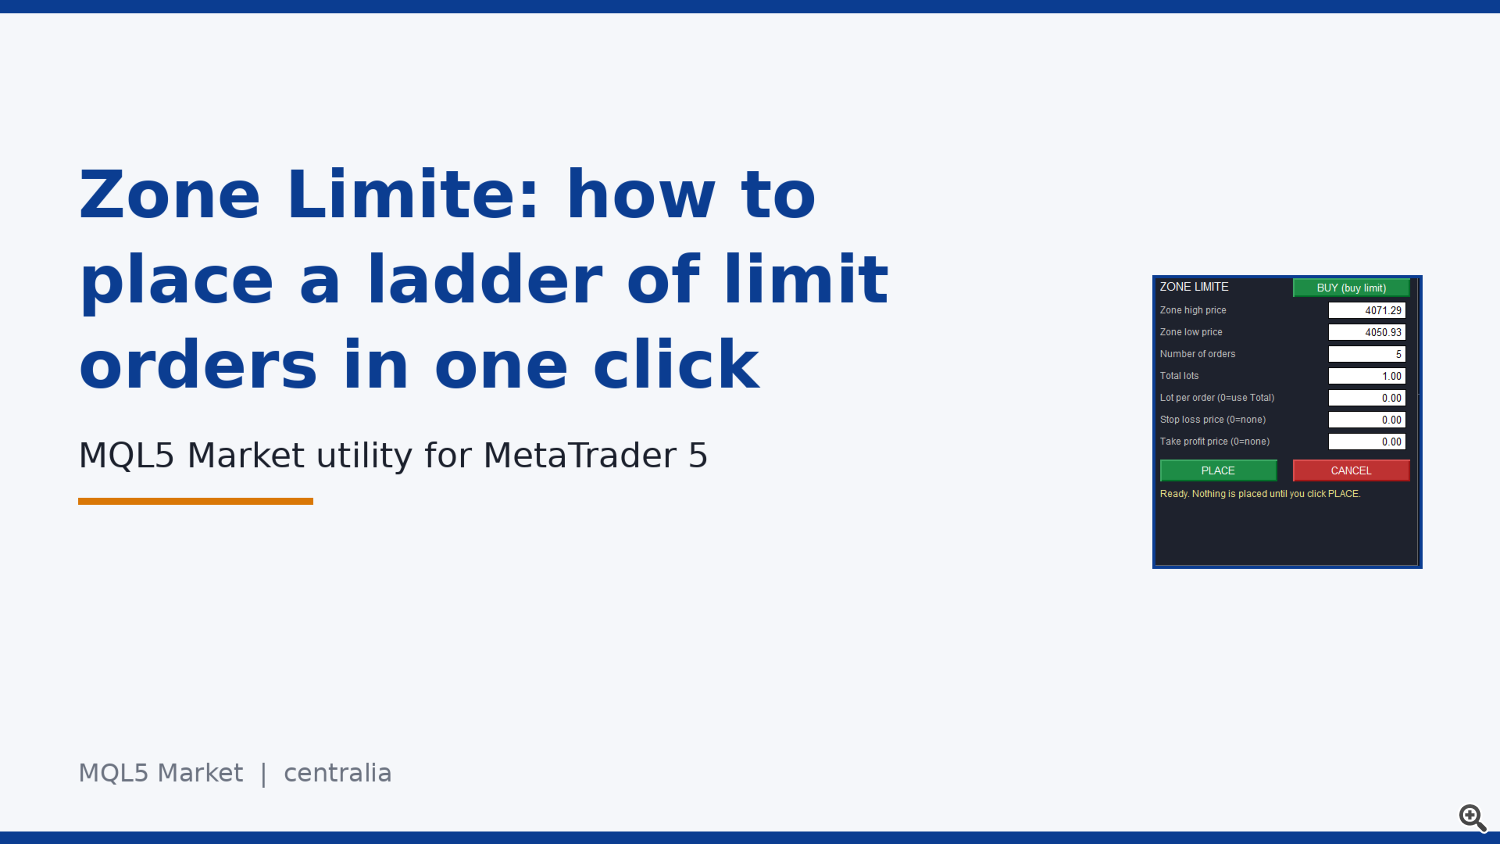
Zone Limite is a manual panel for MetaTrader 5. It places several limit orders, Buy or Sell, at equal price steps between a high price and a low price.
On a live chart, nothing is placed until you click PLACE. This guide describes the use on a live chart and explains each box, with an example you can reproduce.
What it does
You choose a side, a zone (a high price and a low price) and a number of orders. The panel then places that many limit orders at equal steps from one end of the zone to the other.
- Buy: buy limit orders from the zone high down to the zone low.
- Sell: sell limit orders from the zone low up to the zone high.
- Your choice: the tool does not look for entries and does not decide where to trade. You choose the zone, the side and the lots.
Install and open the panel
Attach Zone Limite to a chart like any Expert Advisor. Trading must be allowed for it. If it is not, the status line reports one of four cases:
- Algo trading is disabled in the terminal.
- Trading is not allowed for this robot.
- Trading is disabled for the account.
- Robots are not allowed on the account.
The panel, box by box
The panel is in English, and in French if the terminal language is French. The first boxes define the zone:
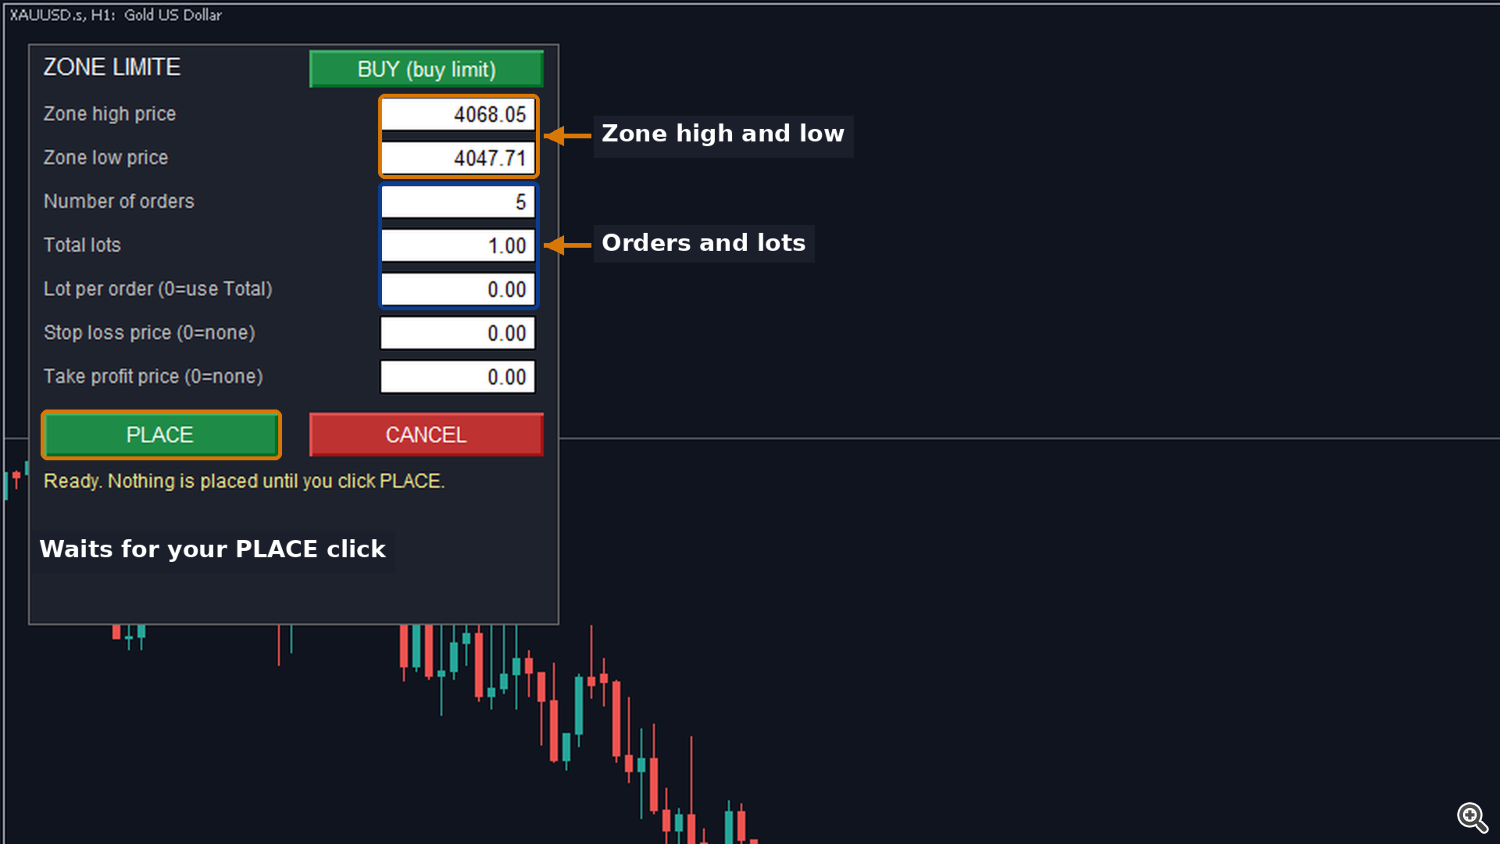
Figure 1. The Buy panel, where you set the zone, the number of orders and the lots.
- Side button: shows BUY (buy limit) or SELL (sell limit). One click switches the side.
- Zone high price and Zone low price: if you leave them untouched, the panel pre-fills a zone near the current price. Type your own prices to replace it.
- Number of orders: a whole number from 1 to 200.
The next boxes define the volume and the protection:
- Total lots: the total volume, divided between the orders. It must be a multiple of the lot step of the symbol. If it does not divide evenly, the first orders get one extra lot step each.
- Lot per order (0 = use Total): if you type a value, each order gets that lot, rounded down to the lot step, never more than you asked for.
- Stop loss price and Take profit price (0 = none): optional. For Buy, the stop loss must be below the zone low and the take profit above the zone high. For Sell, it is the other way round. If you leave 0, the orders have no stop loss: that is your choice.
PLACE sends the orders. CANCEL removes only the pending orders placed by this panel (same symbol and same magic number) and leaves open positions untouched.
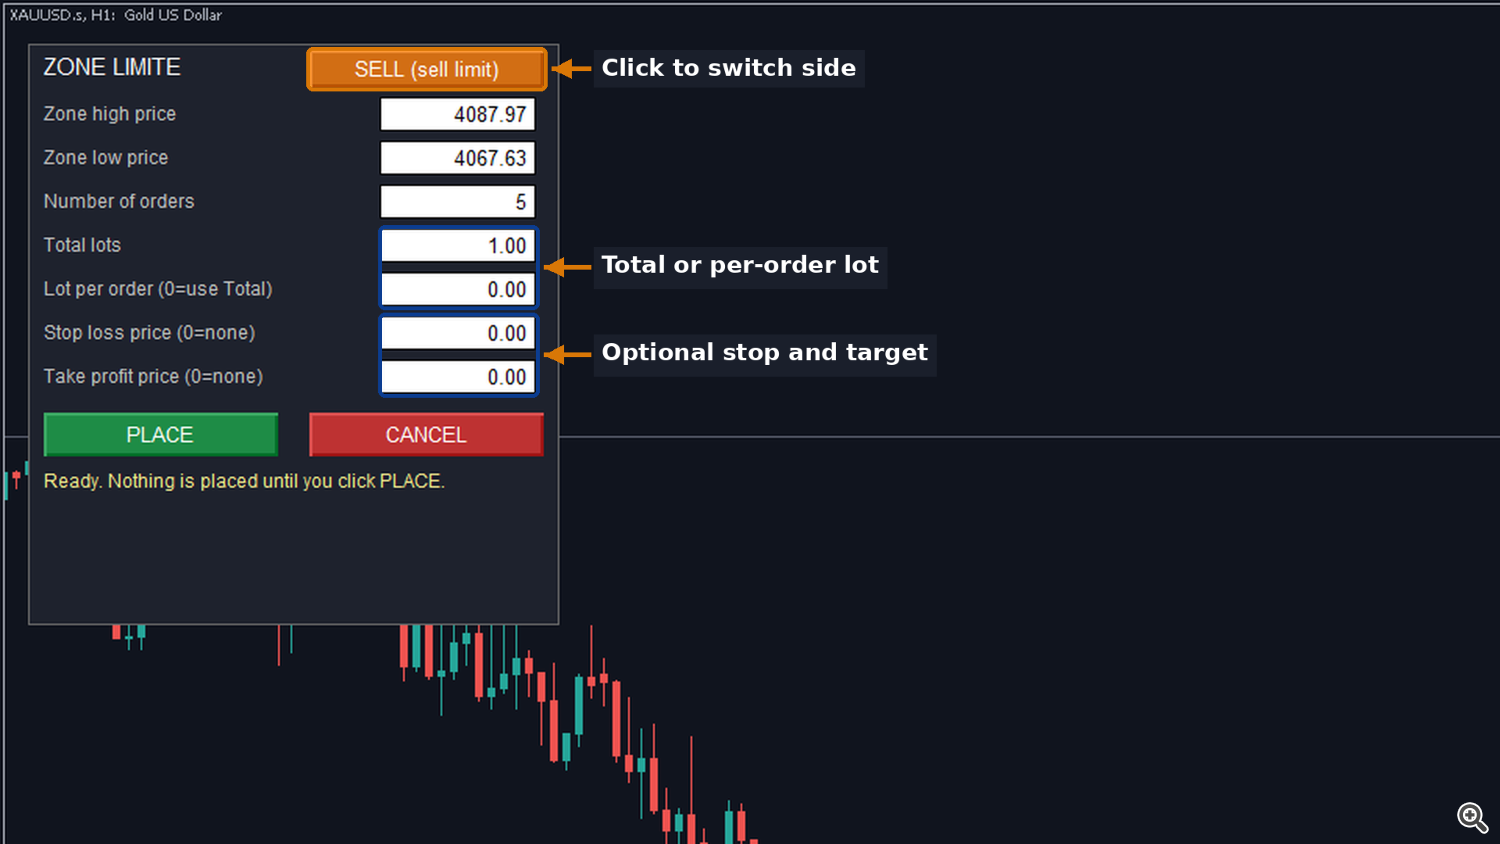
Figure 2. The same panel in Sell mode, with optional stop loss and take profit.
A worked example
These prices are an illustration, not a forecast. The symbol has a lot step of 0.01 and the current price is 2420.00.
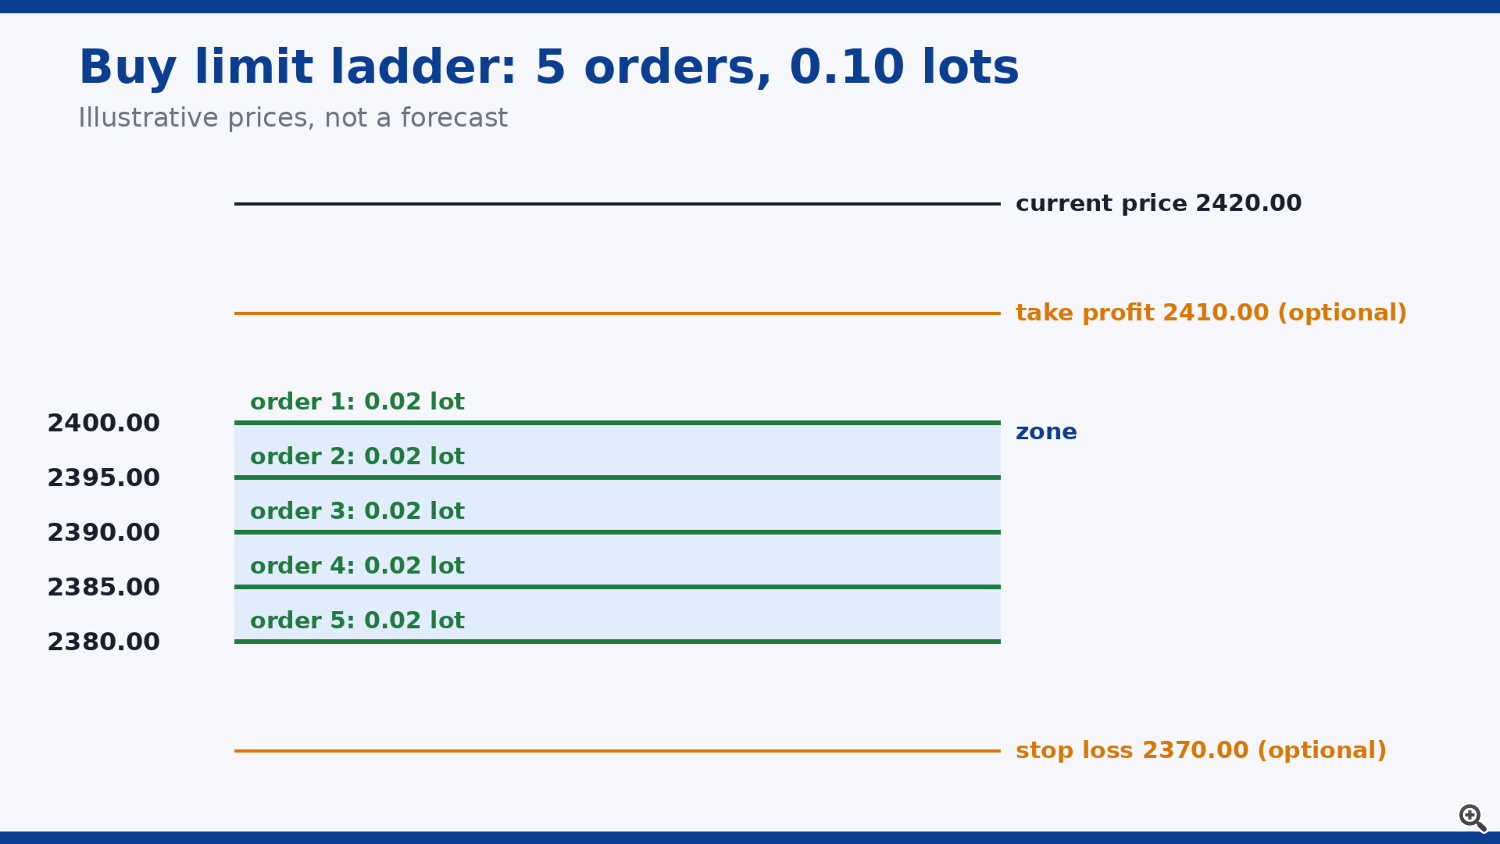
Figure 3. The worked example: five orders at equal steps from 2400.00 to 2380.00, 0.02 lot each (illustrative prices).
Side Buy, zone high 2400.00, zone low 2380.00, 5 orders, 0.10 total lots. The five buy limit orders go to:
- 2400.00, 0.02 lot
- 2395.00, 0.02 lot
- 2390.00, 0.02 lot
- 2385.00, 0.02 lot
- 2380.00, 0.02 lot
Each order gets 0.02 lot (10 lot steps divided by 5 orders). With a total of 0.11 instead, the first order would get 0.03 and the four others 0.02. An optional stop loss at 2370.00 sits below the zone low, and an optional take profit at 2410.00 sits above the zone high.
The chart below shows the five pending orders drawn on a strategy tester chart. In the Strategy Tester, the Market version runs a small automatic demo with the minimum lot, its own stop loss and take profit, and it does not read the boxes of the panel; on a live chart it uses the values you type in the panel.
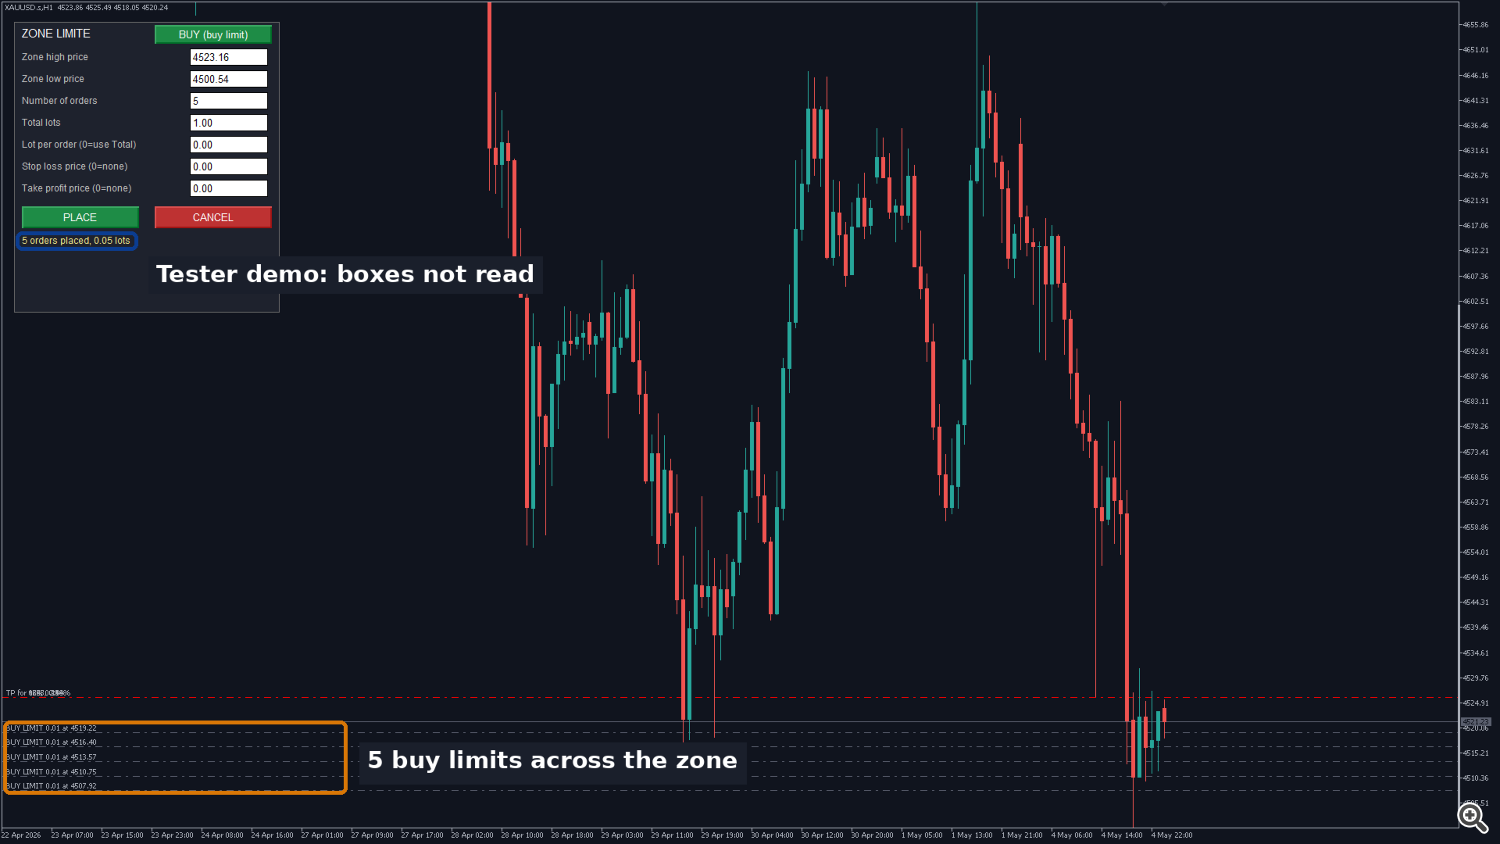
Figure 4. Five pending orders drawn on the strategy tester chart. In the Strategy Tester, the Market version runs a small automatic demo with the minimum lot; on a live chart it uses the values you type in the panel.
Checks before anything is sent
Before the first order is sent, the panel checks:
- every box, and the minimum and maximum lot;
- the minimum distance required by the broker;
- the margin;
- the limit of pending orders of the account;
- the volume limit of the symbol.
Every order is also checked with the server before the first one is sent. Levels on the wrong side of the current price are skipped and the status line tells you how many. If the market is not open for the symbol, nothing is sent.
If the server rejects one order, the panel sends removal requests for the orders already placed by that click. If a zone is already placed, the panel asks you to click CANCEL first.
The settings file and the limits
The attached .set file holds the settings used in this example: Buy, 5 orders, 0.10 total lots, no stop loss, no take profit, and the zone left at 0 so the panel pre-fills it near the price. Each line is commented. In the inputs tab of the robot, load the file, then set your own zone prices.
What it does not do:
- It does not choose entries.
- It does not move stops.
- It does not close positions. Once an order is filled, you manage the position yourself.
Trading involves a high level of risk and you can lose some or all of your capital. Placing several orders in the same direction increases your exposure if the price keeps moving against the zone, and orders without a stop loss have no limit on the loss. Past results do not guarantee future results. The prices in this guide are an illustration, not a forecast. Nothing here is investment advice.
Links
Product page: https://www.mql5.com/en/market/product/206822
Seller profile: https://www.mql5.com/en/users/centralia