The complete guide to trading Smart Money: read market structure (BOS & CHoCH), order blocks, fair value gaps (FVG), liquidity sweeps and premium/discount on MT5 — then execute with a scored A+ setup, a live plan, automatic risk/reward and a hit rate you can verify yourself.
SMC Indicator ICT Concepts Order Blocks FVG Liquidity Sweeps Non-repainting MetaTrader 5
DRX SMC — Smart Money Cockpit
A complete Smart Money Concepts execution cockpit for MetaTrader 5. Available on the MQL5 Marketplace.
→ View the DRX SMC indicator on the MQL5 MarketMost SMC indicators for MT5 just flood your chart with overlapping boxes and leave the interpretation to you. DRX SMC is a decision tool, not a drawing tool. It organises the whole picture — market structure, liquidity, order blocks and premium/discount — into one clean cockpit, scores every setup out of 100, hands you the exact plan (entry, stop, target, risk/reward), and tracks its own hit rate so you can verify the edge yourself in the MT5 strategy tester.
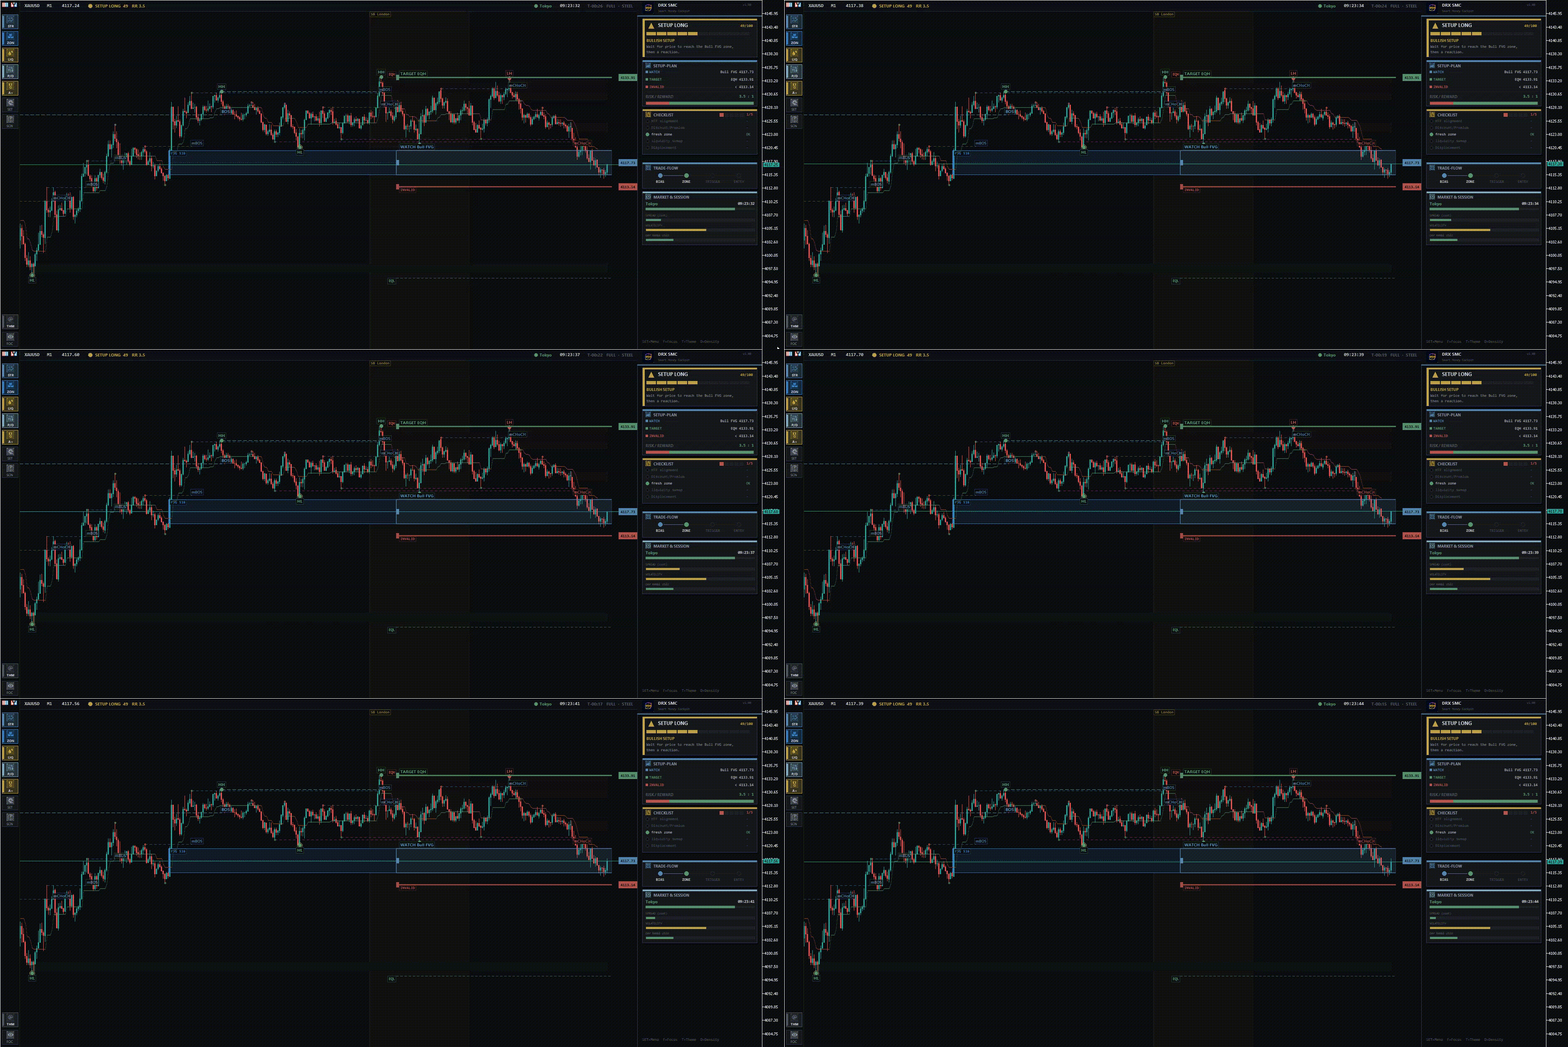
The DRX SMC method in 7 steps
This is the whole strategy on one page — the routine you repeat on every chart. Everything below explains each piece in depth.
- Bias — is the higher-timeframe structure bullish or bearish? (MTF matrix + coach sentence)
- Location — is price in discount for longs / premium for shorts, at a fresh order block or FVG? (the WATCH zone)
- Score — is the A+ score 65+ or building? Check the X/5 confluence meter.
- Timing — are you inside a Kill Zone? Did a sweep just print (“BSL / SSL Taken”)?
- Trigger — wait for the reaction: an internal CHoCH / displacement in your direction.
- Execute — enter at WATCH, stop at INVALID, target the shown level — only if R:R ≥ 2.
- Manage — break-even after the first structural break in your favour; partials at the first liquidity / POC.
One chart. One read. One decision.
Step 1 — Market structure: BOS, CHoCH and the trend skeleton
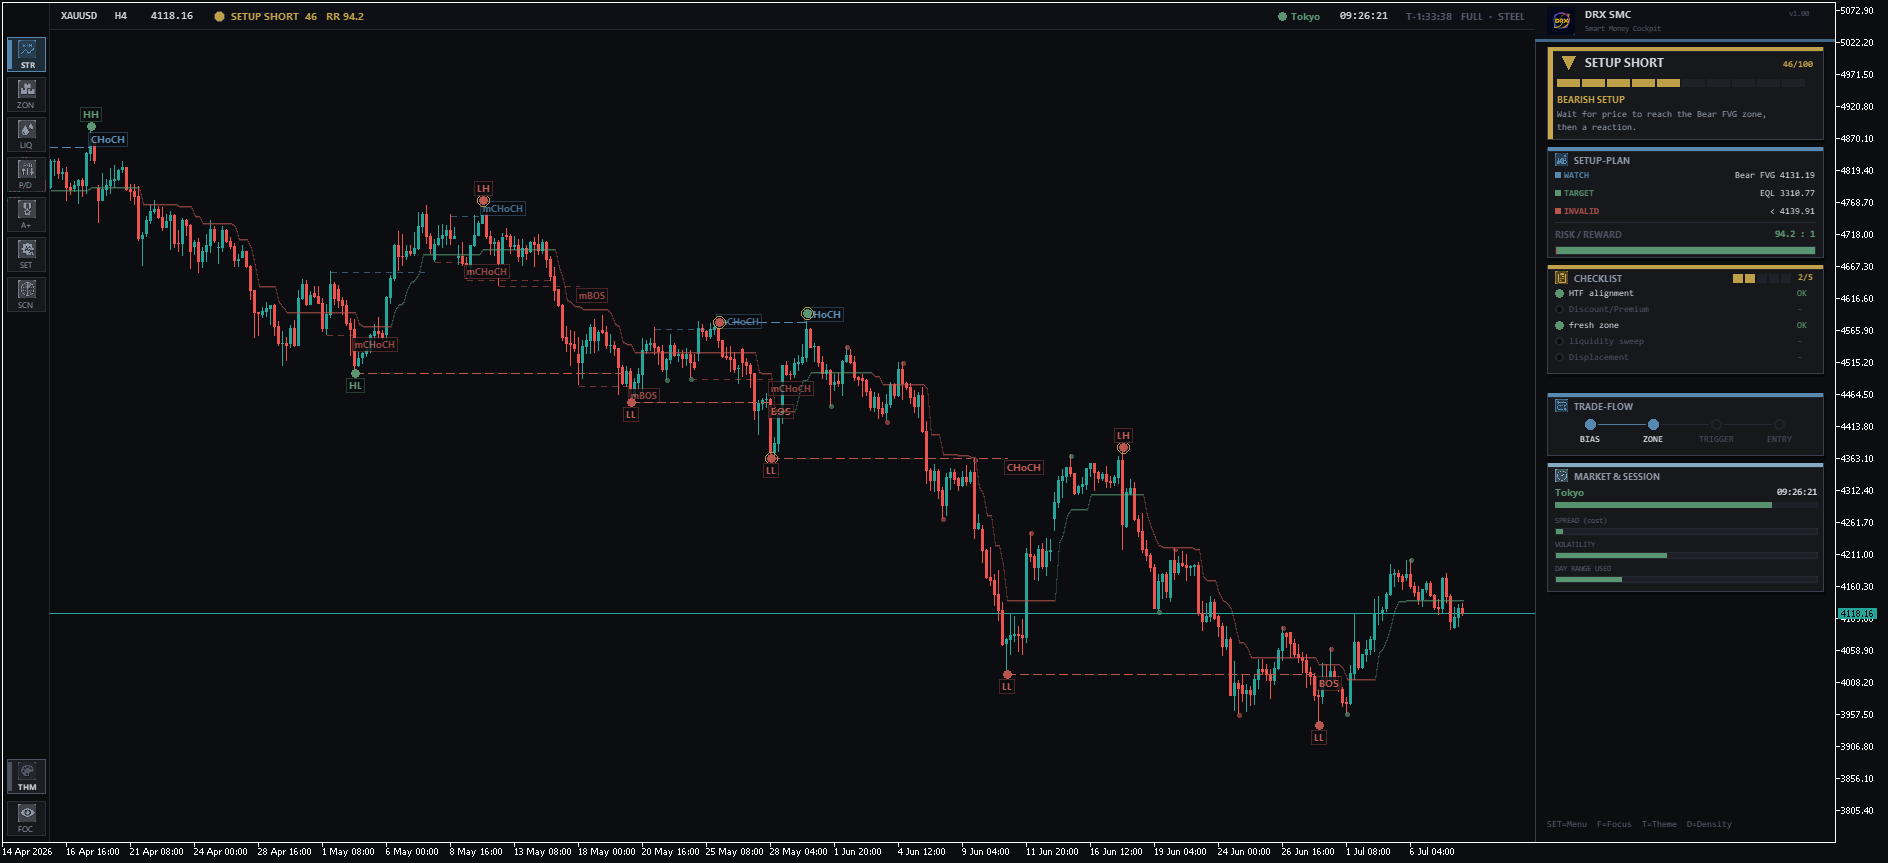
Price isn’t random — it builds a chain of highs and lows. Higher highs & higher lows = uptrend; lower highs & lower lows = downtrend. A BOS (Break of Structure) continues the trend; a CHoCH (Change of Character) breaks it against the trend — the first sign of a reversal.
What DRX shows: every swing labelled (HH/HL/LH/LL), every break tagged BOS or CHoCH, and the smaller internal breaks tagged mBOS / mCHoCH. Strong swings get a highlight ring.
→ How you trade it: trade only with the external structure. Use a CHoCH as your reversal warning, and an internal shift inside your zone as the entry trigger. You stop buying tops and selling bottoms.
Step 2 — Order Blocks & Fair Value Gaps: the entry zones
An Order Block is the last opposing candle before a strong displacement — where institutions loaded up; price often returns to fill the rest. A Fair Value Gap is an imbalance across three candles that price tends to return and rebalance, using the CE (consequent encroachment) midline.
What DRX shows: OB and FVG zones drawn automatically, coloured by direction and volumized (e.g. “OB 29K”), with the CE midline and a full mitigation lifecycle. The nearest fresh zone is emphasized; used zones fade.
→ How you trade it: wait for price to return to a fresh OB/FVG in the trend direction, enter on the reaction (rejection wick / internal CHoCH), stop just beyond the zone. OB + FVG overlapping = stacked confluence.
Step 3 — Liquidity & sweeps: BSL / SSL “Taken” and stop-hunts
Retail stops sit above equal highs (buy-side liquidity) and below equal lows (sell-side liquidity). Institutions push price to grab that liquidity, then reverse — the classic sweep.
What DRX shows: equal highs/lows marked EQH/EQL. When price sweeps and reverses, DRX labels it “BSL Taken” (liquidity above a high grabbed → bearish) or “SSL Taken” (below a low grabbed → bullish), with a gold ring on the sweep.
→ How you trade it: a sweep against you, into your zone is a gift — “SSL Taken” below a low + a bullish reaction = shorts are trapped, you go long. Never place your stop right at an obvious EQH/EQL.
Step 4 — Premium / Discount & the 0.705 OTE: trade location
In any dealing range, the upper half is premium (expensive — you sell), the lower half is discount (cheap — you buy), the middle is equilibrium, and the 0.705 OTE is the optimal entry inside a retracement.
What DRX shows: the range auto-drawn with premium/discount shading, equilibrium and the OTE .705 level.
→ How you trade it: only buy in discount, only sell in premium — the checklist scores you down if you don’t. OTE + order block + discount together = a textbook A+ location.
Step 5 — The A+ Score: six confluence factors, one verdict
One factor is a coin flip. Confluence — several independent factors agreeing — is an edge. DRX SMC scores each setup 0–100 from six factors:
| 1. Trend structure | 2. Multi-timeframe alignment | 3. Premium / Discount location |
| 4. Fresh zone (OB / FVG) | 5. Liquidity sweep | 6. Displacement |
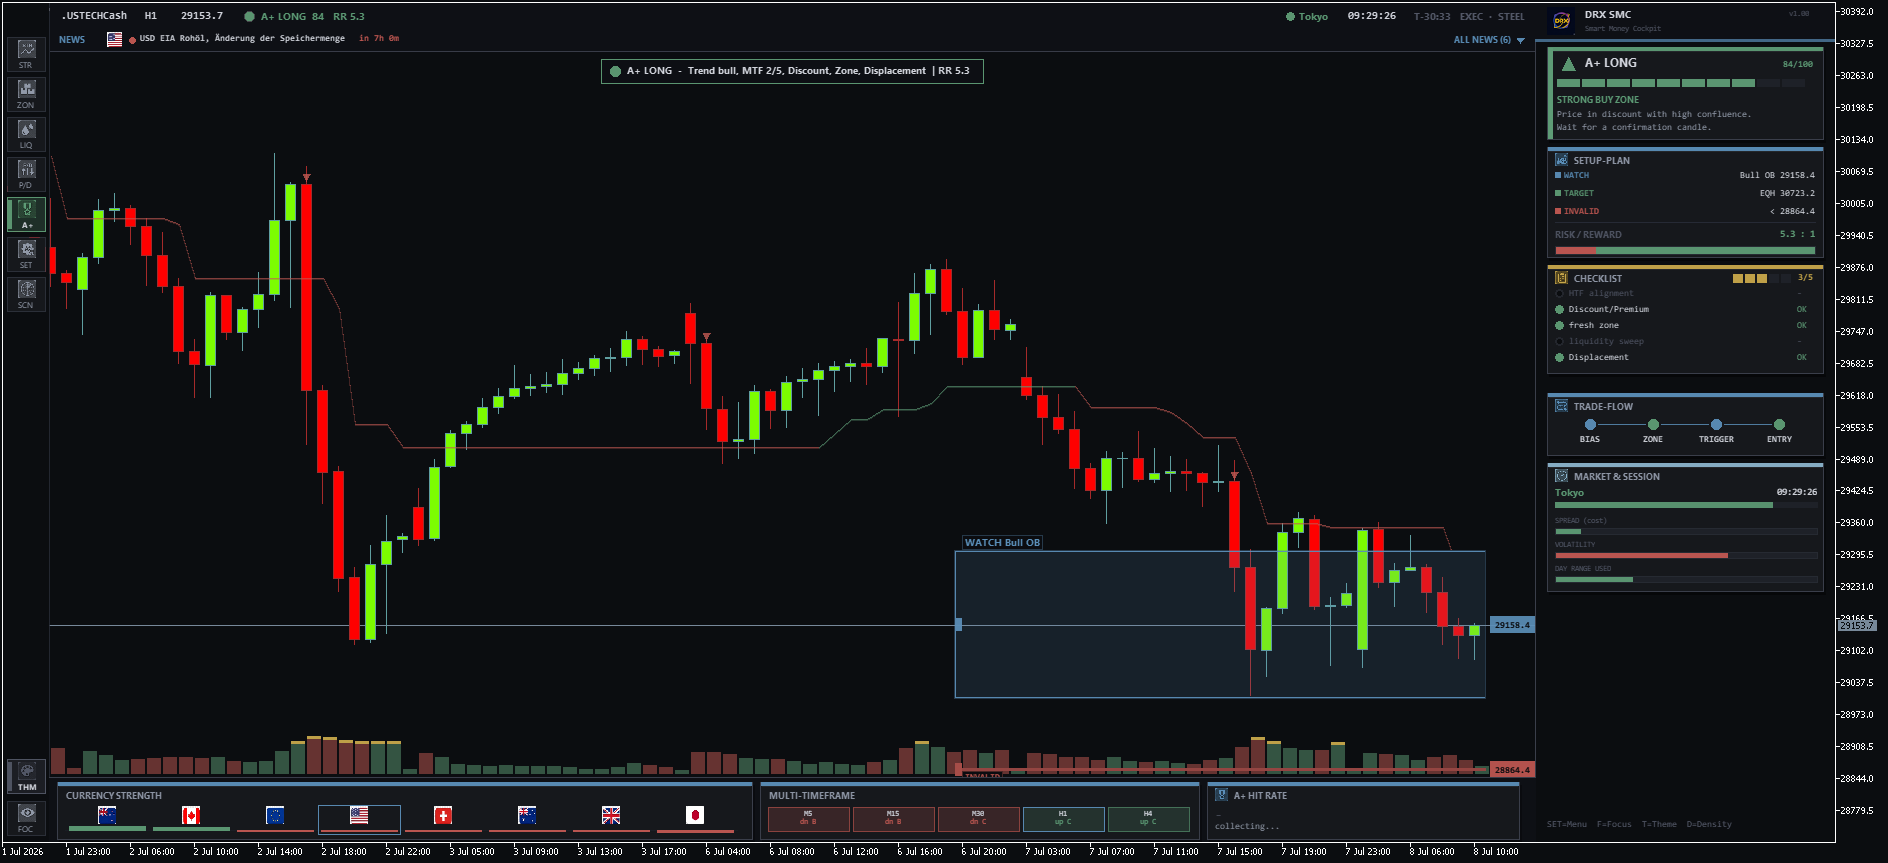
The panel shows the score, a plain-language coach sentence (e.g. “Strong buy zone — price in discount with high confluence. Wait for a confirmation candle.”) and an on-chart checklist with an X/5 confluence meter.
→ How you trade it: Red (<40) = wait, do nothing. Amber (40–64) = a setup is forming, prepare. Green (65+) = the setup you waited for. The checklist tells you exactly which factor is still missing.
Step 6 — The Setup Plan & the visual Trade Box (Entry / SL / TP / R:R)
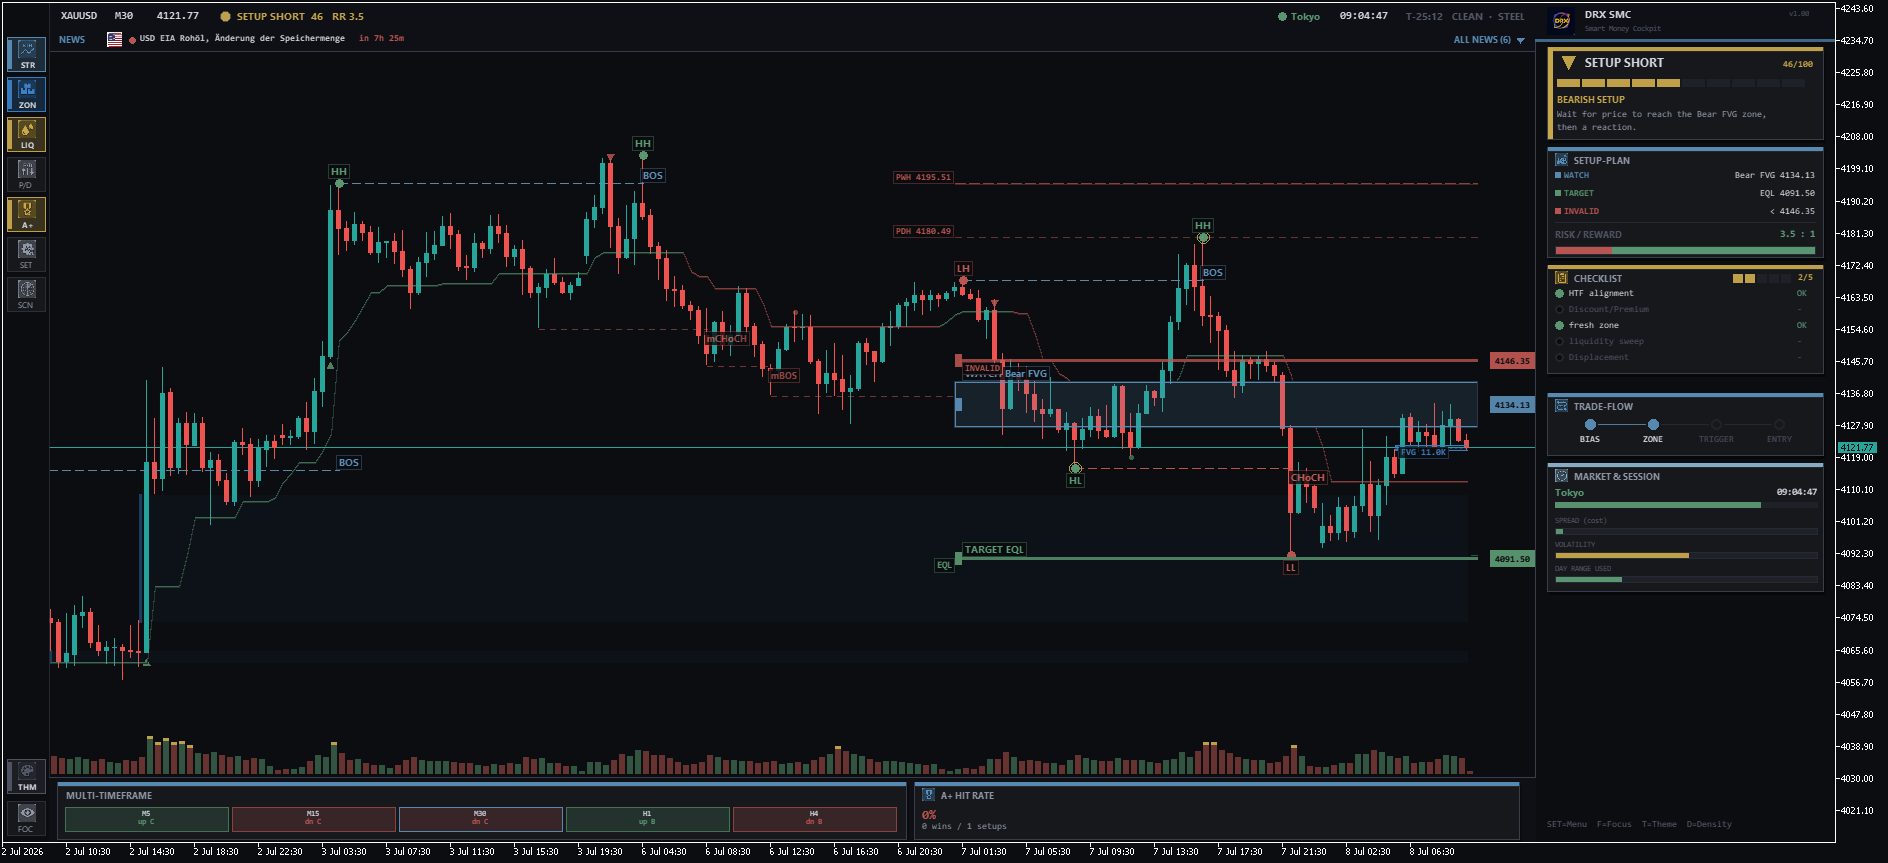
A read without a plan is just an opinion. For every valid setup DRX SMC gives you three prices and the math: WATCH (entry zone), TARGET, INVALID (stop) and the automatic Risk/Reward. On the chart, the toggleable Trade Box draws Entry / SL / TP with the risk zone shaded red, the reward zone shaded green, point distances and a big R:R badge. The stop sits just beyond the zone — a realistic, smart stop.
→ How you trade it: if R:R ≥ 2, the trade is worth the risk. Enter at WATCH, stop at INVALID, target the shown level. Green box bigger than red box = reward outweighs risk, at a glance. No improvising.
Step 7 — Context, confirmation & proof
The best setups need context, and every claim needs proof. DRX SMC layers both in cleanly:
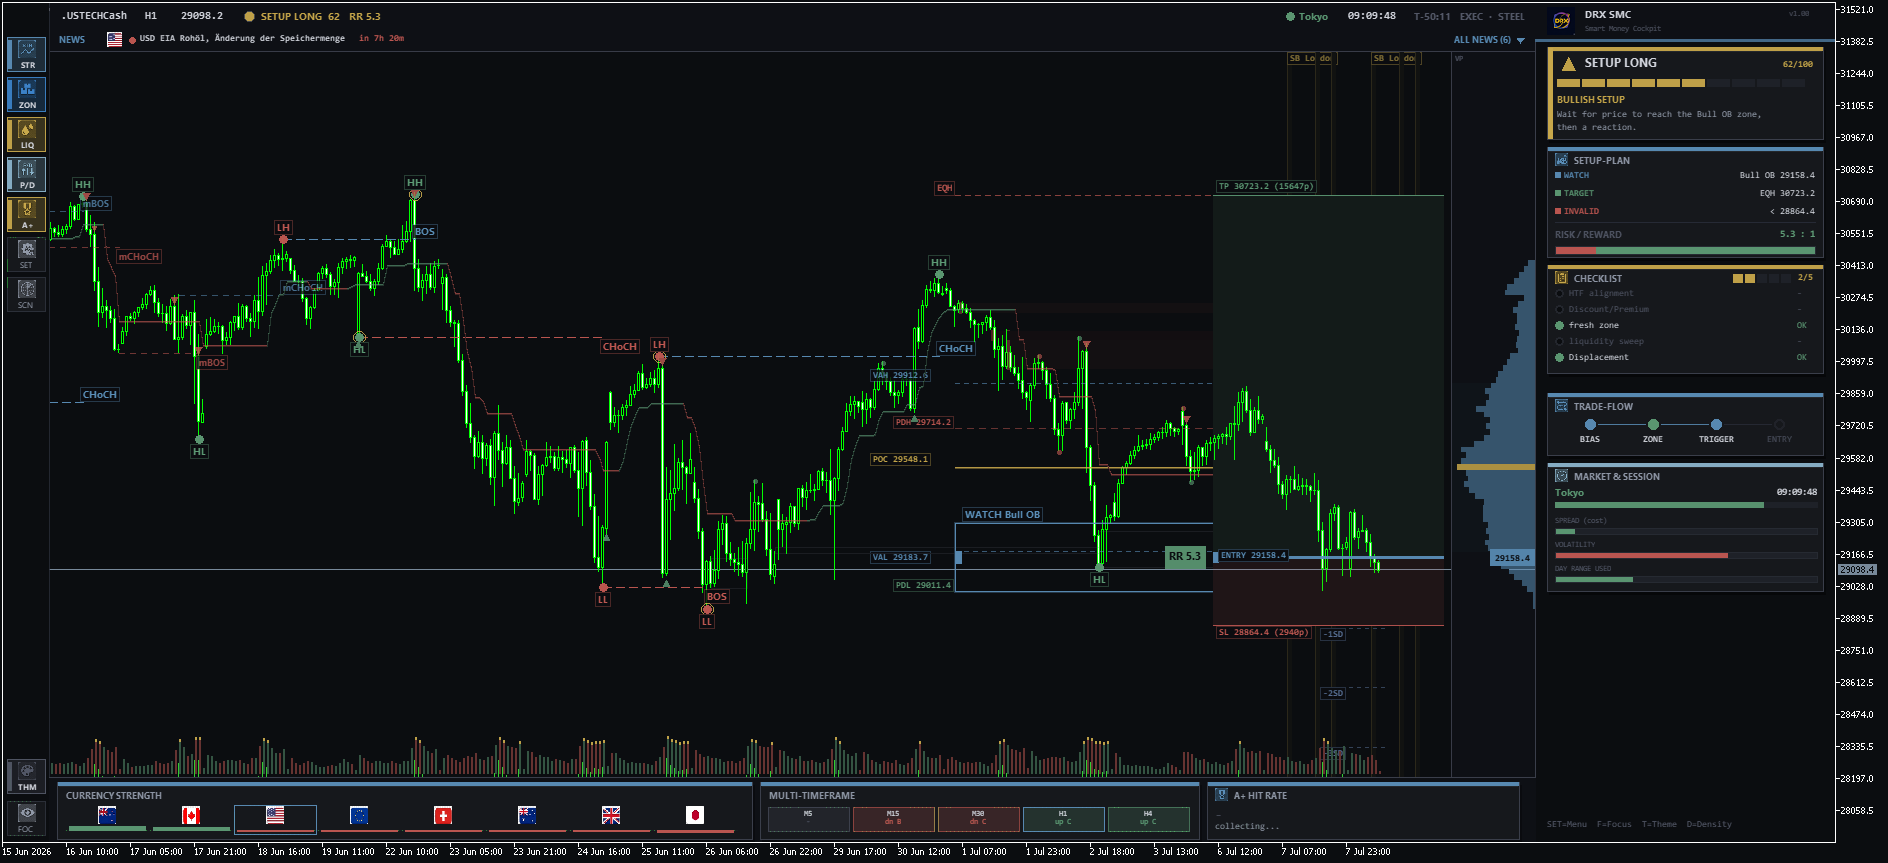
- Higher-timeframe levels & Kill Zones — PDH/PDL, PWH/PWL, Silver-Bullet session windows, plus the live session (Tokyo/London/New York) with a progress bar and your local time. Take your best setups inside a Kill Zone.
- Volume Profile & delta — a clean rail (never over the candles) with POC / VAH / VAL, an optional buy/sell delta split, and a volume-spike floor. The POC is a magnet and a target.
- Currency Strength & MTF matrix — each currency as a flag + strength bar (trade long the strong / short the weak); the M5–H4 bias in one row.
- Hit-Rate statistics — the tool tracks every A+ setup against its own target/invalidation and shows the live win rate. Verify it yourself in the strategy tester — this is your proof, not a screenshot.
- Multi-Symbol Scanner & News — ranks where the next A+ is forming across your watchlist; the news bar shows the next high-impact event with its country flag and a countdown.
![HTF levels + Silver-Bullet sessions + the Volume Profile rail (POC/VAH/VAL), and the bottom bar with Currency-Strength flags, the MTF matrix and the A+ hit rate ]](https://c.mql5.com/6/1015/_USTECHCashH1highertimeframe.png "HTF levels + Silver-Bullet sessions + the Volume Profile rail (POC/VAH/VAL), and the bottom bar with Currency-Strength flags, the MTF matrix and the A+ hit rate ]")
How to navigate DRX SMC
Built for speed — controlled entirely on-screen and by keyboard:
- Left rail — toggle each layer: STR (structure), ZON (zones), LIQ (liquidity), P/D (premium/discount), A+ (bias guidance), plus SET and SCN (scanner).
- SET panel — collapsible sections to switch every element, plus density, theme and language.
- Hotkeys — D density (Clean/Exec/Full) · T theme (Steel/PRO/Light) · F focus mode · P show/hide panel.
No indicator makes you profitable on its own — anyone who says otherwise is selling a dream. DRX SMC removes the guessing and gives you a structured, repeatable, verifiable edge. Combined with discipline and proper risk management, that is what produces consistent results over time.
Technical specifications
| Parameter | Value |
|---|---|
| Platform | MetaTrader 5 (MT5 only) |
| Structure | BOS, CHoCH, internal (mBOS/mCHoCH), HH/HL/LH/LL — non-repainting (closed candle) |
| Zones | Order Blocks (volumized), Fair Value Gaps with CE midline, mitigation lifecycle |
| Liquidity | EQH/EQL, BSL/SSL sweeps with “Taken” labels |
| Premium/Discount | Auto dealing range, equilibrium, 0.705 OTE |
| Decision layer | A+ score 0–100, coach narrative, checklist (X/5), setup plan, auto R:R, visual Trade Box |
| Context | HTF levels, Silver-Bullet sessions, Volume Profile + delta, CBDR, SuperTrend, currency strength, MTF matrix |
| Proof & tools | Live hit-rate statistics, multi-symbol scanner, economic calendar + countdown |
| Alerts | Pop-up, push, e-mail, sound — A+ signals, BOS/CHoCH, zone-touch; each with the reason |
| Interface | Canvas cockpit, 3 themes, density presets, hotkeys, per-chart memory, English / Deutsch |
| Markets | Gold (XAUUSD), major Forex, indices (US30/NAS100), crypto — best on M5–H4 |
A trade from start to finish (worked example)
Price sells off into your daily discount zone, where a fresh bullish order block sits. Instead of guessing whether it holds, you read the cockpit. Price sweeps the low below equal lows — DRX labels “SSL Taken”. The panel flips to SETUP LONG; the checklist ticks discount, fresh zone and liquidity sweep; the coach reads “Bullish setup — wait for a reaction.” An internal CHoCH prints in your direction, the Trade-Flow reaches ENTRY, and the score crosses 65 into A+. You enter at WATCH with the Trade Box showing 2.4 : 1, stop just beyond the block. Precision, not hope.
Frequently asked questions
What are Smart Money Concepts (SMC) and ICT?
SMC and ICT (Inner Circle Trader) are a price-action framework that reads the market through institutional order flow: market structure (BOS/CHoCH), order blocks, fair value gaps, liquidity pools and premium/discount. DRX SMC maps all of these automatically onto your MetaTrader 5 chart and adds a scored decision layer on top.
Is DRX SMC a non-repainting indicator?
Yes. BOS, CHoCH and the setup signals lock in only on candle close — nothing is redrawn after the fact.
Do I need an Expert Advisor (EA)?
No. DRX SMC is a standalone indicator for manual, discretionary trading. It maps structure and gives you the plan, but never opens or closes trades.
Which markets and timeframes work best?
Gold (XAUUSD), major Forex pairs, indices (US30, NAS100) and crypto — best on the M5 to H4 timeframes for intraday and swing execution.
How is this different from standard support/resistance?
Standard S/R relies on historical touches. SMC targets why price moves — unmitigated orders (order blocks) and imbalances (FVGs) — and DRX adds a verifiable decision layer with confluence scoring, a setup plan and a live hit rate.
Is it suitable for beginners?
Yes. The plain-language coach sentence, the checklist and the automated setup plan do the heavy lifting of structure reading, so beginners learn by watching the market read itself — while professionals get a fast, clean cockpit.
Trade the market like Smart Money
DRX SMC — Smart Money Cockpit. Precision over prediction. Available on the MQL5 Marketplace.
→ Get DRX SMC on the MQL5 MarketTrading involves substantial risk of loss and is not suitable for every investor. DRX SMC is an analysis and execution-support tool, not financial advice. Past performance does not guarantee future results.