Premium Signal Toolkit
- 지표
-
Minh Truong Pham
 Hello, my name is Pham and I am a programmer and trader! At here, I create amazing forex indicators and expert advisors for Metatrader.
I will try:
+ Provide best tools base on my 5 years experience as a trader and 10 years as a programmer. - 버전: 2.0
- 활성화: 20
# Premium Signal Toolkit — All-in-One Trend, Signal and Reversal System
**Ten proven analysis engines on one chart, condensed into one arrow and one line you can actually trade.**
Most "all-in-one" indicators fail for the same reason: they draw everything at once and leave you staring at a wall of colour. Premium Signal Toolkit runs ten independent engines in the background, but shows you only what you asked for — and reports the state of everything else in a compact panel in the corner of your chart.
The result is a chart you can read in two seconds: **is the trend up or down, has a signal just fired, and does the rest of the toolkit agree?**
---
## What is inside
| # | Engine | What it answers |
|---|--------|-----------------|
| 1 | **Supertrend Signal Engine** | The main Buy/Sell arrow — an adaptive ATR Supertrend flip, filtered by a fast SMA so it never fires against the immediate momentum |
| 2 | **Range Filter** | The main trend line. A Type-2 range filter built on Average Change, not on raw price — it stays flat through noise and only steps when real range is consumed |
| 3 | **Smart Trail** | A Wilder-ATR trailing stop with a 78.6 Fibonacci anchor. Your ready-made stop-loss and trailing level |
| 4 | **SuperIchi** | An adaptive Ichimoku: Tenkan, Kijun and a Kumo cloud built from volatility bands instead of fixed midpoints |
| 5 | **TBO (Trend Breakout)** | Early EMA-cross entries, with an optional RSI gate |
| 6 | **TP Points** | Exhaustion detector. Marks the bar where a run finally over-extends — where to take profit, not where to enter |
| 7 | **Trend Tracker** | Heikin-Ashi market bias from a double-smoothed EMA body. The slow, "big picture" filter |
| 8 | **Reversal Cloud** | Adaptive KAMA bands. When price reaches a rail it is statistically stretched |
| 9 | **Reversal Signals** | RSI exiting overbought/oversold — an early warning that a swing is turning |
| 10 | **Support & Resistance** | Auto pivot levels, scored by how many times price has respected them |
| + | **State Panel** | All ten engines, current state, one glance |
| + | **PSAR & MACD candle colouring** | Optional classics, off by default |
---
## Key features
- **Clean by design.** Every module has its own on/off switch. Turn on what you use, ignore the rest — the panel still reports all of them.
- **Nothing is hidden.** No black-box "AI". Every calculation is a published, well-understood formula. Every parameter is exposed.
- **No repainting on closed bars.** All maths is strictly causal — no future data, no lookahead. A signal printed on a closed bar stays exactly where it printed, forever.
- **Full alert suite.** Alert popup, mobile push, e-mail and Telegram (MT5). One message per signal per bar — no spam.
- **Choose your alert timing.** Instant on the forming bar, or `Alert only after the signal bar closes` for confirmed-only trading.
- **Works on every symbol and timeframe.** Forex, metals, indices, crypto, stocks. All calculations are volatility-relative, so nothing needs re-tuning per instrument.
- **Light on resources.** Fully incremental — only new bars are recalculated. Runs comfortably with several instances on one terminal.
- **MT4 and MT5.** Identical maths in both versions.
---
## How to trade / read signals with it
### Reading what you see
| On the chart | Engine | What it means |
|---|---|---|
| **Large green ▲ below a bar** | Supertrend | **Primary Buy signal.** Trend flipped up and the close confirmed above the fast average |
| **Large red ▼ above a bar** | Supertrend | **Primary Sell signal.** Trend flipped down and the close confirmed below the fast average |
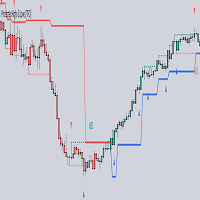
| **Thick green line under price** | Range Filter | Trend is up — buy the dips, ignore sell signals |
| **Thick red line above price** | Range Filter | Trend is down — sell the rallies, ignore buy signals |
| **Grey / flat line** | Range Filter | No trend. Range conditions — stand aside |
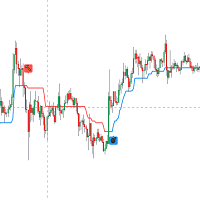
| **Blue dotted line below price** | Smart Trail | You are in a long regime. This is your stop level |
| **Red dotted line above price** | Smart Trail | You are in a short regime. This is your stop level |
| **Small green ▲ / magenta ▼** | TBO | Early entry, ahead of the main arrow. Faster but less reliable — needs trend agreement |
| **Blue ✗ *below* a bar** | TP Points | **Downside exhaustion.** Sellers over-extended into a new low. Cover shorts / possible bottom |
| **Blue ✗ *above* a bar** | TP Points | **Upside exhaustion.** Buyers over-extended into a new high. Take profit on longs / possible top |
| **"Reversal Up" / "Reversal Down" text** | Reversal Signals | RSI has just left oversold / overbought. A *warning*, not an entry |
| **Faint dotted rails far from price** | Reversal Cloud | Statistical extremes. Price touching a rail is stretched and prone to snap back |
| **Blue & orange lines + cloud** | SuperIchi | Tenkan above Kijun = bullish structure. Cloud = dynamic support/resistance zone |
| **Horizontal dotted levels** | S/R | Auto levels. Green = price is above it (support), red = price is below it (resistance) |
### Long playbook
1. **Context** — Range Filter line is **green** (panel: `Range Filter: Up`).
2. **Trigger** — a **large green ▲** prints. For an earlier, more aggressive entry, use the **small green ▲** (TBO) — but only while the Range Filter is already green.
3. **Confirm on the panel** — you want at least two of: `Smart Trail: Long`, `SuperIchi: Bullish`, `Momentum: Bull rising`. Three out of three is an A-grade setup.
4. **Stop loss** — just below the **blue dotted Smart Trail** line, or below the nearest green S/R level, whichever gives you a stop you can live with.
5. **Targets** — the first red S/R level above price, then the upper dotted reversal rail.
6. **Exit** — whichever comes first: a **blue ✗ above a bar** (upside exhaustion), the Range Filter turning red, or the Smart Trail being hit.
7. **Manage** — trail your stop along the Smart Trail line as it steps up. It never steps down while the long regime holds.
### Short playbook
1. **Context** — Range Filter line is **red** (panel: `Range Filter: Down`).
2. **Trigger** — a **large red ▼** prints (or the small magenta ▼ for early entry, with the Range Filter already red).
3. **Confirm on the panel** — `Smart Trail: Short`, `SuperIchi: Bearish`, `Momentum: Bear falling`.
4. **Stop loss** — just above the **red dotted Smart Trail** line, or above the nearest red S/R level.
5. **Targets** — the first green S/R level below price, then the lower dotted reversal rail.
6. **Exit** — a **blue ✗ below a bar** (downside exhaustion), the Range Filter turning green, or the Smart Trail being hit.
7. **Manage** — trail down along the Smart Trail line.
### Signals to skip
Discipline here is what separates a profitable session from a frustrating one.
- ❌ **Any arrow against the Range Filter colour.** A green ▲ while the line is red is a counter-trend bounce, not a trend entry.
- ❌ **Any arrow while the Range Filter is flat/grey.** This is the chop filter doing its job. Wait.
- ❌ **A buy arrow printing at or above the upper dotted rail** (and a sell arrow at or below the lower rail). You would be entering exactly where the move is most stretched. Wait for a pullback towards the Range Filter line.
- ❌ **TBO signals when Smart Trail and Range Filter disagree.** TBO is the fastest and noisiest engine — it needs the slow engines behind it.
- ❌ **A "Reversal Up/Down" label on its own.** It is an early warning. Trade it only if a real arrow follows within the next few bars.
- ❌ **Anything inside a thin, tangled Kumo** with Tenkan and Kijun flat and crossing repeatedly. That is a range.
- ❌ **Signals in the first ~350 bars of a freshly loaded chart.** The slow engines are still warming up. Scroll back to load more history.
### A simple confluence score
Count the panel rows agreeing with your direction (Range Filter, Smart Trail, SuperIchi, TBO, Trend Tracker, Momentum):
- **5–6 agree** → full size, trend continuation.
- **3–4 agree** → half size, take the first target quickly.
- **0–2 agree** → skip it.
---
## The State Panel
```
PREMIUM SIGNAL TOOLKIT
Signal BUY (12 bars)
Range Filter Up
Smart Trail Long
SuperIchi Bullish
TBO Long
Trend Tracker Bullish
Reversal RSI 54.9
Momentum Bull rising
Price vs Band Inside
```
- **Signal** — direction of the last primary arrow and how many bars ago it fired.
- **Reversal RSI** — the live RSI, tagged `OB` / `OS` when it enters an extreme.
- **Price vs Band** — `Inside`, `Above upper` or `Below lower`. Anything other than `Inside` means price is stretched.
The panel keeps working even with every drawing switched off — ideal if you prefer a bare chart or already run other indicators.
---
## Inputs
**WHAT TO SHOW** — one switch per engine. Start with the defaults, add what you need.
**SIGNAL ENGINE**
- `Sensitivity (0.5 – 12)` — the single most important setting. Lower = more signals, faster reaction, more noise. Higher = fewer, higher-quality signals. Default 5.5.
- `Marker distance (x ATR30)` — how far arrows sit from the candles.
- `Bars back to draw markers` — cap history drawing on very long charts.
**SMART TRAIL** — ATR period, ATR factor and smoothing of the trailing stop.
**REVERSAL SIGNALS** — RSI length and the overbought / oversold thresholds.
**SUPPORT / RESISTANCE** — level strength (how many touches a level needs), line style, optional zones.
**REVERSAL BAND** — band length and deviation.
**TBO** — optional custom EMA lengths and an optional RSI gate.
**COLOURS / PANEL** — every colour, the panel corner, offset and font size.
**NOTIFICATION SETTINGS** — alert type (Alert / mobile push / e-mail / Telegram), and `Alert only after the signal bar closes`.
---
## Recommended use
- **Timeframes:** M15 and above for swing and intraday trading. M5 works for scalping with `Sensitivity` reduced to 3.0–4.0.
- **Markets:** anything with clean volatility — major FX pairs, XAUUSD, indices, BTC/ETH.
- **First-time setup:** leave everything at default, watch one instrument for a session, and only then start tuning `Sensitivity`.
- **Best combination:** the Range Filter for direction + the main arrow for timing + the Smart Trail for stop management. The other engines are confirmation.
---
## Important notes
- **Repainting:** signals on **closed** bars never move. The forming bar updates in real time as price moves and can change until it closes — this is true of every indicator that reacts to the live price. If you only want confirmed signals, enable `Alert only after the signal bar closes`.
- **Support & Resistance levels** are pivot-based and therefore confirm 10 bars after the pivot high/low itself. This is inherent to pivot detection, not a defect.
- **Warm-up:** the indicator needs roughly 350 bars of history; the Trend Tracker band needs about 600. Load enough history before judging the output.
- **MT4 version** contains the same engines and the same maths. MetaTrader 4 cannot recolour chart candles, so the MACD candle-colouring option is MT5-only; its information is available in the panel's `Momentum` row.
---
## Support
Questions about settings, or a specific market you want tuned parameters for — send a message and you will get a reply. Screenshots of your chart help a lot.