TrinityConflux Pro
- Experts
-
Noel Anjao Alube
 Dedicated to developing smart, data-driven trading solutions with a strong focus on performance, risk management, and innovation. Committed to transforming trading ideas into automated strategies.
 - Version: 1.0
- Activations: 5
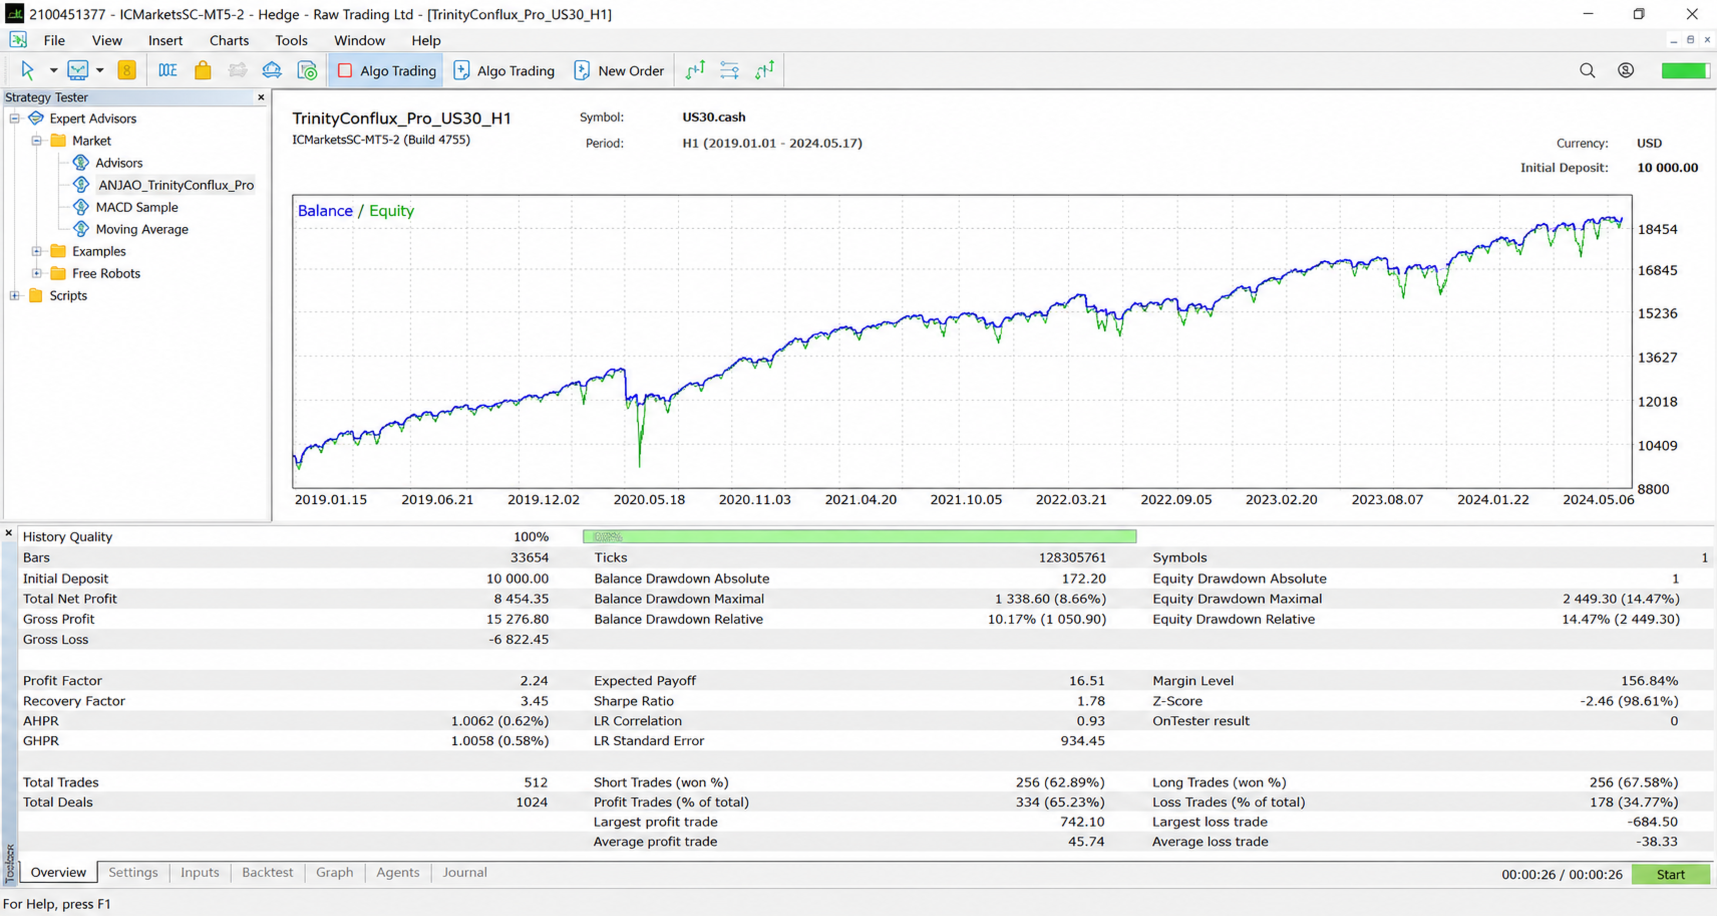
TrinityConflux Pro — Three-Signal Confluence Trading Engine for Multi-Symbol Precision
Three trading strategies working together. One decision engine. One EA.
Most Expert Advisors rely on a single idea — one indicator, one pattern, one theory about how price moves. When that idea stops working, the whole EA stops working. TrinityConflux Pro takes a different approach: it runs three genuinely different trading strategies at the same time, on every symbol you choose, and only opens a trade when enough of them agree with each other. This gives you a system built to handle changing market conditions, instead of betting everything on one method.
Module 1: Mean Reversion — Trading the Relationship Between Two Instruments
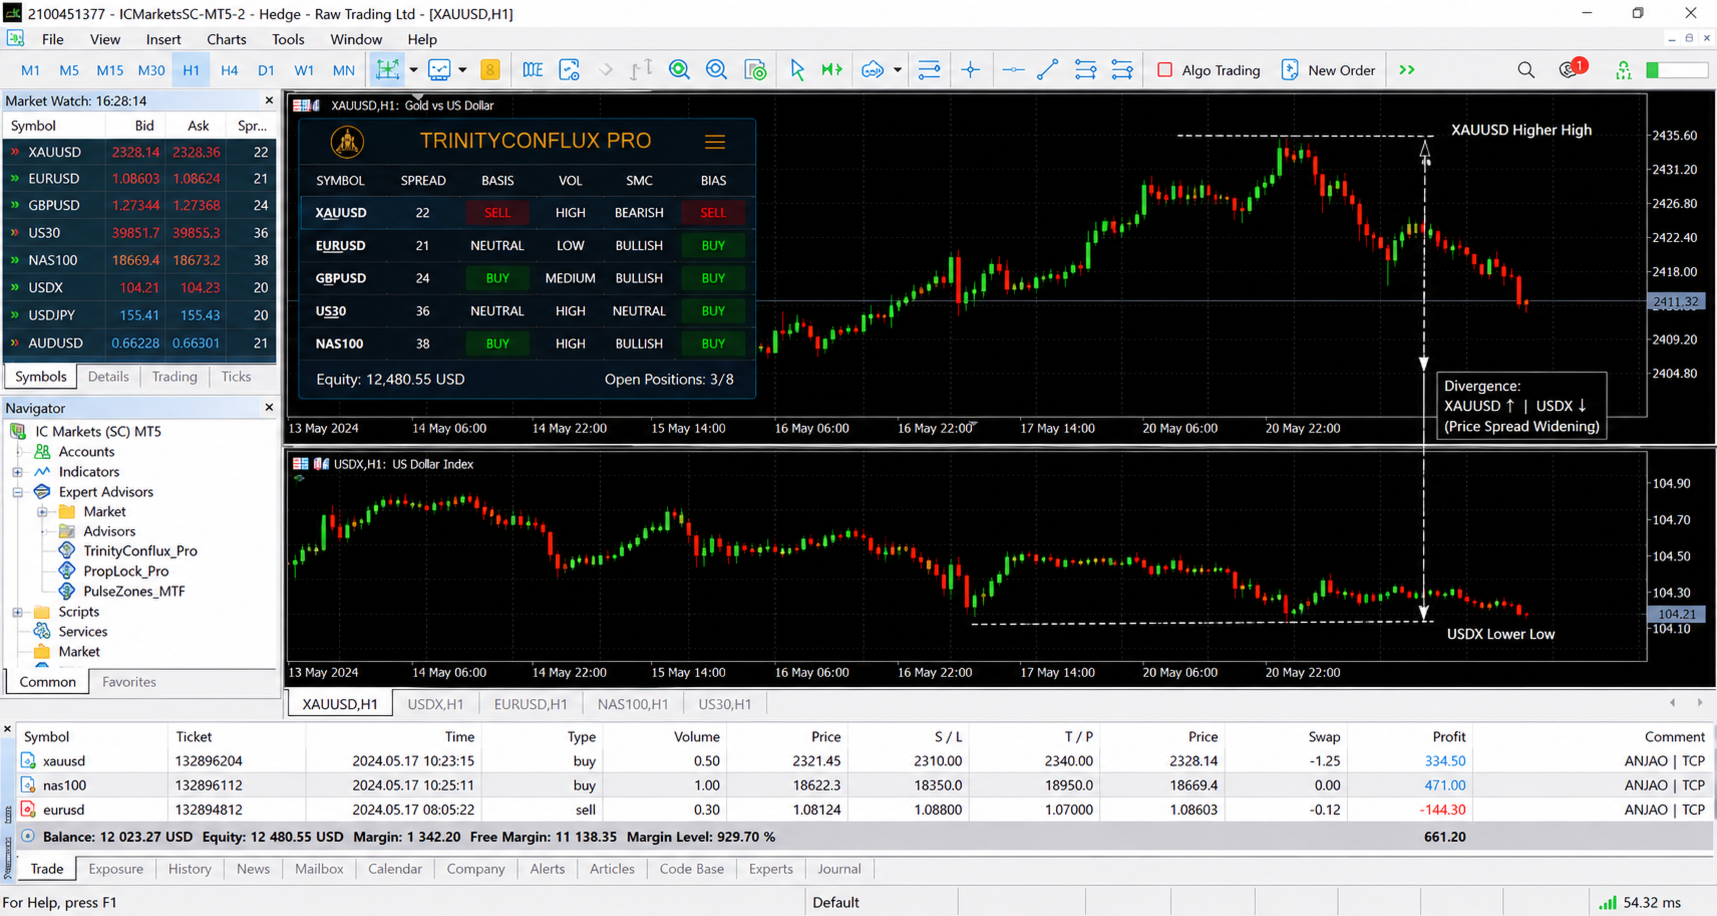
Some markets move together. Gold and the US Dollar, for example, often move in opposite directions — when one strengthens, the other tends to weaken. This module is built around that idea.
Here's how it works in plain terms: you tell the EA which reference symbol to compare against (for example, Gold). The EA then continuously tracks how far your traded symbol's recent price movement has drifted away from what you'd normally expect, given how the reference symbol is moving. Think of it like a rubber band — the further that relationship gets stretched from its normal range, the more likely it is to snap back toward normal.
When the stretch becomes unusually large (measured using a statistical threshold you control), the module signals a trade in the direction it expects the "snap back" to happen. This strategy performs especially well in ranging or choppy markets, where trends are unclear but relationships between instruments still hold.
In short: it watches for when two related markets drift too far apart, and trades the return to normal.
Module 2: Breakout Trading — Catching the Move When Volatility Explodes
Markets spend a lot of time compressing — trading in a tight, quiet range as pressure builds. Then, often without much warning, that pressure releases in a sudden, fast move. This module is built to catch exactly that moment.
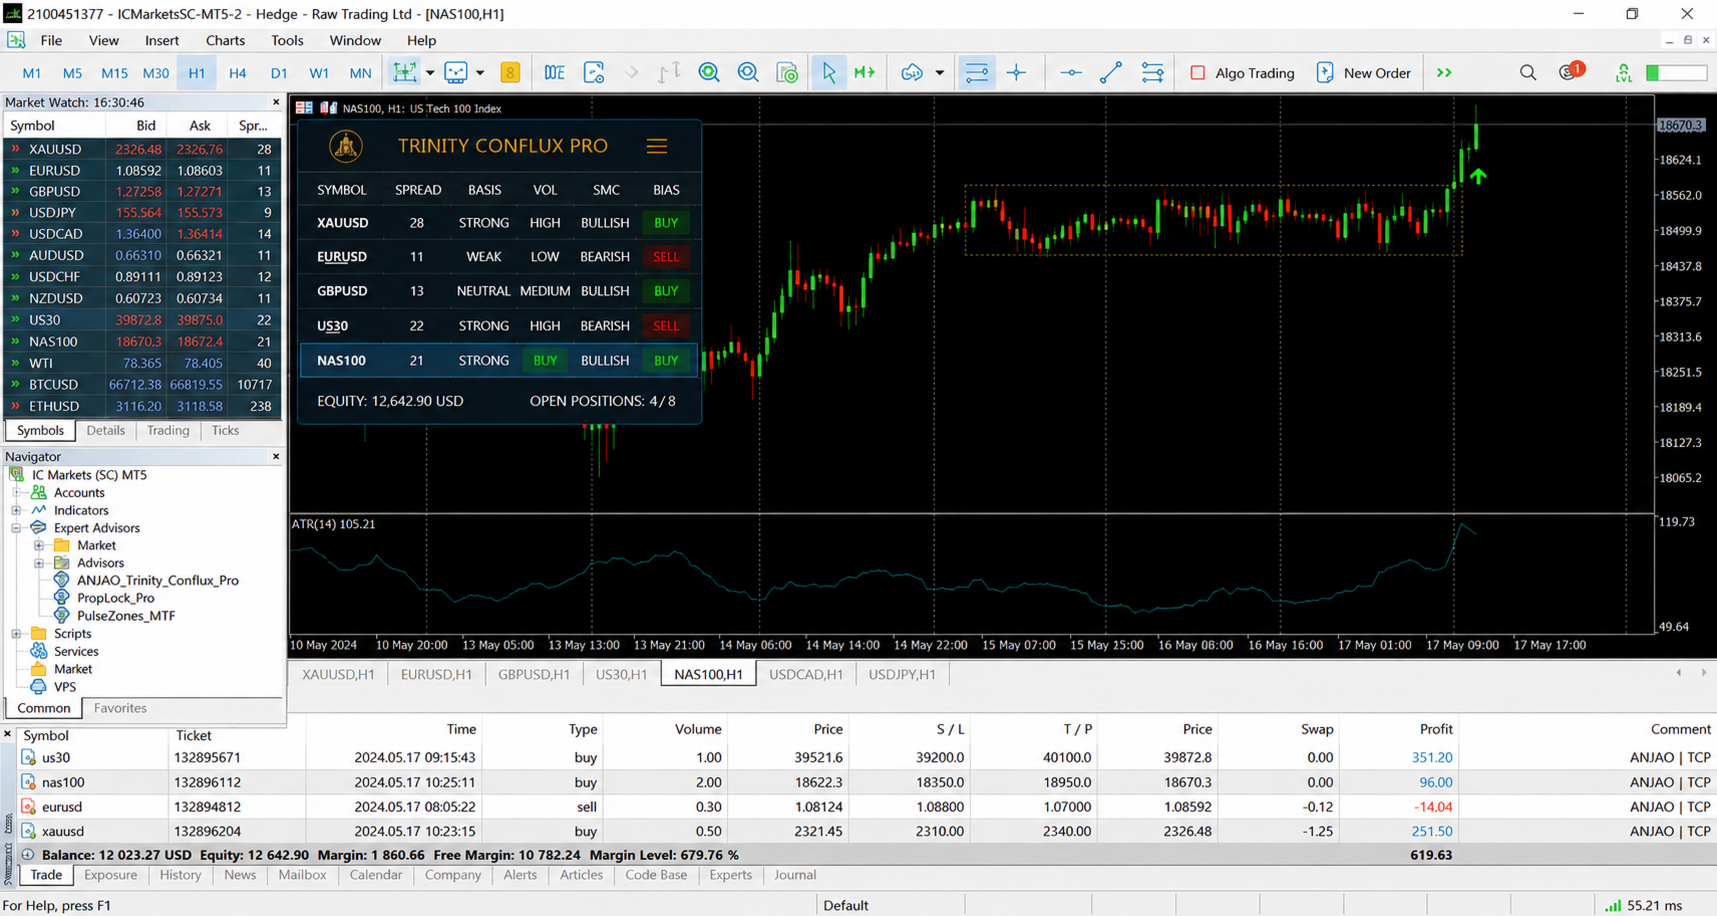
It continuously measures how much a symbol is currently moving compared to its recent average movement (its volatility). When that volatility suddenly jumps well above normal — and at the same time, price actually breaks above or below its recent trading range — the module treats this as a genuine breakout, not just random noise.
This combination matters: volatility alone can be a false alarm, and a range break alone can be a fakeout. Requiring both together filters out a lot of the failed breakouts that trip up simpler breakout systems.
In short: it waits for real pressure-release moments, not just any price wiggle, before signaling a trade.
Module 3: Trend & Structure — Trading With the Big Picture, Not Against It
This module is built around a simple principle experienced traders already know: don't fight the trend, and don't enter blindly — wait for price to come back to a good level first.
First, it checks whether the trend agrees across three different timeframes — the 1-hour, 4-hour, and daily charts. All three have to point in the same direction before this module even considers a trade. This "top-down" agreement filters out a lot of short-term noise and makes sure you're trading with the dominant market direction, not against it.
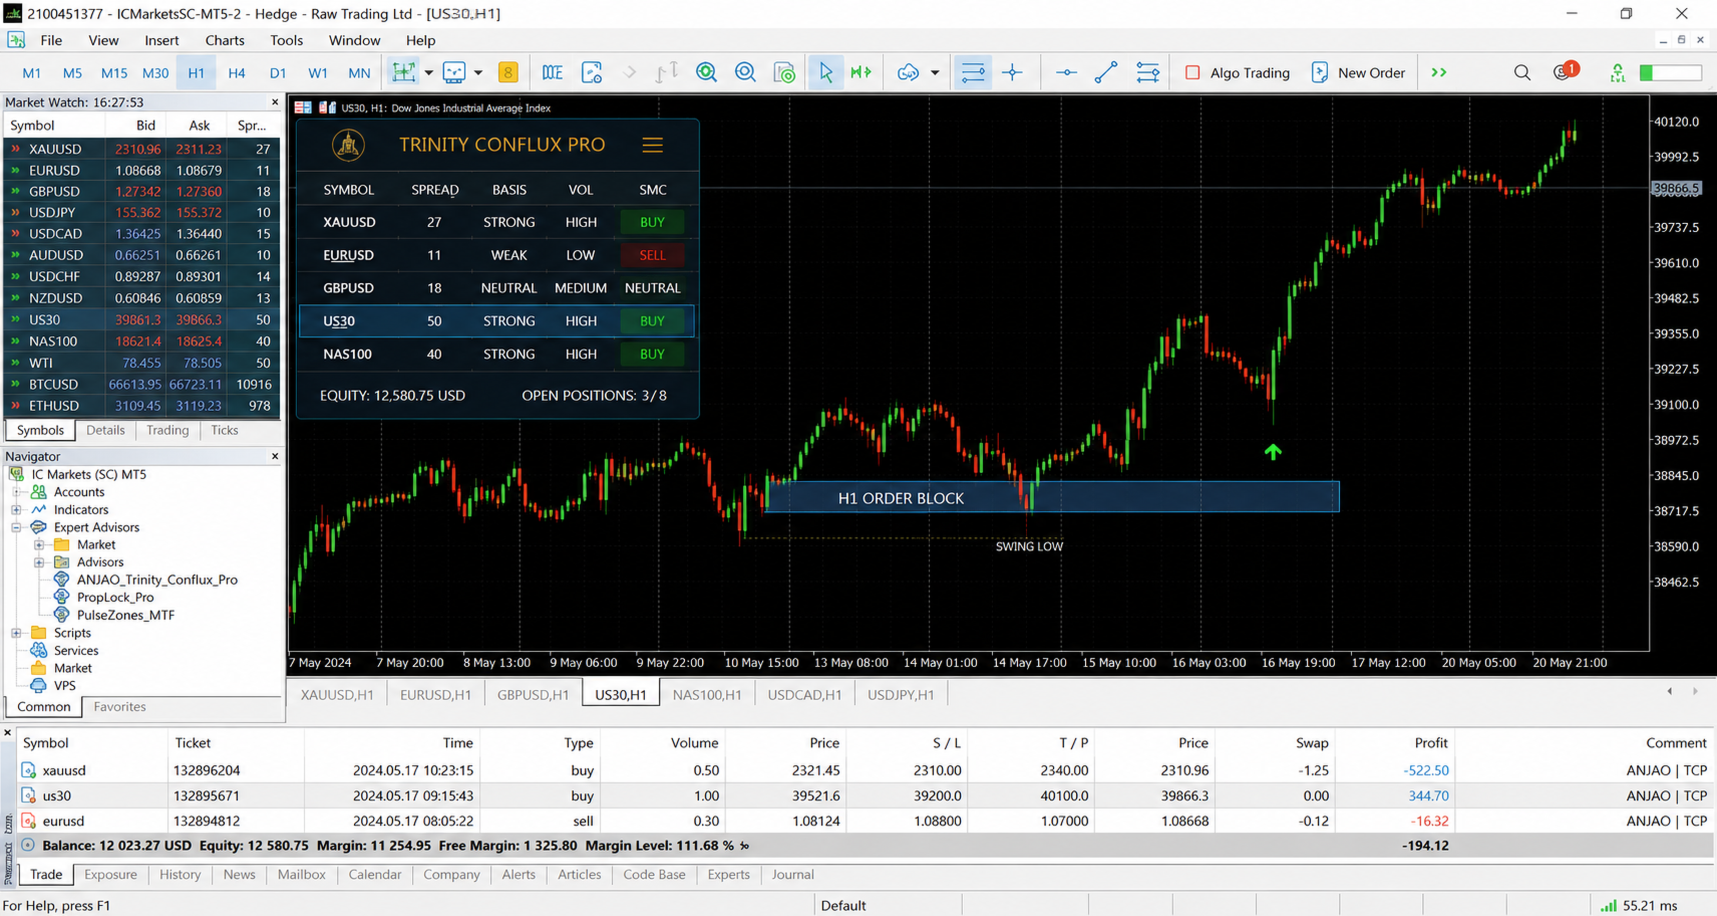
Once that trend agreement is confirmed, the module looks back to find the most recent key structure zone — a specific price area where the market previously reversed sharply, often referred to as an "order block" in Smart Money Concepts trading. It then waits for price to pull back into that zone before signaling an entry, rather than chasing price after it's already moved.
In short: it only trades when the trend is clearly aligned across multiple timeframes, and only enters when price retraces to a proven reaction zone.
How the Three Modules Work Together
Each module votes independently — Buy, Sell, or No Signal — based on its own logic. None of them "talk" to each other directly; they each analyze the market in their own way, which is exactly the point. You then decide, through a simple setting, how many of the three must agree before a trade is actually placed.
Want fewer trades, but higher confidence? Require all three modules to agree. Want more trading activity while still keeping some confirmation? Require just two. This one adjustable setting lets you shape the EA's entire trading personality without touching any code — from selective and conservative, to more active and opportunity-driven.
Trade Multiple Symbols From One Chart
You don't need to attach this EA separately to every chart. Give it a list of symbols — Gold, indices, forex pairs, or any combination you choose — and it manages and trades all of them at once from a single chart, with one unified dashboard showing everything happening across your entire symbol list.
Safe, Responsible Risk Management
There is no martingale, no grid trading, and no increasing position size after a loss anywhere in this EA. Every trade is sized based on a percentage of your account balance combined with the current market volatility, so your risk stays consistent whether you're trading Gold, an index, or a forex pair. Stop-loss and take-profit levels are also calculated from each symbol's live volatility, rather than fixed values that make sense for one instrument but not another.
Built to Work Reliably With Your Broker
The EA automatically detects the correct order execution settings for your broker, so there's no manual configuration needed. It also includes a maximum spread filter to avoid trading during poor market conditions, a trading hours filter so it only operates during the sessions you choose, and a maximum open positions limit to keep your total exposure under control at all times.
A Dashboard You Can Actually Read
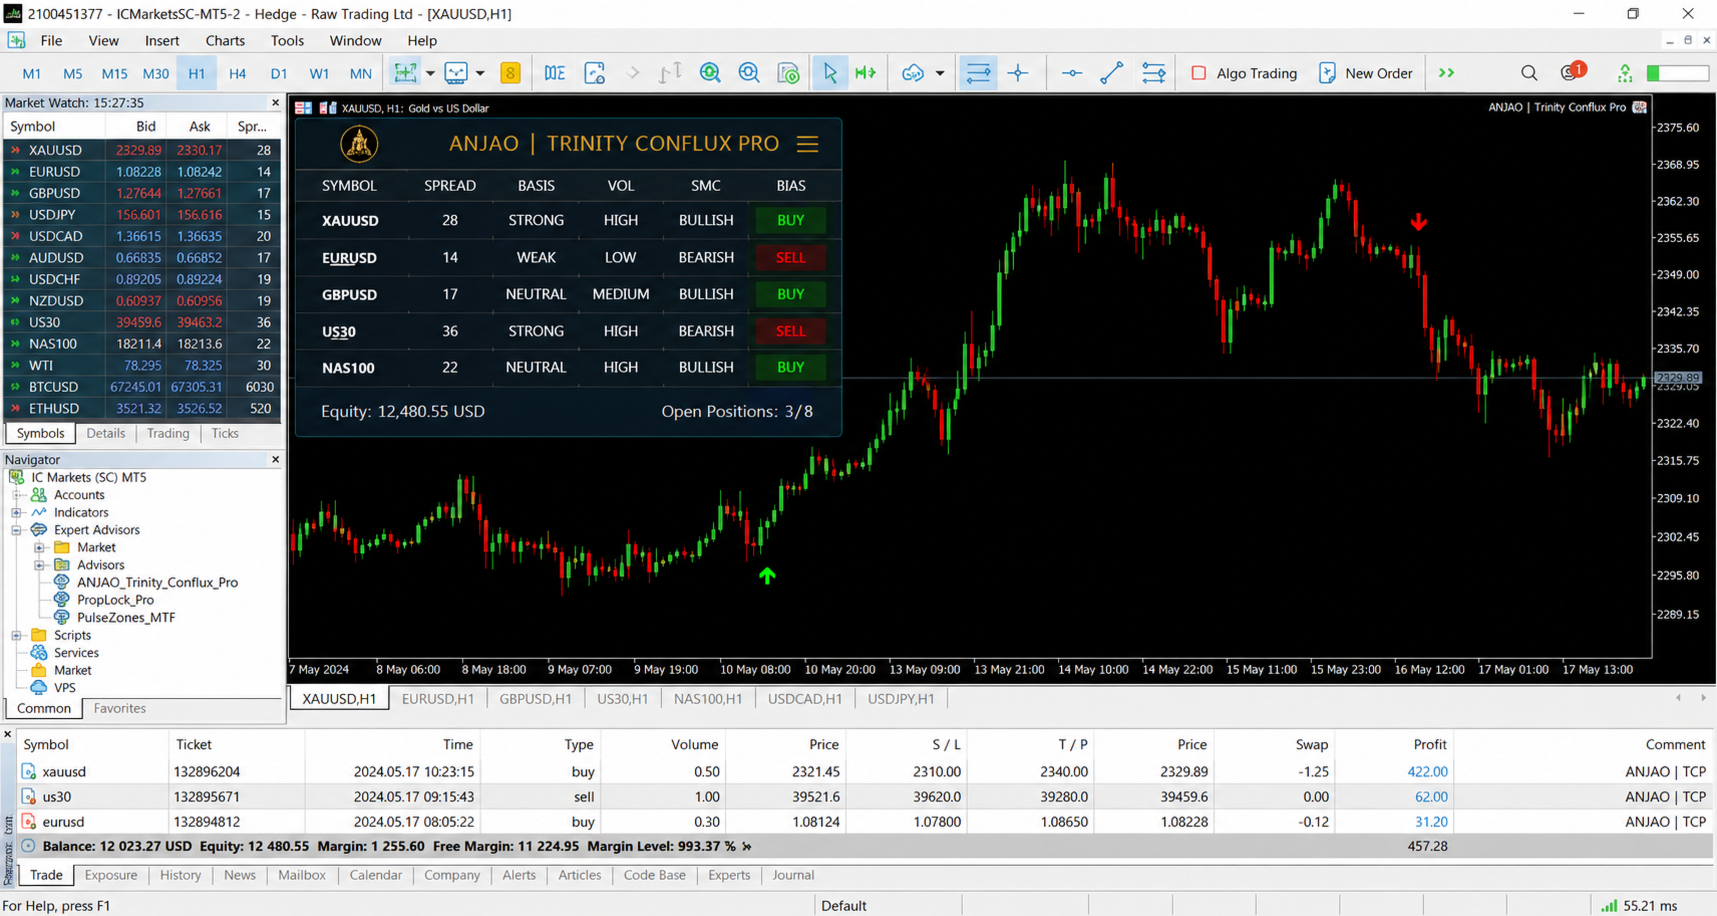
TrinityConflux Pro displays a clean, professional on-chart panel. For every symbol you're trading, it shows the current spread, what each of the three modules is signaling right now (green for buy, red for sell, grey for no signal), and the combined final decision. It also displays your account equity and how many positions are currently open — so at a glance, you always know exactly what the EA is seeing and doing, with nothing hidden.
Who This Is For
This EA is built for traders who are tired of single-signal systems that work great in a backtest and fall apart live. It's for traders managing multiple instruments who want one clear, organized tool instead of several unrelated EAs running independently. And it's for anyone who wants to actually understand why a trade was taken — not a black box, but a transparent system that shows exactly which strategies agreed before every single entry.
Every setting — thresholds, timeframes, risk levels, and which modules are active — is fully adjustable through the EA's input parameters, giving you complete control to fine-tune it to your own trading style.