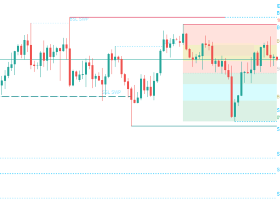
Institutional Gold Analysis (XAU/USD): Pre-New York Session Crossover

XAU/USD Stabilizes Near $4,370 Support into NY Crossover Following Hawkish Fed Re-pricing
Check out my free Indicator: https://www.mql5.com/en/market/product/168629
-
Current Bias: Neutral-to-Bearish (Intraday Bearish Corrective Pullback within a Macro Ascending Trend)
-
Core Level: $4,371 (Critical Institutional Demand Shelf & Session Floor)
-
Primary Driver: Repricing of September Fed rate-hike/hawkish stance probabilities, surging U.S. 10-Year Treasury Yields (>4.75%), and strong US Dollar Index (DXY) momentum.
2. The Macro Context & Catalyst Breakdown
Why Gold Dropped Yesterday
Gold suffered a sharp $120+ drop from its peak near $4,498–$4,510 down to test $4,369. The direct catalyst was a sudden hawkish recalibration in U.S. rate expectations following Federal Reserve rhetoric and sticky inflation metrics. Money markets aggressively repriced the probability of a September Federal Reserve rate hike to over 64%. This sparked a violent unwind of leveraged long gold positions as 10-Year U.S. Treasury Yields rallied above 4.75%, sharply raising the opportunity cost of holding non-yielding bullion. Simultaneously, safe-haven flows rotated back into the U.S. Dollar Index (DXY), which touched multi-week highs.
Current Macro Drivers & News Calendar Context
Into today's London-New York crossover, price is attempting to stabilize around $4,370–$4,380:
-
U.S. Labor Market Data Expectation: Markets are consolidating and reluctant to commit heavy capital ahead of high-impact U.S. economic catalysts, notably the upcoming ADP Employment figures and Friday’s Non-Farm Payrolls (NFP) report.
-
Macro Support Underpinning: Despite short-term yields and DXY headwinds, structural demand remains resilient due to long-term central bank reserve additions (288.9+ tonnes in Q2) and positive institutional ETF inflows, preventing a complete collapse of the higher-timeframe trend.
3. Technical Breakdown & Key Decision Zones
Price action on the H4 timeframe reveals XAU/USD testing the key swing support near $4,371. A hammer-reversal formation on H4 near the lower Bollinger Band signals seller exhaustion, but institutional buyers must reclaim $4,435 to regain control ahead of the New York open.
| Level Type | Price Level | Significance / Actionable Setup |
| Major Resistance | $4,605 | Macro upside expansion target and key supply zone. |
| Immediate Pivot | $4,435 - $4,465 | H1/H4 decision zone; 4H close above confirms bullish recovery toward $4,605. |
| Current Spot Zone | $4,370 - $4,380 | Pre-NY crossover consolidation and Asian/London liquidity sweep floor. |
| Key Support | $4,371 | Primary institutional demand shelf; invalidation level for intraday long setups. |
| Breakdown Target | $4,320 | Secondary liquidity pool target if major $4,371 support fails. |
4. Bullish vs. Bearish Scenarios
-
Bullish Scenario (NY Reversal): An H1/H4 candle close back above $4,435–$4,465 confirms a fakeout sweep of the $4,371 low. This opens the door for a short-squeeze back toward the $4,605 major resistance area.
-
Bearish Scenario (Trend Continuation): A clear 30-minute breakdown and close below $4,371 signals seller dominance, invalidating short-term long setups and opening a path toward $4,320.
5. Risk & Execution Disclaimer
Tactical Summary: Institutional traders in the NY crossover should watch $4,371 closely. Looking for confirmation (displacement + Market Structure Shift on the 5M chart) above $4,371 provides a asymmetric risk-to-reward long setup targeting $4,435 and $4,605.
Disclaimer: This analysis is for educational and institutional research purposes only and does not constitute individual financial advice. Always execute strictly within your risk management rules.
Lesson: TOOLS to use to detect trending markets
No single indicator is 100% accurate on its own; lagging indicators generate false signals in choppy markets, while leading indicators produce premature calls.
The most accurate framework for detecting trends combines three distinct tools into a 3-Layer Trend Verification System: Market Structure (Raw Price Action) + Trend Strength Filter + Momentum Confirmation.
Layer 1: Market Structure (Direction Verification)
Market structure is the only true real-time representation of supply and demand. It establishes direction without lag.
-
Bullish Trend: Sequence of Higher Highs (HH) and Higher Lows (HL).
-
Bearish Trend: Sequence of Lower Highs (LH) and Lower Lows (LL).
-
Break of Structure (BOS): Occurs when price breaks beyond a previous swing point, confirming trend continuation.
-
Change of Character (CHOCH): Occurs when price fails to form a new higher high (or lower low) and instead breaks the prior major swing low (or high), signaling a potential reversal.
Layer 2: Moving Average Ensembles (Baseline & Dynamic Support)
Using two or three Exponential Moving Averages (EMAs) helps filter out market noise and establishes the macro bias.
-
200-period EMA: Macro Trend Filter. If price is above, favor long trades; if below, favor short trades.
-
20 & 50-period EMAs: Dynamic Trend Velocity.
-
Golden Cross: 20 EMA crosses above 50 EMA (Bullish).
-
Death Cross: 20 EMA crosses below 50 EMA (Bearish).
-
Fan alignment (Price > 20 EMA > 50 EMA > 200 EMA) signals an aggressive trending market.
-
Layer 3: Average Directional Index (Trend Quality & Filtering)
The Average Directional Index (ADX) measures trend strength, not direction. It prevents taking trend-following trades in range-bound markets.
| ADX Value | Market State | Action |
| 0 – 20 | Range-bound / Non-trending | Avoid trend strategies (Expect false breakouts) |
| 20 – 25 | Emerging Trend | Prepare entries as breakout materializes |
| 25 – 50 | Strong Trend | High-probability trend-following setup |
| 50+ | Parabolic / Extended | Trend nearing exhaustion; tighten stop-losses |
Complete Trend Entry Checklist
Before entering a trend-following trade, confirm all three layers:
-
Market Structure: Price is forming valid HH/HLs (Uptrend) or LH/LLs (Downtrend).
-
EMA Alignment: Price is above the 200 EMA, and 20 EMA is above 50 EMA.
-
ADX Confirmation: ADX line is strictly above 25 and sloping upward.
-
Volume: Breakout candles display above-average volume.