
SCT Settings:
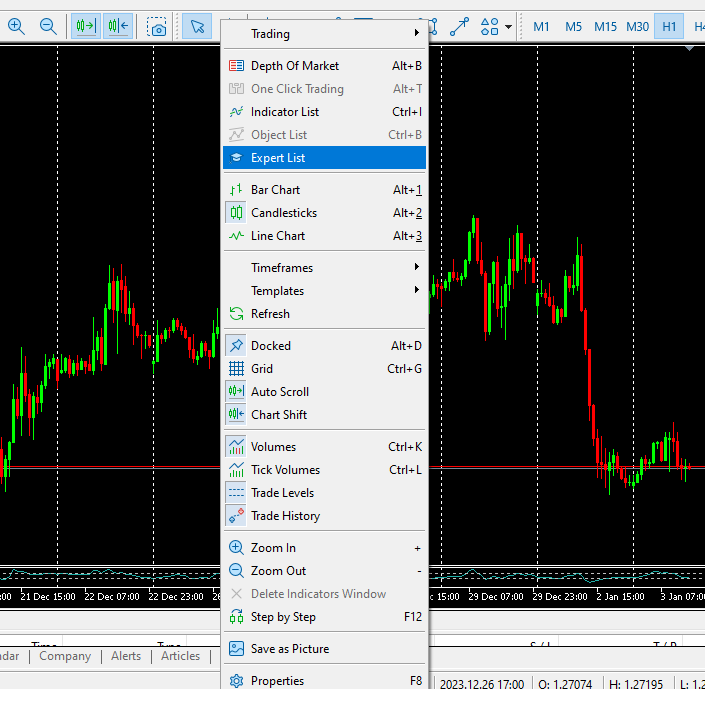
- The first step is to right-click on the chart and select the "Expert List" option.
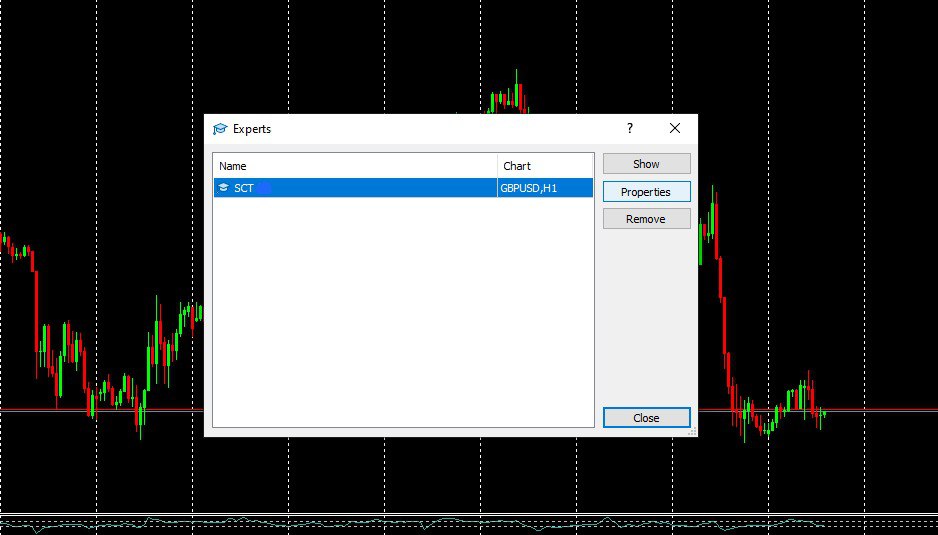
- A new page will appear, and by clicking on the expert, you should hit the "Properties" option.
- In this section, there are parameters that can be adjusted based on the trading style and strategy.
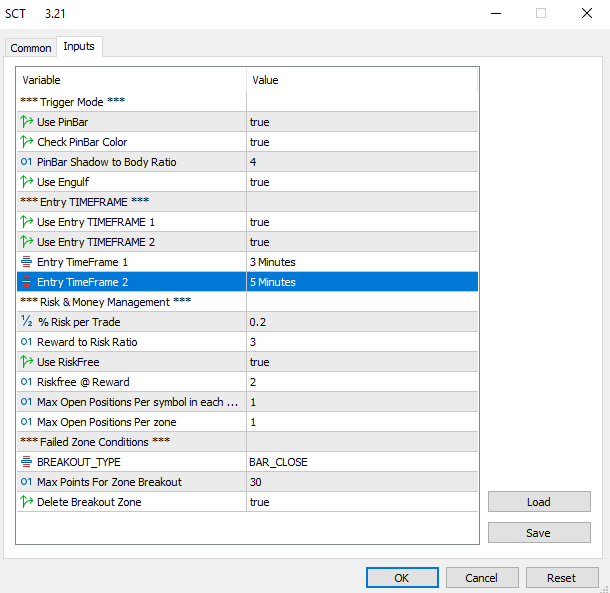
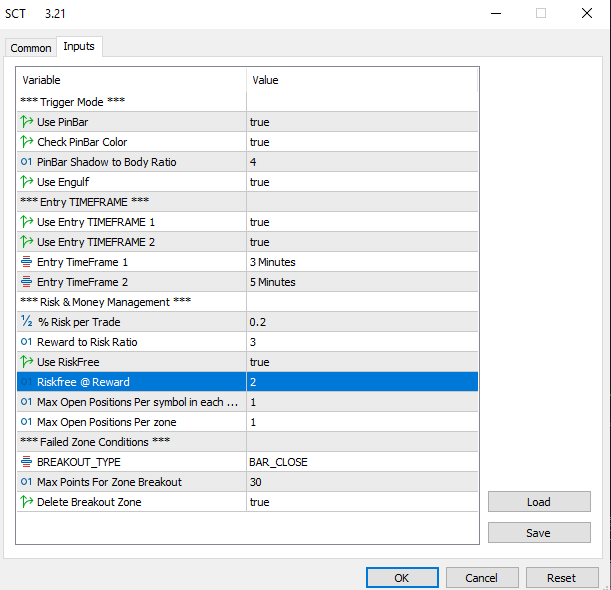
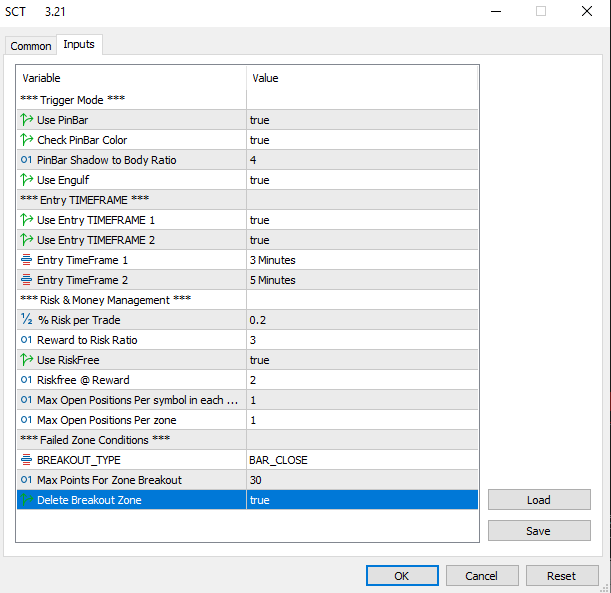
- The first parameter is "Trigger Mode," which includes the following:

- The first part is "Use Pinbar," where setting it to True means utilizing pin bars, and False means deselecting it with a double-click.

- The next option is the first condition for using pin bars, i.e., candle color. If True, it selects only bullish pin bars in an uptrend area, and if False, it considers all bullish pin bars as valid.

- The next condition is the second condition for pin bars, which is the ratio of the entire pin bar to its body. You can set your preferred value based on your experience with the ratio of the pin bar body.
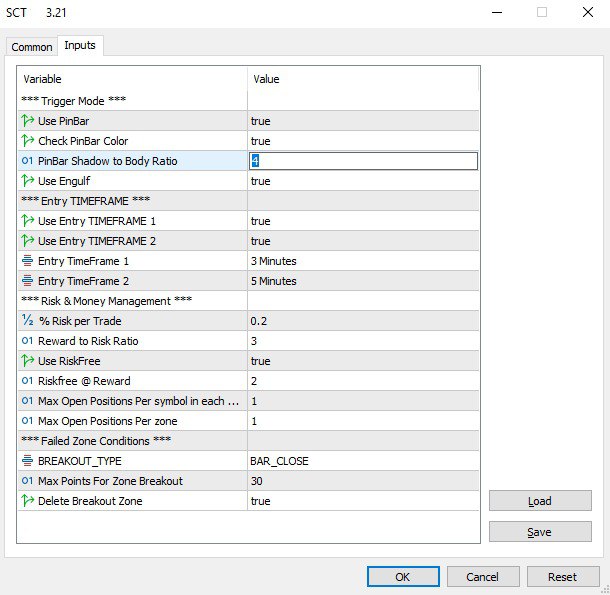
- The next option is "Use Engulf," which can be set to True or False as in the previous example.

- The second parameter is "Entry Timeframe," consisting of two parts:

- The first part: Timeframe 1, where you can use any timeframe you are trading in.
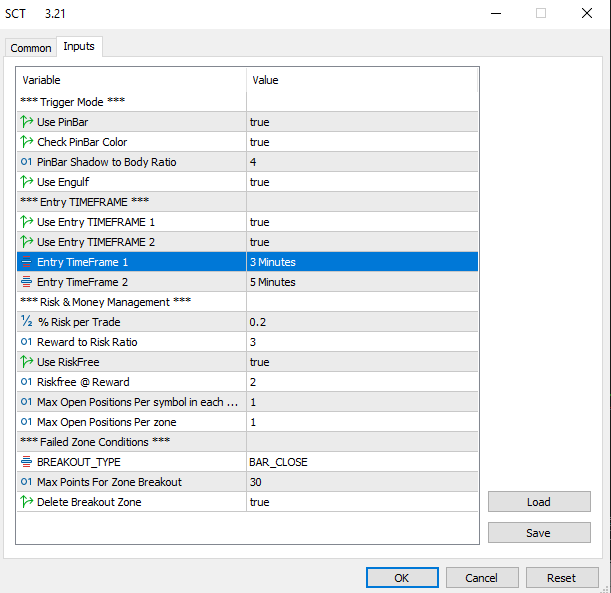
- The second part: Timeframe 2, where you can choose another timeframe or set it to False if you want to use only one timeframe.
- The next parameter is "Risk @ Money Management," which has 6 sections:
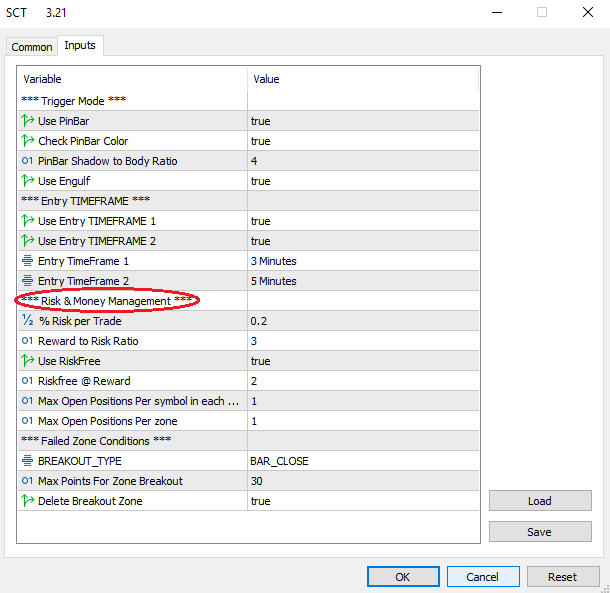
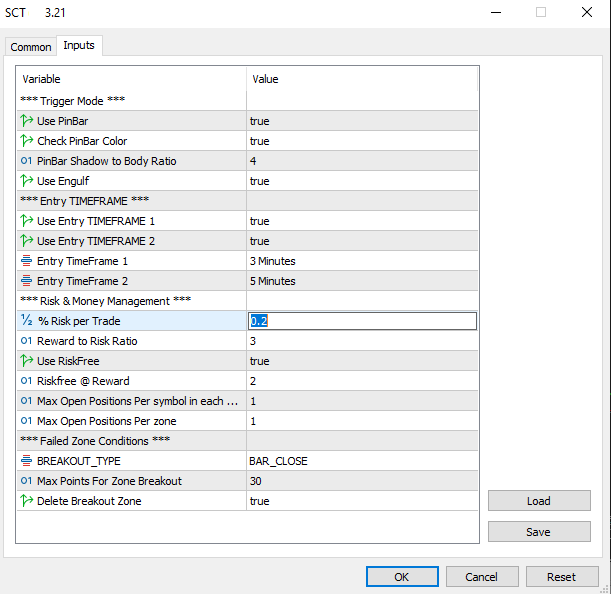
- The first option is "Risk Per Trade," calculating the risk per trade based on your risk tolerance.
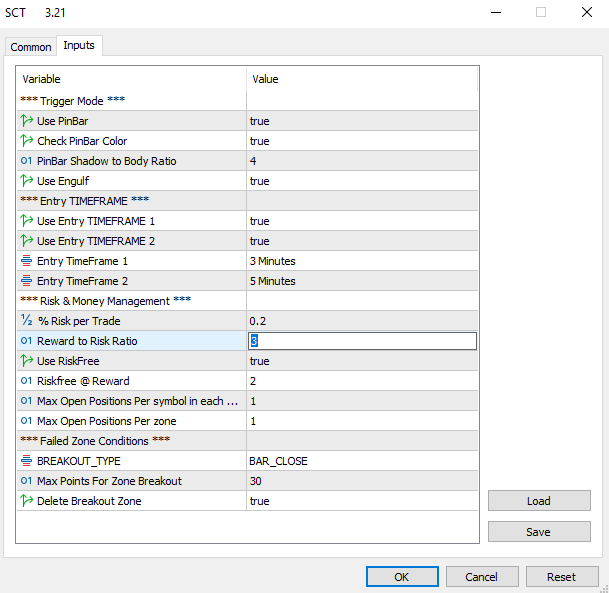
- The second option is "Reward To Risk Ratio," where you can set the desired reward-to-risk ratio.
- The next option is "Use RiskFree," where setting it to True allows for trades with lower risk.

- The following option is "RiskFree @ Reward," allowing you to choose the reward level at which the trade becomes risk-free.
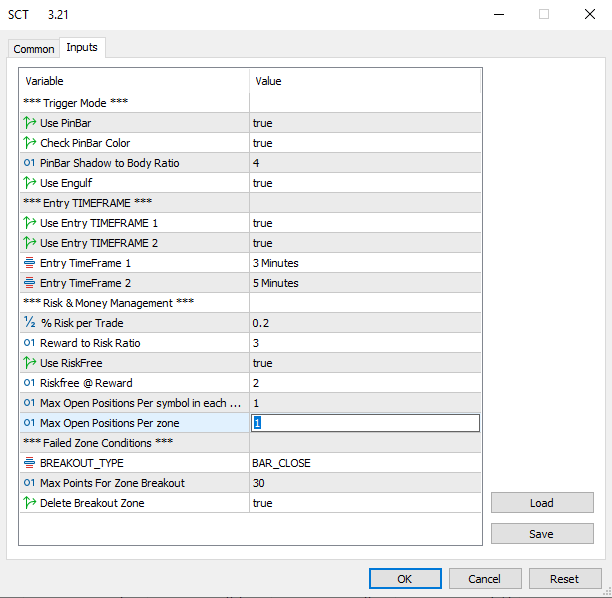
- "Max Open Positions Per Symbol" determines how many trades you want open for a symbol. You can input any desired number.

- "Max Open Positions Per Zone" indicates how many trades the system will initiate in one zone. Setting a higher number than one means the system will take multiple trades in a zone, doubling the risk for each additional trade.
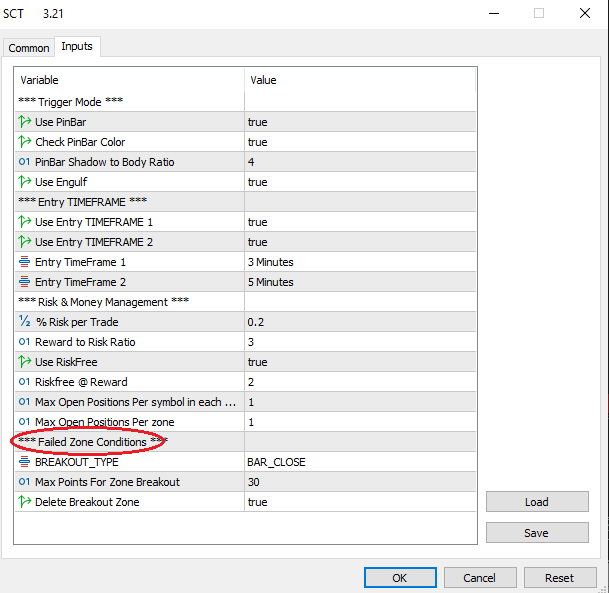
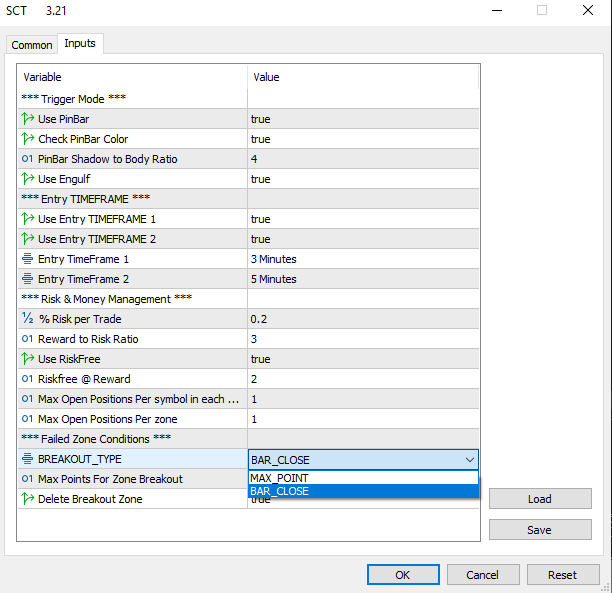
- The next parameter is "Fails Zone Conditions," consisting of 3 parts:
- The first part is "Breakout_Type," determining how the system deactivates a zone. It has two sub-parts:

- "Max Point," specifying the number of points after which the zone is deactivated.
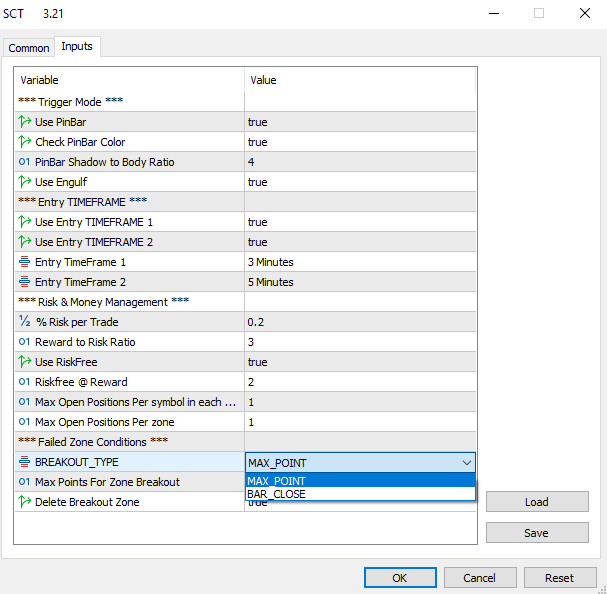
- "Bar_Close," determining whether the zone is deactivated when a candle closes in the timeframe the zone was drawn.
- The last part is "Delete Breakout Zone," which, if set to True, automatically deletes filled zones; otherwise, zones must be deleted manually.


![[Two Different Approaches to Market Timing]: The Spiral Calendar and the VISTmany Research Project](https://c.mql5.com/6/1012/splash-preview-771691.png "[Two Different Approaches to Market Timing]: The Spiral Calendar and the VISTmany Research Project")

