Dual Engulfing Pro MT5 Candle Signals Multi Filter
- Indicateurs
- Version: 1.11
- Activations: 5

════════════════ DUAL ENGULFING PRO MT5 Retail + Institutional Candle Signals with 16 Smart Filters ════════════════
Professional Price-Action Signal Indicator for MetaTrader 5 Dual Engulfing Engine • Multi-Filter Confirmation • Real-Time Alerts
Find high-quality engulfing reversals the way retail traders see them — and the way institutions prefer them. Dual Engulfing Pro MT5 plots two independent arrow systems on the chart, then lets you confirm every signal with up to 16 optional filters: trend, momentum, volatility, volume-style oscillators, Ichimoku, Fibonacci, and support/resistance.
This is not a random arrow indicator. It is a structured candlestick engine built around strict body-engulf rules, optional outside-bar logic, close location, volume comparison, and prior-trend context. You decide how strict the setup must be.
════════════════ PRODUCT INFORMATION ════════════════
Product Type : Technical Indicator (Chart Window) Platform : MetaTrader 5 (MT5) File Type : .mq5 / compiled .ex5 indicator Chart Display : Main price chart (DRAW_ARROW) Signals : Retail BUY / Retail SELL / Institutional BUY / Institutional SELL Version in source : 1.11 Best Use : Reversal and continuation confirmation on FX, Gold, Indices, Crypto CFDs, and Stocks Timeframes : All MT5 timeframes (M1 to MN). Most traders start with M15, M30, H1, H4 Markets : Any symbol that provides OHLC and volume/tick volume Repainting : Signals are evaluated on closed bars (bar index rates_total - 2 for alerts) Alerts : Popup, push notification, email, and custom sound files
════════════════ WHY THIS INDICATOR SELLS (CORE VALUE) ════════════════
Most engulfing indicators only check one condition: the current candle body covers the previous body. That creates too many weak signals in ranging markets.
Dual Engulfing Pro separates quality into two layers:
- RETAIL ENGULFING Classic body engulf. Fast, frequent, easy to understand. Ideal for traders who want more opportunities and will add their own discretion.
- INSTITUTIONAL ENGULFING A stricter “smart-money style” engulf. It can require: • Full outside bar (current high above prior high and current low below prior low) • Larger body vs the previous candle (default 1.5x) • Higher volume / tick volume than the previous bar • Close located in the decisive part of the candle range (default top/bottom 70%) • Longer opposite-candle context before the engulf
You can run both systems together or disable one. Institutional arrows are offset farther from the candle so both signals stay readable when they appear on the same bar.
The real commercial advantage is the filter stack. You do not need 16 separate indicators on the chart. Enable only the confirmations that match your strategy. Filters are AND logic: if a filter is ON, both the pattern and that filter must agree before an arrow is printed.
════════════════ WHAT YOU SEE ON THE CHART ════════════════
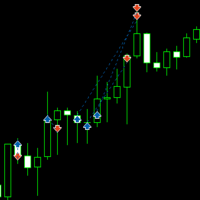
• Aqua arrow : Retail BUY • Red arrow : Retail SELL • DodgerBlue arrow : Institutional BUY (thicker) • Magenta arrow : Institutional SELL (thicker)
Arrow Wingdings codes are configurable. Distance from the candle is controlled in points so the same offset works after you adjust for the symbol’s point size.
════════════════ KEY FEATURES ════════════════
◆ Dual independent engulfing engines Retail and Institutional logic do not overwrite each other. You can compare “normal” vs “strict” quality on the same chart.
◆ True body-engulf definition Bullish: previous candle bearish, current bullish, current open at or below prior close, current close at or above prior open. Bearish: the inverse.
◆ Institutional quality gates Body-size multiplier, optional full outside bar, optional volume expansion, close-position ratio, and extra trend-context bars.
◆ Prior-trend context Optional count of opposite candles before the engulf. Example: a bullish engulf is stronger after 2–3 bearish candles.
◆ 16 optional confirmation filters RSI Cross, RSI 75, ADX, Single MA, Double MA, Ichimoku Senkou Span B, Awesome Oscillator (3 sub-modes), Parabolic SAR, Heiken Ashi, CCI Trend, CCI OB/OS, RVI Trend, RVI Signal, MACD Histogram, MACD Zero Line, Support & Resistance, Fibonacci retracement zone (ZigZag-based swings).
◆ Modular filter design Every filter has its own ON/OFF switch. Unused handles are not required for trading logic when disabled. Mix trend filters with location filters (S/R and Fib) for higher selectivity.
◆ Alert suite Popup Alert(), push SendNotification(), email SendMail(), and PlaySound() with separate BUY/SELL wav files from the MT5 Sounds folder.
◆ Clean inputs with groups Parameters are grouped in the MT5 Inputs tab so you can set up the product quickly without hunting through a flat list.
════════════════ HOW THE TWO ENGULFING MODELS WORK ════════════════
──────────────── RETAIL ENGULFING (STANDARD) ────────────────
Purpose : Detect the classic candlestick engulf that most price-action books describe.
Bullish Retail • Candle i-1 is bearish (close < open) • Candle i is bullish (close > open) • Current body covers prior body: open0 <= close1 AND close0 >= open1 • If “Require previous trend context” is true, the last N candles before the engulf must also be bearish
Bearish Retail • Candle i-1 is bullish • Candle i is bearish • open0 >= close1 AND close0 <= open1 • Optional prior uptrend context (N bullish candles)
Benefit More signals. Useful for scalping, session reversals, and traders who already use a higher-timeframe bias. Pair it with MA, Ichimoku, or ADX if you want fewer Retail arrows.
──────────────── INSTITUTIONAL ENGULFING (ADVANCED / OUTSIDE BAR+) ────────────────
Purpose : Keep only engulfing candles that look decisive — large body, range expansion, strong close, and preferably rising activity.
All Retail body-engulf rules, PLUS:
• Body size : body0 >= body1 * InpBodyMultiplier • Outside bar : if enabled, high0 > high1 AND low0 < low1 • Volume : if enabled, current volume (or tick_volume fallback) > previous volume • Close position:
- BUY : (close - low) / range >= InpMinClosePosition
- SELL : (high - close) / range >= InpMinClosePosition Default 0.70 means the close must finish in the top 30% (buy) or bottom 30% (sell) of the candle. • Trend context : optional, default 3 opposite candles (stricter than Retail’s default 2)
Benefit Fewer arrows, higher visual quality. This is the setting many sellers and signal users prefer for H1/H4 swing entries and for filtering “tiny engulf” noise on lower timeframes.
════════════════ FILTER ENGINE — WHAT EACH FILTER MEANS ════════════════
Filters apply after the pattern is detected. A bullish pattern still needs fBuy = true. A bearish pattern still needs fSell = true. Disabled filters do not block signals.
◆ RSI CROSS FILTER Uses iRSI. BUY : RSI crosses up through Oversold (default 30) SELL : RSI crosses down through Overbought (default 70) Benefit : Catch engulfing that appears as momentum leaves an extreme. Good for reversal-style entries.
◆ RSI 75 FILTER Separate RSI with a long period (default 75). BUY : RSI75 > 50 SELL : RSI75 < 50 Benefit : Slow regime filter. Keeps bullish engulfs only when medium-term RSI is on the bullish side of 50.
◆ ADX FILTER Uses iADX main line. Both directions require ADX >= ADX_Min_Level (default 20). Benefit : Reduces signals in dead, directionless ranges. Does not choose direction by itself.
◆ SINGLE MA FILTER One moving average of close. BUY : close > MA SELL : close < MA Benefit : Simple trend alignment. Period 50 SMA is a common starting point on H1.
◆ DOUBLE MA FILTER Two MAs (default EMA 30 vs EMA 140). BUY : fast MA > slow MA SELL : fast MA < slow MA Benefit : Clear bull/bear market state. Excellent as a higher-level bias when Retail signals are too frequent.
◆ ICHIMOKU SENKOU SPAN B FILTER Uses iIchimoku buffer 3 (Senkou Span B). Tenkan is fixed at 9 in the handle; Kijun and Senkou B periods are inputs. BUY : close > Senkou Span B SELL : close < Senkou Span B Benefit : Trades only on the side of the “cloud base,” a widely used institutional/trend location filter.
◆ AWESOME OSCILLATOR FILTER Uses iAO with three optional sub-rules: • Volume-style threshold : BUY if AO >= AO_Buy_Min (default 4), SELL if AO <= AO_Sell_Max (default -4) • Color / slope : BUY if AO rising, SELL if AO falling • Zero-line acceleration : BUY if AO rising and AO > 0, SELL if AO falling and AO < 0 Benefit : Momentum confirmation in the same family as Bill Williams tools. Combine slope + zero for cleaner swings.
◆ PARABOLIC SAR FILTER BUY : close > SAR SELL : close < SAR Benefit : Stops-and-reverse bias. Works well when you want engulfing only in the current SAR direction.
◆ HEIKEN ASHI FILTER Internal HA open/close (not a separate window). BUY : HA close > HA open (green HA bar) SELL : HA close < HA open (red HA bar) Benefit : Smooths noise. Helps avoid fading a strong HA color streak.
◆ CCI TREND FILTER BUY : CCI > 0 SELL : CCI < 0 Benefit : Zero-line trend from CCI. Period 50 is slower and more “regime-like.”
◆ CCI OB & OS FILTER BUY : CCI > Overbought (default +100) SELL : CCI < Oversold (default -100) Benefit : Momentum-extreme continuation or climax logic. Different from RSI Cross (which waits for a leave-extreme cross). Read this carefully: here the engulf must occur while CCI is already beyond the threshold.
◆ RVI TREND FILTER BUY : RVI > 0 SELL : RVI < 0 Benefit : Relative Vigor confirms that closes are stronger than opens in the lookback window.
◆ RVI SIGNAL FILTER Compares RVI main vs RVI signal line. BUY : main > signal SELL : main < signal Benefit : Timing filter. Useful when you want the oscillator already turning with the engulf.
◆ MACD SIGNAL (HISTOGRAM) FILTER Histogram = MACD main − signal. BUY : histogram > 0 SELL : histogram < 0 Benefit : Classic MACD agreement. Fast EMA 12, slow 26, signal 9 by default.
◆ MACD LEVEL 0 FILTER BUY : MACD main > 0 SELL : MACD main < 0 Benefit : Higher-level MACD regime. Slower than histogram-only confirmation.
◆ SUPPORT & RESISTANCE FILTER Looks back SR_Period bars (default 50) for the lowest low (support) and highest high (resistance). Zone width = SR_Zone_Points * _Point (default 80 points). BUY : current candle touches the support zone (or trades through it) SELL : current candle touches the resistance zone Benefit : Location filter. Engulfing at a freshly mapped swing range is more meaningful than engulfing in the middle of nowhere.
◆ FIBONACCI FILTER Builds recent swing high/low with a depth / deviation / backstep search (ZigZag-style, not the built-in ZigZag indicator). Projects Fib_Level_1 and Fib_Level_2 (default 0.382 and 0.618) as a zone. BUY and SELL both require the current candle to overlap that Fib zone. Benefit : Lets engulfing fire only during a retracement into a premium/discount pocket. If no valid swings are found, both sides are blocked.
Important : Filters stack. Turning on ADX + Double MA + S/R at the same time can make signals rare. Start with 1–2 filters, then tighten.
════════════════ COMPLETE INPUT GUIDE (EVERY VARIABLE) ════════════════
Read this section before you attach the indicator. All names match the Inputs tab.
════════════════ SIGNAL CONTROL ════════════════
InpEnableRetail Type: bool | Default: true Turns the standard body-engulf arrows on or off.
InpEnableInstitutional Type: bool | Default: true Turns the advanced institutional arrows on or off. Tip: For a clean “smart money only” product look, set Retail = false.
════════════════ SIGNAL APPEARANCE ════════════════
InpSignalOffset Type: int | Default: 30 Distance of the arrow from the candle in points. Retail BUY sits at low − offset. Retail SELL sits at high + offset. Institutional arrows use offset + 30 extra points so they do not overlap Retail arrows.
InpArrowCodeBuy Type: int | Default: 233 Wingdings code for BUY arrows (both engines).
InpArrowCodeSell Type: int | Default: 234 Wingdings code for SELL arrows. Change these if you already use 233/234 in another tool.
════════════════ RETAIL SETTINGS (STANDARD) ════════════════
InpRetailRequireTrend Type: bool | Default: true If true, a bullish Retail engulf needs a prior down-move context; a bearish Retail engulf needs a prior up-move context.
InpRetailTrendBars Type: int | Default: 2 How many immediately previous candles must be opposite in color. Example: 2 means two bearish candles before a bullish Retail engulf.
════════════════ INSTITUTIONAL SETTINGS (ADVANCED) ════════════════
InpBodyMultiplier Type: double | Default: 1.5 Current body must be at least this times the previous body. 1.2 = milder, 2.0 = only large displacement candles.
InpRequireHigherVolume Type: bool | Default: true Requires current real volume if available, otherwise tick_volume, to exceed the previous bar. On symbols with no real volume, tick volume is used automatically.
InpMinClosePosition Type: double | Default: 0.70 Fraction of the candle range where the close must finish. 0.50 = close beyond midpoint (looser). 0.80 = close very near the extreme (stricter).
InpRequireFullOutside Type: bool | Default: true Forces a true outside bar / mother-bar break on both sides of the prior candle. Disable this if you want large body engulfs that do not fully wrap the prior wicks.
InpInstRequireTrend Type: bool | Default: true Same idea as Retail trend context, but for the Institutional engine.
InpInstTrendBars Type: int | Default: 3 Default is stricter than Retail (3 vs 2). Increase on H4/D1 if you only want exhaustion after a push.
════════════════ RSI CROSS FILTER ════════════════
Use_RSI_Cross_Filter : enable/disable RSI_Length : RSI period (default 14) RSI_Price_Source : applied price (default PRICE_CLOSE) Oversold : cross-up level for BUY (default 30) Overbought : cross-down level for SELL (default 70)
════════════════ ADX FILTER ════════════════
Use_ADX_Filter : enable/disable ADX_Period : default 10 ADX_Min_Level : default 20 Both BUY and SELL need a strong enough ADX. Direction still comes from the candle pattern + other filters.
════════════════ SINGLE MA FILTER ════════════════
Use_MA_Filter : enable/disable MA_Period : default 50 MA_Method : SMA/EMA/SMMA/LWMA (default SMA) MA_Shift : default 0
════════════════ ICHIMOKU SENKOU SPAN B FILTER ════════════════
Use_Ichimoku_Filter : enable/disable Ichimoku_SenkouB : Senkou Span B period (default 52) Ichimoku_Kijun : Kijun period used in the Ichimoku handle (default 26) The handle is created as iIchimoku(..., 9, Kijun, SenkouB). Only Senkou B is read for the filter.
════════════════ RSI 75 FILTER ════════════════
Use_RSI75_Filter : enable/disable RSI_Filter_Period : default 75 Uses the same applied-price enum as the RSI Cross group (RSI_Price_Source).
════════════════ DOUBLE MA FILTER ════════════════
Use_DoubleMA_Filter : enable/disable MA_A_Period / MA_A_Method / MA_A_Applied / MA_A_Shift : fast line (default EMA 30 close) MA_B_Period / MA_B_Method / MA_B_Applied / MA_B_Shift : slow line (default EMA 140 close)
════════════════ AWESOME OSCILLATOR FILTER ════════════════
Use_AO_Filter : master switch Use_AO_Volume_Filter : use AO_Buy_Min / AO_Sell_Max thresholds AO_Buy_Min : default 4.0 AO_Sell_Max : default -4.0 Use_AO_Color_Filter : rising AO for BUY, falling AO for SELL Use_AO_Zero_Filter : rising and above zero for BUY; falling and below zero for SELL You may enable one, two, or all three sub-rules. All enabled sub-rules must pass.
════════════════ PARABOLIC SAR FILTER ════════════════
Use_SAR_Filter : enable/disable SAR_Step : default 0.02 SAR_Maximum : default 0.2
════════════════ HEIKEN ASHI FILTER ════════════════
Use_HeikenAshi_Filter : enable/disable No extra periods. HA is computed internally from open/high/low/close.
════════════════ CCI TREND FILTER ════════════════
Use_CCI_Filter : enable/disable CCI_Period : default 50 CCI_Applied : default PRICE_CLOSE BUY if CCI > 0, SELL if CCI < 0.
════════════════ CCI OB & OS FILTER ════════════════
Use_CCI_OBOS_Filter : enable/disable CCI_OBOS_Period : default 14 CCI_OBOS_Applied : default PRICE_CLOSE CCI_Overbought : default 100 CCI_Oversold : default -100 BUY requires CCI above the overbought line. SELL requires CCI below the oversold line.
════════════════ RVI TREND FILTER ════════════════
Use_RVI_Filter : enable/disable RVI_Period : default 75 BUY if RVI > 0, SELL if RVI < 0.
════════════════ RVI SIGNAL FILTER ════════════════
Use_RVI_Signal_Filter : enable/disable RVI_Signal_Period : default 20 Reads RVI main (buffer 0) and RVI signal (buffer 1).
════════════════ MACD SIGNAL FILTER (HISTOGRAM) ════════════════
Use_MACD_Filter : enable/disable MACD_FastEMA : default 12 MACD_SlowEMA : default 26 MACD_SignalSMA : default 9 MACD_Applied : default PRICE_CLOSE BUY if main > signal, SELL if main < signal.
════════════════ MACD LEV 0 FILTER ════════════════
Use_MACD_Zero_Filter : enable/disable Uses the same MACD handle as the histogram filter. BUY if MACD main > 0, SELL if MACD main < 0.
════════════════ SUPPORT & RESISTANCE FILTER ════════════════
Use_SR_Filter : enable/disable SR_Period : lookback bars (default 50) SR_Zone_Points : zone thickness in points (default 80) A “point” is the broker _Point value. On 5-digit FX, 80 points = 8.0 pips. On Gold or indices, adjust this number to the symbol’s volatility or the zone will be too tight or too wide.
════════════════ FIBONACCI FILTER ════════════════
Use_Fib_Filter : enable/disable Fib_Level_1 : default 0.382 Fib_Level_2 : default 0.618 ZigZag_Depth : local swing depth (default 12) ZigZag_Deviation : minimum improvement vs last swing, in points (default 5) ZigZag_Backstep : minimum bar distance between accepted swings (default 3) The routine scans backward from the current bar, marks local highs/lows, builds one up or down swing, then projects the two Fib levels as a touch zone.
════════════════ ALERTS ════════════════
InpEnableAlerts : popup Alert() | default true InpEnablePush : MetaQuotes ID push | default false InpEnableEmail : SendMail | default false (configure Email tab in MT5 Options) InpEnableSound : PlaySound | default true InpSoundBuy : file name in /Sounds | default alert.wav InpSoundSell : file name in /Sounds | default alert2.wav
Alert text includes signal class (RETAIL/INSTITUTIONAL), direction, symbol, timeframe, and bar time. Alerts fire when the signal bar is the last fully closed bar (i == rates_total - 2). This avoids calling an alert on an incomplete forming candle.
════════════════ STEP-BY-STEP INSTALLATION ════════════════
- Open MetaTrader 5.
- File → Open Data Folder → MQL5 → Indicators.
- Copy the indicator file into that folder (or use the Market install path if purchased from MQL5 Market).
- Restart MT5 or right-click Navigator → Indicators → Refresh.
- Drag Dual Engulfing Pro onto the chart.
- Allow DLL imports only if your terminal policy requires it (this source does not need external DLLs).
- Enable Algo Trading / notifications in Tools → Options if you want push or email.
- Put custom wav files into Terminal → Sounds if you change InpSoundBuy / InpSoundSell.
Minimum bars: the calculator returns 0 until rates_total is at least 150. Warm-up start index is 60. Do not judge the product on a chart with almost no history.
════════════════ RECOMMENDED STARTING PRESETS ════════════════
Use these as education presets, not financial advice. Always forward-test.
A) CLEAN CHART — LEARN THE PATTERNS Retail = true | Institutional = true All filters = false Trend context = true Purpose: see raw Retail vs Institutional frequency.
B) TREND-FOLLOWING SWING (H1 / H4) Retail = false | Institutional = true Use_MA_Filter or Use_DoubleMA_Filter = true Use_ADX_Filter = true (level 18–25) Use_Ichimoku_Filter = optional Body multiplier 1.5–1.8 | Full outside = true | Close position 0.70
C) REVERSAL AT LOCATION (M15 / M30 / H1) Retail = true | Institutional = true Use_SR_Filter = true OR Use_Fib_Filter = true Use_RSI_Cross_Filter = true Do not stack S/R and Fib plus 4 oscillators on day one.
D) GOLD / HIGH VOLATILITY Increase InpSignalOffset and SR_Zone_Points. Raise InpBodyMultiplier if arrows cluster during news spikes. Confirm point value: Gold often needs a wider S/R zone than EURUSD.
E) SCALPING Retail on, Institutional off or very strict. One fast filter only (SAR or HA or MACD histogram). Never enable every filter at once on M1/M5.
════════════════ HOW TO READ AND TRADE THE ARROWS ════════════════
This indicator marks conditions. It does not place orders, manage stops, or guarantee profit.
Suggested workflow:
- Choose a higher timeframe bias (H4/D1 structure or Double MA).
- Drop to your entry timeframe.
- Wait for candle close. Do not act on a half-formed engulf.
- Prefer Institutional arrows when you want quality over quantity.
- If Retail and Institutional print together, treat it as a higher-conviction print.
- Place invalidation beyond the engulfing candle high/low (common price-action practice).
- Skip signals that fight a major news release unless that is your plan.
Risk note: engulfing after a long trend can be climax or continuation. Filters reduce but do not eliminate that ambiguity.
════════════════ PRACTICAL NOTES AND EDGE CASES ════════════════
• Volume on FX is usually tick volume. The Institutional volume rule still works as “activity expansion,” not exchange-traded lot volume. • Ichimoku Senkou B is a shifted cloud line. On fresh charts the first bars can be empty until enough history exists. • Fibonacci logic is a custom swing search. It will not match every third-party ZigZag pixel-for-pixel. • S/R uses the recent lookback extremes, not multi-year weekly levels. Increase SR_Period for wider structure. • Heiken Ashi filter uses the same bar index as the engulf. It confirms HA color on the signal candle, not the next HA bar. • CCI OB/OS is intentionally aggressive (signal while CCI is already extreme). If you wanted “leave the extreme,” use RSI Cross instead. • Array indexing: price arrays in OnCalculate are used in non-series order (index 0 = oldest). Oscillator copies are set as series. That is already handled inside the code via idx = rates_total - 1 - i. • Do not load this on a chart with fewer than ~150 bars. • Alerts can repeat after reinitialize (timeframe change, re-attach, terminal restart) if the last closed bar still qualifies. This is normal for indicator alerts tied to the last closed candle.
════════════════ WHO THIS PRODUCT IS FOR ════════════════
• Price-action traders who want objective engulf rules instead of eyeballing candles • Smart-money / outside-bar traders who want size, close location, and volume gates • System builders who need one chart tool instead of 10 separate confirmation indicators • Signal sellers and educators who want two clearly labeled qualities of the same pattern • Discretionary traders who will keep filters off and use arrows only as an alert layer
Not ideal as a fully automated “set and forget” holy grail. It is a confirmation and scanning tool.
════════════════ WHAT THIS PRODUCT IS NOT ════════════════
• Not an Expert Advisor (it does not open or close trades) • Not a martingale, grid, or recovery system • Not a guarantee of future performance • Not a replacement for spread, swap, slippage, and news risk control
════════════════ SUGGESTED MARKET CATEGORY TAGS ════════════════
MT5 Indicator, Engulfing Pattern, Outside Bar, Bullish Engulfing, Bearish Engulfing, Institutional Order Flow Style Confirmation, Price Action, Candlestick Scanner, Buy Sell Arrows, RSI, ADX, Moving Average, Ichimoku Senkou Span B, MACD, Fibonacci Retracement, Support Resistance, Parabolic SAR, Heiken Ashi, Awesome Oscillator, CCI, RVI, Push Alert, Non-Repaint Closed-Bar Signals
════════════════ QUICK SPEC SUMMARY ════════════════
Buffers / plots : 4 arrow plots Retail engine : body engulf + optional 2-bar context Institutional engine: body engulf + size + optional outside bar + volume + close location + optional 3-bar context Filters : 16 optional modules Alerts : popup / push / email / sound Work symbol : current chart symbol Work timeframe : current chart period
════════════════ SUPPORT AND GOOD PRACTICE ════════════════
After purchase, test in Strategy Tester visual mode and on a demo chart first. Save your favorite input combination as an .set file (Inputs → Save). If you publish screenshots for your Market page, show: • one raw dual-signal chart • one filtered H1 example • one S/R or Fib location example That combination converts better than a single crowded screenshot.
Thank you for using Dual Engulfing Pro MT5. Trade the pattern. Confirm the context. Manage the risk.