Gold Position Planner
- 지표
- 버전: 2.39
- 활성화: 5

Proper risk management, made visual — for beginners and experienced traders alike.
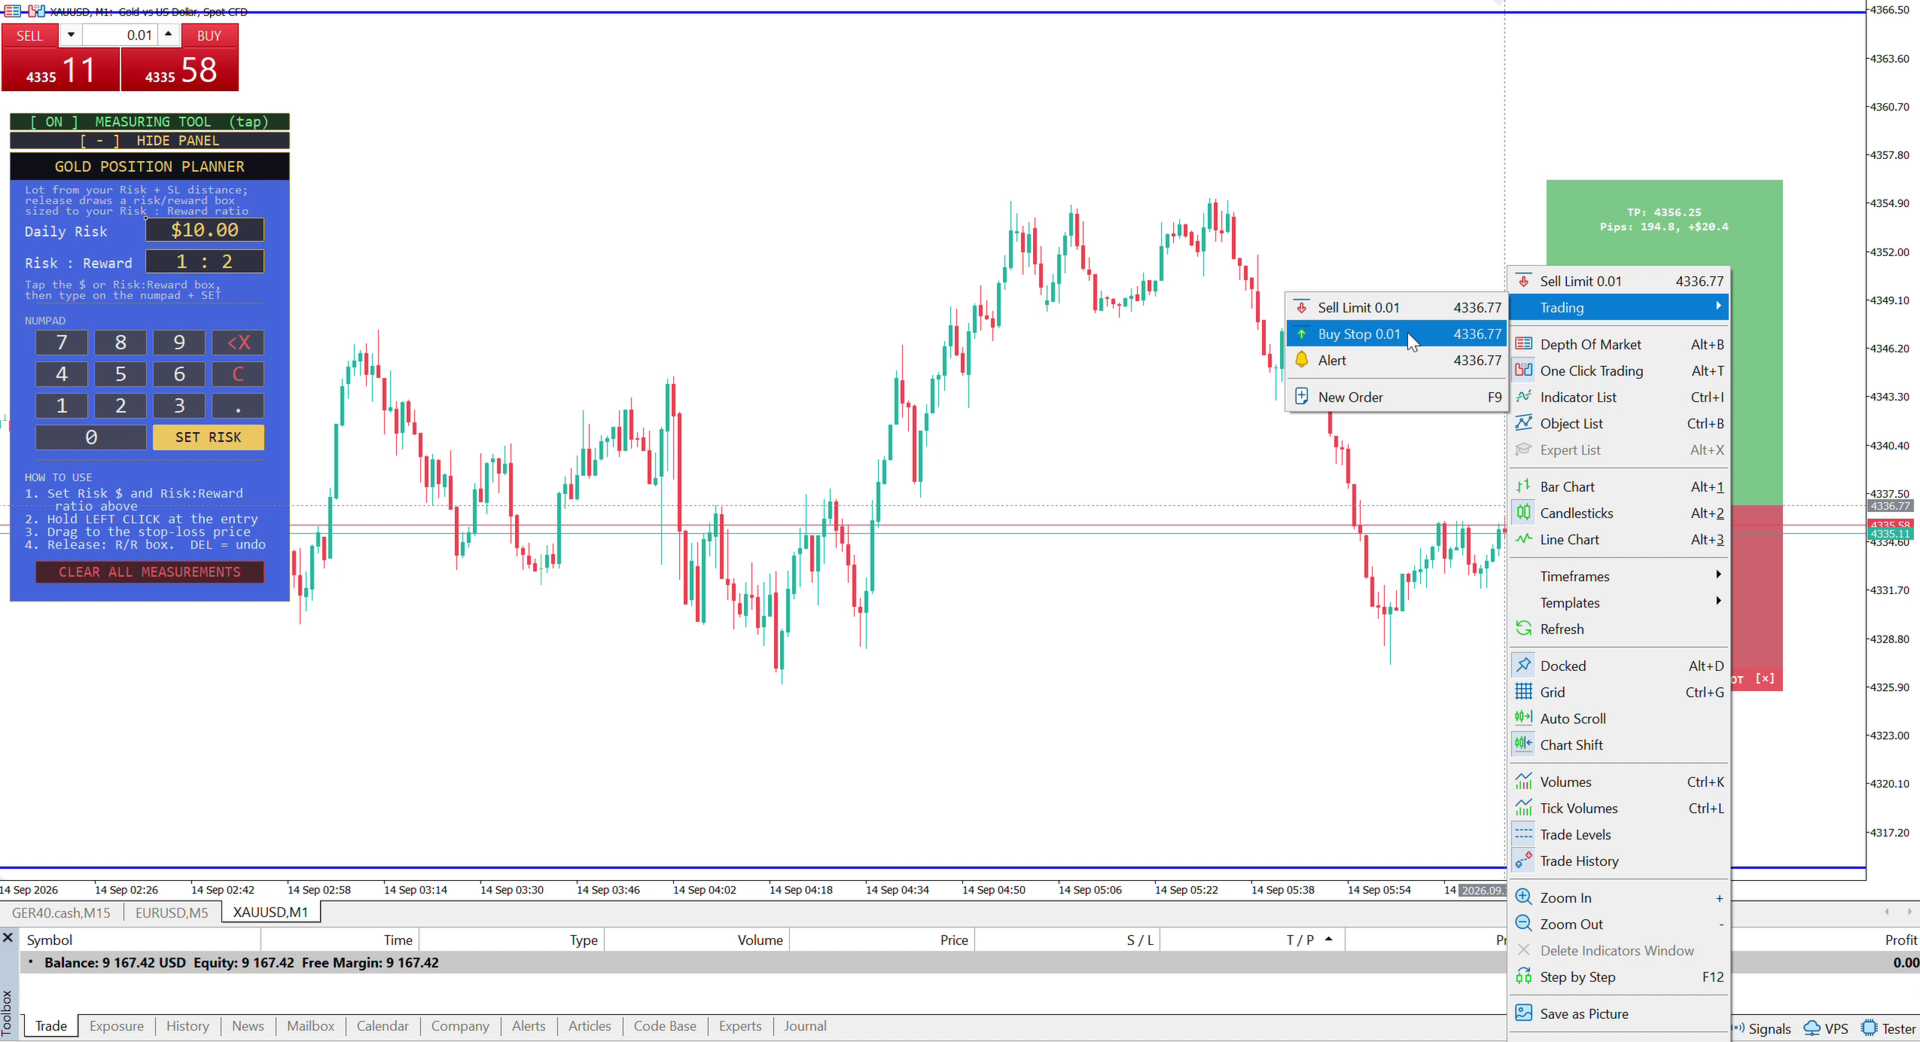
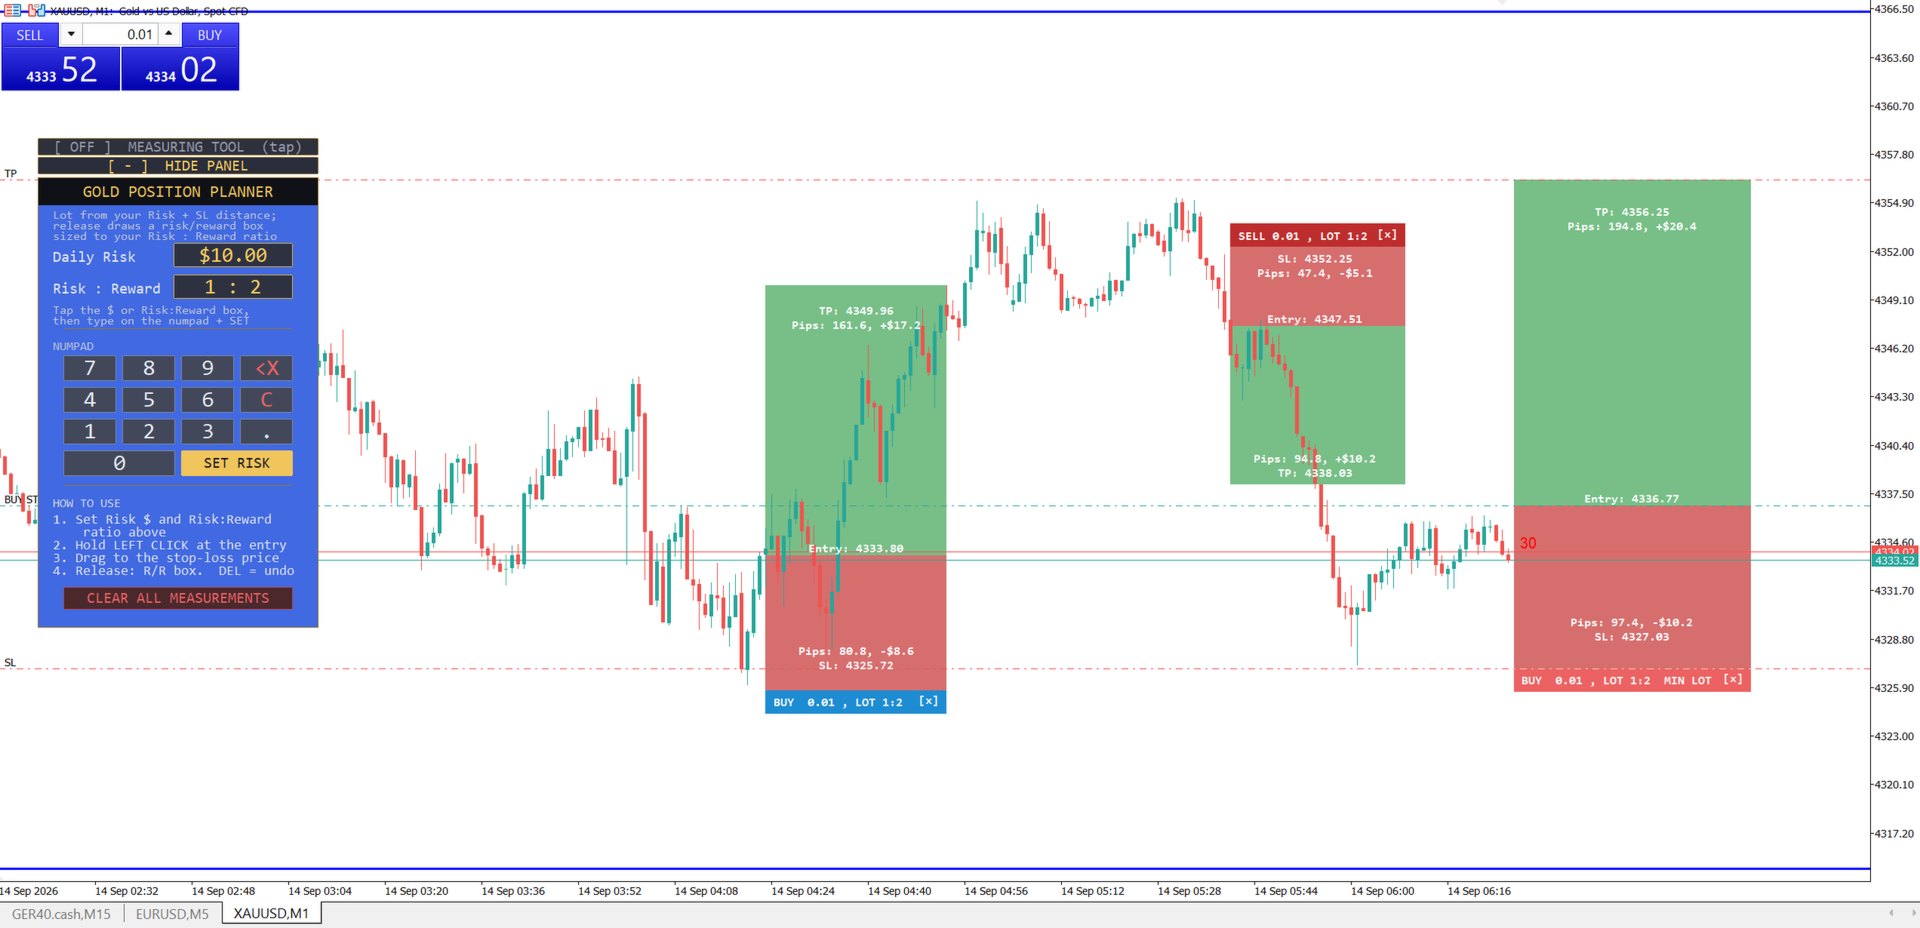
The single biggest reason new traders blow accounts isn't a bad strategy — it's sizing every trade by feel instead of by a fixed, calculated risk. Gold Position Planner fixes that in one drag: set how much you're willing to risk, set your Risk:Reward ratio, drag from your entry to your stop-loss, and release — a complete, TradingView-style position box appears instantly showing your risk zone, your reward zone, your exact lot size, and your take-profit target. No spreadsheet, no mental math, no guessing. Just a clear picture of the trade before you ever click "place order."
If you're new to position sizing, this tool does the risk-management math FOR you, every single time, so you build the habit of trading a fixed dollar risk from day one. If you're an experienced trader, it's a faster way to visually judge whether a setup's risk/reward is actually worth taking, and to keep multiple trade ideas mapped out on your chart at once. Either way, the goal is the same: never risk more than you decided to, on every single trade.
This is the upgraded, visual sibling of our free Gold Lot Size Calculator — built for traders who want to see the full risk/reward picture of a trade, not just the position size.
How to use it
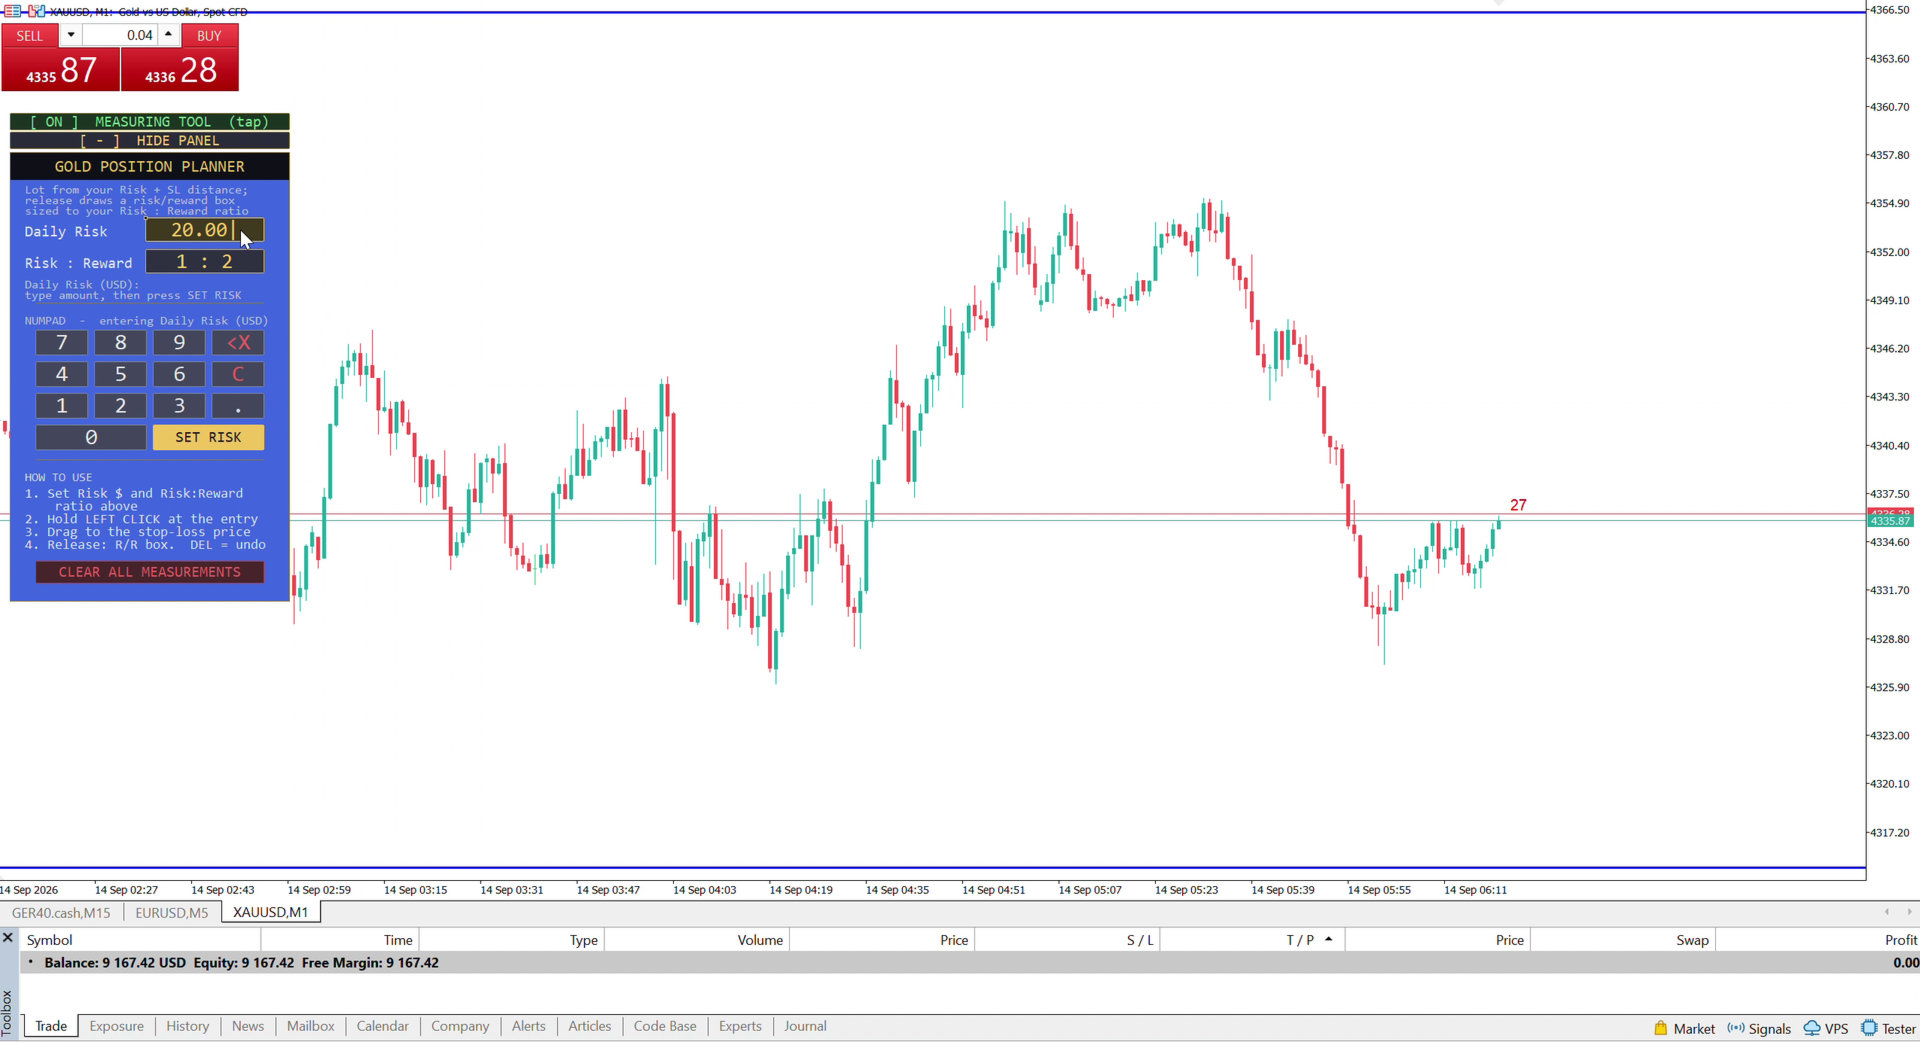
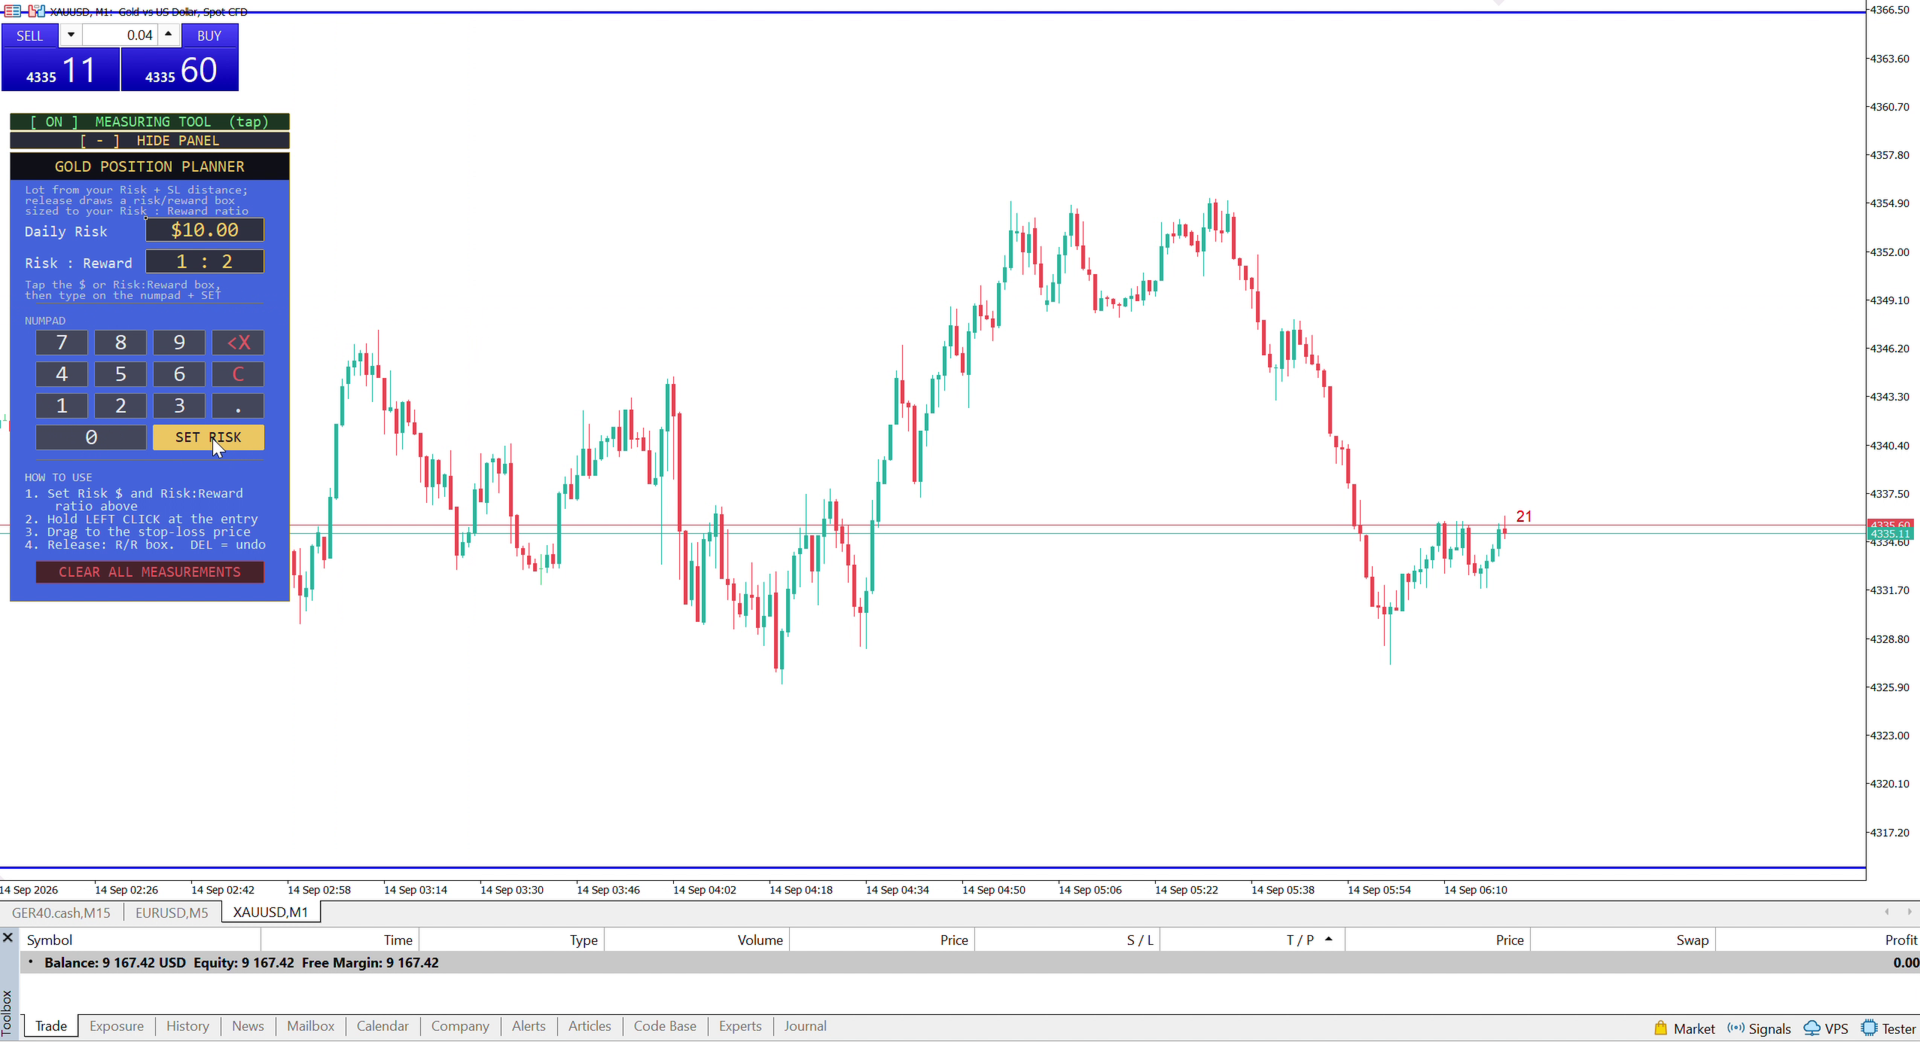
- Set your Daily Risk (USD) and your Risk:Reward ratio in the panel, using the built-in numpad — no keyboard needed.
- Hold left-click on the chart at your intended entry price.
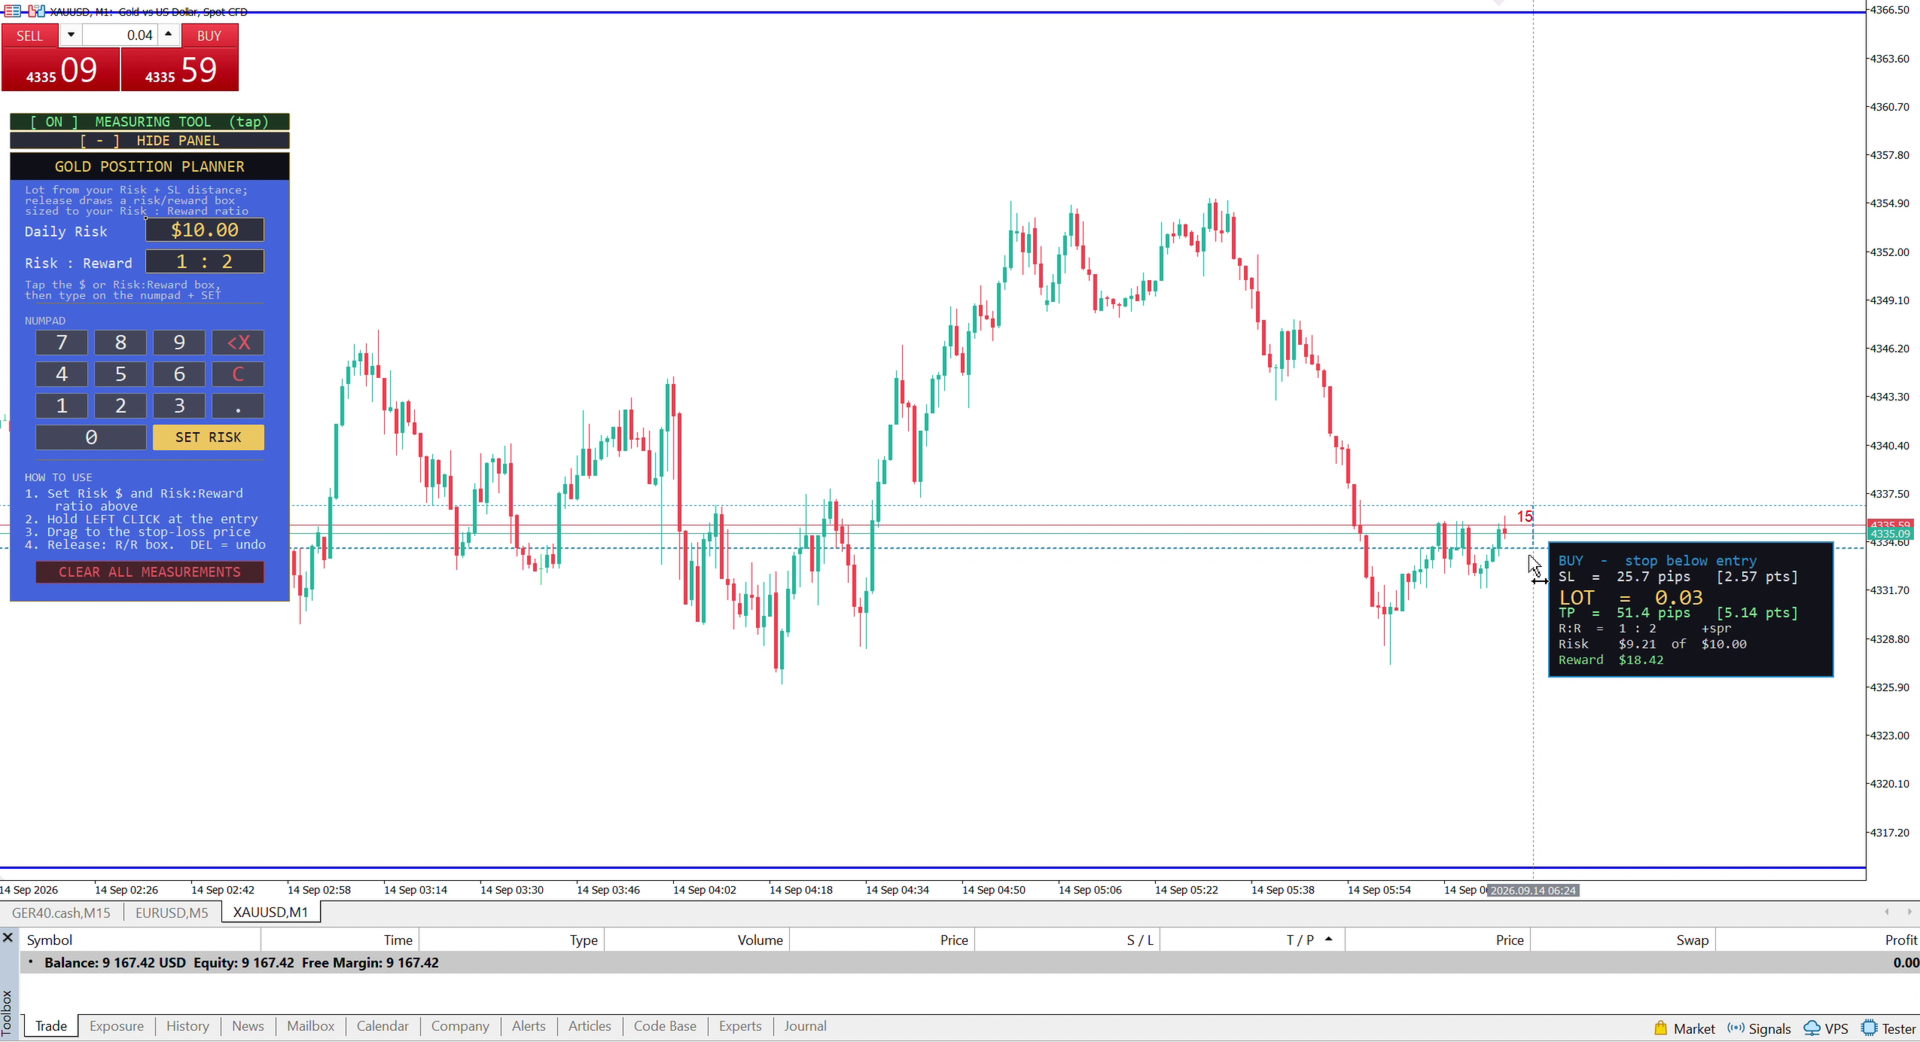
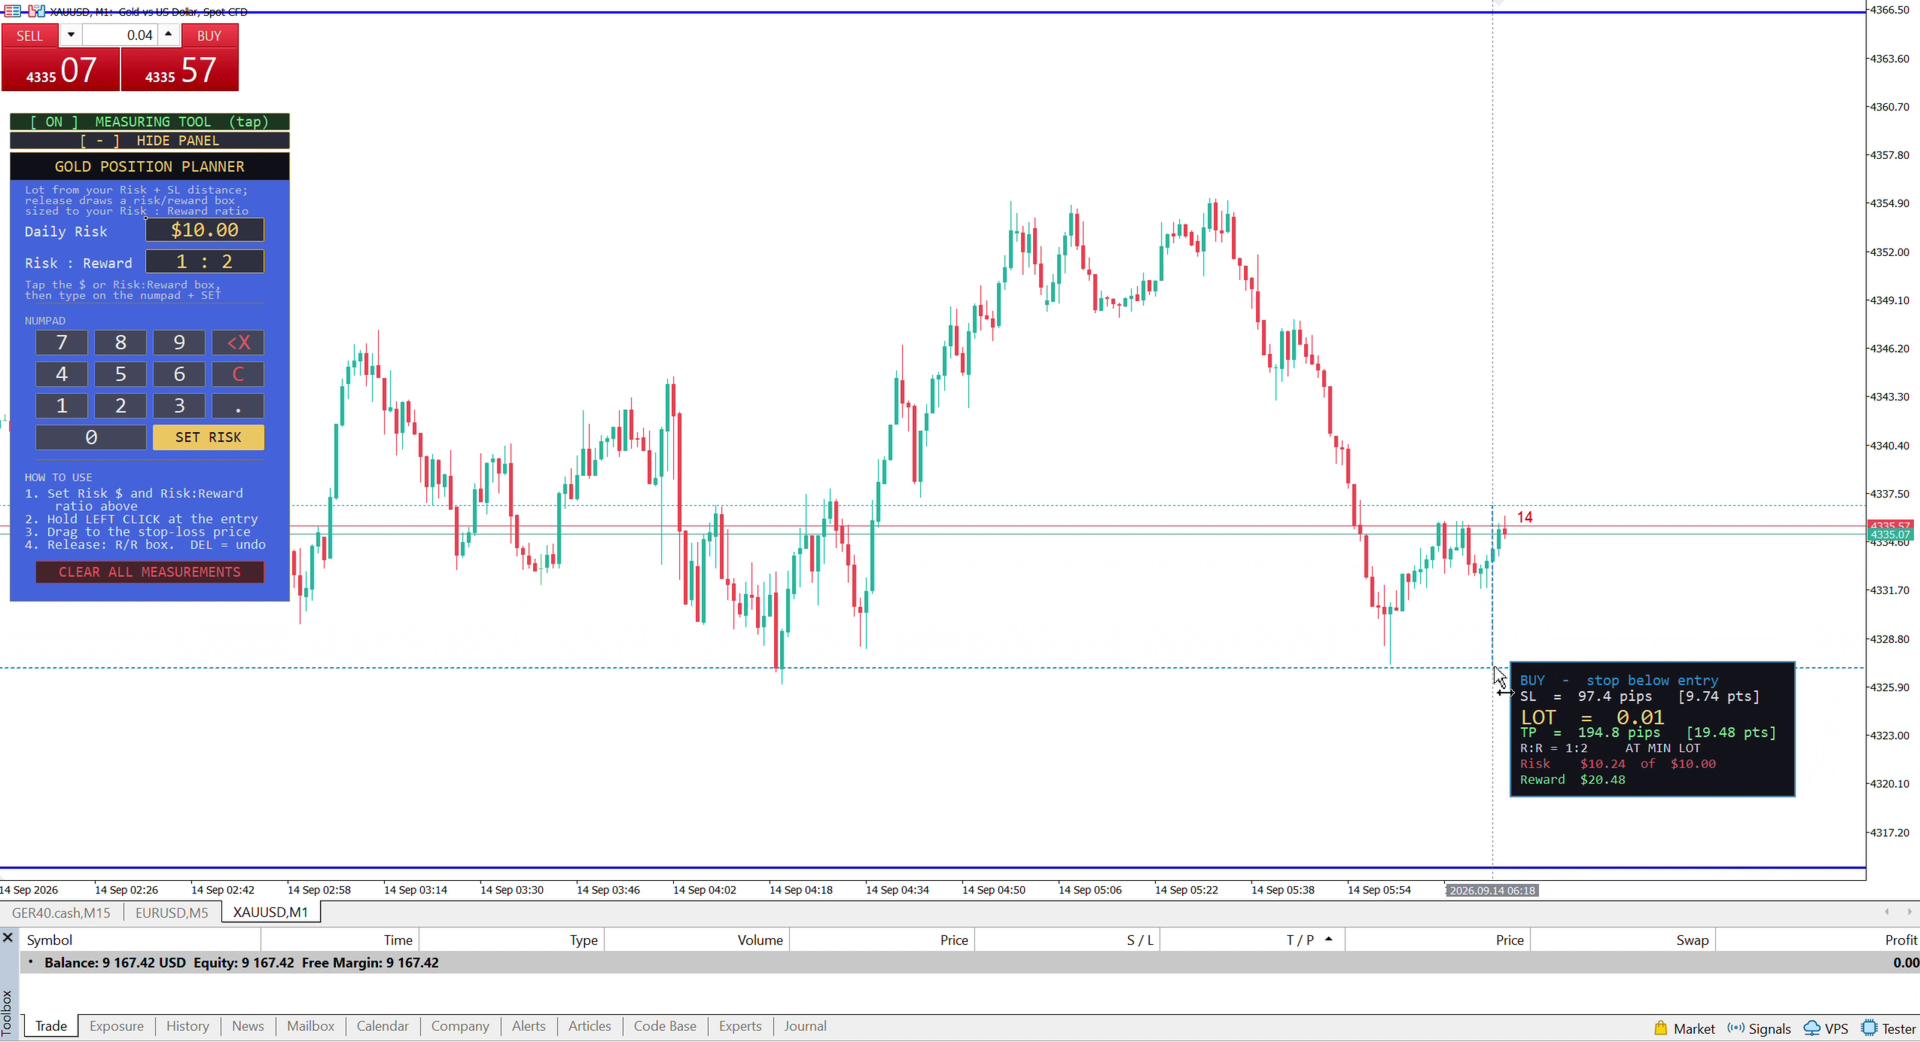
- Drag down (or up) to your stop-loss level. While you drag, live pips, lot size, and your take-profit target float right next to your cursor.
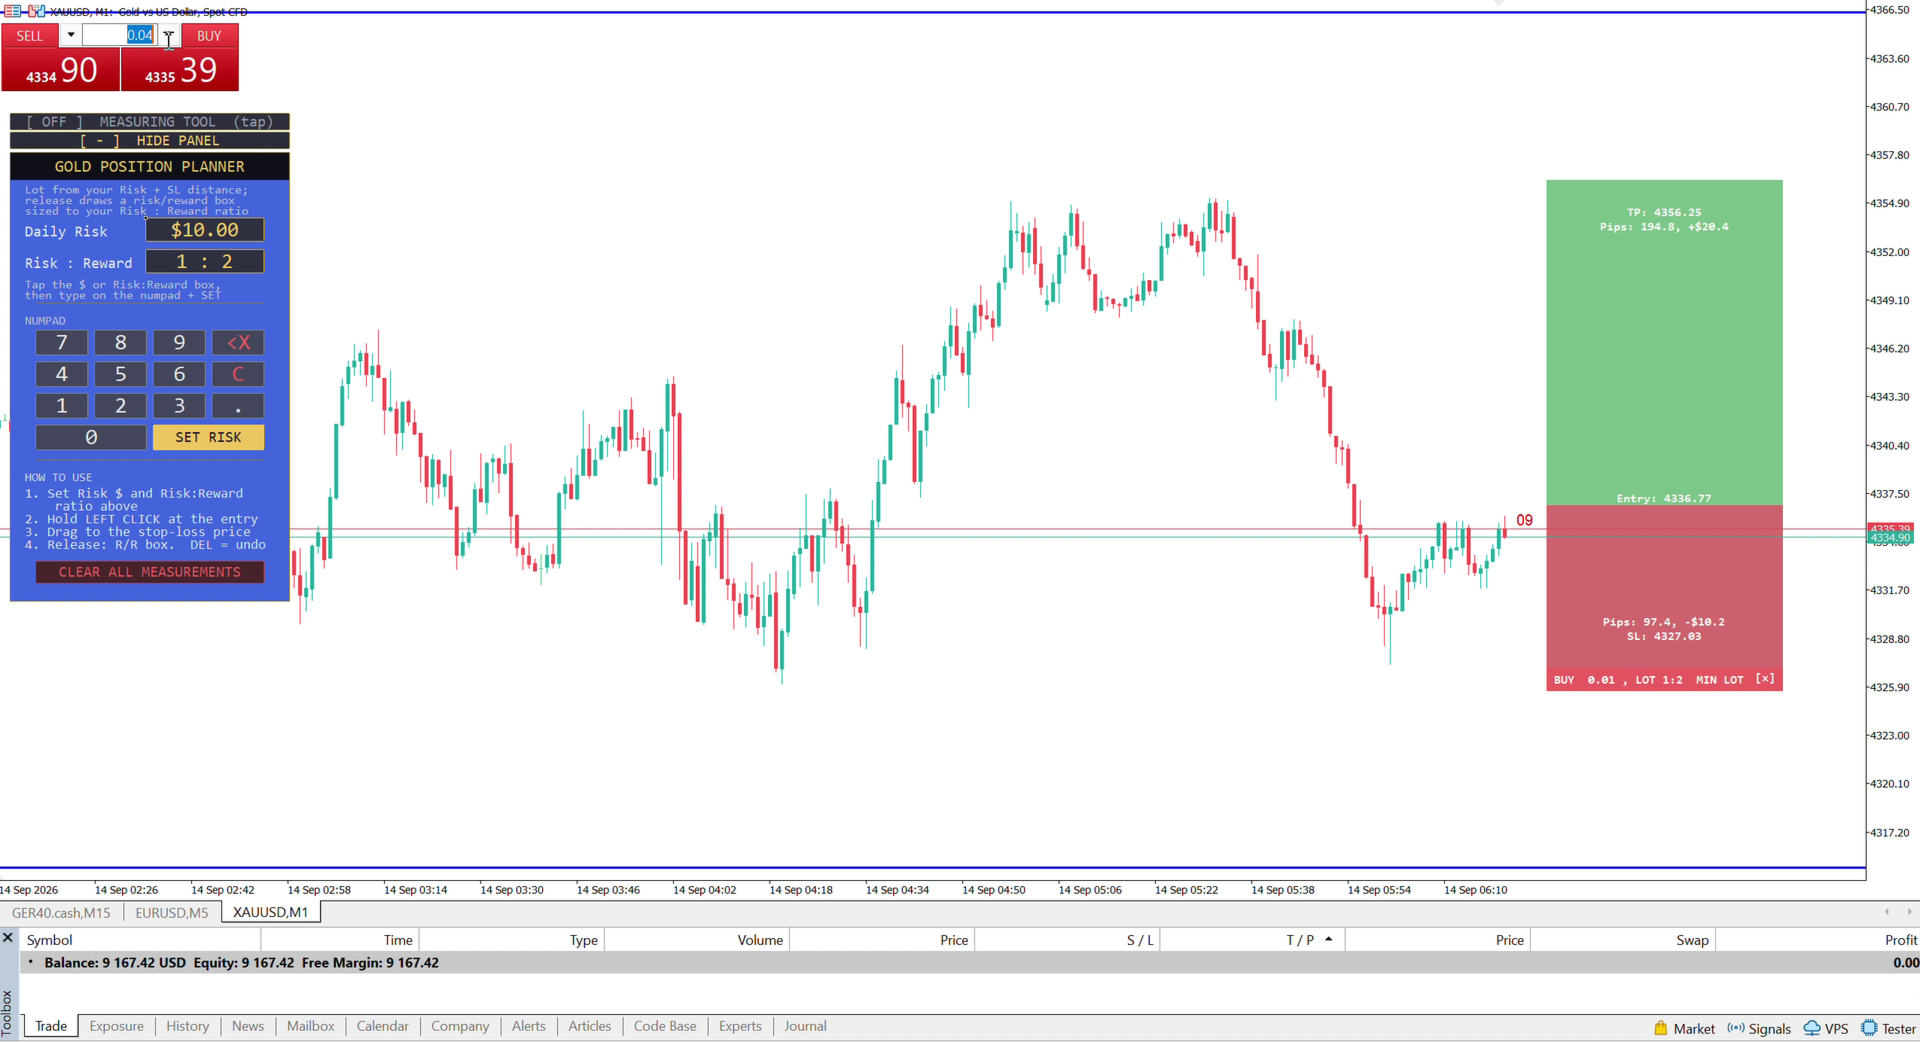
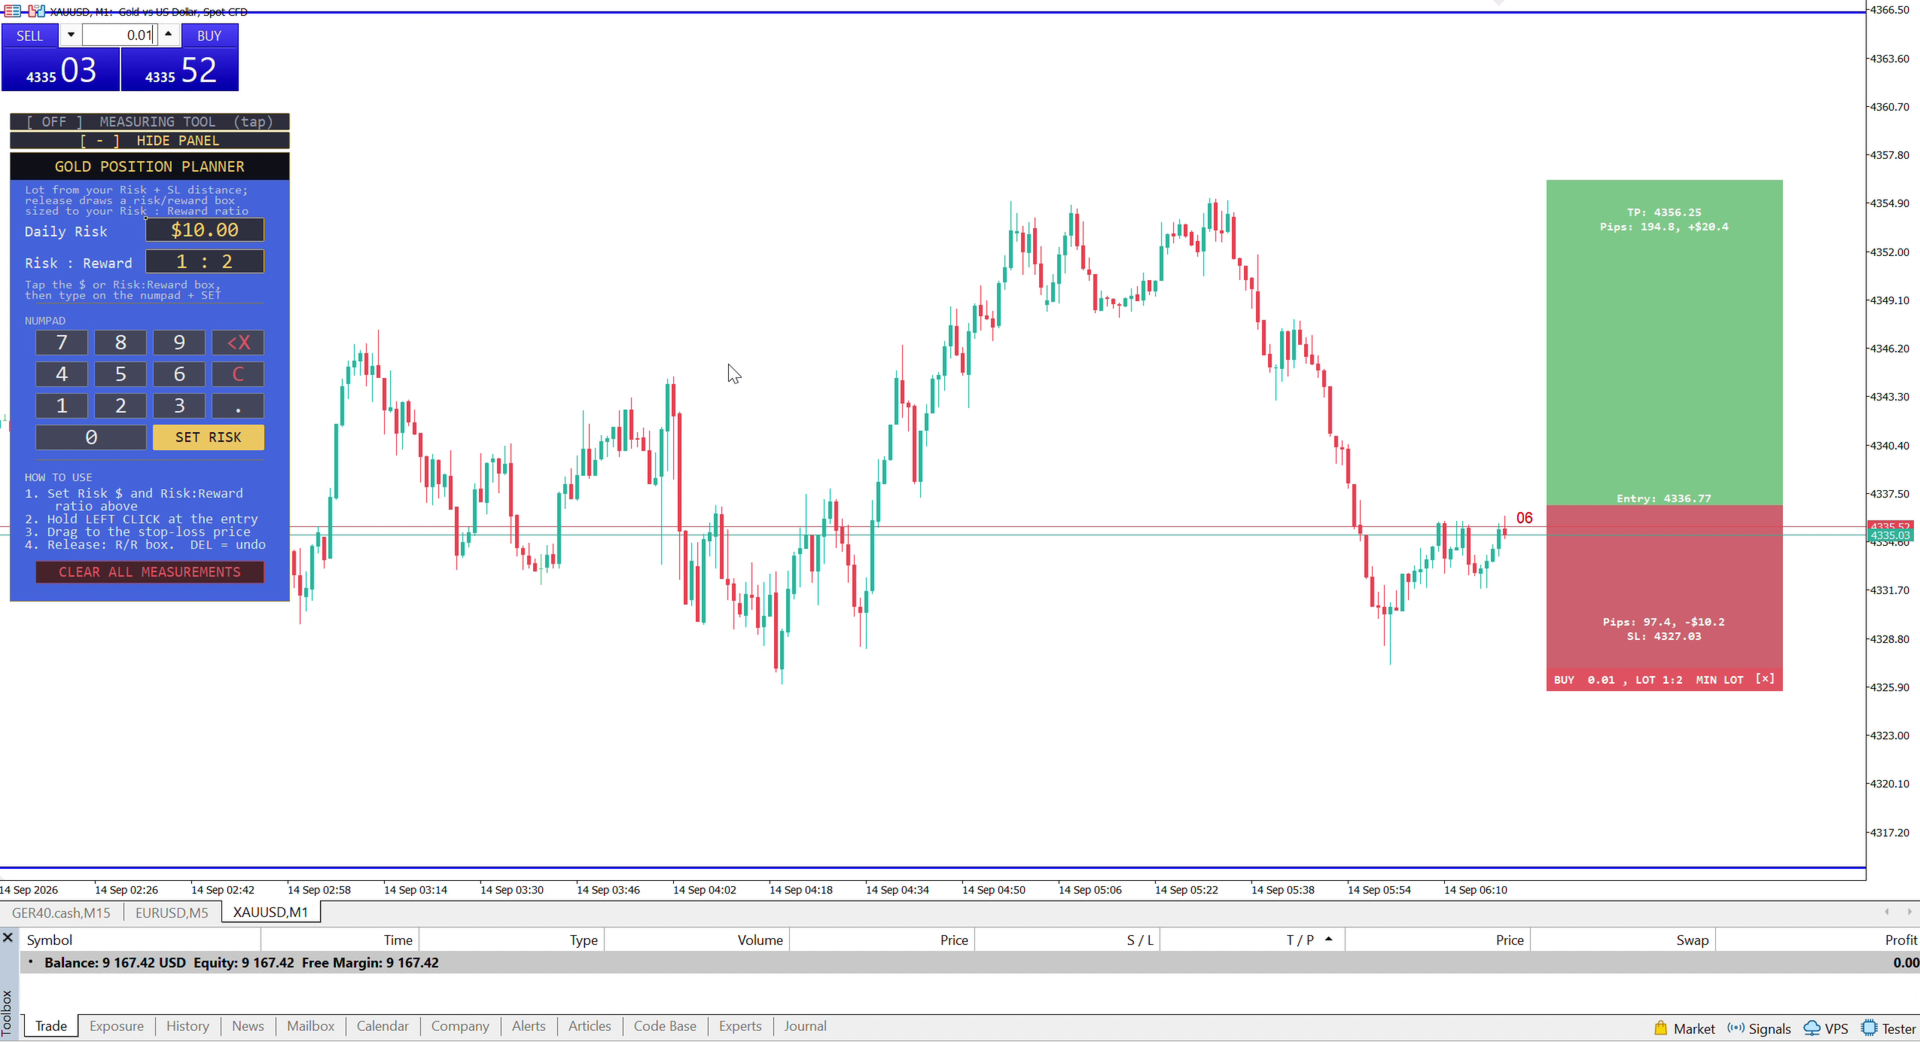
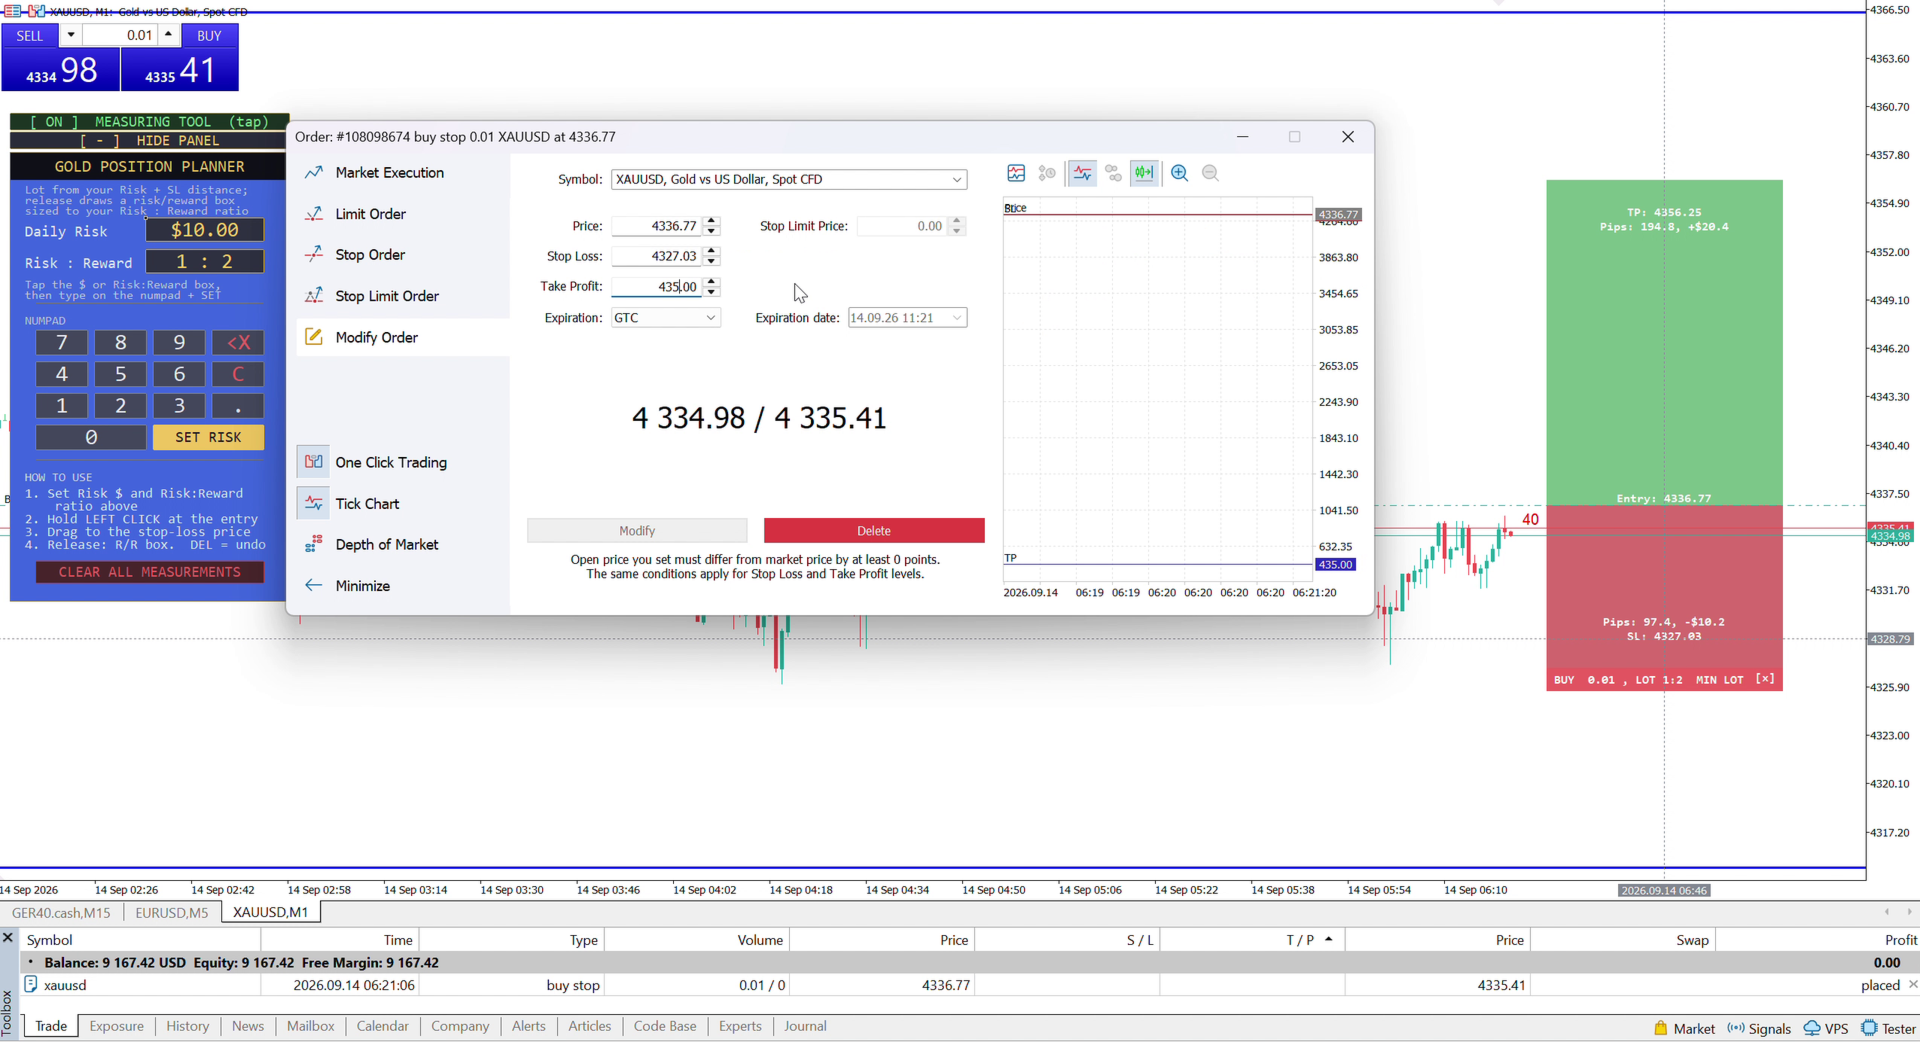
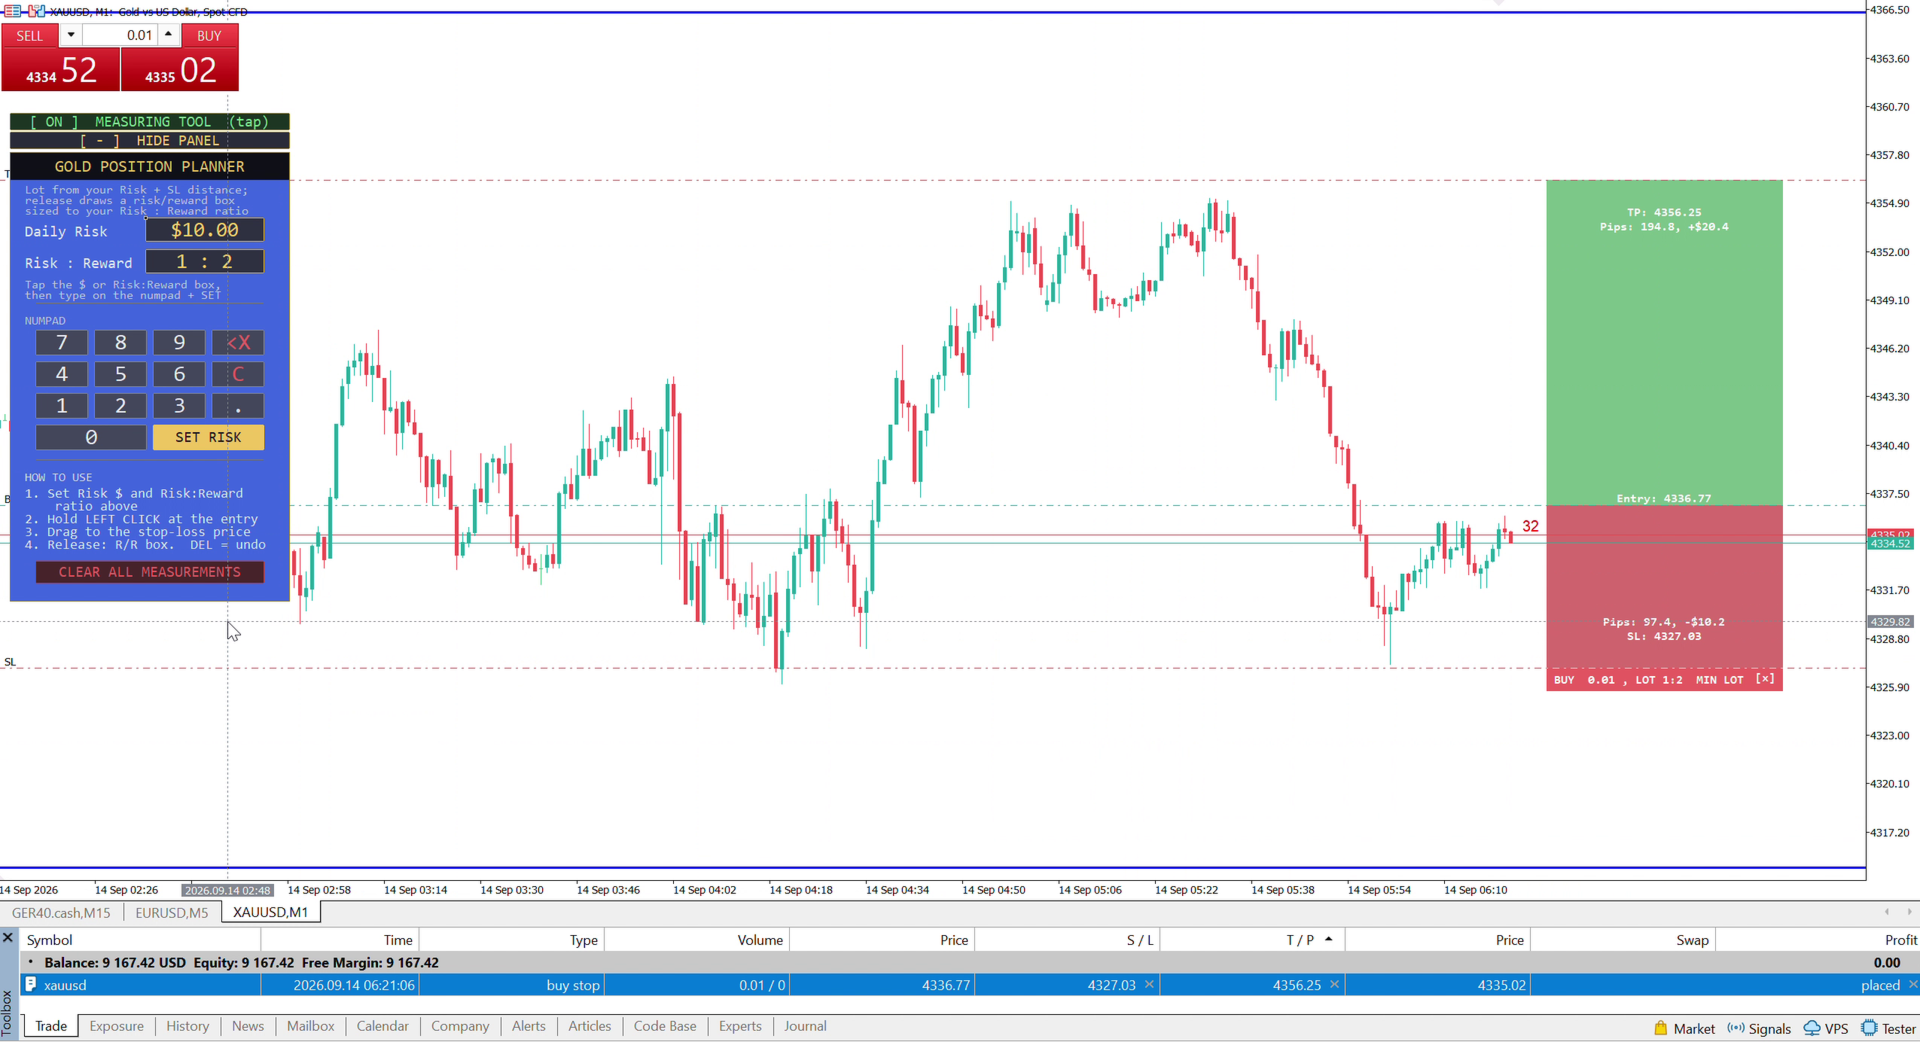
- Release the mouse — a position box locks onto the chart: a red risk zone from entry to stop, a green reward zone from entry to target, with your direction, lot size, Risk:Reward, entry price, stop price, and take-profit price all clearly labeled and readable on any chart background.
- Repeat for as many setups as you want to compare or plan ahead for — every box is independent and stays exactly where you put it, even across a timeframe change.
- Done with a box? Tap the small [x] on it to remove just that one, without touching any of your other trade plans. Want a clean slate? Tap CLEAR ALL (it asks you to confirm with a second tap first, so nothing is ever deleted by accident).
- Press M anytime to arm/disarm the measuring tool, and H to hide or show the panel — both work as instant shortcuts once you're used to the workflow.
Why this matters for your risk management
- Removes guesswork from position sizing. The lot size isn't eyeballed — it's calculated directly from your set Risk amount, factoring in spread and commission, so the dollar amount you risk is the dollar amount you actually risk.
- Enforces discipline automatically. Because the risk box is drawn BEFORE you place the trade, you see the real downside and upside at a glance — making it obvious when a setup doesn't justify the risk, before money is on the line.
- One ratio, every trade. Set your Risk:Reward once (2:1, 3:1, whatever fits your strategy) and every single measurement from then on automatically shows where your target should sit — consistent risk management without recalculating by hand every time.
- Built to stay out of your way. The panel is fully draggable, a precision crosshair helps you aim your entry exactly, and the tool automatically hands control back to normal chart panning the instant you release.
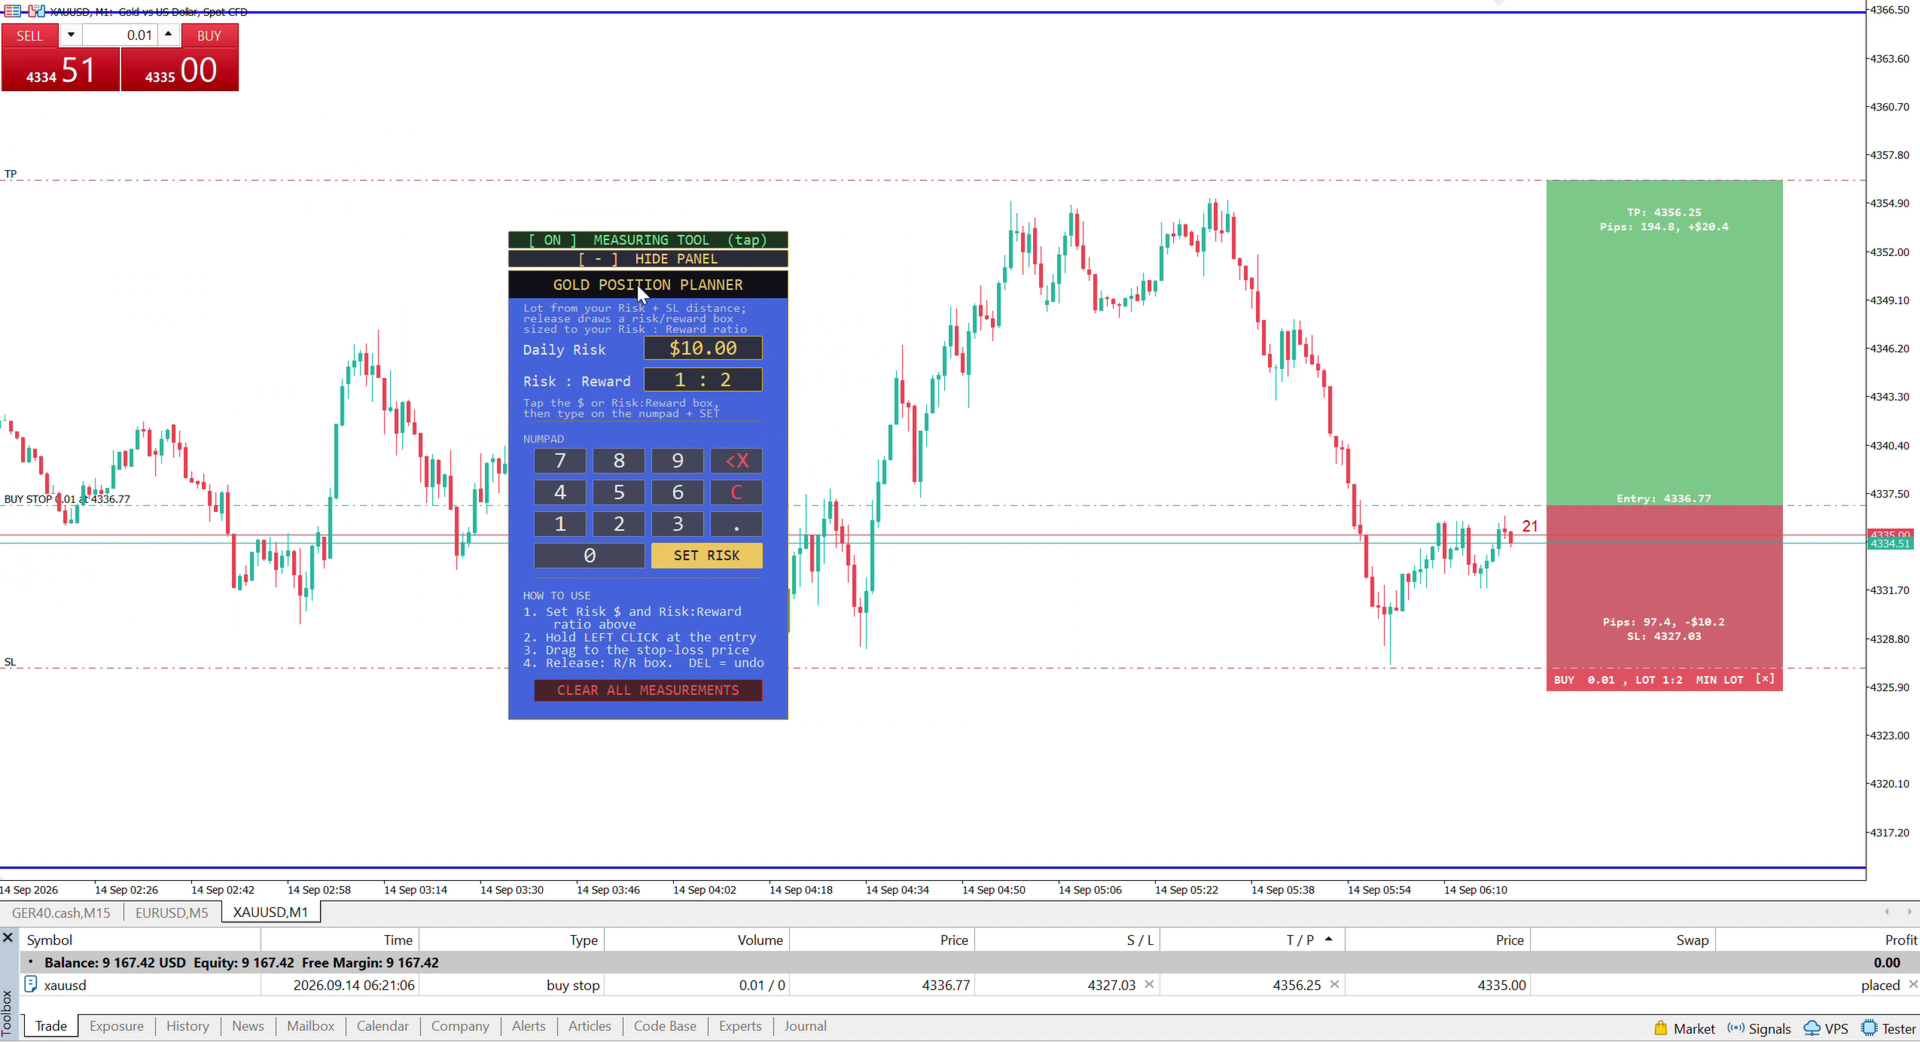
- Your trade plans don't disappear on you. Switch timeframes, reload a template, or just keep working — every locked position box stays exactly where you put it. Boxes only go away when YOU remove them: the per-box delete tag, CLEAR ALL, or removing the indicator itself.
- Remembers your settings. Your risk amount, Risk:Reward ratio, panel position, measuring-tool on/off state, and panel shown/hidden state all persist across timeframe and symbol changes too — set it once.
Key Features
- Visual Position Box — a TradingView-style risk/reward box locks onto the chart on release: red risk zone (entry→stop), green reward zone (entry→target)
- Automatic Lot Sizing — calculated from your set Risk amount, accounting for spread and commission, not just raw pip distance
- Automatic Take-Profit Target — set your Risk:Reward ratio once and every measurement shows exactly where your target should sit
- Per-Box Delete — remove a single locked measurement with a tap, without disturbing any others on the chart
- CLEAR ALL with Confirmation — a tap-twice safeguard so your measurements are never wiped by accident
- Fully Draggable Panel — reposition the control panel anywhere on the chart
- On-Screen Numpad — enter your Risk $ and Risk:Reward ratio without a keyboard
- Live Floating Tooltip — direction, pips, lot size, and risk update in real time while you drag
- Persistent Settings — risk amount, Risk:Reward ratio, panel position, tool on/off state, and panel shown/hidden state all remembered across timeframe, symbol, and template changes
- Persistent Position Boxes — your locked trade plans stay on the chart through timeframe/symbol/template reloads; only [x], CLEAR ALL, or removing the indicator clears them
- Keyboard Shortcuts — M arms/disarms the measuring tool, H hides/shows the panel, both shown as hover tooltips on their buttons
- Precision Crosshair — for exact entry aiming before and during a drag
- Broker-Aware Lot Clamping — automatically respects your broker's min/max lot size, with a clear warning flag if your exact risk target can't be hit
- Readable on Any Chart Theme — every label sits on its own solid background, staying crisp on black, white, or any custom theme
- Multi-Trade Support — lock as many position boxes as you need to compare setups side by side
Who it's for
Every gold trader who wants proper risk management without doing math by hand — whether you're brand new to position sizing and want the calculation done for you correctly every time, or an experienced trader who wants a faster, visual way to judge a setup's risk/reward before committing. If you already use the free Gold Lot Size Calculator and want the full picture — entry, stop, AND target, visualized — this is the upgrade.