Smart SMC FVG
- Indicateurs
- Version: 1.0
- Activations: 5

SMC + Volume Profile + FVG: Indicator Guide
Overview
SMC + Volume Profile + FVG is an all-in-one indicator for MetaTrader 5. It combines three popular price-action tools on a single chart:
- Smart Money Concepts (SMC): market structure (swings, BOS, CHoCH) and Order Blocks
- Fair Value Gaps (FVG): price imbalances left behind by fast moves
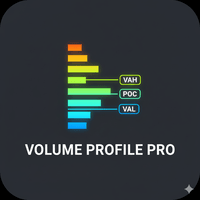
- Volume Profile: where the most trading happened, shown as POC, Value Area High and Value Area Low
Everything is drawn automatically. You can turn each part on or off with buttons on the chart, and choose which timeframe it is calculated on. The indicator works on any symbol, and the defaults were designed with XAUUSD (Gold) in mind.
The indicator is an analysis tool, not a buy/sell signal system. It shows you where important zones are; the trading decision stays with you.
1. Smart Money Concepts
Swing points (HH / HL / LH / LL)
The indicator finds swing highs and lows using a pivot rule. A bar is a swing high if its high is higher than the Swing length bars on each side (default 5). Each new swing is compared with the previous one and labelled:
- HH (Higher High) and HL (Higher Low) in green: signs of an uptrend
- LH (Lower High) and LL (Lower Low) in red: signs of a downtrend
Because a pivot needs bars on its right side, a swing is only confirmed after Swing length more candles have closed. Labels therefore appear with a short delay. This is normal and keeps the swings from repainting.
BOS and CHoCH
When a closed candle finishes beyond the most recent unbroken swing:
- BOS (Break of Structure): the break is in the same direction as the current trend, which confirms the trend continues. It is drawn as a solid line.
- CHoCH (Change of Character): the break is against the current trend, an early sign the trend may be reversing. It is drawn as a dashed line.
Each line runs from the swing that was broken to the candle that broke it, with a "BOS" or "CHoCH" label. Green means bullish, red means bearish. Only closed candles count, so a wick that pokes through a level does not trigger a break.
Order Blocks (OB)
An Order Block is the last opposite-colored candle before the move that broke structure. It is the zone where large orders are thought to have entered.
- Bullish OB: after a bullish break, the indicator finds the lowest point between the swing and the break. It then takes the last bearish candle there (searching up to 5 bars back). The zone covers that candle's high to low.
- Bearish OB: the mirror image, using the last bullish candle at the highest point before a bearish break.
2. Fair Value Gaps (FVG)
An FVG is a three-candle pattern in which the middle candle moves so fast that the first and third candles' wicks don't overlap. This leaves a gap of one-sided trading.
- Bullish FVG (blue): the third candle's low is above the first candle's high
- Bearish FVG (orange): the third candle's high is below the first candle's low
Size filter: tiny gaps are ignored. A gap must be at least Min FVG size × the average bar range of the analysed period (default 0.20, or 20% of an average candle).
Filling behavior:
- When price comes back into the gap, the box shrinks to show only the part still unfilled (you can turn this off).
- When price fills the gap completely, the box is removed.
- A dotted 50% line marks the middle of the gap, often called Consequent Encroachment. Many traders watch this level for reactions.
Only the most recent Max FVGs per side are shown (default 5 per side).
3. Volume Profile
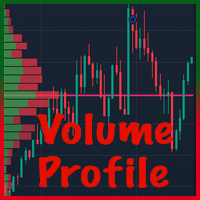
Volume Profile shows how much volume traded at each price level over a chosen period, as a horizontal histogram.
How it is calculated
- The chosen range of candles is taken from the Volume Profile timeframe (default M5 for fine detail).
- The price range is split into equal rows (default 48).
- Each candle's volume is spread across the rows its high-low range covers, in proportion to how much of the candle falls in each row.
- The busiest row becomes the POC (Point of Control).
- Starting from the POC, the Value Area grows one row at a time toward the busier neighbor until it holds 70% of total volume. Its top is the VAH and its bottom is the VAL.
Range options
- Last N bars: a rolling profile (default 600 bars of M5)
- Today: from the start of the current day
- This week: from the start of the current week
On the chart
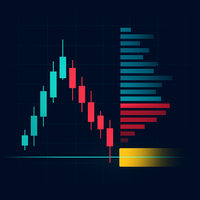
- The histogram is drawn to the right of the latest candle, in the empty space the indicator opens up by turning on chart shift.
- Gold row = POC. Blue rows = inside the Value Area, brighter where volume is higher. Grey rows = outside the Value Area.
- A gold POC line and dotted VAH/VAL lines run across the whole profile period, with price labels.
4. Other features
- Dark theme: applies a clean dark color scheme (teal and red candles, no grid) so the zones stand out. Your original chart colors are restored when you remove the indicator.
- Alerts: a popup alert fires whenever a new BOS or CHoCH appears on the SMC timeframe. No alert fires for old signals when the indicator first loads.
- Light on resources: the zones are fully recalculated only when a new candle opens on the chart, SMC or Volume Profile timeframe, not on every tick.
- Fully customizable colors: every color (bullish, bearish, OB fills, FVG fills, POC, Value Area shades) can be changed in the inputs.
5. Suggested way to use it
- Read the bias. Check the Trend row and the latest BOS/CHoCH on a higher timeframe (for example, set SMC to H1 or H4).
- Find the zones. Look for an unmitigated Order Block or FVG in the direction of the trend, ideally lining up with the POC, VAH or VAL.
- Wait for price to come to you. Use the Nearest zone row to see when price approaches or enters a zone.
- Confirm on a lower timeframe. Look for a CHoCH or a strong rejection candle inside the zone before entering.
- Manage risk. Place your stop beyond the zone and aim for the next opposite zone or the POC.
A zone where several tools agree (for example, a Bull OB that overlaps an FVG and sits near the VAL) is generally stronger than a single tool on its own.
6. Important notes
- Swings appear with a delay of Swing length candles, because each pivot must be confirmed by later bars.
- Structure uses closed candles only, while zone filling and touching include the current forming candle.
- Tick volume is not real volume. It is a common proxy on CFD brokers, but treat profile levels as approximate.
- No indicator predicts the market. Always test on a demo account, use a stop loss on every trade, and be extra careful around high-impact news like NFP, CPI and FOMC.