VuManChu Cipher B and Divergences
- Indicatori
-
Minh Truong Pham
 Hello, my name is Pham and I am a programmer and trader! At here, I create amazing forex indicators and expert advisors for Metatrader.
I will try:
+ Provide best tools base on my 5 years experience as a trader and 10 years as a programmer. - Versione: 1.0
- Attivazioni: 20
Overview
VuManChu Cipher B + Divergences is a professional-grade multi-oscillator indicator that combines five well-established momentum algorithms — WaveTrend, Money Flow Index, RSI, Stochastic RSI, and Schaff Trend Cycle — into a single, unified oscillator panel. Instead of cluttering your chart with five separate windows, this indicator fuses their outputs into a visual system of color-coded waves, signal dots, and automatically detected divergence lines.
The result is an indicator that simultaneously answers five market questions at once: What is the momentum direction? How strong is it? Where is money flowing? Are we approaching exhaustion? Is the trend about to reverse?
Cipher B communicates through four distinct visual layers:
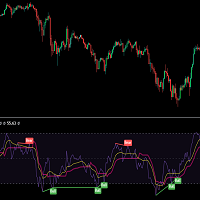
· WaveTrend momentum waves — color-coded fast and slow lines showing current trend strength
· Buy/Sell signal dots — high-conviction entry markers when multiple algorithms converge
· Gold circle signals — rare, highest-priority buy alerts at deep oversold extremes
· · Divergence lines — automatically drawn on WT, RSI, and Stochastic RSI when price and momentum diverge
Why This Indicator Is Unique
Most oscillators measure one thing. Cipher B measures five simultaneously, and only paints a signal when several of them agree. This convergence filter is what separates high-quality entries from noise.
*1. WaveTrend Core Engine*
The backbone of every signal. WT1 (blue, fast) and WT2 (navy, slow) track momentum with much lower lag than traditional MACD or RSI. Crossovers at overbought/oversold extremes generate the primary buy and sell signals.
*2. Money Flow Index (MFI) Area*
A volume-weighted measure of buying vs. selling pressure rendered as a green (bullish) or red (bearish) background area. When MFI aligns with the wave direction, signal confidence increases significantly.
*3. RSI with OB/OS Color-Coding*
An embedded RSI line (purple) that changes color at overbought/oversold thresholds. Primarily used as a divergence confirmation layer — a green dot appearing when RSI is below 30 carries far greater weight.
*4. Stochastic RSI*
Fast (%K, blue) and slow (%D, violet) stochastic lines derived from RSI. These add a second independent divergence source and provide overbought/oversold context for filtering crossovers.
*5. Schaff Trend Cycle (STC)*
An optional faster trend indicator (violet line) built on a double-smoothed stochastic applied to MACD. It provides trend confirmation with reduced lag compared to the underlying MACD itself.
*6. Triple-Layer Divergence Engine*
Divergences are automatically detected and drawn on three independent oscillators — WaveTrend, RSI, and Stochastic RSI — using a fractal-based detection method. When all three show divergence simultaneously, it is among the most reliable reversal signals available to a technical trader.
How It Works
WaveTrend Oscillator
Cipher B begins with a WaveTrend algorithm applied to HLC/3. A fast EMA (esa) is computed, followed by an EMA of the absolute deviation (de), yielding a normalized Channel Index (ci). The fast wave WT1 is a second EMA of ci; the slow wave WT2 is a simple moving average of WT1. The Fast WT line (white) shows their difference — a sharper directional cue.
Money Flow Index
The MFI area uses a custom RSI-based calculation rather than the traditional volume-ratio formula, weighting price by volume across the selected period. The resulting area is positive (green) when capital is flowing in, negative (red) when flowing out.
RSI & Stochastic RSI
An embedded RSI is calculated with configurable length, optionally applied to log-transformed price for smoother behavior on assets with exponential price distributions. A stochastic normalization (highest-high / lowest-low over the stoch period) is applied, then smoothed into %K and %D lines.
Schaff Trend Cycle
MACD is computed from two EMAs of the source. A double stochastic smoothing pass (with two gamma-correction layers) converts the MACD into a bounded 0–100 trend line. The STC line turns and crosses decisively — rarely giving false signals in a trending environment.
Divergence Detection
Peak and trough fractals are identified using a 5-bar pattern at each completed bar. Cipher B then scans backward through the buffer to find the preceding fractal of the same type and compares the oscillator value. If price made a lower low but the oscillator made a higher low, a bullish divergence line is drawn. Bearish divergence is the mirror case. This process runs independently on WaveTrend, RSI, and Stochastic RSI buffers.
How To Use
Reading the Momentum Waves
The blue WT1 line (fast wave) and navy WT2 line (slow wave) are the primary reading surface:
· WT1 rising above WT2 → bullish momentum building
· WT1 crossing below WT2 → momentum shifting bearish
· Both waves above zero → market in bullish territory
· Both waves below zero → market in bearish territory
· Waves flat and compressed near zero → consolidation; a larger move is likely pending
· Wide gap between WT1 and WT2 → strong momentum in the current direction
The overbought zone is above +53/+60 (configurable). The oversold zone is below −53/−60. Crossover signals that occur inside these zones carry significantly higher weight than those near zero.
Reading the Signal Dots
*Green circles (lime, at oversold)*
These appear when WT1 crosses above WT2 while the oscillator is in the oversold zone. This is the primary buy signal. The deeper below the zero line when the dot appears, the higher the probability of a significant reversal.
*How to trade:* Wait for the green circle to print. Confirm MFI background is green or turning green. Enter long on the next candle. Place stop below the recent oscillator swing low.
*Red circles (red, at overbought)*
These appear when WT1 crosses below WT2 in the overbought zone. This is the primary sell/exit signal.
*How to trade:* Red circle prints in overbought zone. Confirm MFI is red or turning red. Close longs or enter short. Stop above the recent swing high.
*Small circles (green/red, appearing anywhere)*
These mark every WaveTrend crossover regardless of zone. They are directional alerts only — treat them as early warnings, not standalone entries.
Reading the Gold Circle
Gold/orange circles are the rarest and highest-priority bullish signal. They appear only when:
1. WaveTrend is at a deep extreme (below −75 or lower)
2. Bullish divergence is confirmed
3. RSI is below 30 (genuinely oversold)
This triple convergence marks major local bottoms. Gold circles do not appear frequently — when they do, treat them with priority over any other signal.
Reading Divergences
Cipher B draws divergence lines directly on the oscillator panel for three oscillators:
| Line Color | Source | Signal Type |
| --- | --- | --- |
| Lime green | WaveTrend | Bullish divergence |
| Red | WaveTrend | Bearish divergence |
| Lime green | RSI | Bullish divergence |
| Red | RSI | Bearish divergence |
| Lime green | Stochastic RSI | Bullish divergence |
| Red | Stochastic RSI | Bearish divergence |
Bullish divergence (price makes lower low, oscillator makes higher low) signals that selling pressure is weakening. When divergence appears on all three oscillators simultaneously, it is a very high-confidence reversal warning.
Bearish divergence (price makes higher high, oscillator makes lower high) signals fading buying pressure and a potential distribution phase.
Divergences on the 4H and Daily timeframes are significantly more reliable than those on sub-hourly charts.
Reading the Money Flow Area
The green/red background area shows whether capital is entering or leaving the market:
· Green MFI area → net buying pressure; aligns with long entries
· Red MFI area → net selling pressure; aligns with short entries or exits
Always check that the MFI direction matches your signal. A green circle appearing on green MFI is a much stronger signal than the same green circle on red MFI.
Combining Signals for High-Confidence Entries
*Highest-conviction BUY setup:*
4. WT1 and WT2 deep in oversold territory
5. Green circle appears (WT1 crosses above WT2)
6. MFI background turns green
7. Bullish divergence line visible on WT or RSI
8. RSI below 30 (gold circle may also appear)
*Highest-conviction SELL setup:*
9. WT1 and WT2 in overbought territory
10. Red circle appears (WT1 crosses below WT2)
11. MFI background turns red
12. Bearish divergence on WT or RSI
*Zero-line reclaim (trend continuation):*
After a pullback in a bullish trend, waves return toward zero without reaching oversold. When WT1 curls upward from near the zero line with MFI green — this is a trend continuation entry with tight stop.
Settings
WaveTrend Settings
| Parameter | Description |
| --- | --- |
| Show WaveTrend | Toggle visibility of WT1 and WT2 lines |
| Show Buy/Sell/Gold Dots | Toggle buy dot (green), sell dot (red), and gold circle signals |
| WT Channel Length | Sensitivity of the WaveTrend calculation (default: 9) |
| WT Average Length | Smoothing period for WT1 (default: 12) |
| Overbought Level 1 / 2 / 3 | Upper threshold levels (default: 53, 60, 100) |
| Oversold Level 1 / 2 / 3 | Lower threshold levels (default: −53, −60, −75) |
| WT Regular Divergence | Enable automatic WT bullish/bearish divergence detection |
| WT Hidden Divergence | Enable hidden divergence detection on WaveTrend |
MFI Settings
| Parameter | Description |
| --- | --- |
| Show MFI | Toggle the Money Flow Index background area |
| MFI Period | Lookback period for MFI calculation (default: 60) |
| MFI Area Multiplier | Visual scale factor for the MFI area display |
| MFI Y Position | Vertical offset for MFI area positioning |
RSI & Stochastic RSI Settings
| Parameter | Description |
| --- | --- |
| Show RSI | Toggle the RSI line display |
| RSI Length | Lookback period for RSI (default: 14) |
| Show Stochastic RSI | Toggle the Stoch RSI %K and %D lines |
| Stoch RSI Length | Stochastic lookback applied to RSI |
| Stoch K Smooth / D Smooth | Smoothing periods for %K and %D lines |
| RSI Divergence | Enable RSI divergence line drawing |
| Stoch RSI Divergence | Enable Stochastic RSI divergence detection |
Schaff Trend Cycle
| Parameter | Description |
| --- | --- |
| Show STC | Toggle Schaff Trend Cycle line |
| STC Fast / Slow EMA | MACD EMA lengths for STC calculation |
| STC Cycle Length | Stochastic smoothing period for STC |
Tips
- Start on 4H or Daily — these timeframes produce the most reliable signals. Lower timeframes generate more noise.
- Never trade every dot — wait for confluence between the dot color, MFI direction, and oscillator zone.
- Oversold/overbought zones matter — a green circle deep in the oversold zone (below −60) is far more meaningful than one near zero.
- Divergence multiplies signal weight — a green circle accompanied by a bullish divergence line is substantially higher probability than either signal alone.
- Use price structure — Cipher B signals at a major support or resistance level are the highest-probability setups available.
Disclaimer
This indicator is provided for educational and informational purposes only. It does not constitute financial advice or investment recommendations. All trading involves risk. Past performance does not guarantee future results. Users are solely responsible for their own trading decisions