TrendRider MTF
- Indicateurs
- Version: 2.2
- Activations: 5

TrendRider MTF: Multi-Timeframe Trend & Pullback Execution System (M5 + M1)
TrendRider MTF is a professional multi-timeframe signal indicator engineered for scalpers and day traders who want to catch explosive trend continuations while avoiding flat traps and whipsaws.
By analyzing the broader structure on the M5 timeframe and executing precision entries on the M1 timeframe, the system synchronizes higher-timeframe momentum with micro-structure pullbacks.
100% Non-Repainting: All calculations and triggers are strictly locked to closed candles. Signals never disappear or recalculate once the bar has closed.
How the Strategy Works (3-Step Execution Model)
The indicator automates a disciplined 3-phase trading framework:
1. Trend Ignition on M5 (Stack Alignment)
-
The system waits for all 4 Exponential Moving Averages (EMA 8, 34, 90, 377) on the M5 timeframe to form a perfect sequential order.
-
Anti-Whipsaw Filter (M5): The indicator confirms that the fast EMA was moving against the trend for a user-defined minimum number of bars prior to alignment. This eliminates false breakouts and flat market noise.
-
Once established, the trend bias (BUY or SELL) is locked.
2. Momentum Pullback Trigger (Awesome Oscillator on M5)
-
Instead of chasing extended prices, the algorithm waits for a healthy retracement.
-
It detects the first color reversal on the M5 Awesome Oscillator (AO):
-
SELL: Waits for a green/blue AO histogram bar (indicating an upward counter-move/pullback).
-
BUY: Waits for a red AO histogram bar (indicating a downward counter-move/pullback).
-
-
Once the pullback is confirmed, the M5 analysis completes, and the system activates the M1 execution engine.
3. Precision Entry on M1 (Resumption of Trend)
-
On the M1 timeframe, the indicator monitors the re-alignment of 4 EMAs (7, 25, 84, 377) in the direction of the dominant M5 trend.
-
Pullback Depth Filter (M1): Ensures the fast EMA spent a minimum number of bars on the opposite side of EMA 25, confirming a genuine structural pullback.
-
Spread / Distance Filter: Confirms that the fan expansion between EMA 7 and EMA 25 exceeds the minimum points threshold, ensuring real momentum.
-
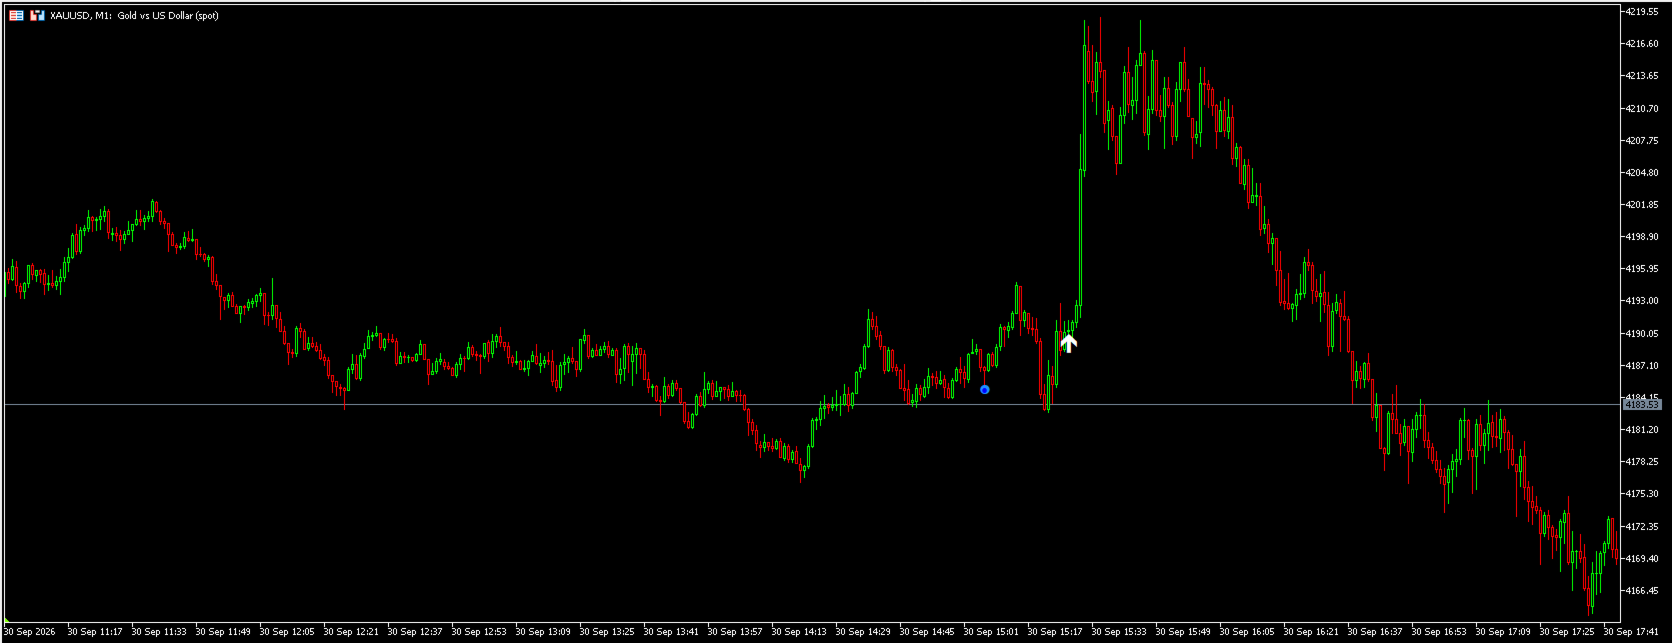
A clear visual arrow (Aqua for BUY, Magenta for SELL) is printed on the open of the next bar.
Key Features
-
Multi-Timeframe Architecture: Run it directly on the M1 chart while it seamlessly tracks and syncs M5 data in real time.
-
Smart Cycle Preservation: Opposite signals on M5 instantly reset the state machine, while same-direction continuations do not disrupt an active entry setup.
-
Visual Debugging Markers: Includes auxiliary markers showing each completed step of the sequence (Step 1 alignment, Step 2 AO trigger), giving full transparency into every setup.
-
Fully Parameterized: Customize all MA periods, MA types (EMA, SMA, SMMA, LWMA), price sources, pullback depths, and minimum point distances.
-
Optimized Performance: Features historical depth limits ( InpMaxHistory ) to keep CPU and memory usage minimal even on low-spec VPS setups.
Input Parameters
General Settings
-
InpMaxHistory — Maximum number of M1 historical bars to calculate (0 = entire history).
Pullback & Noise Filters
-
InpMinBarsOppositeCross_M5 — Minimum counter-trend bars on M5 required before confirming a new stack.
-
InpMinBarsOppositeCross_M1 — Minimum pullback bars on M1 required before entry.
-
InpMinDistance_M1_Pts — Minimum distance (in points) required between M1 EMA 7 and EMA 25 at the moment of entry (0 = disabled).
Moving Average Settings
-
InpMaMethod — Smoothing method (EMA, SMA, SMMA, LWMA).
-
InpMaPrice — Applied price (Close, Open, High, Low, Median, etc.).
-
InpEma1_M5 to InpEma4_M5 — Periods for the 4 M5 Moving Averages (Default: 8, 34, 90, 377).
-
InpEma1_M1 to InpEma4_M1 — Periods for the 4 M1 Moving Averages (Default: 7, 25, 84, 377).
Recommended Setup & Trading Tips
-
Asset Classes: Highly effective on Gold (XAUUSD), Major Forex Pairs (EURUSD, GBPUSD), and Indices (US30, NAS100).
-
Base Chart: Attach the indicator to the M1 timeframe.
-
Exit Strategy: Target the nearest support/resistance levels, previous swings, or use a fixed 1:1.5 to 1:2 Risk-to-Reward ratio with stop-loss placed beyond the recent M1 swing extreme.