SMC Extreme OB Reversal MT4
- インディケータ
- バージョン: 1.0
- アクティベーション: 5

This one draws almost nothing most days, and I'd rather you knew that before you look at a screenshot and decide it's broken.
Here's a number from my own machine. I ran it across four symbols and two timeframes, sixteen charts, looking at the last 300 bars of each. It drew a model on five of them. That's the trade the tool makes: a full chain of breaks, a structure shift that closes, and a pullback all the way back to the block at the root of the move. Three things, in that order, or nothing gets drawn.
Where the popular versions drift
I read the ICT and SMC material properly before writing this, to find where the shortcut versions part company with what the concepts say. Five places, and every one of them is visible on your chart.
| What the material says | What most tools implement | What this does |
|---|---|---|
| A break of structure needs a body close through the level. A wick through and back is a sweep, which means the opposite thing | Wick and close treated identically, so every poke counts as a break | Every break in the chain is measured on the close. A wick under the low leaves the chain intact |
| MSS only means something after liquidity has been taken. It's the turn, not a level being crossed | Any cross of the last swing gets an arrow | The shift is only read at the extreme of a completed chain, and by default price has to close through the last two swings, not one |
| Two order blocks in a leg are worth trading: the decisional one and the extreme one at the root. Everything in between is a trap | Every opposite-coloured candle in the leg gets a box | One block per model, at the root of the leg that shifted structure |
| A PD array price has traded through is finished | Zones stay on the chart until they scroll off the left | A block dies on a close beyond its far edge, and the model dies with it |
| The pattern is defined by price relationships, so counting bars is an arbitrary scale | Pivot length in bars, one number for every symbol and timeframe | Swings can be built from an ATR retracement instead, so one setting travels |
The third row is the one that costs money. In a long downtrend you'll pass four or five candles that look like bullish order blocks, and price will slice through all of them before it reaches the one at the base of the move. Marking all five and calling them zones isn't analysis, it's a list. This marks the one at the root and lets the rest go.
What it draws
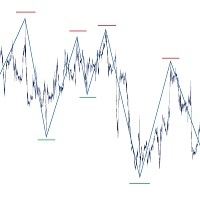
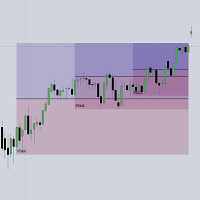
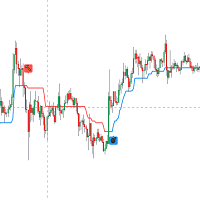
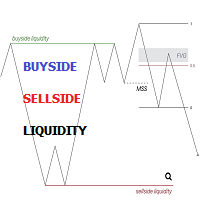
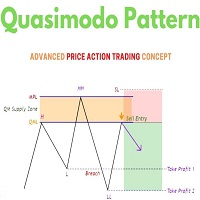
The chain. Points are labelled A, B, C and so on, left to right. A is the high the whole leg came from. Each broken low is joined to the bar that broke it by a dotted line captioned BOS−, so the number of breaks behind a setup is there at a glance.
The shift. A solid line from the swing that got taken out to the bar whose close took it, captioned MSS. This is where the model becomes visible, and it happens on a bar close, not on a pivot that needs another eight bars to confirm. That matters more than it sounds.
The extreme block. The zone at the root of the rally out of the low, stretched to cover the wick that took the liquidity. Amber and captioned EX OB (waiting) until price comes back, neutral once it does.
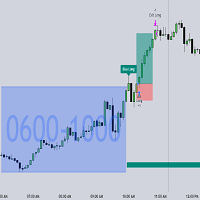
Entry, stop and target. Two solid blocks running right from the entry bar: entry to stop in orange, entry to target in cyan. The stop sits outside the block by a slice of ATR, the target sits inside point A by another one, so profit comes off before price has to break the old high. If that puts the target on the wrong side of the entry, the model is thrown away rather than drawn as a trade with no room in it.
It doesn't draw fair value gaps, liquidity pools, killzones, session boxes or higher-timeframe zones, and there are no buy and sell arrows anywhere in it. One model, one direction, one zone.
The panel
SMC Extreme OB Reversal Structure BOS 2.0xATR Buy T/W/L 1 / 1 / 0 Buy win % 100.0% Sell T/W/L 0 / 0 / 0 Sell win % -
T/W/L is total, won, lost, counted over every model in the history you loaded, not just the ones on screen. And I'll be blunt about that win rate: it's the tool marking its own homework, with its own stop and target, no spread, no slippage, no commission. It says 100% up there because one buy setup completed. One. That's a sample of one, and it's why you won't find a win rate table anywhere in this listing.
Alerts fire on the waiting setup, not the finished model. Two modes: the moment price trades into the block, checked every tick, or on bar close only, when the bar reached into the zone but didn't close beyond it. One alert per bar per direction, and the first pass after you attach it runs silently, so loading a chart never replays six months of old signals at you.
How to read it
| On the chart | Read it as |
|---|---|
| Dashed line marked TARGET | where the model is aiming, the high the leg came from |
| Dotted lines marked BOS− | each low the market closed through on the way down |
| Solid line marked MSS | the close that ended the downtrend |
| Amber box, EX OB (waiting) | the zone it wants price back in, nothing to do yet |
| Neutral box, EX OB | price came back, entry is marked |
| Orange block from entry | entry to stop |
| Cyan block from entry | entry to target |
Long: wait for the chain of BOS− labels and the MSS line to be on the chart, check the amber block is still amber, then let price come back into it. Take your own confirmation on a lower timeframe when it gets there, put the stop under the block, and treat the TARGET line as the destination rather than the first thing you take profit at. Short is the same thing upside down, with BOS+ labels and the block above price.
Skip it when the chain is only two breaks and the whole leg is shorter than a normal day's range on that symbol, or when the shift closed into a session gap. And skip it when price has already spent three or four bars sitting inside the block without leaving. A zone price is comfortable in isn't a zone.
What this version can't do
It has no higher-timeframe awareness. A buy on H1 sitting under a daily supply zone is drawn exactly like one with clear air above it, and it's on you to look.
There's a behaviour worth knowing because it looks like repainting and isn't quite. Levels never move once a bar closes: everything comes from closed bars and the shift is confirmed by a close. But a model whose block dies before price comes back is removed from the chart, because a setup that can never be taken is noise. So models do vanish. They just never move.
The ATR multiplier that builds the swings is the one setting you'll have to touch. 2.0 is a sensible middle on gold and the majors, but on a quiet cross it produces too few swings to make a chain out of. Pivot mode is there for exactly that reason, and both modes ship in the same file so you can flip between them on one chart and compare.
Honestly, the chain builder wasn't the hard part. What ate the time was deciding when to start counting the block as dead: count from the extreme itself and the very candle that made the low kills its own block, every time, and you end up with a tool that finds nothing at all.
Questions you'll have
Which mode should I run? Start with the BOS chain, it's the default. If you're on a symbol where it draws nothing for weeks, switch to pivot mode and drop the length to 5 or 6 before you start pulling the ATR multiplier around.
Why so few signals? The pullback to the extreme block is the rarest part of the sequence. Price shifts structure often enough, but coming all the way back to the root of the move before it goes is not common, and a tool that says otherwise is drawing something else and calling it this.
Timeframes? H1 and H4 are where I'd run it. It works on M15, but the chains get short and the target ends up close enough to the entry that the ATR offsets start eating the whole move.
MT5? Yes, same engine, listed separately on the MT5 Market. The one thing that build has and this one doesn't is Telegram alerts, because the MQL4 notification helper doesn't have them.
Support
Message me on MQL5 with a screenshot that has the panel visible, plus the symbol and timeframe, and I can normally tell you what happened from that alone. Updates are free.
Analysis tool. It places no trades and makes no profitability claim. Past price behaviour is not a guide to future price behaviour.