CCZ Candle Concentration Zones MT4
- 지표
- 버전: 1.0

CCZ is an objective support/resistance zones built from consecutive candle-overlap through same price range, on any base timeframe
"From the maker of Risk Sentinel — risk-first position sizing that keeps your risk fixed as you drag the stop: https://www.mql5.com/en/market/product/185979"
=================================================================================================================================================
The Main Concept:
Classic support and resistance measures “reaction”: how many times did price turn here? CCZ measures “acceptance”: how long did price agree to trade here?
CCZ do an honest measure: “How many candles in an unbroken row accepted this price?”
The method is almost mechanical:
1. Take a slice of recent price and cut it into thin horizontal bands, each about a fraction of the current ATR tall. Think of them as shelves.
2. For each band, walk through the candles and count the longest unbroken run whose high-to-low range crosses that band. One candle that misses ends the streak, and the count starts again from zero.
3. Any band whose best run clears a threshold — say six candles (or set by user’s own rules) — becomes a zone.
The "in a row" rule is the whole idea. A wall of consecutive overlapping candles is consolidation — a fair-value shelf.
─────────────────────────────────────
│ │ │ │ │ │ │ │
▓ ▓ ▓ ▓ ▓ ▓ ✗ ▓ ▓
1 2 3 4 5 6 miss 1 2
└── 6 in a row ──┘ ↑ └ run resets
qualifies gap
─────────────────────────────────────
Reading the zones
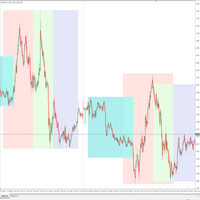
Each zone is a rectangle spanning a price band, with a number printed on it. That number is the length of the longest unbroken run of candles that all touched the band — the zone's strength score. A "6" means six candles in a row shared that price; a "12" is a much more contested level than a "6".
A zone's right edge extends forward as long as it stays relevant. Once price has moved away and then comes back, the zone is **mitigated** — it has been tested and stops extending. You choose what "comes back" means:
- “Touch” — any wick back into the zone mitigates it (strict)
- “Close inside” — only a candle closing inside counts (lenient)
- “Touch then close inside” — a wick first, then a later candle closing inside — ignores single-wick rejections
An option to hide zones once mitigated keeps the chart down to only the levels still in play.
Zone detection on any base timeframe
The candles being counted don't have to be the candles on your chart. Set a base timeframe once — lower, equal, or higher than your chart — and the zones are built from that timeframe's candles no matter which chart you're viewing them on.
Run it on H1 candles while trading from an M5 chart, and the same H1-built zones sit on both charts. Zoom into M1 and they're still the same levels — you're looking at a magnified view of one detection, not a different one per timeframe.
Settings
- Base timeframe — independent of the chart, any resolution
- Min candles in a row required to qualify a zone
- Scan depth — how many base candles the rolling window covers
- Area height resolution: Auto (ATR-based) or Manual (fixed ticks)
- Auto mode: measure ATR on the chart timeframe or the base timeframe, plus an ATR divisor to set how tight a band counts as "the same level"
- Base candles kept in memory
- Mitigation rule: Touch / Close inside / Touch then close inside
- Zone style: outline only, or filled + outline, with independent fill opacity
- Hide zones once mitigated
- Candle-count label: on/off, colour, font size
- Border colour and width, max zones kept, chart bars scanned on load
Typical use
Use it as an objective second opinion on your own support and resistance — a level only appears because candles repeatedly proved it mattered, not because it looks important on the chart.
Run the base timeframe higher than your entry chart to trade from clean higher-timeframe shelves without switching windows to find them. Or match it to your chart timeframe for a pure price-action read of where the current session keeps getting rejected.
It pairs naturally with a separate entry trigger: use the zones as your bias for where to look for a reversal or a breakout, and your own signal for when to act on it. At some occasion, you can also read it as a target area.
Who it's for
Traders who already think in terms of support, resistance, or supply and demand zones, and want a rule-based way to find the strong ones instead of eyeballing swing highs. Useful from scalping timeframes up to swing trading, on forex, indices, metals, or crypto. It assumes you already have a way to decide entries — this tool finds the levels, not the trigger.
What it does not do
- It gives no buy or sell signals, and no entry, stop or target prices
- It places no orders and cannot touch your account — the indicator runs with no access rights at all
- It has no alerts or notifications
- It does not repaint history: only closed candles are counted, and a zone's strength number never changes after the fact. Its right edge does keep extending forward each bar until the zone is mitigated — that's the zone staying live, not the past being redrawn
Things worth knowing
If you set the base timeframe higher than your chart's, switch "ATR measured on" to the base timeframe too. Leaving it on the chart timeframe measures a higher-timeframe candle with a smaller ruler, which makes the price band far too thin and zones far too rare to form.
A zone can only be judged mitigated after price has first left it and then returned — a zone still forming can't be mitigated on its own first candle.
Higher-timeframe base candles start at your broker's server time. Two brokers can legitimately cut the same higher-timeframe candle at different points, so zones on the same symbol can read slightly differently across brokers. That's a property of the data, not a fault in the indicator.
Trading involves risk. Past performance does not guarantee future results.