AT24 Zone Pro
- インディケータ
-
Pravin Awari
 # Algotraders24 AI
We build trading tools for MetaTrader 5: Expert Advisors, indicators and utilities for Forex, gold, indices and crypto.
## What we do
- MetaTrader 5 Expert Advisors and indicators
- Testing, validation and risk analysis of our own products - バージョン: 1.0
- アクティベーション: 5
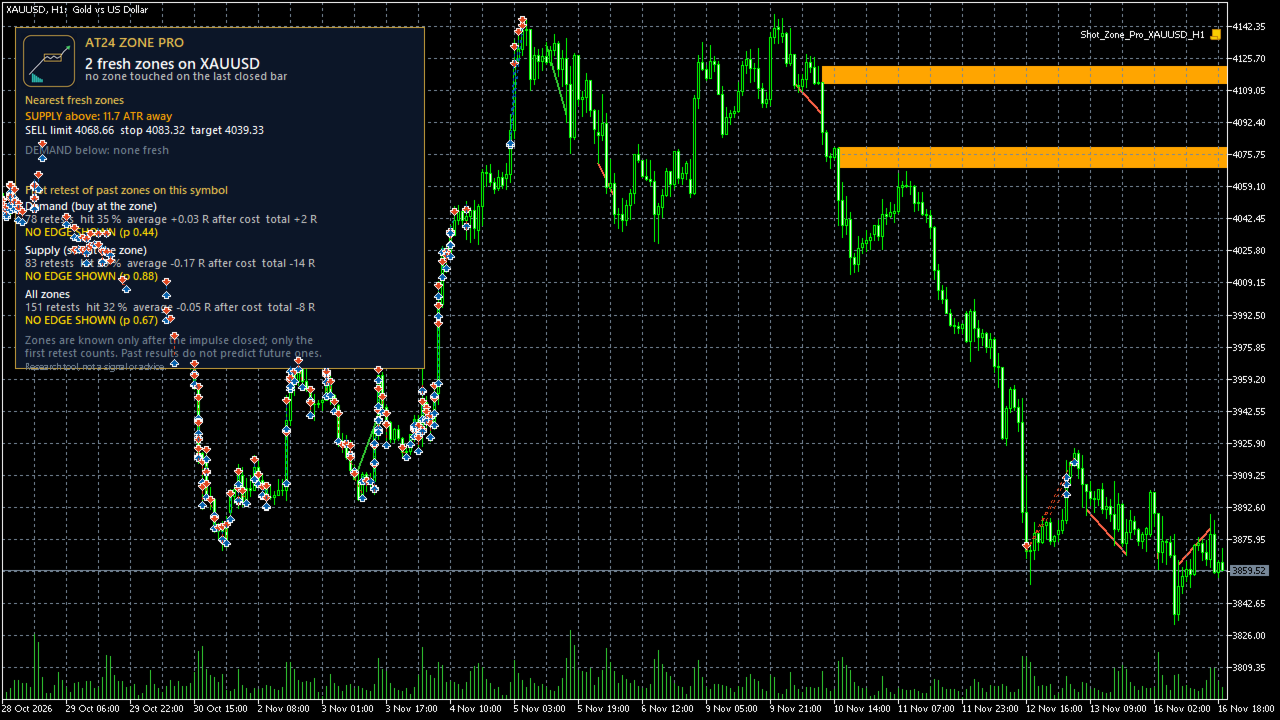
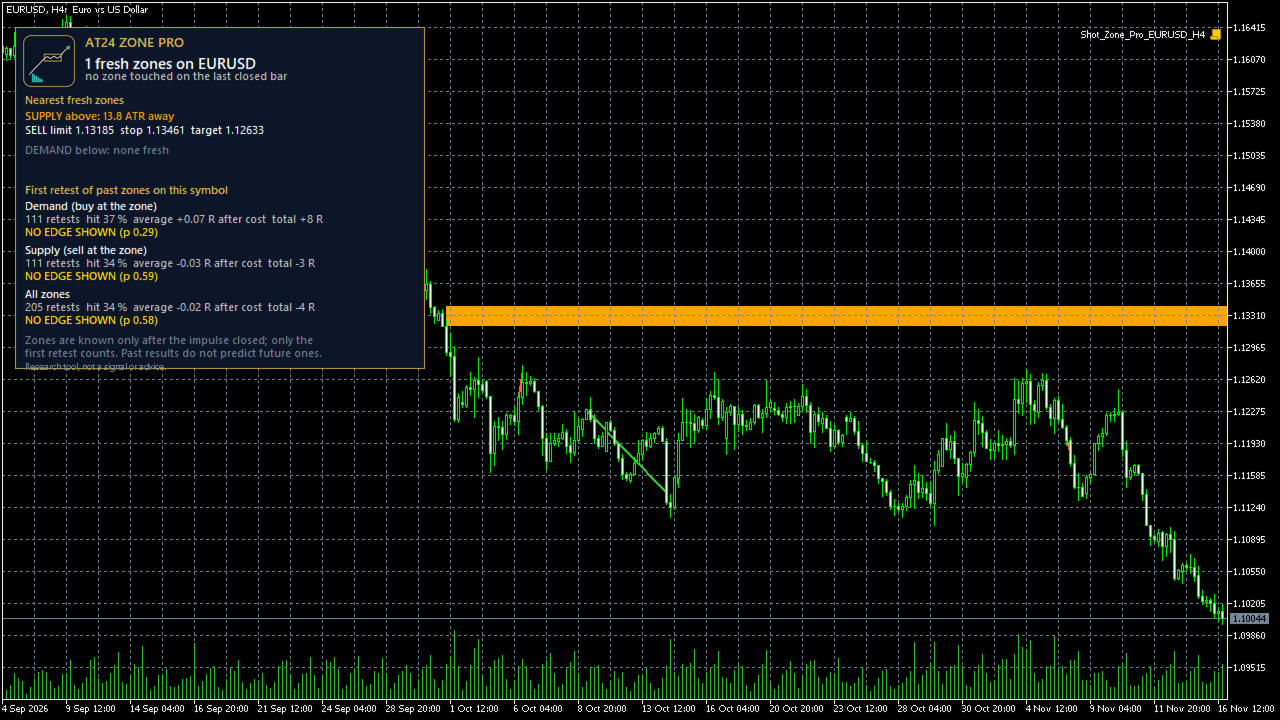
AT24 Zone Pro marks supply and demand zones on the chart and shows how past zones performed on your own symbol.
What it does
The indicator draws fresh zones above and below the price and prepares a simple plan for the nearest zone on each side: an entry level, a stop level and a target level. The levels are shown before any trade, so you can judge the idea yourself.
The scorecard
Every past zone is scored on its first return into the zone, using the history of the chart you are on. A small table lists demand zones, supply zones and all zones together: number of retests, hit rate, average result in R after cost, total R and a luck test. When the history shows no edge beyond chance, the table says so. When there are too few retests, it says that too.
Points to know
Zone settings, trade plan settings (stop buffer, reward to risk, holding period, cost), number of bars analysed, how many zones to draw, alerts and dashboard position. The dashboard is hidden in the Strategy Tester by default.
Notes
Works on any symbol and timeframe that has enough history. Cost is taken from the current spread unless you set it. Slippage and gaps are not modelled in the scorecard.
Research and planning tool, not a signal or a forecast. Past results do not predict future results. Not financial advice.
What it does
The indicator draws fresh zones above and below the price and prepares a simple plan for the nearest zone on each side: an entry level, a stop level and a target level. The levels are shown before any trade, so you can judge the idea yourself.
The scorecard
Every past zone is scored on its first return into the zone, using the history of the chart you are on. A small table lists demand zones, supply zones and all zones together: number of retests, hit rate, average result in R after cost, total R and a luck test. When the history shows no edge beyond chance, the table says so. When there are too few retests, it says that too.
Points to know
- Zones appear only after the bar that created them has closed. Closed bars are used, so drawn zones do not move afterwards.
- The calculation chain was compared with an independent calculation on the same bars and gave identical numbers.
- The scorecard is in-sample. Several inputs can be changed, and tuning them until a table looks good will find a lucky result. Treat the table as research, not as a forecast.
- Optional alert at bar close when price first touches a fresh zone. Alerts are off by default and have not yet been watched on a long live session.
- The indicator places no trades.
Zone settings, trade plan settings (stop buffer, reward to risk, holding period, cost), number of bars analysed, how many zones to draw, alerts and dashboard position. The dashboard is hidden in the Strategy Tester by default.
Notes
Works on any symbol and timeframe that has enough history. Cost is taken from the current spread unless you set it. Slippage and gaps are not modelled in the scorecard.
Research and planning tool, not a signal or a forecast. Past results do not predict future results. Not financial advice.