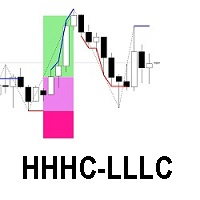
Higher High Higher Close Lower Low Lower Close
60 USD
Demo heruntergeladen:
928
Veröffentlicht:
18 April 2017
Aktuelle Version:
1.34
Keinen passenden Roboter gefunden?
Geben Sie Ihren Eigenen in Auftrag
auf Freelance!
Gehen Sie zu Freelance
Geben Sie Ihren Eigenen in Auftrag
auf Freelance!
Wie man einen Roboter oder Indikator kaufen kann
Starte Deinen EA im
Virtual Hosting
Virtual Hosting
Teste einen Indikator/Roboter vor dem Kauf
Möchtest Du Geld im Market verdienen?
Wie man Produkte richtig präsentiert
Sie verpassen Handelsmöglichkeiten:
- Freie Handelsapplikationen
- Über 8.000 Signale zum Kopieren
- Wirtschaftsnachrichten für die Lage an den Finanzmärkte
Registrierung
Einloggen
Sie stimmen der Website-Richtlinie und den Nutzungsbedingungen zu.
Wenn Sie kein Benutzerkonto haben, registrieren Sie sich

Hi Mark,
I purchased your indicator. Watched your introduction videos on youtube.
Just had a question about the printing of the Kill Zones:
1. When does it begin the printing of the Kill Zone?
2. And does it finish the printing of the Kill Zone?
I've just been looking at it from a backtesting. And looking how it performs on live charts now.
Thank you.
Hello Zanctus,
Thank you for buying my indicator, I hope it serves you well.
The indicator draws kill zones for trend continuations. So that means a bull move that has new HHHC at a higher level than the previous bull move. The first bull move after a bearish move is not considered for the kill zones, but the second and subsequent bull moves would be considered for kill zones.
A bullish kill zone (HHHC) is printed until a bearish move is detected (LLLC). Opposite for bearish kill zone.
Regards,
Mark
Hello,
I purchased your indicator and I also am trying to figure out the kill zones , it seems as if the kill zones are not painted until price actually happens (lagging) clarification the kill zones are not painted until the price actions have already occurred. How then to you approach entry if the kill zone is painted after the price action has occurred?