Grid Core Ease of Movement EA
- Эксперты
-
AL MOOSAWI ABDULLAH JAFFER BAQER
 To trade successfully we need to go through the proven path that others had gone and reached!
Here are 17 quotes from such successful investors:
1- Limit your size in any position so that fear does not become the prevailing instinct guiding your judgment.
Joe Vidich - Версия: 3.24
- Активации: 5
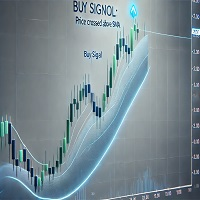
Built for grid traders who want price to move easily, not just move, before the first order. One job: open a grid only when price starts travelling with little effort and the trend agrees. Mechanism: an Ease of Movement zero cross on a closed bar, checked by a Thrust Guard, a Range Guard and an EMA 200, then an ATR-spaced grid that banks small closures.
Why a core grid costs less: it carries the same grid engine, the same safety fixes and the same panel as our full grid EAs, with one focused signal instead of extra layers, so you pay for what you use.
Tested on: EURUSD H1, $10,000, default inputs, 2025.01.01 to 2026.09.30: net +665.33, maximal equity drawdown 239.08 (2.33%), 322 trades, no stop-out, no margin refusal. Deepest basket: 8 grid orders open at the same moment, 0.60 lots in total.
Try it free first: load Grid Core Ease of Movement EA in the MetaTrader 5 Strategy Tester with visual mode on, default inputs, EURUSD H1. Every crossing it accepts gets an arrow; on the live chart every crossing a guard refused is shown as a grey dot.
The trade lifecycle in four verbs. It weighs how far each bar's midpoint travelled against the range and the tick volume it took, waits until that ease flips from negative to positive (or back) with a real jump and the trend behind it, opens the first level and spaces the next ones by ATR, and banks groups of orders as soon as their joint result clears the target.
Plain risk up front. This IS a grid. It adds to losing positions and uses no stop loss by default. Defaults: 0.01 first lot, additive steps of 0.01, ATR spacing with a 50 point floor, hedge cycle off, margin-level safety off. Limits stop new levels; they never force-close the book.
----------
EFFORT BEFORE SIZE
Ease of Movement, introduced by Richard Arms, asks a question most momentum tools ignore: how much volume did it take to move price? Each bar's midpoint move is multiplied by the bar's range and divided by its tick volume, then smoothed over 14 bars. A strong positive value means price rose with little resistance; a strong negative one means it fell easily. When the smoothed line crosses zero, the easy direction has changed. The EA adds a 9 bar EMA of it as a signal line for an optional faster mode.
Five things to know first
- Entry: Ease of Movement crosses above zero (BUY) or below zero (SELL) on a closed bar. A signal-line mode is included for earlier, more frequent entries. Accepted signals do not repaint.
- Calculated inside the EA from highs, lows and tick volume. No indicator file, no DLL, no web request.
- The Thrust Guard asks for a real jump on the crossing bar, a Range Guard skips quiet boxes, and an EMA 200 filter keeps entries on the side of the main trend.
- The Thrust Guard ships switched ON at 1.5, because in our test it lowered the worst drawdown on both symbols and kept the basket one order shallower. It also earned less per unit of drawdown; the full on/off numbers are below.
- No stop loss and no forced close-all. Limits stop new levels; the open book stays under management.
----------
Start here (5 minutes)
1. Attach it to EURUSD H1 and leave every input at its default.
2. Set RunMode to Scan only for the first session. The panel shows each plan; no order is sent.
3. Look at the arrows and grey dots on the chart: they show which past crossings the guards would have taken or refused.
4. When the plans make sense to you, press ARMED on the panel.
5. Repeat the tester runs below on your own broker's data before any real money; spread, swap, commission and tick volume differ between brokers. More than one chart? Give each copy its own EAMagicNumber and HedgeMagicNumber.
----------
Reproduce our numbers
Strategy Tester, default inputs, 1 minute OHLC, leverage 1:100, 2025.01.01 to 2026.09.30, one broker's demo data. Same settings, same period, and you should land close to these:
- EURUSD H1, $10,000: net +665.33, maximal equity drawdown 239.08 (2.33%), 322 trades, deepest basket 8 orders / 0.60 lots. No stop-out, no margin refusal.
- EURUSD H1, $1,000,000: net +665.33, maximal equity drawdown 239.08 (0.02%), 322 trades, deepest basket 8 orders / 0.60 lots. No stop-out, no margin refusal.
- XAUUSD D1, $10,000: net +27.77, maximal equity drawdown 23.33 (0.23%), 8 trades, deepest basket 1 order / 0.01 lots. No stop-out, no margin refusal.
- XAUUSD D1, $1,000,000: net +27.77, maximal equity drawdown 23.33 (0.00%), 8 trades, deepest basket 1 order / 0.01 lots. No stop-out, no margin refusal.
Read these as one past stretch, not a forecast. The deepest basket is counted from the tester's deal list (largest number of grid orders open together, and their lots). Money drawdown is the same at both deposits because lots do not grow with the balance, so it is a far bigger share of a small account; deposits below $10,000 were not tested. Defaults were set once by judgement on this same period, which flatters them. Eight gold trades in 21 months is far too few to judge gold. Tick volume differs between brokers, so the signal can differ too. Netting accounts were not verified.
----------
The Thrust Guard: on or off, in numbers
The idea: a crossing that happens because the line slowly drifts over zero says less than one where it jumps. So the change on the crossing bar must be at least InpEOMThrustMin times the average change of the 20 bars before it. Same period, same settings, guard at 1.5 against guard off:
- EURUSD H1, $10,000: on, net +665.33, drawdown 239.08 (2.33%), 322 trades, deepest 8 orders / 0.60 lots. Off, net +1,185.25, drawdown 346.68 (3.35%), 552 trades, deepest 9 orders / 0.72 lots.
- XAUUSD D1, $10,000: on, net +27.77, drawdown 23.33, 8 trades, deepest 1 / 0.01. Off, net +52.70, drawdown 24.97, 10 trades, deepest 1 / 0.01.
With the guard on, the worst drawdown fell by 31% on EURUSD and slightly on gold, and the deepest basket was one order and 0.12 lots lighter. The price: about 44% less profit on EURUSD and half on gold, and less profit per unit of drawdown (about 2.6 against 3.3 combined). It ships on because the brief for this EA is the smaller swing, not the bigger result. If you prefer the bigger profit and accept about 45% more drawdown, set InpEOMThrustMin to 0.
----------
Why Ease of Movement
A grid needs one clean starting gun, then it needs the engine to work. Ease of Movement is a useful gun for three reasons. It joins price and volume in one number, so a move made on heavy effort counts for less than a move made easily. It is measured in points per tick, so its zero line works on any symbol without retuning. And the zero cross is a single, unambiguous event on a closed bar. The honest costs: tick volume is broker data, not exchange volume, so values differ between brokers; the line arrives after the turn has started; and in a flat market it can hover around zero. The guards, the trend filter and the signal gap are there for exactly that.
----------
One cycle, step by step
1. Measure. Each new bar recomputes the raw ease of every finished bar (midpoint move x range / tick volume, in points), its 14 bar average and the 9 bar signal EMA.
2. Cross. In the default mode the line must cross zero, upward for a BUY, downward for a SELL. In signal mode it must cross its signal line instead.
3. Thrust Guard. The change on the crossing bar must be at least 1.5 times its 20 bar average (0 switches it off).
4. Range Guard. The last 20 bars must span at least 5 ATR, so tight boxes are skipped.
5. Trend filter. By default the close must be on the matching side of the EMA 200. It can also fade that side, or be switched off.
6. Timing. Accepted signals are kept apart by a gap of bars, and a signal may wait a few bars if the level cannot be placed at once.
7. Ladder. Levels follow ATR or fixed points, with a floor, a ceiling and an optional freeze. BUY and SELL grids can run together or alone.
8. Banking. Groups of oldest and newest orders close when their joint result, after swap and commission, clears the target. If the oldest order is too heavy, a slice of it is closed instead.
9. Safety checks. A closure that would reopen a level at once is blocked, each leg is confirmed in deal history, failed legs are retried, and a plan is dropped if the book changed before sending.
10. Hedge cycle, optional. Off by default and not exercised in our tests. When on, it holds a balanced pair on a chosen symbol and retires it in equal slices, paid by a small surcharge on closures the grid already makes.
----------
The panel
The panel sits on the left, so the right side and the price scale stay clear. It lists symbol, magic number, a status pill, grid mode, lot step, spacing, banked result, the book, each side's closing plan and the order table. The EOM PULSE row shows the period and signal length, the line and signal values of the last closed bar, whether the line is rising (UP) or falling (DN), and the bars since the last crossing. The THRUST GUARD row shows the side the line favours, the mode, the bar's thrust ratio with OPEN, HOLD or off, the Range Guard width in ATR with its state, and the EMA side. On the live chart every crossing of the last 150 bars is marked: a small arrow when accepted, a grey dot when a guard refused it. Buttons switch Armed / Scan only, Pause / Resume, chart marks and slicing. The Hedge Vault card docks under the main panel; with the hedge off it stays hidden. Nothing is drawn in a non-visual backtest.
----------
Limits you control
No setting closes the book for you; limits only stop new levels.
Each order passes a free margin check with a safety buffer before it is sent.
Caps on levels per grid, orders per side and lot per order keep the ladder finite. MinMarginLevelPercent and MaxAccountRiskPercent start at off; set them for your own account.
An optional margin-level timeframe safety moves the signal and spacing to a higher timeframe as margin falls. It is off by default and was not exercised in our tests.
Copies are kept apart by symbol and magic number.
Scan only shows every decision without sending a single order.
----------
Who this is for
Traders who want a grid that starts when price moves without a fight, not on a slow drift; who are happy with many small closures; who prefer a quiet EA that trades less with the trend behind it; who want the core engine at a lower price; and who will size lots to their balance.
Who this is NOT for
- Anyone who needs a stop loss on every order. This grid has none by design.
- Anyone expecting a fixed monthly return or a fast doubling. The tested result above is modest, and it is the honest one.
- Small accounts running large lots unattended. A long one-way trend can hold the book open for weeks.
- Traders who want to trade every candle. The filters keep it quiet on purpose, and on daily gold it may sit idle for months.
- Traders who want the largest possible profit at any drawdown. The default favours a smaller drawdown; switching the Thrust Guard off trades more and swings harder.
- Traders who want a ready-made gold system. Gold was tested only on D1 with eight trades, which proves nothing either way.
- Traders who expect identical signals on every broker. Tick volume is broker data.
- Traders who will not test first. If you skip the Strategy Tester on your own broker, this is not the right tool for you.
----------
Common questions
Does it repaint? Accepted signals, chart marks and both panel rows use finished bars only.
Is it the classic Ease of Movement? Yes in shape: midpoint move times range divided by volume, smoothed by a 14 bar average. It is expressed in points and uses tick volume, so no scaling constant is needed. The signal line is a 9 bar EMA of it, added by this EA.
Zero or signal-line mode? Zero mode waits for the easy direction itself to change and trades less. Signal-line mode reacts to the line turning and trades more often; it was not backtested here.
Which markets were tested? EURUSD H1 and XAUUSD D1. Everything else is for you to test.
How deep did the grid go in the test? At most 8 orders open together on EURUSD, 0.60 lots in total, with the default guard. With the guard off it reached 9 orders and 0.72 lots.
What should I change first? InpEOMThrustMin, then InpEOMRangeMinATR, then InpEOMPeriod. One change at a time, and look at drawdown and basket depth next to net result.
Netting accounts? A separate margin cap exists for them, but netting behaviour is unverified.
----------
All inputs
Grid levels
TradeMode - two grids, BUY and SELL, by default, or one direction only.
GridSpacePoints - level distance in fixed spacing mode (25).
GridSpaceMultiplier - above 1.0 widens deeper levels (1.0 = even).
MaxGridLevels - most levels in one grid (1000).
UpDirectionIsBuy - which side an up move arms.
EAMagicNumber - number on grid orders (9769510).
GridOrderComment - text on grid orders (GEOM).
OneOrderPerBar - at most one new level per bar.
Lots
InitialLotSize - volume of the first level (0.01).
LotSizingMode - additive by default, multiply as the alternative.
LotMultiplier - factor per level in multiply mode (1.25).
LotAddStep - step per level in additive mode (0.01; 0 uses the starting lot).
MaxOrderVolume - largest single order (1.0).
UseAutoLot - links the starting lot to balance (off).
AutoLotBaseBalance - balance that matches the starting lot (1000).
AutoLotAllowDecrease - lets auto lot go below the starting lot (off).
ATR spacing
GridSpacingMode - ATR by default, fixed points as the alternative.
ATRTimeframe - ATR timeframe (current chart).
ATRPeriod - ATR length (14).
ATRSpacingFactor - spacing as a multiple of ATR (1.0).
ATRBarShift - ATR bar; 1 is the last finished bar.
ATRMinSpacingPts - lowest spacing in points (50; 0 none).
ATRMaxSpacingPts - highest spacing in points (5000; 0 none).
ATRFreezeOnStart - keeps one spacing for the whole cycle (off).
Profit target
DesiredProfitPerClosure - base target in account currency (2.0).
ProfitMultiplier - final scale, 1.00 to 2.00.
ProfitTargetMode - scaled by default: bigger, deeper books aim higher.
ProfitVolumePower - how closing volume lifts the target (1.0; 0 off).
ProfitDepthBonus - extra target per additional open level (0.10).
ProfitMaxMultiple - scaled target ceiling in multiples of the base (50).
ProfitMaxReachFraction - keeps the target inside this share of one grid step (0.50).
Fragment scanner
UseMultiLegScan - checks multi-order groups before the plain pair (on).
MaxOldestLegs - most old orders in one closure (3).
MaxNewestLegs - most new orders in one closure (6).
ScanPriority - ranking of qualifying groups; largest group first by default.
NeverBankLessThanPair - a group must also beat the pair target (on).
RequireCloseVolumeExceedsTarget - newest volume must be above oldest volume (on).
MinCloseVolumeRatio - required ratio of those volumes (1.5).
Target slicing
EnableTargetSlicing - allows part-closing the oldest order (on).
FragProfitWeightPower - profit weight per closing lot (1.5).
FragMinSlicePercent - smallest slice, percent of the target order (20).
FragAllowMultiCloser - several new orders may fund one slice (on).
FragPreferFullClosure - a full closure wins when both are possible (on).
Reopen guard
ReopenGuard - blocks closures that would reopen a level at once (step based).
ReopenGuardCushion - safe distance as a share of one step (0.90).
Account protection
MinMarginLevelPercent - no new levels below this margin level (0 off).
MaxAccountRiskPercent - no new levels beyond this floating loss, percent of balance (0 off).
NetMaxMarginPercent - netting only: cap on net position margin, percent of equity (5.0).
MaxTotalOrders - absolute order cap per side (1000).
Execution and checks
RunMode - Armed or Scan only.
CloseSequence - order in which legs are sent; oldest first by default.
MaxSlippagePoints - allowed slippage (30).
MaxSpreadPoints - no trading above this spread (7500).
MinSecondsBetweenClosures - pause between closures per side (5).
CloseAttemptsPerLeg - attempts before the retry queue (3).
VerifyTimeoutSeconds - how long a stuck leg is followed (90).
DeferWhenMarketClosed - waits for the session instead of halting (on).
MarketClosedRetrySeconds - retry spacing while orders are refused (30).
AutoResumeAfterSeconds - a halt clears itself after this many seconds (300; 0 waits for you).
NoPartialRetryMinutes - partial closes tried again this many minutes after a broker refusal (15; 0 never).
AbortIfBookChanged - drops a plan if a leg changed (on).
UseFullCommission - counts commission on both sides (on).
CommissionPerLot - fallback figure (0 reads history).
CloseOrderComment - text on closing deals.
Hedge cycle
EnableHedgeCycle - main switch (off).
HedgeSymbols - comma list; repeat a symbol for more turns (XAGUSD).
HedgeSymbolRotation - how the next symbol is picked (per cycle).
HedgeMaxSymbolsInTester - rotation cap in the tester only (2; 0 none).
HedgeCycleLots - lots on each side of the pair (0.01).
HedgeSliceLots - lots retired per side each slice (0.01).
HedgeFragmentBonus - bonus over the slice cost (100).
HedgeBonusIsPercent - bonus is a percent; false means money (on).
HedgeMaxSurcharge - money cap per closure (0 none).
HedgeMaxSurchargePercent - largest rise of any closure target, percent (50).
HedgeMagicNumber - number on hedge legs, must differ from the grid (9769511).
HedgeReopenOnFinish - opens a new cycle when one ends (on).
HedgeStartRequiresTrade - first cycle waits for a grid order (on).
HedgeIntegritySeconds - leg balance check interval (5).
HedgeAutoRepair - repairs a lone leg automatically (on).
HedgeNakedAction - what to do with a lone leg; re-hedge by default.
HedgeMaxSpreadPoints - hedge spread limit (0 off).
HedgeSlippagePoints - hedge slippage allowance (30).
HedgeAttemptsPerLeg - attempts per hedge leg (3).
HedgeVerifyTimeout - follow time for a stuck hedge leg (90).
HedgeCommissionPerLot - fallback hedge commission (0 reads history).
HedgeOrderComment - text on hedge deals.
Weekly cash day
WeeklyCashDay - pauses new cycles and slices around withdrawals (off).
CashDayOfWeek - 0 Sunday, 1 Monday and so on (1).
CashCutoffHour - server hour after which no new slice fires (21).
Panel and chart
ShowPanel - panel on or off.
PanelX and PanelY - distance from the chart edge (12, 15).
PanelFontSize - base text size (9).
ShowArabic - second language line (on).
ShowChartMarks - plans and levels drawn on the chart (on).
MaxTableRows - order rows per grid (13).
PanelCorner - corner the panel is anchored to.
Entry trigger
EntryTriggerMode - the Ease of Movement strategy by default.
SignalBarShift - 1 is the last finished bar.
SignalBarsDelay - bars between accepted signals (30; 0 every).
SignalValidBars - bars a signal stays usable (3).
SignalAllowBuy and SignalAllowSell - switch each side.
SignalReverse - turns the direction around (off).
Ease of Movement
InpEOMPeriod - bars in the average that smooths the raw ease of movement (14).
InpEOMSignal - EMA length of the signal line (9).
InpEOMMode - 0 the line crosses zero, 1 it crosses its signal line (0).
InpEOMThrustMin - Thrust Guard: the change of the line on the crossing bar must be at least this many times its 20 bar average (1.5; 0 off; see the test above).
InpEOMRangeMinATR - Range Guard: least window width in ATR (5; 0 off).
InpEOMRangeBars - Range Guard: window length in bars (20).
InpEOMATRPeriod - ATR length for the Range Guard (14).
InpEOMTrendFilter - 1 with the EMA side, 2 against it, 0 off (1).
InpEOMTrendMAPeriod - trend EMA length (200).
InpShowSignalArrows - arrow where a cycle armed (on).
InpShowEOMOnChart - past crossings on the live chart, arrow or grey dot (on).
Debug
DebugMode - extra journal detail (off).
Margin timeframe safety
UseMarginTFSafety - main switch (off).
Level1MarginPct and Level1TF - at 6000 percent the work moves to M15.
Level2MarginPct and Level2TF - at 5000 percent the work moves to H1.
MarginTFHysteresisPct - recovery needed before stepping back (500).
----------
Risk, plainly
Grid trading is risky. It adds to losing positions, uses no stop loss, and a long trend can keep the book open for a long time or, with lots too big for the balance, end in a stop-out and a heavy loss. Ease of Movement is built from past bars and tick volume and cannot see the next bar. No profit is promised. Pick lots that survive a bad run, test on your own broker, and only risk money you can afford to lose. No DLLs or extra files are needed.
If you have run it, an honest review of how it behaved for you, good or bad, helps the next trader decide.