MSRLab Yen Long EA
- Experts
-
Adebayo Oluwaseun Ojo
 I’m Dr. Adebayo Ojo, a geophysicist and systematic trading researcher based in Canada with decades of experience.
 - Versione: 1.1
MSRLab Yen Long EA
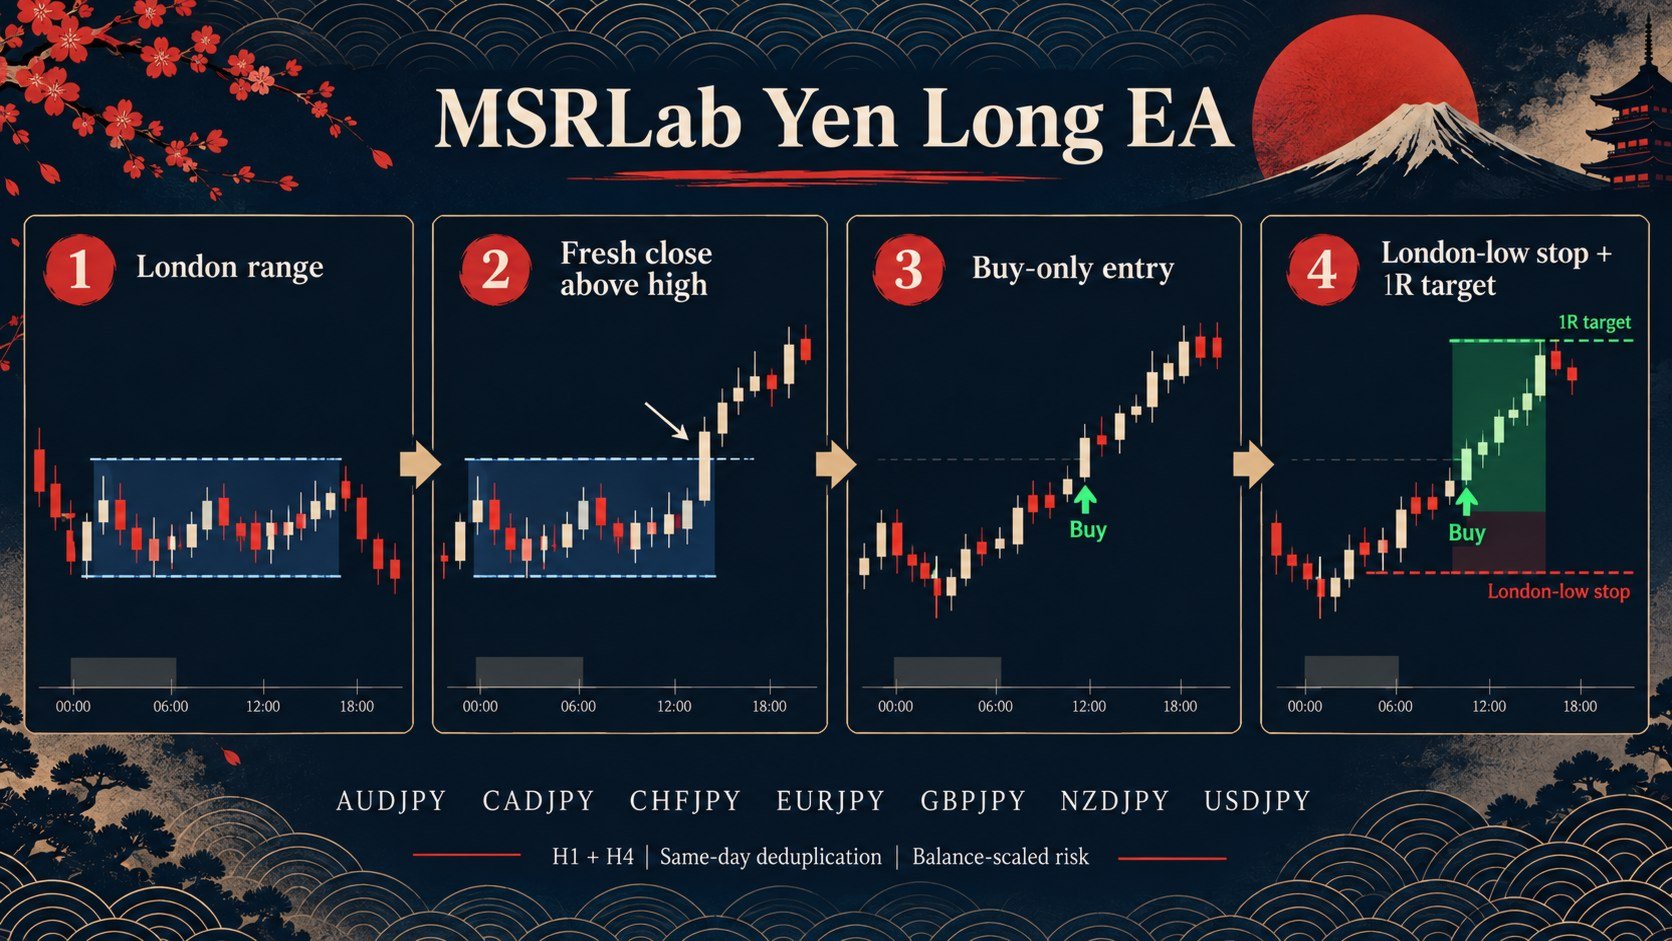
MSRLab Yen Long EA is a buy-only London-range breakout EA for selected JPY currency pairs.
It monitors the configured pairs for a fresh bullish close above the London-session high. When a valid breakout appears, the EA calculates the stop from the London range and places a buy trade with a pair-specific reward/risk target.
The EA does not use:
- Short trades
- OCO orders
- Martingale
- Grid recovery
- Loss doubling
- Manual trade intervention
Default symbols
The default portfolio contains:
| Symbol |
|---|
| AUDJPY |
| CADJPY |
| CHFJPY |
| EURJPY |
| GBPJPY |
| NZDJPY |
| USDJPY |
Users can remove any pair from the InpSymbols input if their broker does not offer it, uses a different symbol name, or if they prefer a smaller portfolio.
Timeframes and signal logic
The EA uses:
- H1 signals
- H4 signals
- London range construction
- Entry window after the London range
- Fresh close above the range high
- Strong bullish candle filter
- London-range low as the protective stop
- Pair-specific reward/risk targets
- Same-symbol daily deduplication across H1 and H4
Only one relevant trade per symbol per trading day is permitted across the enabled timeframes.
Risk and position sizing
The EA calculates position size automatically from the selected account risk and the actual stop-loss distance.
The calculation considers:
- Account balance
- Risk percentage
- Entry price
- Stop-loss price
- Tick value
- Tick size
- Contract specifications
- Broker volume step
- Broker minimum and maximum lot size
The basic principle is:
Allowed currency risk ÷ monetary loss at the stop = calculated lot size
This means the lot size is not fixed. A wider stop produces a smaller lot, while a tighter stop produces a larger lot, subject to broker limits.
Main risk inputs
| Input | Purpose |
|---|---|
| InpUsePercentRisk | Enables percentage-of-balance sizing |
| InpRiskPercent | Percentage of account balance allowed per trade |
| InpMaxRiskCurrency | Optional maximum currency-risk ceiling |
| InpSkipIfBelowMinimumLot | Skips trades when the calculated lot is below broker minimum |
| InpMaxSpreadPips | Prevents entries when spread is too high |
| InpMinRiskPips | Rejects trades with an impractically small stop distance |
| InpMaxDailyEquityLossPercent | Daily equity protection |
| InpMaxTotalEquityLossPercent | Overall equity protection |
| InpSymbols | Selects which JPY pairs are enabled |
| InpEnableH1 | Enables H1 signals |
| InpEnableH4 | Enables H4 signals |
The default percentage-risk setting is 2.5%. This is an aggressive setting and should not be treated as suitable for every user. Conservative users should reduce it, for example to 0.5%, 1.0%, or another level they understand.
If the calculated lot is below the broker’s minimum volume and InpSkipIfBelowMinimumLot=true , the EA skips the trade instead of silently increasing the risk.
Guards and protections
The EA includes safeguards against:
- Excessive spread
- Invalid or excessively small stop distance
- Insufficient broker volume
- Unsupported symbols
- Duplicate trades on the same symbol and day
- H1/H4 duplicate exposure
- Daily equity loss
- Total equity loss
- Invalid tick-value or tick-size calculations
- Broker volume-step incompatibility
If the account reaches a configured equity-loss threshold, the EA halts new entries. Existing positions are not forcibly closed solely because the guard is activated.
IC Trading backtest evidence
The following tests were run on IC Trading using the seven-pair T48 candidate.
The tests were performed as independent symbol tests, not as one synchronized portfolio account. The dollar totals below are therefore sums of separate reports and should not be interpreted as an exact combined portfolio equity curve.
Test configuration
| Item | Setting |
|---|---|
| Broker | IC Trading |
| Starting balance | $100,000 |
| Currency | USD |
| Leverage | 1:100 |
| Period 1 | 1 January 2025 – 31 December 2025 |
| Period 2 | 1 January 2026 – 29 September 2026 |
| Risk model used | $200 reference risk per trade |
| Lot size | Dynamic, calculated from stop distance |
| Signal timeframes | H1 and H4 |
| Direction | Buy-only |
| Pairs | Seven JPY pairs |
| Testing method | Separate MT5 strategy-tester report per pair |
There was no single fixed lot size. Lots varied by pair and trade because each position was calculated from the stop-loss distance and the configured risk amount.
2025 results
| Pair | Net profit | Trades | Profit factor | Maximum equity drawdown |
|---|---|---|---|---|
| AUDJPY | $1,164.94 | 58 | 1.22 | 0.95% |
| CADJPY | $413.48 | 43 | 1.08 | 1.91% |
| CHFJPY | $552.30 | 51 | 1.08 | 2.10% |
| EURJPY | $221.22 | 67 | 1.03 | 1.52% |
| GBPJPY | $82.44 | 63 | 1.01 | 1.27% |
| NZDJPY | $1,171.91 | 66 | 1.19 | 1.93% |
| USDJPY | $778.59 | 46 | 1.14 | 2.00% |
| Sum of separate tests | $4,384.88 | 394 | — | — |
2026 YTD results
Period: 1 January 2026 – 29 September 2026.
| Pair | Net profit | Trades | Profit factor | Maximum equity drawdown |
|---|---|---|---|---|
| AUDJPY | $516.61 | 64 | 1.08 | 2.19% |
| CADJPY | $400.76 | 42 | 1.07 | 2.46% |
| CHFJPY | $365.42 | 32 | 1.09 | 1.25% |
| EURJPY | $1,319.20 | 49 | 1.31 | 1.21% |
| GBPJPY | $1,672.15 | 48 | 1.42 | 1.02% |
| NZDJPY | -$2,953.97 | 60 | 0.60 | 3.86% |
| USDJPY | $1,615.65 | 32 | 1.43 | 1.16% |
| Sum of separate tests | $2,935.82 | 327 | — | — |
Important interpretation
The IC Trading results show that the strategy can behave very differently by pair and period. NZDJPY was profitable in 2025 but materially negative in 2026 YTD. This is why users can remove individual symbols from InpSymbols and should evaluate the EA on their own broker before using real capital.
The results are broker-specific. Different brokers may have different:
- Symbol specifications
- Server time
- Spreads
- Tick history
- Minimum lot sizes
- Contract sizes
- Execution conditions
- Available trading sessions
The EA does not guarantee identical trades, returns, drawdown, or profitability across brokers.
Users should begin with demo or forward testing, select a risk percentage they can tolerate, and avoid increasing risk to compensate for missed or different trades.