|
4 years
experience
|
108
products
|
54
demo versions
|
|
0
jobs
|
0
signals
|
0
subscribers
|
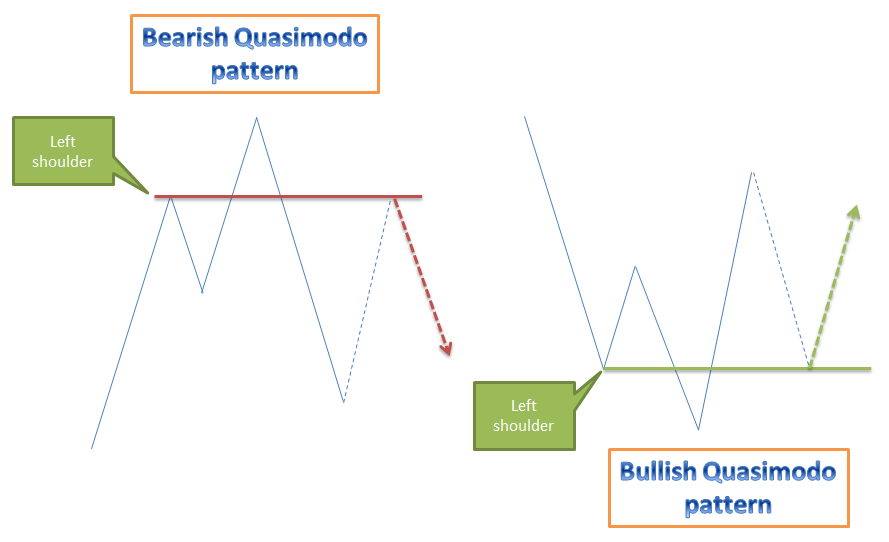
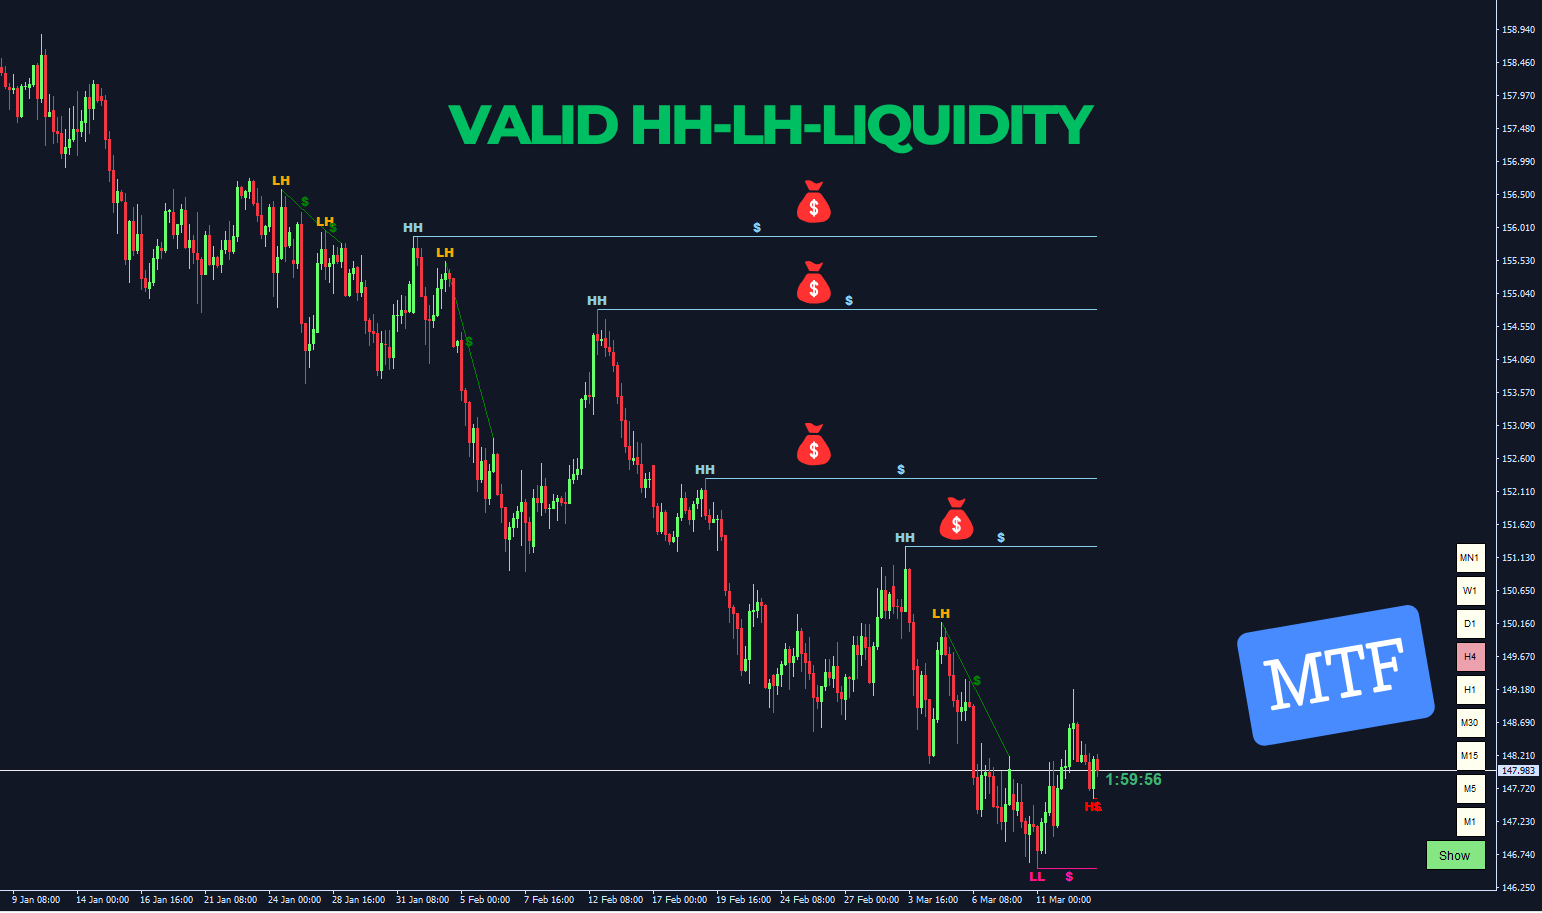
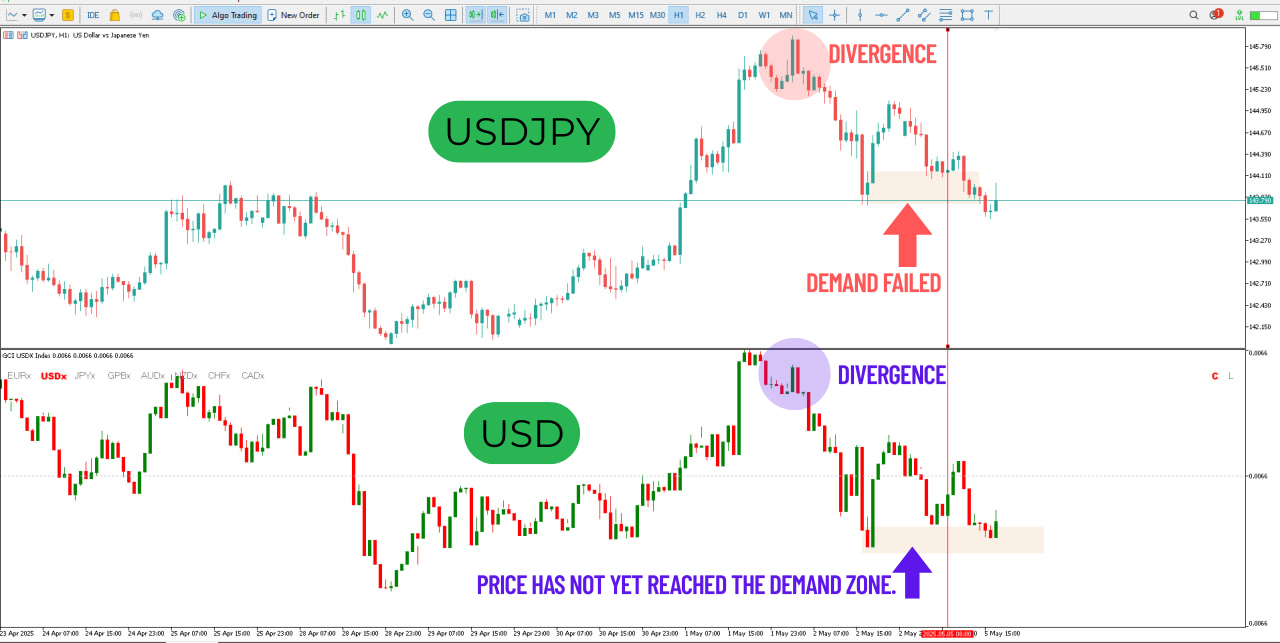
💧 PRO TIP - Don't Open Orders Where You See, Open Them Where Others Can't!
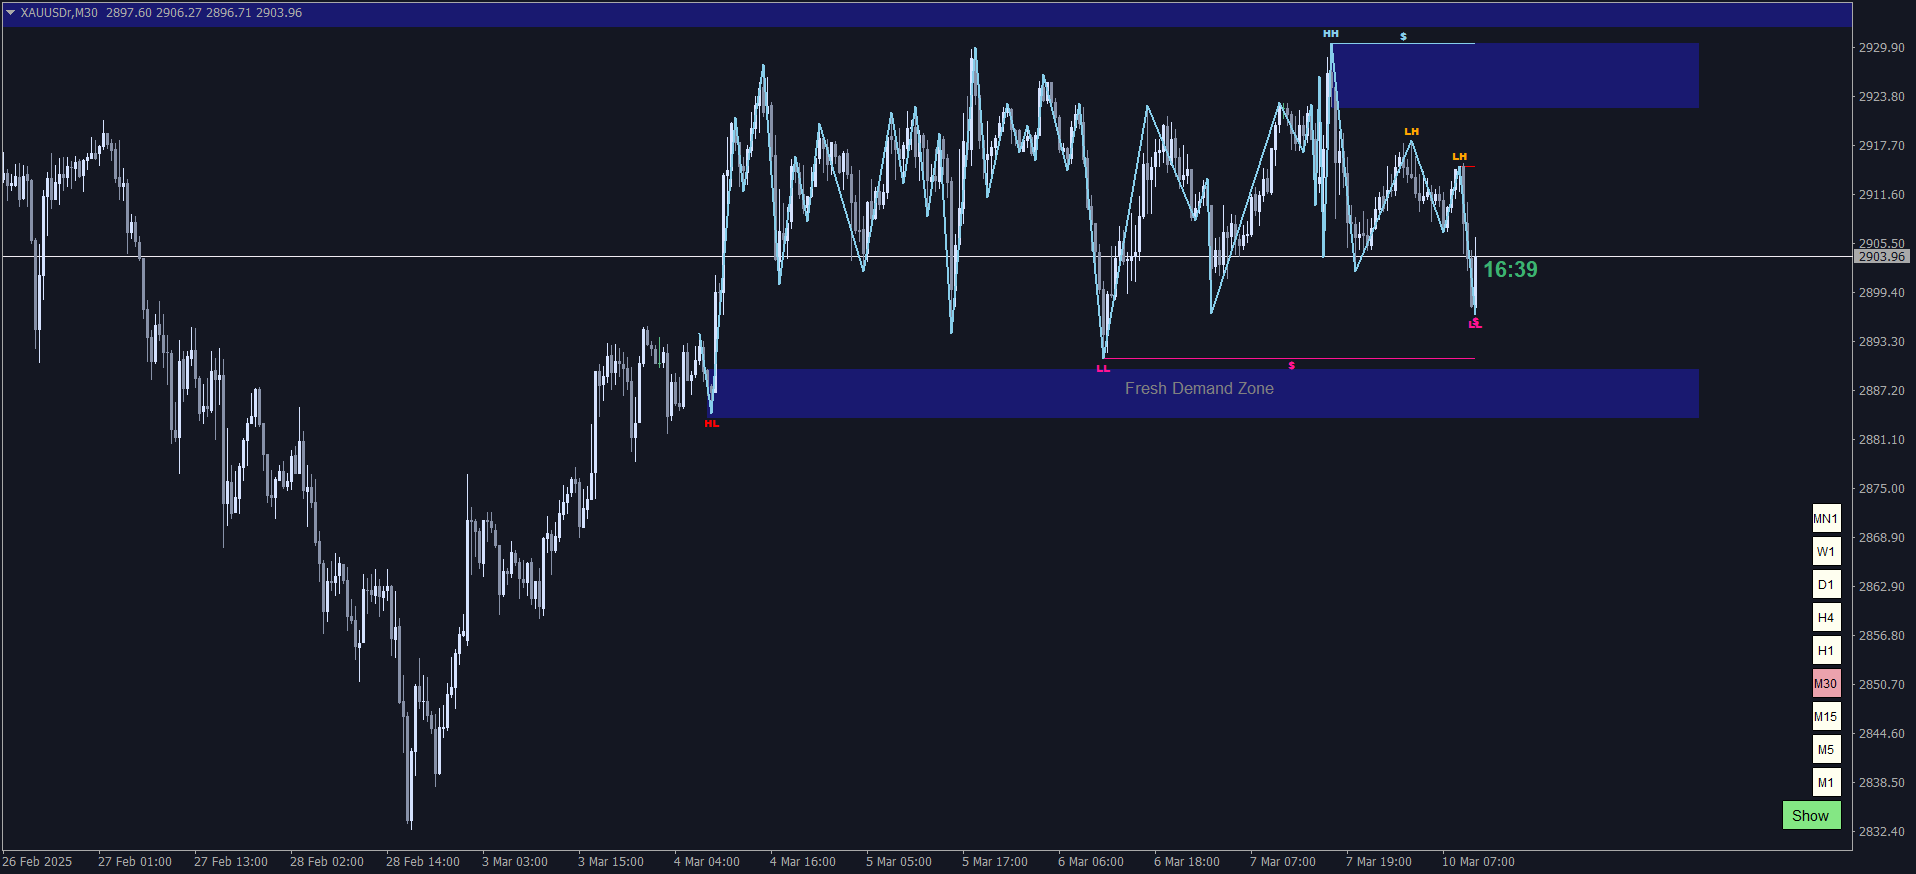
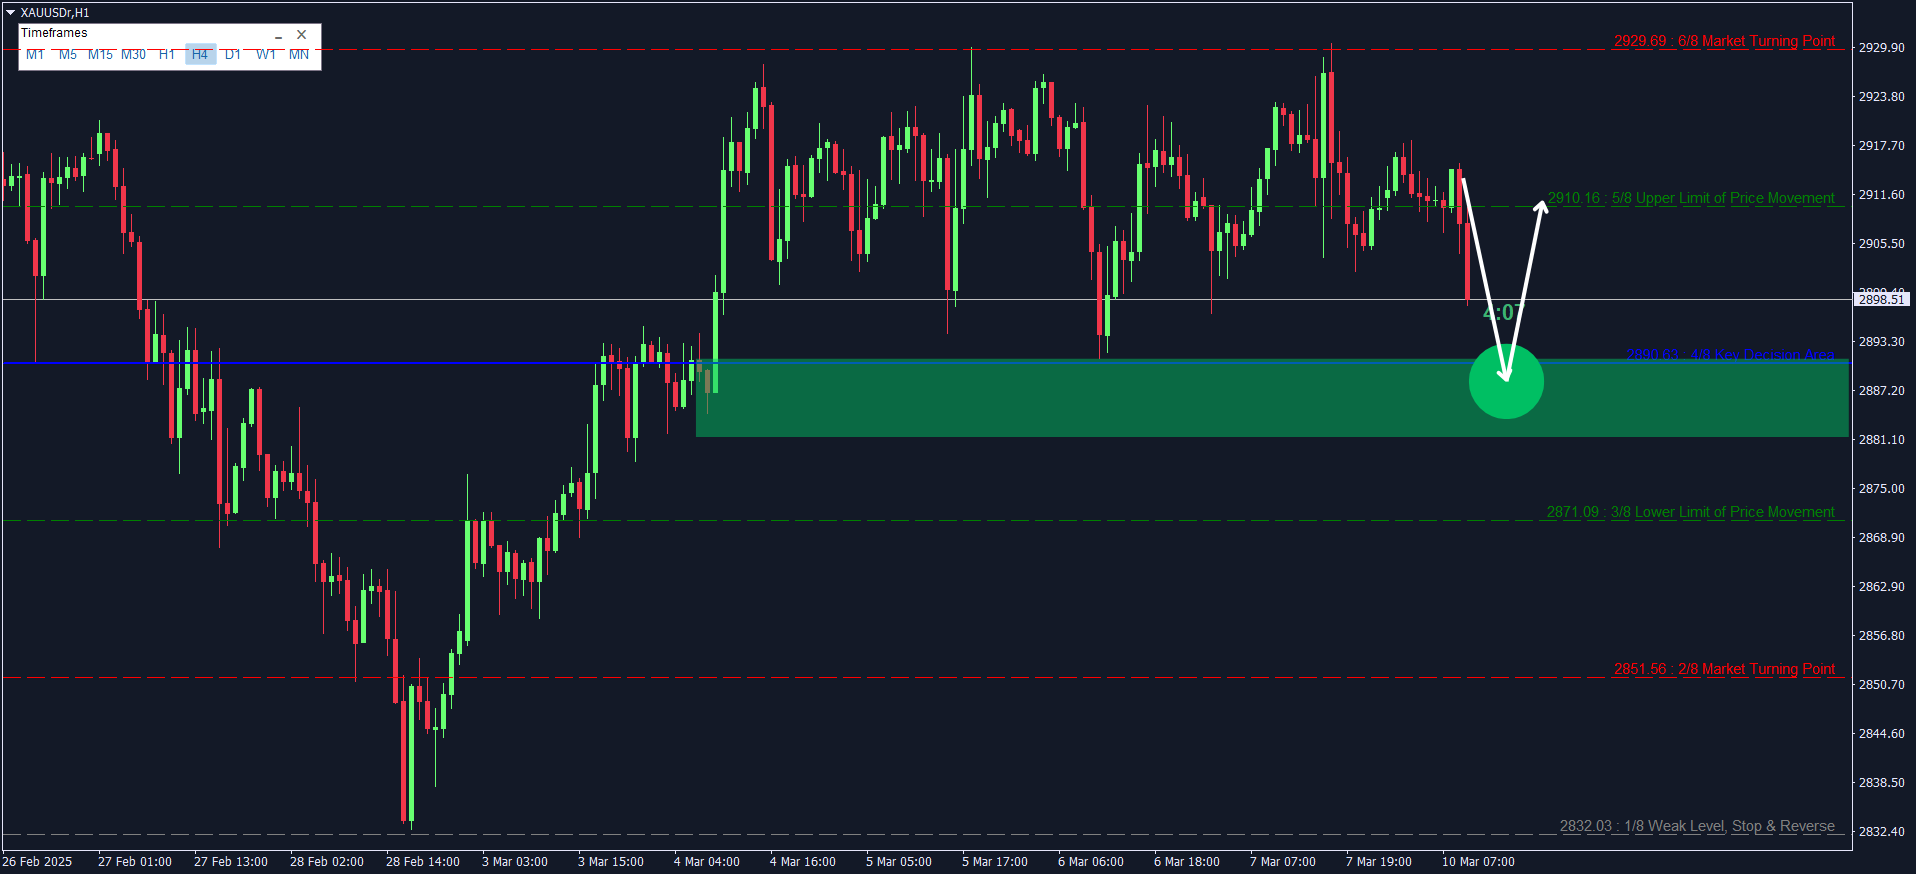
📈 Decoding Market Phases Like Never Before – The SuvashishFx Revolution!
🛑 Join To Learn Market Depth - https://www.mql5.com/en/channels/suvashishfx
🗄️ VPS I Use - https://bit.ly/3TyCwTK
👋 Hello, I'm Suvashish Halder – a Chart Analyst, Trader, and Data Expert 📊, dedicated to transforming market insights into profitable strategies.
Trading is a journey of continuous learning, where every day brings new discoveries. Patience, discipline, and risk management are the key pillars of success in this ever-evolving landscape.
Beyond trading, I develop innovative tools designed to enhance traders' experiences. While some tools may be game-changers, others may not fit every strategy—but the goal is to explore, learn, and grow together.
Wishing you all the best on your trading journey. Happy trading, and thank you! 🙏


Suvashish Halder
· 2
Suvashish Halder
2025.03.20
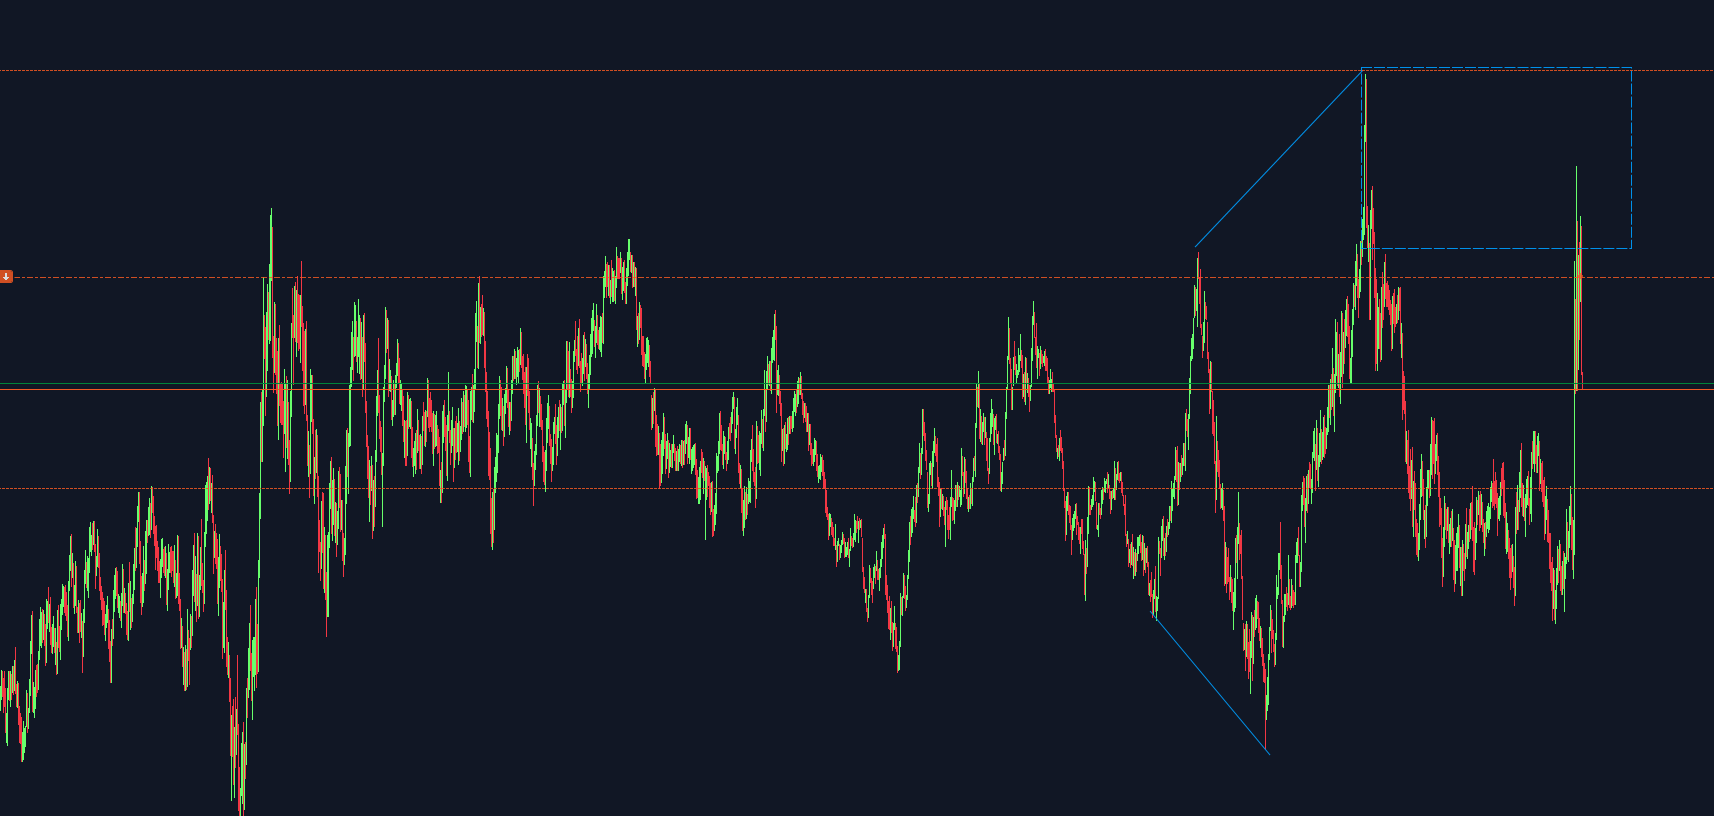
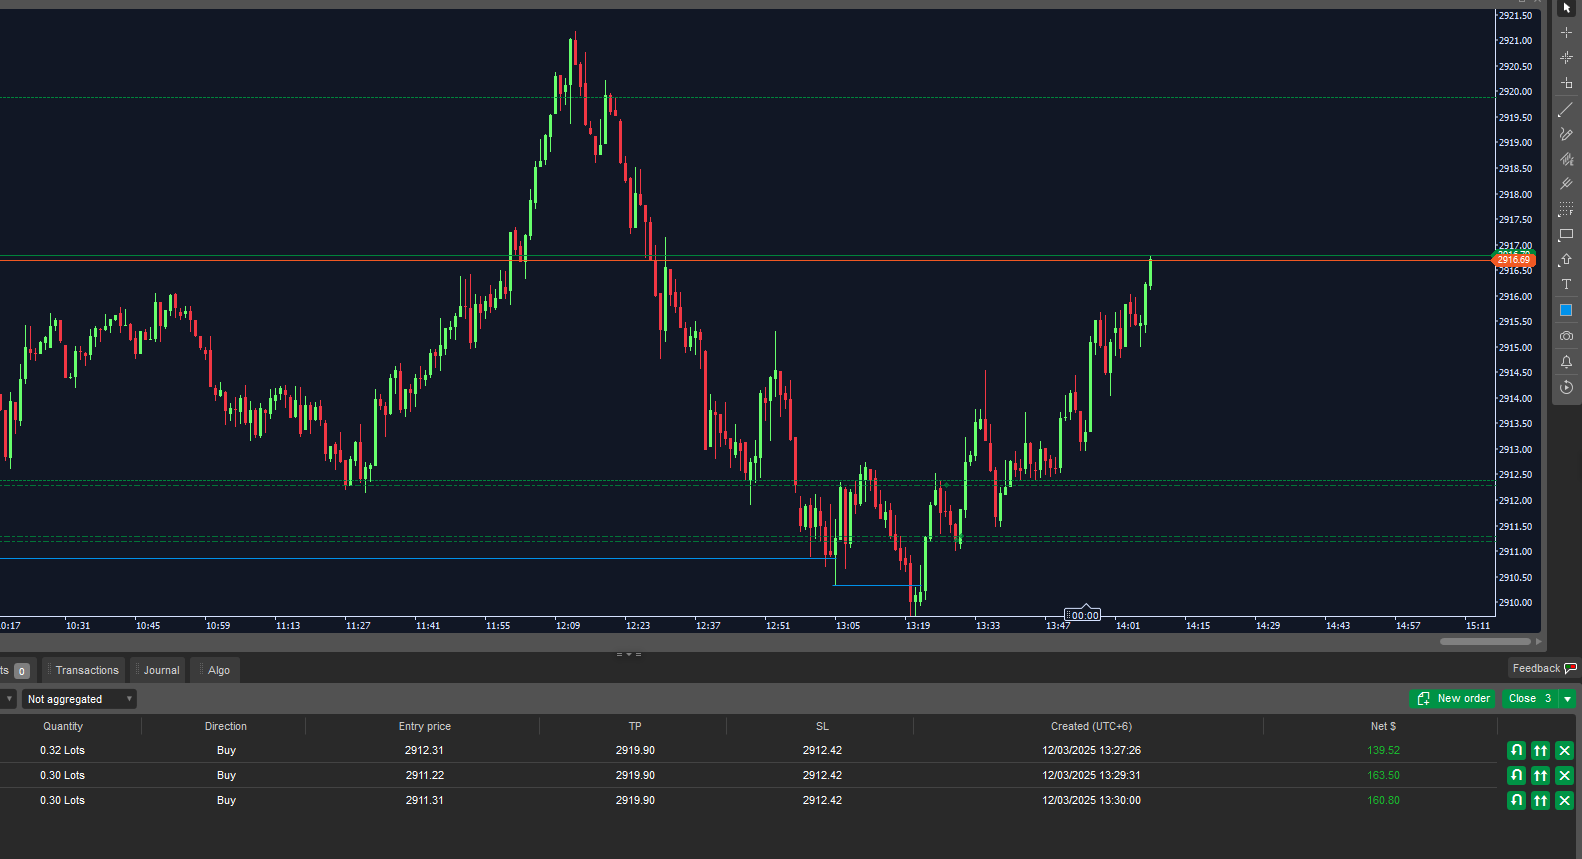
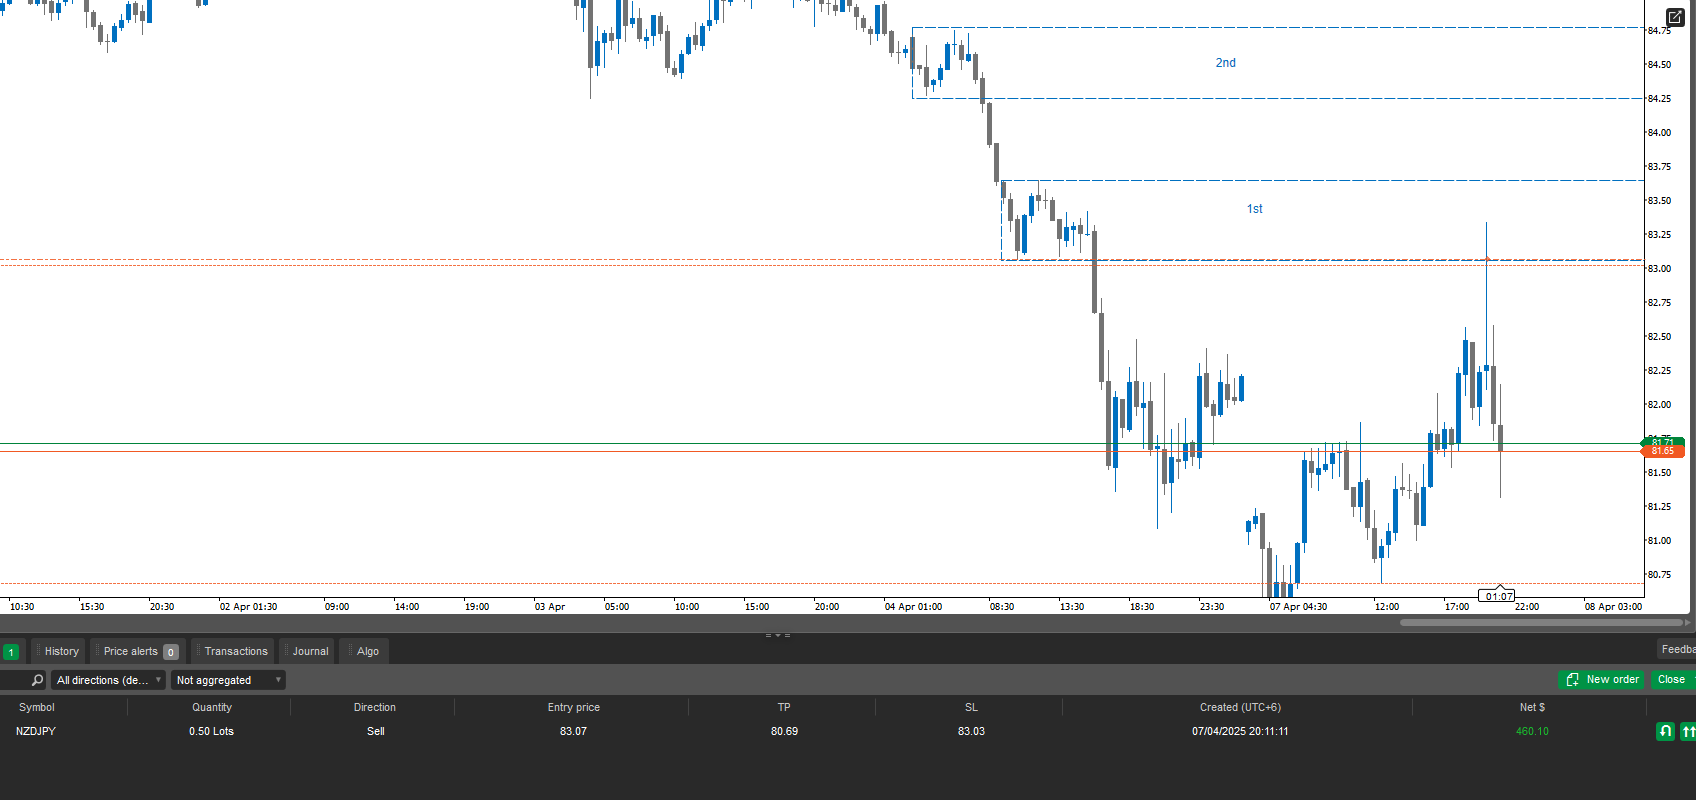
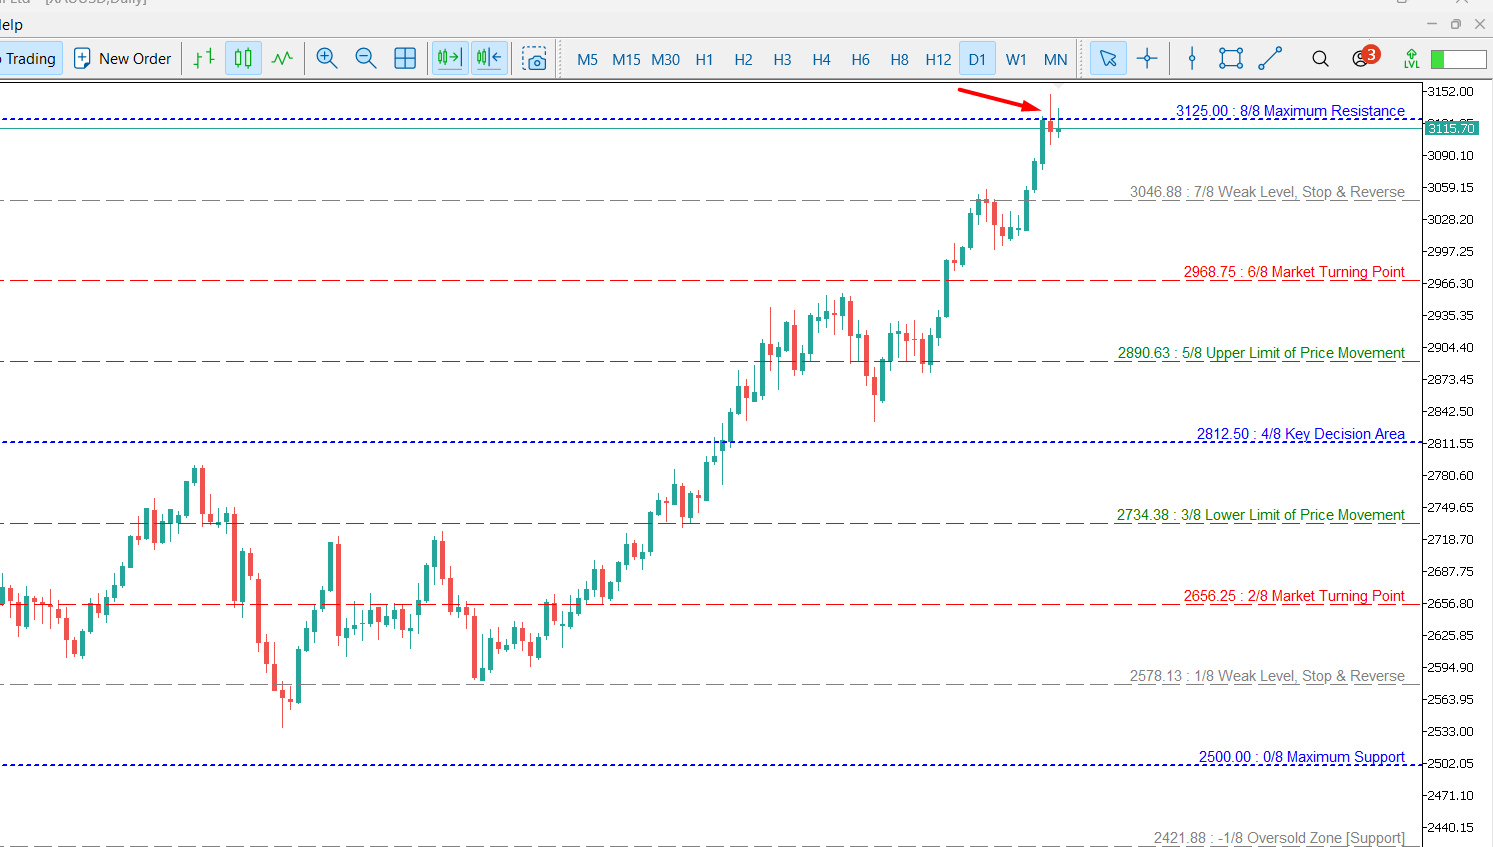
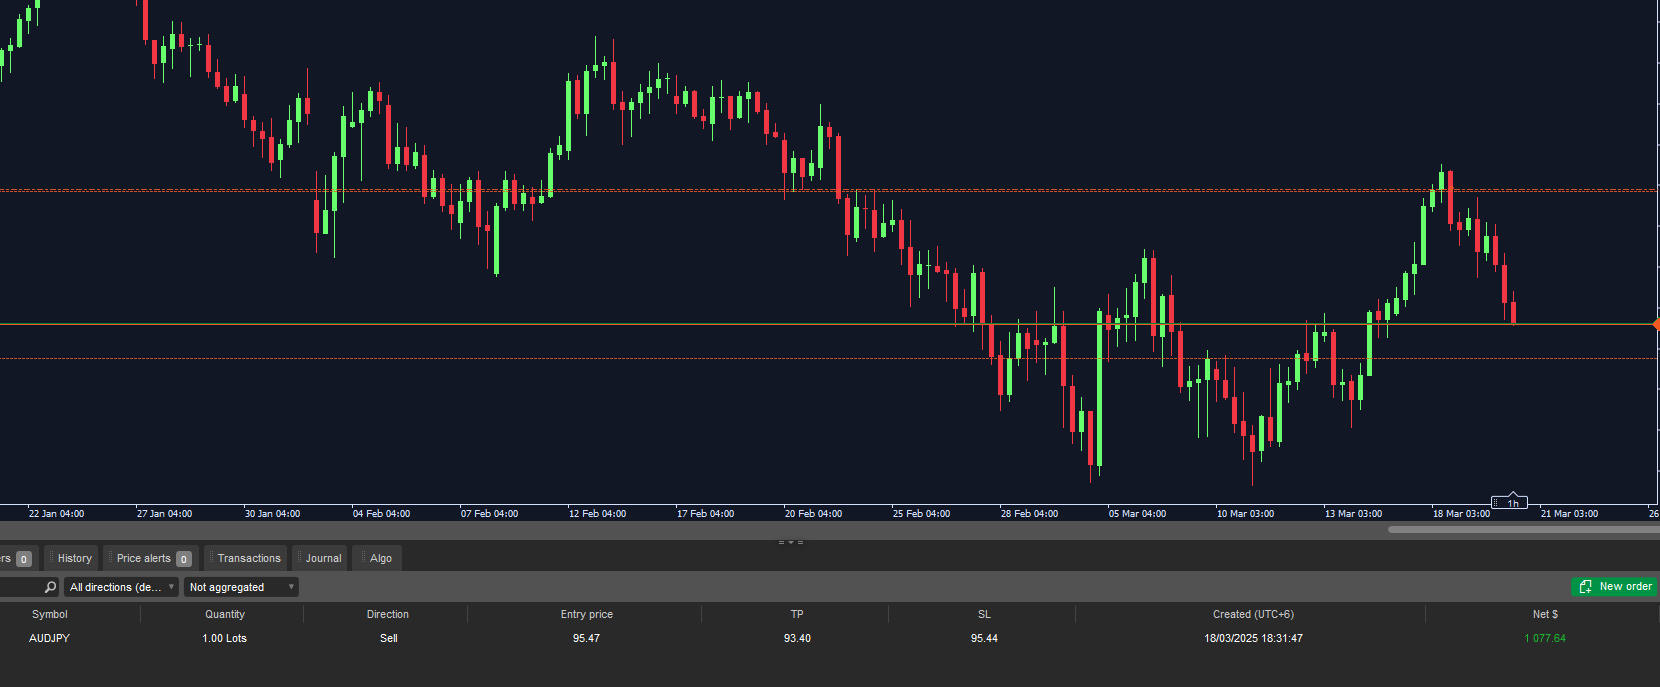
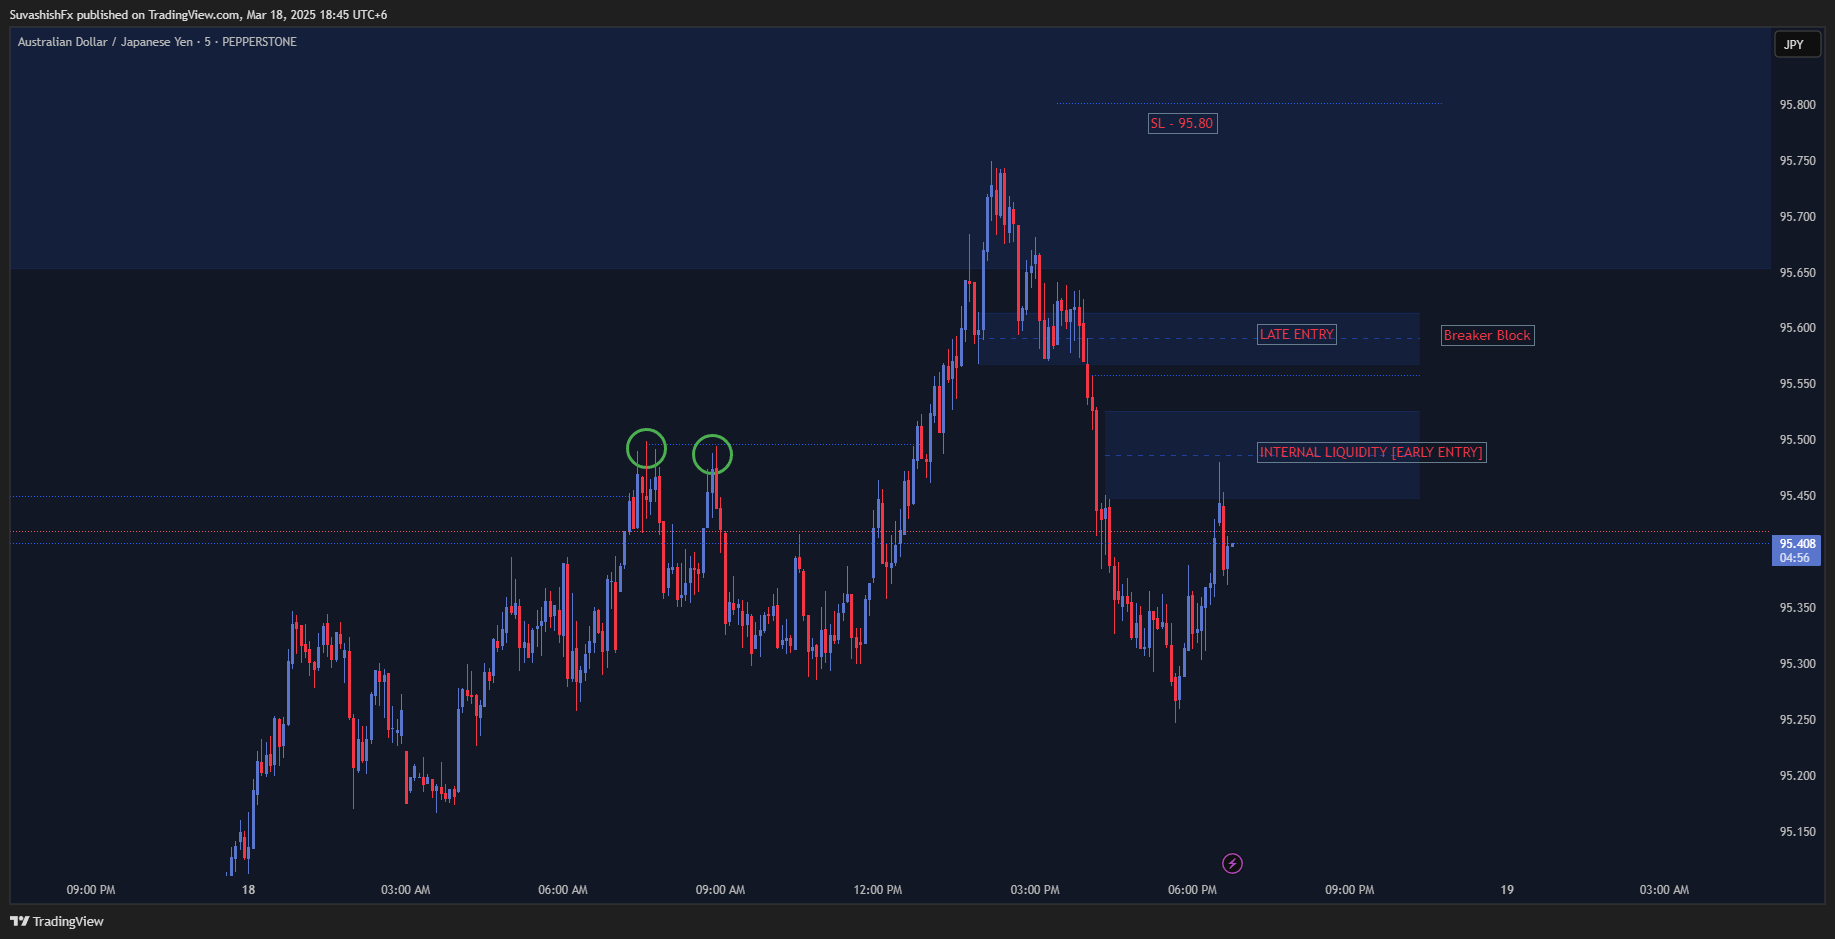
The risk-reward ratio was 1:5, meaning I aimed for 200 pips. Right now, it's up 170 pips in profit. Check my recent post for details!