Crowdsourced GUI. Open beta testing.
Closed Code -> Marketplace.
Open code -> Forum.
Closed Code -> Marketplace.
Open code -> Forum.
Okay. I'll post the open source code of the constructor. But, I need a couple of days to brush it up. Will you agree to wait?
Good. I'll publish the open source code of the constructor. But, I'll need a couple of days to comb through it. Will you agree to wait?
Your theme isn't going anywhere.
"What? Again?!)
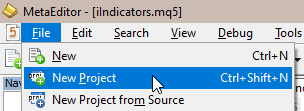
By the way, try creating a Project:
Okay. Just to clarify. The constructor or engine code itself is over 20,000 lines of code. In this thread, I wanted to teach people how to create a GUI in a markup language, not how to understand the code of the constructor itself. Therefore, I want to lay out the constructor code in one file, for user convenience.
All right. Just to clarify. The constructor or engine code itself is over 20,000 lines of code. In this thread, I wanted to teach people how to create a GUI in a markup language, not how to understand the code of the constructor itself. That's why I want to post the constructor code in one file, for users' convenience.
Nope. That way, every Market Seller will start its own branch like "Test my best EA".
Nope. That's how every Market vendor will start their own "Test my best EA" thread.
(chuckles) Okay. Whatever. I'll post it as is.
- Free trading apps
- Over 8,000 signals for copying
- Economic news for exploring financial markets
You agree to website policy and terms of use
I offer the community a GUI builder for MQL programsfor free use.
I will be grateful for your constructive participation.
P.S. The project is crowdsourced, which means we will implement it together.
//-----------------------------------------------------------------------------------------------------------------
CONSTRUCTION:
INSTRUCTIONS FOR INSTALLATION:
Step 1 - unpacking:
Step 2 - Install files:
Step 3 - preparation for work:
Step 4 - getting started:
Step 5 - Design the user GUI:
Step 6 - Save the custom GUI:
Step 7 - Connect the user GUI to the Expert Advisor:
Step 8 - receiving events from the controls:
HH. There is a compiled version of the builder with integrated resources on the blog :https://www.mql5.com/ru/blogs/post/733356
This version has only open source code, because the resources are located in different folders (sounds and subfolders with pictures) and there's no sense in transferring everything here with huge amount of explanations.