MQL5でのグラフィカルパネルの作成を簡単に

はじめに
MQL5は、コーディングのプロセスを容易にし、時間と労力を節約して効果的に物事を成し遂げるために使用できる多くの便利なツールを開発者に提供しています。このような便利なツールの一例として、MQL5には多くのライブラリやクラスがあり、開発者はこれらのアプリケーションのコードをゼロから構築することなく、多くのアプリケーションをコーディングするために使用することができます。これらのライブラリやクラスには、たとえばPanelsやDialogsがあります。この記事では、これらのクラスを使用してアプリケーションを作成する方法を学びます。また、同じアプリケーションを作成するための2つの異なる方法を紹介して、MetaTrader 5ソフトウェアを作成する際にMQL5クラスを使用することがいかに便利であるかを明らかにします。
加えて、この記事は、初心者開発者が、ゼロから自分のコードですぐに使えるようなアプリケーションをコーディングし作成することで、プログラミングロジックのスキルを強化向上させ、コーディングスキルを向上させる実践的なコンテンツとしても有効です。また、トレーダーは、取引中に気が散らないようにするための簡単なガイドとしても使えます。MQL5開発者の初心者の方は、MetaTrader 5ターミナルでグラフィカルなパネルを作成する方法を学ぶのに役立つガイドとして使用できます。このシンプルなガイドでは、シンプルなグラフィカルパネルを作成できるように、あるいは開発者だけではなくトレーダーが複雑なパネルを作成するために、このトピックにさらに深く入り込めるように、物事を単純化することを試みます。
以下のポイントを通して、トピックをカバーするよう努めたいと思います。
この記事のテーマを理解するのに役立てるため、MQL5のオブジェクト指向プログラミングのトピックに関する知識を持っていることをお勧めします。必要に応じて、MQL5オブジェクト指向プログラミング (OOP)についての私の記事を読んでください。
グラフィカルパネルの識別
この部分では、グラフィカルパネルが何を意味し、取引業界でどのように役立つかを説明します。パネルは、役立つ機能や情報を備えたグラフィカル インターフェイスです。例は、取引の開始と管理、口座や取引日などに関する情報の提供に使用できるパネルです。このようなパネルを使うことで、時間を節約したり、通常のやり方をせずに必要なものを簡単に手に入れたりすることができるため、非常に便利であり、取引中は取引や市場分析により集中することができます。
それによれば、パネル上のオブジェクトやタスク、あるいはユーザーとパネルとのインタラクションの性質に応じて、パネルをカスタマイズすることができます。
- 数値
- 文字列
- 形
- 色
- ボタン
- その他
このようなパネルを自分たちで開発したりコーディングしたりするにはどうすればいいのかと聞かれた場合、2つの方法があると答えることができます。最初の方法は、すべてを最初からコーディングする難しい方法です。この方法には多くの時間と労力がかかりますが、これによりコーディングスキルが向上するため、開発者であればその方法を理解しておく必要があります。仕事でそれを使用することはなくても、少なくともそのタスクを自分で理解して実行できるようにするために使用します。もう1つの方法は、既成のクラスやライブラリを使用するという最も簡単でスムーズな方法で、多くの時間と労力を費やすことなく、素早く効果的に作業をおこなうことができます。この記事の残りで、これらのパネルを作成するために使用できるクラスについて詳しく説明します。さらに、クラスを使うことが価値あることであることを判断し、確認できるようにするために、2つの方法を使った簡単なアプリケーションを作成します。
PanelsクラスとDialogsクラス
この部分では、グラフィカルパネルを簡単に作成するのに役立つクラスについて説明します。PanelクラスとDialogsクラスを参照します。この記事で紹介するのは一部なので、詳細についてはMQL5リファレンスを参照してください。
PanelsやDialogsのコントロールを作成するためのクラスは、指標やエキスパートアドバイザー(EA)を含むインタラクティブなパネルやアプリケーションを作成したり開発したりするための、すぐ使用できるコードを持つライブラリであると言えます。インクルードフォルダ内のControlsフォルダ内のターミナルデータフォルダにあります。補助クラス、基本クラス、単純クラス、複雑クラスがあり、それぞれ異なる操作に使用できます。以下は、これらのクラスの例です。
| クラス | インクルードファイル名(Controlsフォルダ) | 詳細 |
|---|---|---|
| CLabel | Label.mqh | 編集不可能なテキストラベルを作成するためのシンプルなコントロールクラス |
| CButton | Button.mqh | シンプルなボタンを作成するためのシンプルなコントロールクラス |
| CEdit | Edit.mqh | ユーザーがテキストを入力できるようにするシンプルなコントロールクラス |
| CPanel | Panel.mqh | コントロールと他の類似した機能をグループにまとめるためのシンプルなコントロールクラス |
| CCheckBox | CheckBox.mqh | チェックボックスを表示し、ユーザーが真か偽かを選択できるようにする複雑なコントロールクラス |
| CSpinEdit | SpinEdit.mqh | インクリメントとデクリメントフィールドによって整数値を編集できる複雑なコントロールクラス |
| CDialog | Dialog.mqh | コントロールと他の異なる機能をグループにまとめるための複雑なコントロールクラス |
前述のクラスやその他のクラスからわかるように、通常のコードを通じて、またはクラスを使用せずに実行しようとすると多大な時間と労力がかかる多くのタスクは、これらのクラスを使用して実行できます。また、同じビューを次のように拡張することもできます。 他のクラスは、パネル以外の他のタスクの実行に役立ちます。もし、簡単な例やアプリケーションを通してその違いを確認したいのであれば、次の部分でそれをおこなうことになります。
シンプルなグラフィカルパネルアプリケーション
この部分では、ロットサイズを決定した後に売買注文を建てるために使用できる、シンプルな取引パネルの作成方法を学びます。このパネルは2つの方法を使用して作成します。1つ目ではクラスを使用せずに独自のコードを作成し、2つ目ではクラスを使用します。クラスの使用が目的をスムーズかつ簡単に達成するのにどれだけ役立つかを確認して比較します。また、クラスを使用せずに独自のコードをパネルで確認することで、プログラミングロジックとコーディングスキルが向上します。
クラスなしのグラフィカルパネル
この記事ではパネルの作成を学習することに焦点を当てているため「Trade」クラスは使用しますが、それ以外はクラスを使用せずにロットサイズを決定した後に買い注文と売り注文を開くための簡単な注文パネルを作成するための次の手順を示します。
includeを使用してTradeインクルードファイルをインクルードし、tradeという名前で未決済注文に使用するオブジェクトを作成します。
#include <Trade\Trade.mqh>
CTrade trade;
ブール値の取引開始関数を作成して、ENUM_ORDER_TYPE型の取引の注文タイプ変数とdouble型のロットサイズ変数を設定します。これらは、作成するこの関数のパラメータになります。関数の本体は次のようになります。
- double型の価格変数の作成
- if条件を使用して、注文タイプに基づいて価格タイプ(売/買呼値)を決定する条件を設定します。
- 注文タイプが買いの場合、注文を開始するために使用される価格は売呼値です。
- 注文タイプが売りの場合、価格は買呼値です。
- 現在の銘柄、注文タイプ、ロットサイズ、価格タイプ、ストップロスとテイクプロフィットのゼロ値、および空のコメントでポジションを開いて、戻ります。
bool openTrade(ENUM_ORDER_TYPE type, double vol)
  {
   double price;
   if(type==ORDER_TYPE_BUY)
   {
      price=SymbolInfoDouble(Symbol(),SYMBOL_ASK);
   }
   else price=SymbolInfoDouble(Symbol(),SYMBOL_BID);

   return trade.PositionOpen(Symbol(),type,vol,price,0,0,"");
  }
const ENUM_BASE_CORNER型のpanelLoc変数を作成した後、左上隅を選択してパネルの位置を設定します。
const ENUM_BASE_CORNER panelLoc=CORNER_LEFT_UPPER;
const整数型変数xとyを作成した後に、xとyのマージンを設定します。
const int xMargin=20;
const int yMargin=20;
別のconst整数型変数を作成した後、xとyの要素間にスペースを設定します。
const int xSpace=10;
const int ySpace=10;
ボタンの幅を表すbtnWidth、ボタンの高さを表すbtnHeight、テキストの幅を表すtxtWidth、テキストの高さを表すtxtHeightの4つのconst int変数を作成した後、ボタンとテキストである要素のサイズを設定します。
const int btnWidth=50;
const int btnHeight=20;
const int txtWidth=(btnWidth*2)+xSpace;
const int txtHeight=20;
テキストとボタンの位置を設定すると、テキストx、テキストy、買いボタンx、買いボタンy、売りボタンx、売りボタンyとなります。これらすべてに対してconst整数型変数を宣言し、それぞれに値を代入します。
const int txtX=3;
const int txtY=yMargin+txtHeight;
const int buyX=3;
const int buyY=txtY+ySpace+btnHeight;
const int sellX=buyX+xSpace+btnWidth;
const int sellY=txtY+ySpace+btnHeight;
テキスト、買いボタン、売りボタンの各要素にconst文字列変数を作成した後、各要素の名前を割り当てます。
const string txtName="txttVol";
const string buyName="buyBtn";
const string sellName="sellBtn";
double型の初期値付きロットサイズ変数を作成します。
double lotSize=0.01;
OnInit()で、後で作成するcreatePanel()関数を呼び出します。
createPanel();
OnDeinit()では、オブジェクトの名前を使って削除します。
   ObjectDelete(0,txtName);
   ObjectDelete(0,buyName);
   ObjectDelete(0,sellName);
グローバルスコープに、パネルとのインタラクションを可能にする関数を以下の手順で作成します。
OnChartEven関数とそのパラメータを使用します。
- const int id:イベントID
- const long &lparam:long型のイベントパラメータ用
- const double &dparam:double型のイベントパラメータ用
- const string &sparam:文字列型のイベントパラメータ用
オブジェクトのテキスト(ロットサイズ)、買いボタン、売りボタンとのインタラクションの条件を設定します。
//+------------------------------------------------------------------+
//| Interaction function                                             |
//+------------------------------------------------------------------+
void OnChartEvent(const int id, const long &lparam, const double &dparam, const string &sparam)
  {
//--- If the event id is equal to the end of text editing in the panel and the string type event is equal to the text name
   if(id==CHARTEVENT_OBJECT_ENDEDIT && sparam==txtName)
     {
      //--- lotTxt string variable will be equal to the returned property value by using the ObjectGetString function
      string lotTxt=ObjectGetString(0, txtName, OBJPROP_TEXT);
      //--- call setLot function that we will create later with the lotTxt value
      setLot(lotTxt);
      //Setting the property value by using the ObjectSetString
      ObjectSetString(0, txtName, OBJPROP_TEXT, string(lotSize));
      //--- Use return
      return;
     }
//--- If the event id is equal to the object click to check if we click the buy button
   else
      if(id==CHARTEVENT_OBJECT_CLICK)
        {
         //We will check if the string param is equal to buyname
         if(sparam==buyName)
           {
            //--- Setting the value of the property by using the ObjectSetInteger
            ObjectSetInteger(0, buyName, OBJPROP_STATE, false);
            //Calling the created openTrade to open a buy order.
            openTrade(ORDER_TYPE_BUY, lotSize);
            //--- Use return
            return;
           }
         //--- If the event id is equal to the object click to check if we click the sell button
         //--- We will check if the string param is equal to sellname
         else
            if(sparam==sellName)
              {
               //--- Setting the value of the property by using the ObjectSetInteger
               ObjectSetInteger(0, sellName, OBJPROP_STATE, false);
               //Calling the created openTrade to open a sell order
               openTrade(ORDER_TYPE_SELL, lotSize);
               //--- Use return
               return;
              }
        }
  }
OnInit()で呼び出したvoid createPanel関数を以下の手順で作成します。
- txtName、buyName、sellNameのオブジェクトを削除します。
- EditCreate関数を呼び出します。
- 買いボタンのButtonCreate関数を呼び出します。
- 売りボタンのButtonCreate関数を呼び出します。
//+------------------------------------------------------------------+
//|createPanel function                                              |
//+------------------------------------------------------------------+
void createPanel()
  {
//--- Delete objects of txtName, buyName, and sellName
   ObjectDelete(0, txtName);
   ObjectDelete(0, buyName);
   ObjectDelete(0, sellName);
//--- calling the EditCreate function
   EditCreate(             // Parameters:
      0,                   // const long (chart_ID): to specify the chart's ID, we will use (0).
      txtName,             // const string (name): to specify the button name,  we will use (txtName)
      0,                   // const int (sub_window): to specify the subwindow index, we will use (0) for the main window
      txtX,                // const int (x): to specify the X coordinate, we will use (txtX)
      txtY,                // const int (y): to specify the Y coordinate, we will use (txtY)
      txtWidth,            // const int (width):to specify the button width, we will use (txtWidth)
      txtHeight,           // const int (height): to specify the button height, we will use (txtHeight)
      string(lotSize),     // const string (text): to specify the text, we will use (lotSize)
      "Arial",             // const string (font): to specify the font, we will use "Arial"
      10,                  // const int (font_size): to specify the font size, we will use (10)
      ALIGN_LEFT,          // const ENUM_ALIGN_MODE (align_mode): to specify the position of text, we will use (ALIGN_LEFT)
      false,               // const bool (read_only=false): to specify the ability to edit, we will be (false)
      panelLoc,            // const ENUM_BASE_CORNER (corner): to specify the chart corner for anchoring, we will call panelLoc function
      clrBlack,            // const color (clr): to specify the text color, we will specify clrBlack
      clrWhite,            // const color (back_clr): to specify the background color, we will specify clrWhite
      clrBlack,            // const color (border_clr): to specify the border color, we will specify clrBlack
      false,               // const bool (back=false): in the background, we will set false
      false,               // const bool (selection=false): highlight to move, we will set false
      false,               // const bool (hidden): hidden in the object list, we will set false
      0);                  // const long (z_order=0): priority for a mouse click, we will use (0)
//--- calling the ButtonCreate function for the buy
   ButtonCreate(           // Parameters:
      0,                   // const long (chart_ID): to specify the chart's ID, we will use (0)
      buyName,             // const string (name): to specify the button name, we will use (buyName) for the buy button
      0,                   // const int (sub_window): to specify the subwindow index, we will use (0) for the main window
      buyX,                // const int (x): to specify the X coordinate, we will use (buyX) for buy
      buyY,                // const int (y): to specify the Y coordinate, we will use (buyY) for buy
      btnWidth,            // const int (width): to specify the button width, we will use (btnWidth) for buy
      btnHeight,           // const int (height): to specify the button height, we will use (btnHeight) for buy
      panelLoc,            // const ENUM_BASE_CORNER (corner): to specify the chart corner for anchoring, we will call panelLoc function for buy button
      "Buy",               // const string (text): to specify the text, we will use ("Buy") for the buy button
      "Arial",             // const string (font): to specify the font, we will use "Arial"
      10,                  // const int (font_size): to specify the font size, we will use (10)
      clrBlack,            // const color (clr): to specify the text color, we will specify clrBlack
      clrGreen,            // const color (back_clr): to specify the background color, we will specify clrGreen for the buy button
      clrBlack,            // const color (border_clr): to specify the border color, we will specify clrBlack
      false,               // const bool (state): to specify if the object is pressed or released, we will specify false
      false,               // const bool (back=false): in the background, we will set false
      false,               // const bool (selection=false): highlight to move, we will set false
      false,               // const bool (hidden): hidden in the object list, we will set false
      0);                  // const long (z_order=0): priority for mouse click, we will use (0) for buy button
//--- calling the ButtonCreate function for the sell
   ButtonCreate(          //Parameters:
      0,                   //const long (chart_ID): to specify the chart's ID, we will use (0)
      sellName,            //const string (name): to specify the button name, we will use (sellName) for the sell button
      0,                   //const int (sub_window): to specify the subwindow index, we will use (0) for the main window
      sellX,               //const int (x): to specify the X coordinate, we will use (sellX) for sell
      sellY,               //const int (y): to specify the Y coordinate, we will use (sellY)
      btnWidth,            //const int (width): to specify the button width, we will use (btnWidth) for sell
      btnHeight,           //const int (height): to specify the button height, we will use (btnHeight) for sell
      panelLoc,            //const ENUM_BASE_CORNER (corner): to specify the chart corner for anchoring, we will call panelLoc function for sell button
      "Sell",              //const string (text): to specify the text, we will use ("Sell") for the sell button
      "Arial",             //const string (font): to specify the font, we will use "Arial"
      10,                  //const int (font_size): to specify the font size, we will use (10)
      clrBlack,            //const color (clr): to specify the text color, we will specify clrBlack
      clrRed,              //const color (back_clr): to specify the background color, we will specify clrRed for the sell button
      clrBlack,            //const color (border_clr): to specify the border color, we will specify clrBlack
      false,               //const bool (state): to specify if the object is pressed or released, we will specify false
      false,               //const bool (back=false): in the background, we will set false
      false,               //const bool (selection=false): highlight to move, we will set false
      false,               //const bool (hidden): hidden in the object list, we will set false
      0);                  //const long (z_order=0): priority for mouse click, we will use (0) for sell button
  }
lotSizeに使用されるlotTxtを1つのパラメータとするvoid setLot関数を作成します。関数本体は以下の通りです。
- StringToDouble関数を使用して文字列からdoubleに変換した後、doubleのnewLot変数を作成し、それをlotTxtに代入する
- newLot変数が0より小さければ、「Invalid Volume Specified」というメッセージを表示し、returnを使う
- lotSizeと同じになるようにnewLotの値を返す
void setLot(string lotTxt)
  {
   double newLot=StringToDouble(lotTxt);
   if(newLot<0)
     {
      Print("Invaid Volume Specified");
      return;
     }
   lotSize=newLot;
  }
以下の手順でEditCreate関数を作成します。
//+------------------------------------------------------------------+
//|EditCreate function                                               |
//+------------------------------------------------------------------+
bool EditCreate(const long             chart_ID=0,
                const string           name="Edit",
                const int              sub_window=0,
                const int              x=0,
                const int              y=0,
                const int              width=50,
                const int              height=18,
                const string           text="Text",
                const string           font="Arial",
                const int              font_size=10,
                const ENUM_ALIGN_MODE  align=ALIGN_CENTER,
                const bool             read_only=false,
                const ENUM_BASE_CORNER corner=CORNER_LEFT_UPPER,
                const color            clr=clrBlack,
                const color            back_clr=clrWhite,
                const color            border_clr=clrNONE,
                const bool             back=false,
                const bool             selection=false,
                const bool             hidden=true,
                const long             z_order=0)
  {
//--- Reset the error value by using ResetLastError()
   ResetLastError();
//--- Create an edit field
   if(!ObjectCreate(chart_ID, name, OBJ_EDIT, sub_window, 0, 0))
     {
      Print(__FUNCTION__,
            ": failed to create \"Edit\" object! Error code = ", GetLastError());
      return(false);
     }
//--- Setting the object coordinates x and y by using the ObjectSetInteger
   ObjectSetInteger(chart_ID, name, OBJPROP_XDISTANCE, x);
   ObjectSetInteger(chart_ID, name, OBJPROP_YDISTANCE, y);
//--- Setting the object size by using the ObjectSetInteger function also
   ObjectSetInteger(chart_ID, name, OBJPROP_XSIZE, width);
   ObjectSetInteger(chart_ID, name, OBJPROP_YSIZE, height);
//--- Setting the text by using ObjectSetString function
   ObjectSetString(chart_ID, name, OBJPROP_TEXT, text);
//--- Setting the text font by using the ObjectSetString function also
   ObjectSetString(chart_ID, name, OBJPROP_FONT, font);
//--- Setting the font size by using the ObjectSetInteger function
   ObjectSetInteger(chart_ID, name, OBJPROP_FONTSIZE, font_size);
//--- Setting the type of text alignment in the object
   ObjectSetInteger(chart_ID, name, OBJPROP_ALIGN, align);
//--- Setting the ability to edit, enable if it is (true) or cancel (false) if you need a read-only mode
   ObjectSetInteger(chart_ID, name, OBJPROP_READONLY, read_only);
//--- Setting the chart's corner, relative to which object coordinates are defined to set the location of the object.
   ObjectSetInteger(chart_ID, name, OBJPROP_CORNER, corner);
//--- Setting the text color
   ObjectSetInteger(chart_ID, name, OBJPROP_COLOR, clr);
//--- Setting the background color
   ObjectSetInteger(chart_ID, name, OBJPROP_BGCOLOR, back_clr);
//--- Setting the border color of the object
   ObjectSetInteger(chart_ID, name, OBJPROP_BORDER_COLOR, border_clr);
//--- Displaying in the foreground by (false) or in the background by (true)
   ObjectSetInteger(chart_ID, name, OBJPROP_BACK, back);
//--- Setting (true) to enable or (false) to disable the mode of moving the label by mouse
   ObjectSetInteger(chart_ID, name, OBJPROP_SELECTABLE, selection);
   ObjectSetInteger(chart_ID, name, OBJPROP_SELECTED, selection);
//--- Setting (true) if you need hiding or (false) if you need the display of graphical object name in the object list
   ObjectSetInteger(chart_ID, name, OBJPROP_HIDDEN, hidden);
//--- Setting the priority for receiving the event of a mouse click in the chart
   ObjectSetInteger(chart_ID, name, OBJPROP_ZORDER, z_order);
//--- Returning (true) if successful execution
   return(true);
  }
ButtonCreate関数の作成は、EditCreate関数の前のパラメータと同じですが、少し違いがあります。
bool ButtonCreate(const long              chart_ID=0,
                  const string            name="Button",
                  const int               sub_window=0,
                  const int               x=0,
                  const int               y=0,
                  const int               width=50,
                  const int               height=18,
                  const ENUM_BASE_CORNER  corner=CORNER_LEFT_UPPER,
                  const string            text="Button",
                  const string            font="Arial",
                  const int               font_size=10,
                  const color             clr=clrBlack,
                  const color             back_clr=C'236,233,216',
                  const color             border_clr=clrNONE,
                  const bool              state=false,
                  const bool              back=false,
                  const bool              selection=false,
                  const bool              hidden=true,
                  const long              z_order=0)
  {
   ResetLastError();
   if(!ObjectCreate(chart_ID,name,OBJ_BUTTON,sub_window,0,0))
     {
      Print(__FUNCTION__,
            ": failed to create the button! Error code = ",GetLastError());
      return(false);
     }
   ObjectSetInteger(chart_ID,name,OBJPROP_XDISTANCE,x);
   ObjectSetInteger(chart_ID,name,OBJPROP_YDISTANCE,y);
   ObjectSetInteger(chart_ID,name,OBJPROP_XSIZE,width);
   ObjectSetInteger(chart_ID,name,OBJPROP_YSIZE,height);
   ObjectSetInteger(chart_ID,name,OBJPROP_CORNER,corner);
   ObjectSetString(chart_ID,name,OBJPROP_TEXT,text);
   ObjectSetString(chart_ID,name,OBJPROP_FONT,font);
   ObjectSetInteger(chart_ID,name,OBJPROP_FONTSIZE,font_size);
   ObjectSetInteger(chart_ID,name,OBJPROP_COLOR,clr);
   ObjectSetInteger(chart_ID,name,OBJPROP_BGCOLOR,back_clr);
   ObjectSetInteger(chart_ID,name,OBJPROP_BORDER_COLOR,border_clr);
   ObjectSetInteger(chart_ID,name,OBJPROP_BACK,back);
   ObjectSetInteger(chart_ID,name,OBJPROP_STATE,state);
   ObjectSetInteger(chart_ID,name,OBJPROP_SELECTABLE,selection);
   ObjectSetInteger(chart_ID,name,OBJPROP_SELECTED,selection);
   ObjectSetInteger(chart_ID,name,OBJPROP_HIDDEN,hidden);
   ObjectSetInteger(chart_ID,name,OBJPROP_ZORDER,z_order);
   return(true);
  }
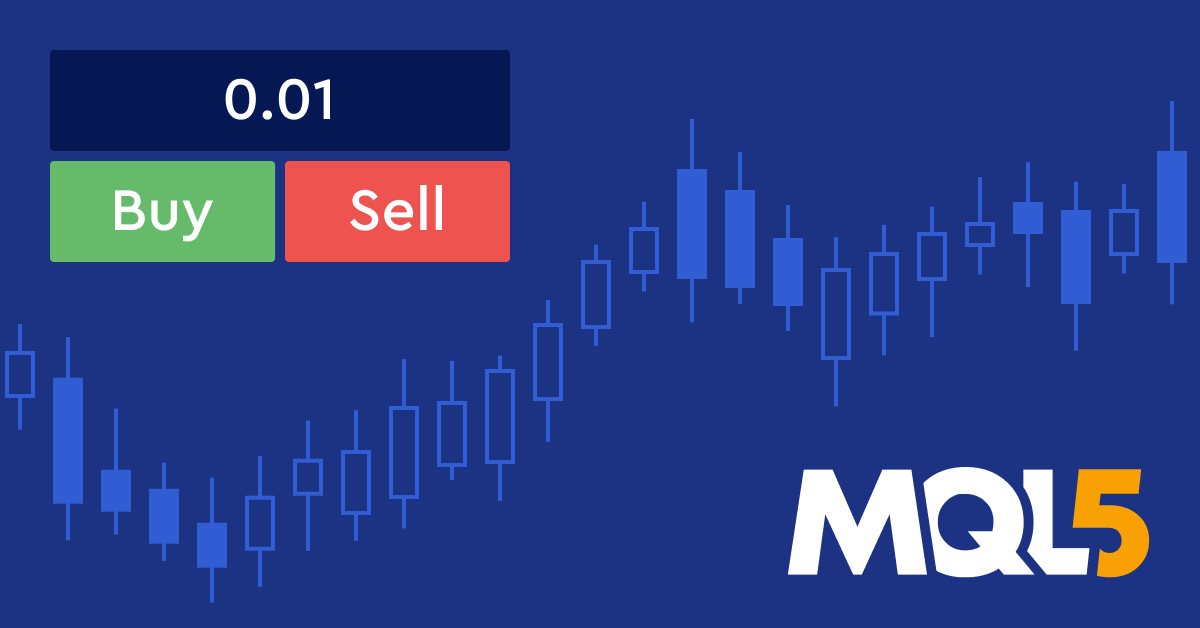
コードをコンパイルして実行すると、以下のようにパネルが表示されます。

先ほどの図でわかるように、左上にはロットサイズと売り買いの2つのボタンがあるパネルがあり、必要なロットサイズを指定し、必要なタイプに基づいて買いまたは売りを押して注文を出すことができます。これはPanelsやDialogsのクラスを使わずにパネルを作成する最初の方法ですが、この方法には多くのコード行が必要です。次に、PanelsクラスとDialogsクラスを使用して同じパネルを作成し、これら2つの方法を比較することで複雑さや長いコードを評価および確認します。
クラスを使ったグラフィカルパネル
ここでは、必要なクラスを使用して同じパネルを作成する2番目の方法を示します。次が手順です。
プログラム内でコンポーネントを使用するために必要なファイルまたはクラス(Dialog、Button、Edit、Trade)をインクルードします。これはご存知のように#includeコマンドを使えば可能です。
#include <Controls\Dialog.mqh>
#include <Controls\Button.mqh>
#include <Controls\Edit.mqh>
#include <Trade\Trade.mqh>
定数にニーモニック名を割り当てるプリプロセッサ指令である#defineマクロ置換を使うと、これらは以下のようになります。
- PANEL_NAME "Order Panel"
- PANEL_WIDTH 116
- PANEL_HIEIGHT 100
- ROW_HEIGHT 20
- BUY_BTN_NAME "Buy BTN"
- SELL_BTN_NAME "Sell BTN"
- CLOSE_BTN_NAME "Close BTN"
- EDIT_NAME "Lot Size"
#define PANEL_NAME "Order Panel"
#define PANEL_WIDTH 116
#define PANEL_HIEIGHT 100
#define ROW_HEIGHT 20
#define BUY_BTN_NAME "Buy BTN"
#define SELL_BTN_NAME "Sell BTN"
#define CLOSE_BTN_NAME "Close BTN"
#define EDIT_NAME "Lot Size"
クラスからオブジェクトを作成する方法は、次のとおりです。
CAppDialog panel;
CButton buyBtn;
CButton sellBtn;
CButton closeBtn;
CEdit lotSize;
CTrade trade;
OnInit()で、作成したオブジェクトpanel.Createとそのパラメータを使用して、パネルオブジェクトを作成します。
- const long chart:メインチャートにパネルを表示するには0を使用
- const string name:PANEL_NAMEを使用
- const int subwin:0を使用
- const int x1:10を使用
- const int y1:20を使用
- const int x2:10+PANEL_WIDTH+8を使用
- const int y2:20+PANEL_HIEIGHTを使用
panel.Create(0,PANEL_NAME,0,10,20,10+PANEL_WIDTH+8,20+PANEL_HIEIGHT);
以下の手順で売買ボタンを作成し、設定します。
- object.Createを使用してオブジェクトを作成
- object.Widthを使用して売買オブジェクトの幅を設定
- object.Heightを使用して売買オブジェクトの高さを設定
- object.ColorBackgroundを使用してオブジェクトの背景色を設定
- object.Text.Textを使用してオブジェクトのテキストを設定
- object.Font.Fontを使用してオブジェクトのフォントを設定
- object.FontSizeを使用してオブジェクトのフォントサイズを設定
- object.Color.Colorを使用してオブジェクトの色を設定
- object.ColorBorderを使用してオブジェクトの境界線を設定
- オブジェクトのオブジェクトをパネルに配置
- 次にパネルを動かす
int OnInit()
  {
   //buy button
   panel.Create(0,PANEL_NAME,0,10,20,10+PANEL_WIDTH+8,20+PANEL_HIEIGHT);
   buyBtn.Create(0,BUY_BTN_NAME,0,3,40,0,0);
   buyBtn.Width(50);
   buyBtn.Height(ROW_HEIGHT);
   buyBtn.ColorBackground(clrGreen);
   buyBtn.Text("Buy");
   buyBtn.Font("Arial");
   buyBtn.FontSize(10);
   buyBtn.Color(clrBlack);
   buyBtn.ColorBorder(clrBlack);
   panel.Add(buyBtn);
   //sell button
   sellBtn.Create(0,SELL_BTN_NAME,0,63,40,0,0);
   sellBtn.Width(50);
   sellBtn.Height(ROW_HEIGHT);
   sellBtn.ColorBackground(clrRed);
   sellBtn.Text("Sell");
   sellBtn.Font("Arial");
   sellBtn.FontSize(10);
   sellBtn.Color(clrBlack);
   sellBtn.ColorBorder(clrBlack);
   panel.Add(sellBtn);
   //lotSize
   lotSize.Create(0,EDIT_NAME,0,4,10,0,0);
   lotSize.Width(108);
   lotSize.Height(ROW_HEIGHT);
   lotSize.Text("0.01");
   lotSize.Font("Arial");
   lotSize.FontSize(10);
   lotSize.ColorBackground(clrWhite);
   lotSize.Color(clrBlack);
   lotSize.ColorBorder(clrBlack);
   panel.Add(lotSize);
   //run the panel
   panel.Run();
   return(INIT_SUCCEEDED);
  }
OnDeinit(const int reason)では、初期化解除関数として以下のDestroyを使います。
void OnDeinit(const int reason)
  {
   panel.Destroy();
  }
次のように、OnChartEvent関数を使ってパネルとのインタラクションを有効にし、売買ボタンの動作の条件を設定します。
- OnChartEvent関数の作成
- 関数本体
- object.ChartEventを使用(パラメータはid:イベントID、lparam:long型イベント、dparam:double型イベント、sparam:文字列型イベント)
- idがChart Clickと等しいかどうかを確認
- sparamが名前としてbuyBtnまたはsellBtnと等しいかどうかを確認
- ロットのdouble型変数を作成し、StringToDouble(ロットサイズ値)に代入
- ロット値を使って、イベントの種類に応じて買い注文または売り注文を出す
void  OnChartEvent(const int id, const long &lparam, const double &dparam, const string &sparam)
  {
   panel.ChartEvent(id,lparam,dparam,sparam);
   if(id==CHARTEVENT_OBJECT_CLICK)
     {
      if(sparam==buyBtn.Name())
        {
         double lot=StringToDouble(lotSize.Text());
         trade.Buy(lot);
        }
      else
         if(sparam==sellBtn.Name())
           {
            double lot=StringToDouble(lotSize.Text());
            trade.Sell(lot);
           }
     }
  }
コードをコンパイルして実行ファイルを実行すると、次の図のようにチャートにパネルが接続されているのがわかります。
")
前の図でわかるように、パネル左上隅にロットサイズ、買い、売りがあり、ロットサイズと未決済注文を編集することができます。
2つの異なる方法で同じパネルを作成した結果、クラスを使用しない場合よりも、クラスを使用した場合の方が簡単でスムーズにパネルを作成できることがわかりました。クラスは非常に便利で、コードを簡単に作成して時間を大幅に節約できますが、開発者には、これらのクラスや組み込み関数のような既製のものを作成する方法を学び、理解しようとすることをお勧めします。これは、コーディングとプログラミングのスキルとロジックを向上させるための非常に良い方法です。コーディングするときにクラスを作成すると、繰り返しのタスクを実行する時間を節約できるだけでなく、よりスムーズかつ簡単にコーディングできるようになります。
このタイプのパネルを作成する方法を学んだ後で、これは単純なアプリケーションであり、より多くの機能を使用することで、より発展させることができるということを述べておきます。というのも、パネルは私たちが述べたようなシンプルなものから、非常に複雑でより多くのツールや機能を備えたものまであるからです。ここでの目的は、これらのクラスの重要性と価値を見極めた上で、その使い方を理解することです。
結論
この記事の最後では、クラスの使用は一般的に価値があり有用であり、特にMetaTrader 5で使用できるパネルを作成する場合に役立つと結論付けることができます。パネルは、トレーダーにとって多くのことに役立ちます。これらのパネルを使用する以外に多くの重要なタスクを実行することなく、取引自体と市場に集中できるようになります。また、パネルとは何か、その種類と例を学び、パネルを簡単に作成するためのPanelsクラスとDialogクラスについて学びました。2種類の方法(これらのクラスを使用せずに通常のコードで、そして、これらのクラスを使用して)簡単なパネルをアプリケーションとして作成し、クラスを使用しない場合にどれだけの時間と労力を消費するかを確認しました。
この記事が読者にとって有益であり、提供された情報が理解しやすく、実現しやすいものであることを願っています。また、より多くの言及されたアプリケーションを開発する方法や、取引に役立つ便利なパネルを作成するために開発し、深く掘り下げる方法、あるいはMQL5開発者の初心者である場合、クラスを使用するこの重要なトピックによっておこなう方法について、新しいことを学び、より多くの洞察が得られたことを願っています。
クラスとオブジェクトについてもっと理解し、学びたいのであれば、以前の記事「MQL5オブジェクト指向プログラミング(OOP)について」を読むことをお勧めします。最も人気のあるテクニカル指標を使用した取引システムの作成方法についてお読みになりたい場合は、私の記事セクションから過去の記事をお読みいただけます。
MetaQuotes Ltdにより英語から翻訳されました。
元の記事: https://www.mql5.com/en/articles/12903
- 無料取引アプリ
- 8千を超えるシグナルをコピー
- 金融ニュースで金融マーケットを探索
でも、「ヒストリカルデータを使ったデバッグ」ではうまくいきませんでした。-- チェックボックスを いくつか見逃してしまったのでしょうか?
OnChartEvent()はStrategy Testerの EAでは機能しないので、OnTick()でボタンの状態をチェックする必要があります。
https://www.mql5.com/en/forum/170896
OnChartEvent()はStrategy Testerの EAでは機能しないので、OnTick()でボタンの状態をチェックする必要があります。
https://www.mql5.com/en/forum/170896
コメントありがとうございます。
この記事の主な目的は、クラスを使って簡単なパネルを作成する方法を明らかにすることです。
code: "buyBtn.ToolTip ("Click open buy order")"
失敗しました。
code: "buyBtn.ToolTip ("Click open buy order")"
失敗しました。