

High Tools Guide
In this section, you can read the guide to using the “High Tools”
Version MetaTrader 4: https://www.mql5.com/en/market/product/68684
1-After running the tool, in the first step, you will see the basic settings.
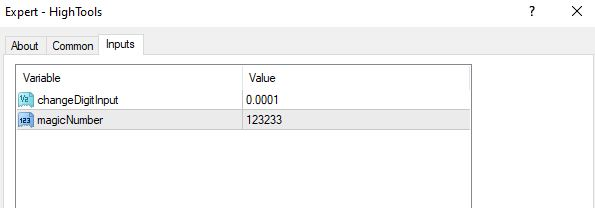
In the first setting, you can adjust the amount of bar displacement (in the second part of the tool).
(Read the complete settings guide in the settings guide section)
In the second setting, specify the magic number for the trades taken with this tool. An arbitrary number
2-In the second step, you will see the initial page of the tool.
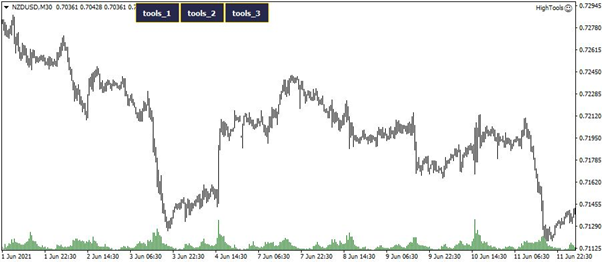
As you know, in version 1.0, this tool consists of 3 tools. Each section has its own characteristics.
We will get acquainted with each section step by step.
3-Click on the first tool to get acquainted with this section.

This tool shows your history trades in detail with each trade.
In version 1.0, in this section, we see 3 types of information from each trade:
Type of trade, volume of trade and profit of each trade
For example, in the figure above, our trading type is "buy". The trading volume is 0.1 lots and our profit is $ 57.28.
In later versions, we can display more information if you wish.
4-Click on the second tool to get acquainted with this section.
Note that to use this section, you must enable "automatic trading" .
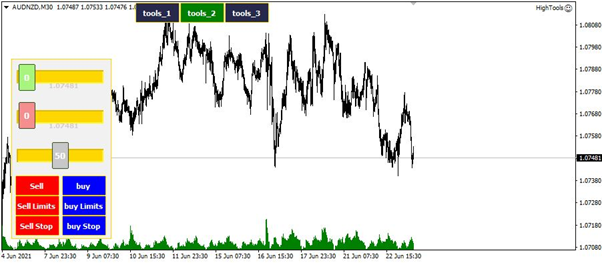
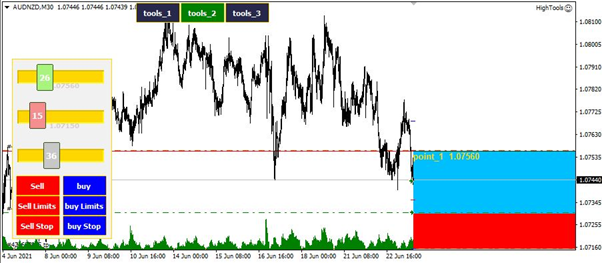
In this section, you can do all kinds of trades easily and accurately. Easily specify the location of the SL & TP and Choose one of the trades.
According to the instructional video posted on the site, click on the first option and move it so that you can find the exact location of a price for the SL or TP.
The second setting is the same as the first setting. Click on it once and then move it.
In the third setting, you can move the middle line location.
These settings are useful when you want to trade “buy Stop” or “by limit” or “Sell stop” and Sell limit”.
Finally, select one of the trading options.
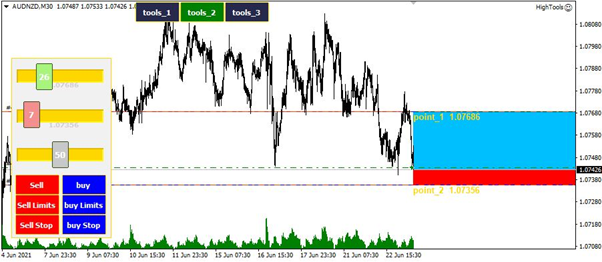
For example, in the figure above, I have made a Buy Trade. I put the loss limit at the bottom of the support line and the profit limit at the bottom of the resistance line.
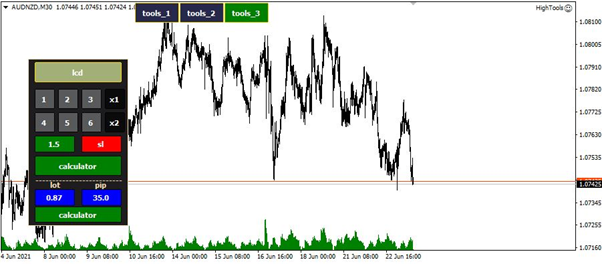
But in the figure below, I have done a “Sell stop” trade.
Using the second setting, I changed the location of the center line.
I moved down. Then I clicked on “Sell Stop”. Easily specify a “Sell stop” trade with the exact location.
5-Click on the third tool to get acquainted with this section.
This tool is a complete calculator. You can specify the risk of each of your trades and lot amount.
For example, if you have a “30 pips loss limit” and your trading volume is 0.1 lot, what percentage did you risk in that trade?
For example, I set the pip value to 50 pips and the trading volume to 0.1 lots. According to the account capital, I have risked 5%.
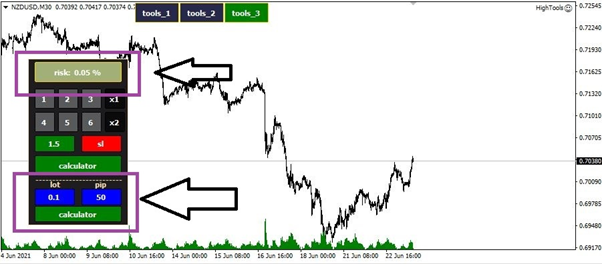
Enter the amount of inputs at the bottom and see the result at the top of the page.
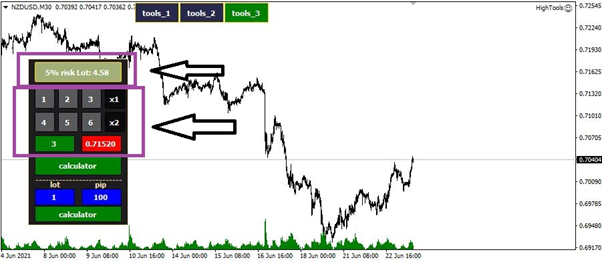
But at the top, you can specify the volume of the transaction. For example, if you want to take a 5% risk, you can calculate how many "lot" you should trade.
For example, I set the loss limit at 0.71520 and set the risk level at 3%. As you can see on the screen, I have to trade 2.72 lots.

But at the end of this part of the tool, you can choose the numbers for the “Risk”. That means you do not have to type using a numeric keypad. Choose a number as a risk. Then write the amount of the loss limit. Click the calculate button at the end.
For example, after writing the loss limit value of 0.71520, I clicked on the number 5 to risk 5% in each trade. Immediately on the screen, it was calculated for me that I should trade how much "lots".
We have reached the end of the training file. If you have any suggestions or criticisms, be sure to let us know. We do our best to provide you with the best market tools.


