Optimization management (Part I): Creating a GUI
Andrey Azatskiy | 14 August, 2019
Table of contents
- Introduction
- MetaTrader launch methods and configuration files
- Functionality of the desired add-on and technologies used
- ViewModel and a connector between MetaTrader and the implemented dll
- Conclusion and attachments
Introduction
The alternative method for launching the MetaTrader terminal was already discussed in an article by Vladimir Karputov. Also, the terminal launch steps and an additional alternative method are described in the relevant documentation. Data from these two sources was used within this article, but none of the sources contains a description of how one could create a convenient GUI for the simultaneous operation of multiple terminals. This topic will be covered in the given my article.
Based on the related research, I created an extension for the terminal which enables the launch of the optimization process of Expert Advisors on multiple terminals within one computer. Further article versions will expand the possibilities of this extension through the addition of new functionality.
The operation of the resulting version can be viewed in the video. This article provides only the description of the GUI creation process, while the logic of the extension will be demonstrated in the next part.
MetaTrader launch methods and configuration files
Before considering in detail the created extension, let us briefly review the terminal (as well as other applications) launch using command line. This method may seem somewhat archaic, but it is often used, for example in Linux-based operating systems, or it is also used to launch applications without a graphical interface.
Let us consider the terminal launch on the example of a simple program written in C++:
#include <iostream>

using namespace std;

int main()
{
    cout<<"Hello World";

    return 0;
}
After program compilation, we receive an .exe file. Run the file and the "Hello World" message will appear in the console, which is a usual behavior. Note that the starting function 'main' does not have any inputs, but this is a special case. If we change this program using another 'main' function overload, we will create a console application which receives a number of parameters:
#include <iostream>

using namespace std;

int main(int argc, char *argv[])
{
    cout << "Hello World" << endl;

    for(int i = 0; i < argc; i ++)
    {
        cout << argv[i] << endl;
    }

    return 0;
}
The first parameter 'argc' indicates the length of the array of arrays of the second parameter.
The second parameter is the list of countries input to the t=program at startup. This program can be called from console as follows:
./program "My name" "is Andrey"
where ./program is an indication of the program name, and other lines are its parameters separated by spaces. These parameters are written to
the passed array. The program execution result is shown below:
Hello World
./program
My name
is Andrey
The first message remains from the previous program, while all other strings were passed as parameters to the 'argv' array of strings (note that the first parameter is always the name of the application you are launching). We will not analyze this example in details, while it is only an illustration of how the MetaTrader application can be launched from the command line.
When working with parameters, usually flags are indicated in front of each of them: these flags indicate which parameter should receive the passed value. The C/C++ language features a number of functions for working with flags. This means that the simple application with the executable file extension (.exe), can be launched from the console with the passed parameters, which can change the application properties.
According to the official instruction, there are special flags and values for running MetaTrader using the command line:
- /login:login number (terminal.exe /login:100000)
- /config:path to the configuration file (terminal.exe /config:c:\myconfiguration.ini)
- /profile:profile name (terminal.exe /profile:Euro)
- /portable (terminal.exe /portable)
The flags can be combined. For example, using a combination of flags, you can launch the terminal in portable mode with the specified configuration file:
terminal.exe /config:c:\myconfiguration.ini /portable
Though the differences between the example 'Hello World' program and the terminal are huge, the methods of launching them using the command line are identical. We will use this feature when developing our add-on.
Pay special attention to the configuration file, path to which is specified using the /config key: due to this file the terminal understands which login/password should be used at launch, as well as the tester launch mode or generally the need to run the tester. I will not copy the configuration file use instructions here. However let us consider the structure of these files. Each configuration file consists of a series of sections indicated in square brackets.
[Tester]
The section is followed a key-value list containing the description of fields which characterize the program start parameters. Configuration files can also contain comments which start with characters ";" or "#". New configuration file formats are now available in addition to *.ini, which use XAML markup or json files and enable saving of a larger amount of data in one file. However MetaTrader uses only *.ini files. WinApi supports functions for operations with configuration files, which was used when developing a wrapper class for convenient operation with the required format. The used functions and the wrapper for working with the MetaTrader configuration files .
Functionality of the desired add-on and technologies used
To be able to work with the project, you should install Visual Studio IDE (Integrated Development Environment). This project was created using the Community 2019 version. During Visual Studio installation, you should also install .Net 4.6.1, which was used in developing this add-on. To help the readers, who do not have proficient knowledge of C#, in understanding the idea, I will provide detailed descriptions of specific language issues and of the techniques which I used during programming.
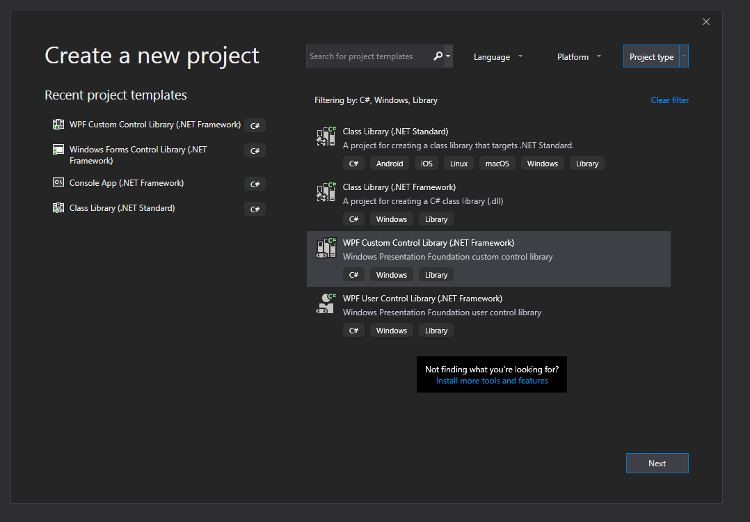
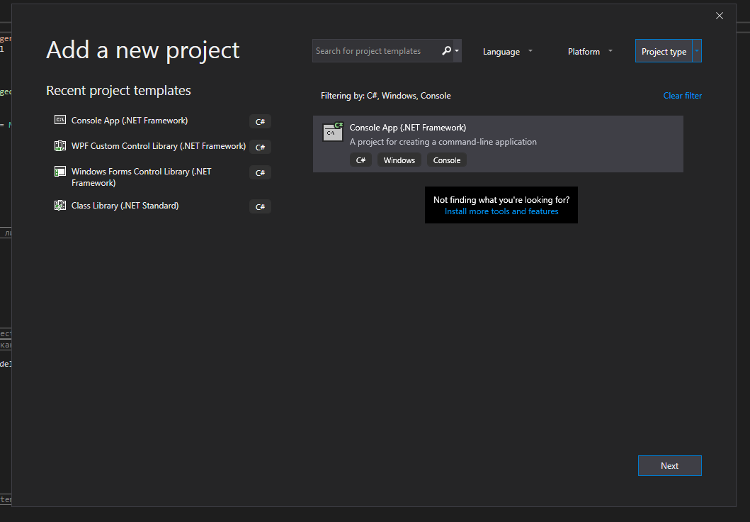
Since the most convenient method to create a graphical interface is to use the C# language and the MetaTrader terminal supports a convenient method for applying this language, we will use the provided possibilities. Recently, a few articles were published in this site, related to GUI creation using C#. These articles demonstrate GUI creation methods based on the Win Forms technology and a connecting dll which launches graphics using reflection mechanisms. The solution used by the article author is good enough, but for the current article I decided to use a more modern GUI development methods: using WPF technology. As a result, I managed to avoid the connecting library, while implementing everything needed within one single dll. To solve the main task, we need to create the type of the project which would allow us to store graphic objects described using the WPF technology. The project should be compiled into the dynamic library (*.dll file), which can be then loaded into the terminal. This project type exists: WpfCustomControlLibrary. This type was especially developed for creating custom graphic objects. AN example of this is a library which plots charts. We will use this type for our specific purpose, i.e. for creating an add-on for the MetaTrader terminal. To create this project type, select it from the list of projects in IDEVisual Studio, as it is shown in the below screenshot:
Let us call our project "OptimisationManagerExtention". The Themes folder is initially created in the project. It contains a (*.xaml) file "Generic.xaml": this file will store the styles which set colors, initial sizes, indents and similar properties of graphic objects. We will need this file later, therefore let's leave it as is. Another automatically generated file is the one containing the CustomControl1 class. We will not need this file, so let's delete it. Since more articles will be written based on this one, we need to provide the possibility to expand our add-on. It means we will need to use the MVVM programming template. If you are not familiar with the pattern, you please read explanation at this link. To implement a well structured code, let's create the "View" folder and add our graphic window to it. To create the graphic window, we need to add the Window (WPF) element to the created folder (as is shown in the below screenshot):
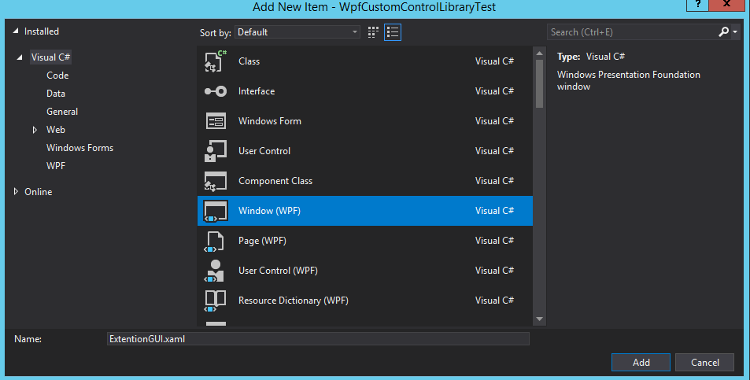
Let us call the window ExtentionGUI.xaml — this is the very graphic element which is shown in the above window. Let us consider namespaces. We created the project and called it OptimisationManagerExtention; after that Studio automatically generated the main namespace: "OptimisationManagerExtention". In C#, like in many other programming languages, the namespaces serve as containers, in which our objects are contained. Namespace properties can be demonstrated by the following example:
The below construction is incorrect, because both classes are declared in the same namespace:
namespace MyNamespace
{
    class Class_A
    {
    }

    class Class_A
    {
    }
}
The following use of classes is permissible, because both classes, despite the same name, are in different namespaces:
namespace MyFirstNamespace
{
    class Class_A
    {
    }
}

namespace MySecondNamespace
{
    class Class_A
    {
    }
}
There are also so-called nested namespaces. When these are used, one namespace contains a number of other namespaces. In this case the following code is also valid:
using System;
using System.Collections.Generic;
using System.Linq;
using System.Text;
using System.Threading.Tasks;

namespace MyNamespace
{
    class Class_A
    {
    }

    namespace Second
    {
        class Class_A
        {
        }
    }

    namespace First
    {
        class Class_A
        {
        }
    }
}
But since this form of recording is inconvenient, C# supports a short record, which is more convenient for perception:
namespace MyNamespace
{
    class Class_A
    {
    }
}

namespace MyNamespace.First
{
    class Class_A
    {
    }
}

namespace MyNamespace.Second
{
    class Class_A
    {
    }
}
The code variants presented in the two previous examples are identical, but the second one is more convenient. Having created the View folder, we created the nested namespace and thus the objects added to the View folder will be added to the "OptimisationManagerExtention.View" namespace. Accordingly, our window also has this namespace. To enable the application of styles, which we describe in the Generic.xaml file, to the entire window, we need to edit the XAML markup for this file. Firstly, we need to delete the code block which starts with the <Style> tag, because we do not need it. Secondly, we need to add a link to our window's namespace — this is done via the "xmlns:local" property. As a result, we obtain the following contents:
<ResourceDictionary
    xmlns="http://schemas.microsoft.com/winfx/2006/xaml/presentation"
    xmlns:x="http://schemas.microsoft.com/winfx/2006/xaml"
    xmlns:local="clr-namespace:OptimisationManagerExtention.View">

</ResourceDictionary>
In order to set the size/color or other properties for our window, we need to describe their style. I will not add here the details concerning the beauty of the application, but will only describe the necessary minimum. You can add any desired design, animation or other features. After editing, we obtain a file describing styles, while all styles are automatically applied to all elements of the window. It is very convenient, isn't it?
<ResourceDictionary
    xmlns="http://schemas.microsoft.com/winfx/2006/xaml/presentation"
    xmlns:x="http://schemas.microsoft.com/winfx/2006/xaml"
    xmlns:local="clr-namespace:OptimisationManagerExtention.View">

    <!--Set the window background color-->
    <Style TargetType="{x:Type local:ExtentionGUI}">
        <Setter Property="Background" Value="WhiteSmoke"/>
    </Style>

    <!--
    Set the background color for the dividing strip, by dragging which
    we change ranges of horizontally divided zones in the first tab
    of our window
    -->
    <Style TargetType="GridSplitter">
        <Setter Property="Background" Value="Black"/>
    </Style>

    <!--Set the height of drop-down lists-->
    <Style TargetType="ComboBox">
        <Setter Property="Height" Value="22"/>
    </Style>

    <!--Set the height of calendars-->
    <Style TargetType="DatePicker">
        <Setter Property="Height" Value="22"/>
    </Style>

    <!--Set the height of text boxes-->
    <Style TargetType="TextBox">
        <Setter Property="Height" Value="22"/>
    </Style>

    <!--Set the height of buttons-->
    <Style TargetType="Button">
        <Setter Property="Height" Value="22"/>
    </Style>

</ResourceDictionary>
For the styles to be applied to the window, describe the link to them in the XAML markup of our window: after the opening tag <Window> indicate the following construction setting the path to the file with resources relative to the window position.
<!--Connect styles-->
<Window.Resources>
    <ResourceDictionary Source="../Themes/Generic.xaml"/>
</Window.Resources>
In addition to the created View directory, create a few more directories:
- ViewExtention — here we will store a number of classes expanding he possibilities of the standard XAML markup; this is used to pass the table click event from View (our graphics) into ViewModel (the layer which connects the graphics and Model in which the application logic description is stored).
- ViewModel — here ViewModel and related objects will be stored.
As you may guess, the layer responsible for the graphics of the application is described exclusively in the XAML markup, without using the C# language directly. Having created the appropriate directories, we created 2 more nested namespaces which should be added to the XAML markup of our window in order to be able to use them. Let us also create the "ExtentionGUI_VM" class in the OptimisationManagerExtention.ViewModel namespace. This class will be our connector object. However, in order to be able to perform required functions, it should be inherited from the "INotifyPropertyChanged" interface. It contains the PropertyChanged event, via which the graphical part is notified of a change in the value of any of the fields, and thus of the need to update the graphic. The created file looks as follows:
/// <summary>
/// View Model
/// </summary>
class ExtentionGUI_VM : INotifyPropertyChanged
{
    /// <summary>
    /// The event of a change in any of the ViewModel properties
    /// and its handlers
    /// </summary>
    #region PropertyChanged Event
    public event PropertyChangedEventHandler PropertyChanged;
    /// <summary>
    /// The PropertyChanged event handler
    /// </summary>
    /// <param name="propertyName">Updated variable name</param>
    protected virtual void OnPropertyChanged(string propertyName)
    {
        PropertyChanged?.Invoke(this, new PropertyChangedEventArgs(propertyName));
    }
    #endregion
}
The XAML markup after creating the window and adding all links looks as follows:
<Window x:Class="OptimisationManagerExtention.View.ExtentionGUI"
        xmlns="http://schemas.microsoft.com/winfx/2006/xaml/presentation"
        xmlns:x="http://schemas.microsoft.com/winfx/2006/xaml"
        xmlns:d="http://schemas.microsoft.com/expression/blend/2008"
        xmlns:mc="http://schemas.openxmlformats.org/markup-compatibility/2006"
        xmlns:local="clr-namespace:OptimisationManagerExtention.ViewModel"
        xmlns:viewExtention="clr-namespace:OptimisationManagerExtention.ViewExtention"
        mc:Ignorable="d"
        Title="ExtentionGUI" Height="450" Width="1100">

    <!--Connect styles-->
    <Window.Resources>
        <ResourceDictionary Source="../Themes/Generic.xaml"/>
    </Window.Resources>
    <!--Connect ViewModel-->
    <Window.DataContext>
        <local:ExtentionGUI_VM />
    </Window.DataContext>

    <Grid>


    </Grid>
</Window>
The main preparation for developing GUI for our application have been done and thus we can proceed to filling the XAML markup of our window for creating the graphic layer. All controls will be written inside the <Grid/> block. For those who do not have enough experience in working with the XAML markup, I recommend opening it directly from the studio and check reading. Those who are familiar with this tool, can use the code pieces available in this article. If we compare the two GUI creation methods (WinForms / WPF), in addition to the obvious differences, they also have similarities. Remember WinForms interfaces, in which all graphic elements are presented as class instances and are stored in the hidden part of an abstract class (such as Button or ComboBox).
Thus, it turns out that the entire WinForms graphical application consists of a set of interconnected object instances. By analyzing the WPF markup, it is hard to imagine that it based on the same principle. Each markup element, for example, the "Grid" tag, is actually a class, and thus you can recreate exactly the same application without using XAML markup, while utilizing only classes from the corresponding namespace. However, this would be ugly and bulky. Actually, by opening the <Grid> tag, we indicate that we want to create the class instance. Then the compiler mechanisms parse the markup which we have specified and create instances of required objects. This property of WPF applications enables the creation of custom graphic objects, or objects which extend the standard functionality. Further we will consider how to implement extra functionality.
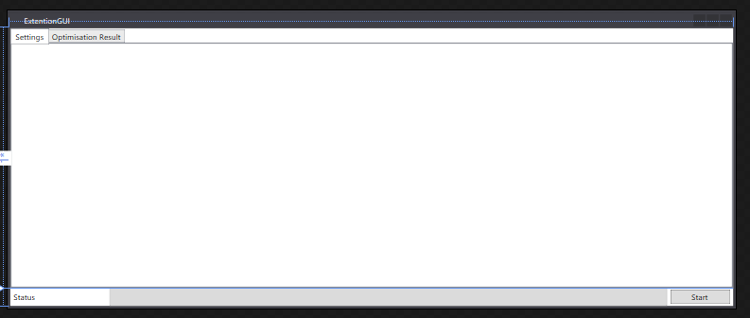
As for the graphics creation process, note that <Grid/> is a layout block, which means that it is designed for convenient placement of controls and other design blocks. As you can see from the video, when changing between the Settings tabs and the Optimization Result tab, the lower part (ProgressBar) remains unchanged. This is achieved by dividing the main <Grid/> blocks into 2 rows, inside of which the Panel with the main tabs (TabControll) is placed, as well as one more block <Grid/> is placed, which contains the Status Line (Label), ProgressBar and the optimization start button. but now it is divided horizontally into three columns, each containing one of the controls ( Lable, ProgressBar, Button)
<Grid>
    <Grid.RowDefinitions>
        <RowDefinition/>
        <RowDefinition Height="27"/>
    </Grid.RowDefinitions>

    <!--Create TabControl with two tabs-->
    <TabControl>
        <!--The tab with robot settings and optimization or single test launch options-->
        <TabItem Header="Settings">

        </TabItem>

        <!--Tab for viewing optimization results and launching a test upon a double-click event-->
        <TabItem Header="Optimisation Result">

        </TabItem>
    </TabControl>

    <!--Container with a progress bar, operation status and a launch button-->
    <Grid Grid.Row="1">
        <Grid.ColumnDefinitions>
            <ColumnDefinition Width="150"/>
            <ColumnDefinition/>
            <ColumnDefinition Width="100"/>
        </Grid.ColumnDefinitions>
        <!--Status of a running operation-->
        <Label Content="{Binding Status, UpdateSourceTrigger=PropertyChanged}"/>
        <!--Progress bar-->
        <ProgressBar Grid.Column="1"
                                     Minimum="0"
                                     Maximum="100"
                                     Value="{Binding PB_Value, UpdateSourceTrigger=PropertyChanged}"/>
        <!--Start button-->
        <Button Margin="5,0,5,0"
                                Grid.Column="2"
                                Content="Start"
                                Command="{Binding Start}"/>
    </Grid>
</Grid>
Let us also consider the properties which were used together with these controls, namely let us consider how data is passed from ViewModel into View. For each of the fields which display data or allow to input data, an individual field storing its value will be created in the ExtentionGUI_VM class (our ViewMpodel object). When creating WPF applications, and especially when using the MVVM pattern, graphics elements are usually not accessed directly, that is why we will use a more convenient value passing process, which requires a minimum of code. For example, the Value property for the ProgressBar graphic element is set using data linking technology, which is done in the following line:
Value="{Binding PB_Value, UpdateSourceTrigger=PropertyChanged}"
The Binding property is followed by the name of the field which stores data, while property UpdateSourceTrigger indicates method for updating data in the graphic element. By setting this property with the PropertyChanged parameter, we inform the application that this particular property of this particular element needs to be updated only if the PropertyChanged event in the ExtentionGUI_VM class has triggered, and the name of the variable with which it was linked was passed as one of the parameters of this event, namely "PB_Value". As you can see from the XAML markup, the button also has data linking, however for the button linking is performed with the Command property which via the ICommand interface points to the command (or rather to a method defined in the ViewModel class), which is called upon the button click event. This is the linking of the button click event and of other events (such as a double click on the optimization results table). Now our graphic part looks as follows:
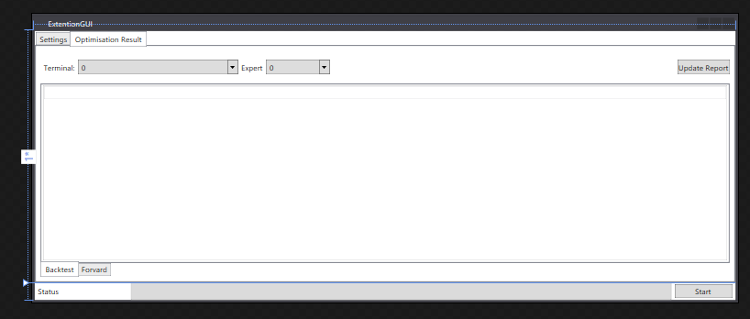
The next GUI creation step is the addition of controls in the OptimisationResults tab. This tab contains two Comboboxex for selecting the terminal in which optimization was performed and the Expert Advisor, as well as the Update Report button. This tab also contains a nested TabControl with two nested tabs, each of which contains a table (ListView) with the optimization results. Here is the appropriate XAML markup:
  <!--Tab for viewing optimization results and launching a test upon a double-click event-->
            <TabItem Header="Optimisation Result">
                <Grid Margin="5">
                    <Grid.RowDefinitions>
                        <RowDefinition Height="50"/>
                        <RowDefinition/>
                    </Grid.RowDefinitions>

                    <Grid VerticalAlignment="Center">
                        <WrapPanel>
                            <Label Content="Terminal:"/>
                            <ComboBox Width="250"
                                  ItemsSource="{Binding TerminalsAfterOptimisation}"
                                  SelectedIndex="{Binding TerminalsAfterOptimisation_Selected, UpdateSourceTrigger=PropertyChanged}"/>
                            <Label Content="Expert"/>
                            <ComboBox Width="100"
                                  ItemsSource="{Binding BotsAfterOptimisation}"
                                  SelectedIndex="{Binding BotsAfterOptimisation_Selected, UpdateSourceTrigger=PropertyChanged}"/>
                        </WrapPanel>
                        <Button HorizontalAlignment="Right"
                            Content="Update Report"
                            Command="{Binding UpdateOptimisationReport}"/>
                    </Grid>
                    <!--Container with the optimization result tables-->
                    <TabControl
                        TabStripPlacement="Bottom"
                        Grid.Row="1">
                        <!--A tab in which the historic optimization results are shown-->
                        <TabItem Header="Backtest">
                            <!--Table with optimization results-->
                            <ListView ItemsSource="{Binding HistoryOptimisationResults}"
                                  viewExtention:ListViewExtention.DoubleClickCommand="{Binding StartTestFromOptimisationResults}"
                                  viewExtention:ListViewExtention.DoubleClickCommandParameter="History"
                                  SelectedIndex="{Binding SelectedHistoryOptimisationRow}" >
                                <ListView.View>
                                    <GridView
                                    viewExtention:GridViewColumns.ColumnsSource="{Binding OptimisationResultsColumnHeadders}"
                                    viewExtention:GridViewColumns.DisplayMemberMember="DisplayMember"
                                    viewExtention:GridViewColumns.HeaderTextMember="HeaderText"/>
                                </ListView.View>
                            </ListView>
                        </TabItem>
                        <!--A tab in which the results of forward optimization
                    passes are shown-->
                        <TabItem Header="Forvard">
                            <!--Table with optimization results-->
                            <ListView ItemsSource="{Binding ForvardOptimisationResults}"
                                  viewExtention:ListViewExtention.DoubleClickCommand="{Binding StartTestFromOptimisationResults}"
                                  viewExtention:ListViewExtention.DoubleClickCommandParameter="Forvard"
                                  SelectedIndex="{Binding SelectedForvardOptimisationRow}">
                                <ListView.View>
                                    <GridView
                                   viewExtention:GridViewColumns.ColumnsSource="{Binding OptimisationResultsColumnHeadders}"
                                   viewExtention:GridViewColumns.DisplayMemberMember="DisplayMember"
                                   viewExtention:GridViewColumns.HeaderTextMember="HeaderText"/>
                                </ListView.View>
                            </ListView>
                        </TabItem>
                    </TabControl>
                </Grid>
            </TabItem>
As mentioned earlier, each tag that is used in the XAML markup is a class. We can also write our own classes extending the functionality of standard markup or create custom graphic elements. At the current stage, we needed to expand the functionality of the existing markup. The tables with the results of optimization passes should have different numbers of columns and different names: this will be our first extension.
The second extension is the conversion of a double click to an ICommand interface. We could avoid the need to create the second extension, if we did not use the MVVM development template, according to which ViewModel and Model must not be connected with the View layer. This is done in order to enable an easy modification or re-writing of the graphic layer of the application if necessary. As can be seen from the extension call methods, they are all located in the ViewExtention nested namespace which is followed by a colon and the name of the class which contains the extensions. The "point" operator is followed by the name of the property to which we want to set the value.
Let us consider each of the extensions, starting with the one which converts click events to the ICommand interface. To create an extension processing double click events, create partial class ListViewExtention in the ViewExtention folder. The partial access modifier indicates that the class implementation can be divided between several files, while all methods/fields and other components of the class, which is marked as 'partial' but is divided between two or more files, will belong to the same class.
using System.Windows;

using ICommand = System.Windows.Input.ICommand;
using ListView = System.Windows.Controls.ListView;

namespace OptimisationManagerExtention.ViewExtention
{
    /// <summary>
    /// The class of extensions for ListView, which translates events to commands (ICommand)
    /// the class is marked with keyword 'partial', i.e. its implementation is divided into several files.
    ///
    /// In this class ListView.DoubleClickEvent is translated
    /// into the ICommand type command
    /// </summary>
    partial class ListViewExtention
    {
        #region Command
        /// <summary>
        /// Dependent property - containing a reference to the command callback
        /// The property is set via View in the XAML markup of the project
        /// </summary>
        public static readonly DependencyProperty DoubleClickCommandProperty =
            DependencyProperty.RegisterAttached("DoubleClickCommand",
                typeof(ICommand), typeof(ListViewExtention),
                new PropertyMetadata(DoubleClickCommandPropertyCallback));

        /// <summary>
        /// Setter for DoubleClickCommandProperty
        /// </summary>
        /// <param name="obj">Control</param>
        /// <param name="value">The value to link with</param>
        public static void SetDoubleClickCommand(UIElement obj, ICommand value)
        {
            obj.SetValue(DoubleClickCommandProperty, value);
        }
        /// <summary>
        /// Getter for DoubleClickCommandProperty
        /// </summary>
        /// <param name="obj">Control</param>
        /// <returns>a link to the saved command of type ICommand</returns>
        public static ICommand GetDoubleClickCommand(UIElement obj)
        {
            return (ICommand)obj.GetValue(DoubleClickCommandProperty);
        }
        /// <summary>
        /// Callback which is called after setting property DoubleClickCommandProperty
        /// </summary>
        /// <param name="obj">Control for which the property</param>
        /// <param name="args">events preceding callback</param>
        private static void DoubleClickCommandPropertyCallback(DependencyObject obj, DependencyPropertyChangedEventArgs args)
        {
            if (obj is ListView lw)
            {
                if (args.OldValue != null)
                    lw.MouseDoubleClick -= Lw_MouseDoubleClick;

                if (args.NewValue != null)
                    lw.MouseDoubleClick += Lw_MouseDoubleClick;
            }
        }
        /// <summary>
        /// Callback of the event which is translated to the ICommand type
        /// </summary>
        /// <param name="sender"></param>
        /// <param name="e"></param>
        private static void Lw_MouseDoubleClick(object sender, System.Windows.Input.MouseButtonEventArgs e)
        {
            if (sender is UIElement element)
            {
                object param = GetDoubleClickCommandParameter(element);
                ICommand cmd = GetDoubleClickCommand(element);
                if (cmd.CanExecute(param))
                    cmd.Execute(param);
            }
        }
        #endregion

        #region CommandParameter
        /// <summary>
        /// Dependent property - containing a reference to parameters passed to the callback of type ICommand
        /// The property is set via View in the XAML markup of the project
        /// </summary>
        public static readonly DependencyProperty DoubleClickCommandParameterProperty =
            DependencyProperty.RegisterAttached("DoubleClickCommandParameter",
                typeof(object), typeof(ListViewExtention));
        /// <summary>
        /// Setter for DoubleClickCommandParameterProperty
        /// </summary>
        /// <param name="obj">Control</param>
        /// <param name="value">The value to link with</param>
        public static void SetDoubleClickCommandParameter(UIElement obj, object value)
        {
            obj.SetValue(DoubleClickCommandParameterProperty, value);
        }
        /// <summary>
        /// Getter for DoubleClickCommandParameterProperty
        /// </summary>
        /// <param name="obj">Control</param>
        /// <returns>passed parameter</returns>
        public static object GetDoubleClickCommandParameter(UIElement obj)
        {
            return obj.GetValue(DoubleClickCommandParameterProperty);
        }
        #endregion
    }
}
Each property of each class from WPF graphic objects is linked to the DependancyProperty class. This class allows performing data binding between View and ViewModel layers. To create the class instance, use the stating DependencyProperty.RegisterAttached method which returns the configured DependencyProperty class. The method accepts 4 parameters. For details read here. Note that the created property must have access modifiers 'public static readonly' (i.e. accessible from outside of the class, possibility to call this property without the need to create a class instance, while 'static' modifier sets the unity of this property within this specific application and 'readonly' makes the property unchangeable).
- The first parameter sets the name by which the property will be visible in the XAML markup.
- The second parameter sets the type of the element with which binding will be performed. Objects of this type will be stored in the created instance of the DependancyProperty class.
- The third parameter sets the type of the class in which the property is located. In our case the class is ListViewExtention.
- The last parameter accepts the PropertyMetadata class instance — this parameter refers to the handler of the event, which is called after the creation of the DependancyProperty class instance. This callback is needed in order to subscribe to the double click event.
In order to be able to correctly set and get values from this property, let us create methods with the names consisting of the name passed during DependancyProperty class instance creation and the prefix Set (to set values or Get to get values). Both methods must be static. Essentially, they encapsulate the use of pre-existing methods SetValue and GetValue.
The callback of the event related to the completion of dependent property creation, implements subscription to the event of a double click on a table row and unsubscribing from the earlier subscribed event, if there was any. Inside the double click event handler, CanExecute and Execute methods from the ICommand filed passed to View are sequentially called. Thu, when the event of a double click on any of the rows of the subscribed table triggers, we automatically call the event handler, which contains calls of the methods of the logic which is executed after the occurrence of this event.
The created class is actually an intermediary class. It handles events and calls methods from ViewModel but does not perform any business logic. This approach may seem more confusing than a direct call of a method from a double-click event handler (as is implemented in WinForms), but there are reasons to use this approach: we need to observe the MVVM pattern, which states that View should not know anything about ViewModel and vice versa.
By using the intermediary class, we reduce the connectivity between the classes, for which we use the mentioned programming pattern. Now we can edit the ViewModel class. It is however necessary to specify one specific ICommand type property, which the intermediary class will access.
The extension also contains an implementation of the property which converts the SelectionChanged event to ICommand, as well as an intermediary class, which automatically creates columns for the tables based on the binded filed which stores the collection of column names. These two XAML markup extensions are implemented as described above, therefore I will not go into further detail. If you have questions, please ask them in comments to this article. Now that we have implemented the Optimization Result tab markup, our window looks as follows:
The next step is to implement the Settings tab. For convenience, I will show here inly the part which describes the basic graphic objects, rather than adding the full version of the XAML markup for this tab. The full code is attached below.
<!--The tab with robot settings and optimization or single test launch options--> <TabItem Header="Settings"> <!--Container with settings and other items--> <Grid> <Grid.RowDefinitions> <RowDefinition/> <RowDefinition Height="200"/> </Grid.RowDefinitions> <!--Container with the list of selected terminals--> <Grid> <Grid.RowDefinitions> <RowDefinition Height="30"/> <RowDefinition/> </Grid.RowDefinitions> <!--Container with the selection of terminals which are determined automatically--> <WrapPanel HorizontalAlignment="Right" VerticalAlignment="Center"> <!--List with terminals--> <ComboBox Width="200" ItemsSource="{Binding TerminalsID}" SelectedIndex="{Binding SelectedTerminal, UpdateSourceTrigger=PropertyChanged}" IsEnabled="{Binding IsTerminalsLVEnabled, UpdateSourceTrigger=PropertyChanged}"/> <!--Terminal adding button--> <Button Content="Add" Margin="5,0" Command="{Binding AddTerminal}" IsEnabled="{Binding IsTerminalsLVEnabled, UpdateSourceTrigger=PropertyChanged}"/> </WrapPanel> <!--List of selected terminals--> <ListView Grid.Row="1" ItemsSource="{Binding SelectedTerminalsForOptimisation}" SelectedIndex="{Binding SelectedTerminalIndex, UpdateSourceTrigger=PropertyChanged}" IsEnabled="{Binding IsTerminalsLVEnabled, UpdateSourceTrigger=PropertyChanged}" > <ListView.View> <GridView> . . . </GridView> </ListView.View> </ListView> </Grid> <!--Container with parameters for editing and optimization settings--> <TabControl Grid.Row="2" Margin="0,0,0,5" TabStripPlacement="Right"> <!--Robot parameters tab--> <TabItem Header="Bot params" > <!--List with robot parameters--> <ListView ItemsSource="{Binding BotParams, UpdateSourceTrigger=PropertyChanged}"> <ListView.View> <GridView> . . . </GridView> </ListView.View> </ListView> </TabItem> <!--Optimization settings tab--> <TabItem Header="Settings"> <Grid MinWidth="700" MinHeight="170" MaxWidth="750" MaxHeight="170"> <Grid.ColumnDefinitions> <ColumnDefinition/> <ColumnDefinition/> <ColumnDefinition/> </Grid.ColumnDefinitions> <Grid.RowDefinitions> <RowDefinition/> <RowDefinition/> <RowDefinition/> </Grid.RowDefinitions> <!--Login seen by the robot--> <StackPanel Margin="2" VerticalAlignment="Center"> <Label Content="Login:"/> <TextBox Text="{Binding TestLogin, UpdateSourceTrigger=PropertyChanged}"/> </StackPanel> <!--Execution type--> <StackPanel Margin="2" VerticalAlignment="Center" Grid.Column="1" Grid.Row="1"> <Label Content="Execution:"/> <ComboBox DataContext="{Binding ExecutionList}" ItemsSource="{Binding ItemSource}" SelectedIndex="{Binding SelectedIndex, UpdateSourceTrigger=PropertyChanged}"/> </StackPanel> <!--Type of history passing for tests--> <StackPanel Margin="2" VerticalAlignment="Center" Grid.Column="2" Grid.Row="1"> <Label Content="Model:"/> <ComboBox DataContext="{Binding ModelList}" ItemsSource="{Binding ItemSource}" SelectedIndex="{Binding SelectedIndex, UpdateSourceTrigger=PropertyChanged}"/> </StackPanel> <!--Optimization criteria--> <StackPanel Margin="2" VerticalAlignment="Center" Grid.Column="2" Grid.Row="2"> <Label Content="Optimisation criteria:"/> <ComboBox DataContext="{Binding OptimisationCriteriaList}" ItemsSource="{Binding ItemSource}" SelectedIndex="{Binding SelectedIndex, UpdateSourceTrigger=PropertyChanged}"/> </StackPanel> <!--Forward period start date--> <StackPanel Margin="2" VerticalAlignment="Center" Grid.Column="1" Grid.Row="0"> <Label Content="Forward date:"/> <DatePicker SelectedDate="{Binding ForvardDate, UpdateSourceTrigger=PropertyChanged}"/> </StackPanel> <!--Deposit--> <StackPanel Margin="2" VerticalAlignment="Center" Grid.Column="0" Grid.Row="1"> <Label Content="Deposit:"/> <ComboBox DataContext="{Binding Deposit}" ItemsSource="{Binding ItemSource}" SelectedIndex="{Binding SelectedIndex, UpdateSourceTrigger=PropertyChanged}"/> </StackPanel> <!--Profit calculation currency--> <StackPanel Margin="2" VerticalAlignment="Center" Grid.Column="0" Grid.Row="2"> <Label Content="Currency:"/> <ComboBox DataContext="{Binding CurrencyList}" ItemsSource="{Binding ItemSource}" SelectedIndex="{Binding SelectedIndex, UpdateSourceTrigger=PropertyChanged}"/> </StackPanel> <!--Leverage--> <StackPanel Margin="2" VerticalAlignment="Center" Grid.Column="1" Grid.Row="2"> <Label Content="Leverage:"/> <ComboBox DataContext="{Binding LaverageList}" ItemsSource="{Binding ItemSource}" SelectedIndex="{Binding SelectedIndex, UpdateSourceTrigger=PropertyChanged}"/> </StackPanel> <!--Whether to use test visualizer--> <CheckBox Content="Visual mode" Margin="2" VerticalAlignment="Center" Grid.Column="2" Grid.Row="0" IsChecked="{Binding IsVisual, UpdateSourceTrigger=PropertyChanged}"/> </Grid> </TabItem> </TabControl> <!--Separator line which allows resizing one area relative to the other one--> <GridSplitter Height="3" VerticalAlignment="Bottom" HorizontalAlignment="Stretch"/> </Grid> </TabItem>
Firstly, let us consider the implementation of dynamically editable areas. This form behavior is implemented by forming two lines in the main <Grid/> and adding the <GridSplitter/> element. We drag it to resize the area with the list of terminals and the area with other tables. In the first line of the generated table, insert the new <Grid/>, which we again divide into 2 parts. The first part contains one more layout element — WrapPanel, which contains the list of terminals and a button for adding a new terminal. The second part contains a table with the list of added terminals.
In addition to the text, the table also contains controls using which data in the table can be changed. Thanks to the data binding technology for changing/adding values to the table, we do not have to write any additional code, since the table is directly associated with a collection of control data. The lower part of the editable <Grid/> block contains TabControl, which contains tester settings and a table with the list of robot parameters.
Thus we have performed the generation of the graphical shell for this extension. Before proceeding to ViewModel description, let us consider the table binding method.
Here is the description based in the example of a table with robot parameters, which should have the following fields:
- Flag — if the parameter needs to be optimized
- Parameter name
- The value of the parameter used in the tester
- Parameters enumeration start
- Parameters enumeration end
- Parameters enumeration step
To pass all these parameters to the table, we need to create a storage class to store the table row data. In other words, this class should describe all the table columns, and the collection of these classes will store the entire table. The following class was created for our table:
/// <summary>
/// The class describing rows for the table with the robot parameter settings before optimization
/// </summary>
class ParamsItem
{
    /// <summary>
    /// Class constructor
    /// </summary>
    /// <param name="Name">The name of the variable</param>
    public ParamsItem(string Name) => Variable = Name;
    /// <summary>
    /// The flag showing whether this robot variable needs to be optimized
    /// </summary>
    public bool IsOptimize { get; set; }
    /// <summary>
    /// Variable name
    /// </summary>
    public string Variable { get; }
    /// <summary>
    /// The value of the variable selected for the test
    /// </summary>
    public string Value { get; set; }
    /// <summary>
    /// Parameters enumeration start
    /// </summary>
    public string Start { get; set; }
    /// <summary>
    /// Parameters enumeration step
    /// </summary>
    public string Step { get; set; }
    /// <summary>
    /// Parameters enumeration end
    /// </summary>
    public string Stop { get; set; }
}
Each property of this class contains information related to a specific column. Now let us see how the data context is changed. When creating the application window, we indicated at the very beginning that the data source for the window would be the class ExtentionGUI_VM, which is the main DataContext for this window and which should contain the collection the table is associated with. However, for each specific row of this specific table DataContext is changed from class ExtentionGUI_VM to ParamsItem. This is an important point, so if you need to update any cell of this table from the program code, then you will have to call the PropertyChanged event not on the ExtentionGUI_VM class, but on the context class of this particular row.
Thus we have completed the description of the graphical layer creation process and can proceed to describing the class connecting the application and the program logic.
ViewModel and a connector between MetaTrader and the implemented dll
The next component of the program is the part which is responsible for the connection of the above discussed graphics and the logic, which will be discussed next. In the used programming template (Model View ViewModel or MVVM), this part is called ViewModel and it is located in the appropriate namespace (OptimisationManagerExtention.ViewModel).
In the first chapter of this article we have already created the ExtentionGUI_VM class and implemented the INotifyPropertyChanged interface — this class connects the graphic and logic. Please note that all fields of the ExtentionGUI_VM class, with which data from View are linked, must be declared as Property, not as variables. If you are not well familiar with this C# language construct, please see the below code with explanations:
class A
{
    /// <summary>
    /// This is a simple public field to which you can set values or read values from it
    /// But there is no possibility to perform a check or other actions.
    /// </summary>
    public int MyField = 5;
    /// <summary>
    /// This property allows processing data before reading or writing
    /// </summary>
    public int MyGetSetProperty
    {
        get
        {
            MyField++;
            return MyField;
        }
        set
        {
            MyField = value;
        }
    }

    // This is a read-only property
    public int GetOnlyProperty => MyField;
    /// <summary>
    // This is a write-only property
    /// </summary>
    public int SetOnlyProperty
    {
        set
        {
            if (value != MyField)
                MyField = value;
        }
    }
}
As you can see from the example, properties are a kind of hybrid of methods and fields. They allow performing specific actions before returning the value or verifying the recorded data. Also properties can be read-only or write-only. We referred to these C# constructs in View when we implemented data binding.
When implementing the ExtentionGUI_VM class, I divided it into blocks (constructs #region #endregion). In View we started with the creation of the Optimization Result, and thus let us now consider properties and methods for creating this tab. For convenience, I will first provide the code responsible for the data displayed on this tab, and after that I will add explanations.
#region Optimisation Result

/// <summary>
/// Table with historical optimization results
/// </summary>
public DataTable HistoryOptimisationResults => model.HistoryOptimisationResults;
/// <summary>
/// Table with forward optimization results
/// </summary>
public DataTable ForvardOptimisationResults => model.ForvardOptimisationResults;
/// <summary>
/// Observable collection with a list of optimization columns
/// </summary>
public ObservableCollection<ColumnDescriptor> OptimisationResultsColumnHeadders =>
       model.OptimisationResultsColumnHeadders;

#region Start test from optimisation results
/// <summary>
/// Run the test for the selected optimization process
/// </summary>
public ICommand StartTestFromOptimisationResults { get; }
/// <summary>
/// The method that starts a test upon a double-click
/// </summary>
/// <param name="type"></param>
private void StartTestFromOptimisationResultsAction(object type)
{
    ENUM_TableType tableType = (string)type == "History" ?
        ENUM_TableType.History : ENUM_TableType.Forvard;
    int ind = tableType == ENUM_TableType.History ?
        SelectedHistoryOptimisationRow : SelectedForvardOptimisationRow;

    model.StartTest(tableType, ind);
}
#endregion

/// <summary>
/// Index of the selected row from the historical optimization table
/// </summary>
public int SelectedHistoryOptimisationRow { get; set; } = 0;
/// <summary>
/// Index of the selected row from the forward optimization
/// </summary>
public int SelectedForvardOptimisationRow { get; set; } = 0;

#region UpdateOptimisationReport

#region TerminalsAfterOptimisation
public ObservableCollection<string> TerminalsAfterOptimisation => model.TerminalsAfterOptimisation;
public int TerminalsAfterOptimisation_Selected
{
    get => model.TerminalsAfterOptimisation_Selected;
    set
    {
        model.TerminalsAfterOptimisation_Selected.SetVarSilently(value);
        if (value > -1)
           model.SelectNewBotsAfterOptimisation_forNewTerminal();
    }
}

public ObservableCollection<string> BotsAfterOptimisation => model.BotsAfterOptimisation;
public int BotsAfterOptimisation_Selected
{
    get => model.BotsAfterOptimisation_Selected;
    set => model.BotsAfterOptimisation_Selected.SetVarSilently(value);
}
#endregion
public ICommand UpdateOptimisationReport { get; }

        private void UpdateReportsData(object o)
        {
            model.LoadOptimisations();
        }
        #endregion
        #endregion
Let us consider the data sources for the historical and forward optimization tables, as well as the list of columns, which is connected with the columns of the two tables via the intermediary class (GridViewColumns). Each table has two unique fields: the data source (types by the DataTable) and the property which contains the index of the selected row in the table. The index of the selected table row is not important for the display, but we will need it for further actions, such as the launch of testing runs by a double click on the table row. Loading of data into tables and clearing of that data are implemented by the program logic; and according to OOP principles, one specific class should be responsible for one specific task, then in the properties that provide data about the table composition, we simply refer to the corresponding properties from the main class of the model (ExtemtionGUI_M). Tracking of the selected indexes is performed automatically through mouse clicks on the table fields, and therefore these properties do not perform any actions or checks. They are similar to class fields.
Also pay attention to the used data type for the property containing the list of columns (OptimisationResultsColumnHeadders) — ObservableCollection<T>. This is one of the standard C# classes which stores dynamically changeable collections. But unlike lists (List<T>), this class contains the CollectionChanged event, which is called each time when data in the collection are changed/deleted/added. Having created a property types by this class we get automated notification of View about a change in the data source. Thus we eliminate the need to manually notify the graphics of the need to re-write the displayed data.
Now pay attention to the drop-down lists with the selection of terminals and robots, as well as proceed to implementing button press and table click event handlers. The block for working with drop-down lists and loading of optimization results is contained in the area marked as #region UpdateOptimisationReport. First, consider a data source for the first drop-down list, which contains a list of terminals. This is the list of terminal IDs for which optimization was performed, and the index of selected terminals. The list of terminals is compiled by the model, therefore we can simply refer to the appropriate field in the model. Selection of selected terminal index is a bit more complicated task. Let us use the advantage of properties over fields which was mentioned earlier. After selecting a terminal from the drop-down list, the TerminalsAfterOptimisation_Selected property setter is called, in which the following actions are performed:
- Saving of a selected index in the model
- Update of the value of the second drop-down list, which stores the list of robots that were optimized in this terminal.
The extension stores the history of performed tests, grouping them by robots and terminals. If you re-optimize the same robot in the same terminal the past history will be re-written. This method for passing events from View to ViewModel is the most convenient one. However it is not always suitable.
The next method for passing events from the graphics layer to ViewModel is the use of commands. Some graphic elements such as Button support commands. When using commands, we link the 'command' property with a property from ViewModel by a parametrized ICommand type. The ICommand interface is one of the standard interfaces of the C# language and it looks like this:
public interface ICommand
{
    //
    // Summary:
    //     Occurs when changes occur that affect whether or not the command should execute.
    event EventHandler CanExecuteChanged;

    //
    // Summary:
    //     Defines the method that determines whether the command can execute in its current
    //     state.
    //
    // Parameters:
    //   parameter:
    //     Data used by the command. If the command does not require data to be passed,
    //     this object can be set to null.
    //
    // Returns:
    //     true if this command can be executed; otherwise, false.
    bool CanExecute(object parameter);
    //
    // Summary:

    //     Defines the method to be called when the command is invoked.
    //
    // Parameters:
    //   parameter:
    //     Data used by the command. If the command does not require data to be passed,
    //     this object can be set to null.
    void Execute(object parameter);
}
When a button is clicked, the ConExecute event is triggered first, and if it returns false, the button becomes inaccessible, otherwise the Execute method is called, which performs the required operation. We need to implement this interface in order to use this functionality. I did not invent anything new when implementing the interface and simply used its standard implementation.
/// <summary>
/// Implementation of the ICommand interface, used for
/// binding commands with methods from ViewModel
/// </summary>
class RelayCommand : ICommand
{
    #region Fields
    /// <summary>
    /// Delegate directly performing the action
    /// </summary>
    readonly Action<object> _execute;
    /// <summary>
    /// Delegate checking for the possibility of performing an action
    /// </summary>
    readonly Predicate<object> _canExecute;
    #endregion // Fields

    /// <summary>
    /// Constructor
    /// </summary>
    /// <param name="execute">The method passed for the delegate, which is a callback</param>
    public RelayCommand(Action<object> execute) : this(execute, null) { }
    /// <summary>
    /// Constructor
    /// </summary>
    /// <param name="execute">
    /// The method passed for the delegate, which is a callback
    /// </param>
    /// <param name="canExecute">
    /// The method passed for the delegate, which checks the possibilities to perform an action
    /// </param>
    public RelayCommand(Action<object> execute, Predicate<object> canExecute)
    {
        if (execute == null)
            throw new ArgumentNullException("execute");
        _execute = execute; _canExecute = canExecute;
    }

    /// <summary>
    /// Checking the possibility to perform an action
    /// </summary>
    /// <param name="parameter">parameter passed from View</param>
    /// <returns></returns>
    public bool CanExecute(object parameter)
    {
        return _canExecute == null ? true : _canExecute(parameter);
    }
    /// <summary>
    /// Event - called whenever the callback execution ability changes.
    /// When this event is triggered, the form calls the "CanExecute" method again
    /// The event is triggered from ViewModel when needed
    /// </summary>
    public event EventHandler CanExecuteChanged
    {
        add { CommandManager.RequerySuggested += value; }
        remove { CommandManager.RequerySuggested -= value; }
    }
    /// <summary>
    /// The method calling a delegate which performs the action
    /// </summary>
    /// <param name="parameter">parameter passed from View</param>
    public void Execute(object parameter) { _execute(parameter); }
}
According to this ICommand interface implementation, two private read-only fields are created, which store delegates, which in turn store methods that were passed to them through one of the Relaycommand class constructor overloads. In order to use this mechanism, create the RelayCommand class instance in the ExtentionGUI_VM class constructor. Pass to this instance a method that performs some actions. The UpdateOptimisationReport property which updates information in optimization tables, looks as follows:
UpdateOptimisationReport = new RelayCommand(UpdateReportsData);
Here UpdateReportsData is the private method from the ExtentionGUI_VM class which calls the LoadOptimisations() method from the ExtentionGUI_M class (i.e. from our model class). Similarly, the StartTestFromOptimisationResults property is linked with the event of a double-click on the table row selected by the user. However in this case the double click event is passed not via the standard property (like in a button, the Button class), but via the earlier described and implemented solution "ListViewExtention.DoubleClickCommand". As can be seen from the Execute and CanExecute method signature, they can accept the 'Object' type value. In the case of the button, we do not pass any values; in the case of the double-click event, we pass the table name: you can see it from the binding method with these properties in the XAML markup:
viewExtention:ListViewExtention.DoubleClickCommand="{Binding StartTestFromOptimisationResults}"
viewExtention:ListViewExtention.DoubleClickCommandParameter="History"
Based on this parameter, our model understands from which table it should take data to run the optimization test pass.
Now let us consider the implementation of properties and callbacks for working with the Settings tab, in which the main controls are located. Let us start with the implementation of the data source for the table containing selected terminals.
#region SelectedTerminalsForOptimisation && SelectedTerminalIndex (first LV params)
/// <summary>
/// The list of terminals selected for optimization, which is displayed in the terminals table
/// </summary>
public ObservableCollection<TerminalAndBotItem> SelectedTerminalsForOptimisation { get; private set; } =
    new ObservableCollection<TerminalAndBotItem>();
/// <summary>
/// The index of the selected row
/// </summary>
private int selectedTerminalIndex = 0;
public int SelectedTerminalIndex
{
    get { return selectedTerminalIndex; }
    set
    {
        // Assign the value of the newly selected index
        selectedTerminalIndex = value;

        //((RelayCommand)Start).OnCanExecuteChanged();

        // Fill in the list of parameters of the robot selected in the current row
        if (value == -1)
        {
            return;
        }
        TerminalAndBotItem terminal_item = SelectedTerminalsForOptimisation[value];
        if (terminal_item.Experts.Count > 0)
        {
            FillInBotParams(terminal_item.Experts[terminal_item.SelectedExpert],
                terminal_item.TerminalID);
        }
    }
}
        #endregion
The list of terminals is presented as an observed collection typed by the TerminalAndBotItem class. The collection is stored in the ViewModel class. The ViewModel also contains a property for setting and getting the index of the selected row: this is done in order to be able to react to a terminal selection event. As is shown in the video, when a row is clicked, the selected robot parameters are dynamically loaded. This behavior is implemented in the SelectedTerminalIndex property setter.
Also remember that the rows in the table with the selected terminals contain controls, and accordingly we need to organize the TerminalAndBotItem as a data context class.
Firstly, we delete the terminal from the list of terminals. As mentioned above, data for the table are stored in ViewModel, while callback for the Delete button in the table can be bound only to the context of the row data, i.e. with the TerminalAndBotItem class from which this collection cannot be accessed. The solution in this case is to use delegates. I implemented a data deleting method in the ExtentionGUI_VM, and then passed it via a constructor as a delegate to the TerminalAndBotItem class. For clarity, in the below code I deleted all extra lines. Passing of a method to delete itself from the outside looks as follows
class TerminalAndBotItem
{

    public TerminalAndBotItem(List<string> botList,
        string TerminalID,
        Action<string, string> FillInBotParams,
        Action<TerminalAndBotItem> DeleteCommand)
    {
        // Fill in the delegate fields
        #region Delegates
        this.FillInBotParams = FillInBotParams;
        this.DeleteCommand = new RelayCommand((object o) => DeleteCommand(this));
        #endregion
    }

    #region Delegates
    /// <summary>
    /// Field with the delegate to update selected robot parameters
    /// </summary>
    private readonly Action<string, string> FillInBotParams;
    /// <summary>
    /// Callback for a command to delete a terminal from the list (Delete button in the table)
    /// </summary>
    public ICommand DeleteCommand { get; }
    #endregion

    /// <summary>
    /// index of the selected EA
    /// </summary>
    private int selectedExpert;
    /// <summary>
    /// Property for the index of the selected EA
    /// </summary>
    public int SelectedExpert
    {
        get { return selectedExpert; }
        set
        {
            selectedExpert = value;
            // Run the callback to load parameters for the selected EA
            if (Experts.Count > 0)
                FillInBotParams(Experts[selectedExpert], TerminalID);
        }
    }
}
As can be seen from this fragment, another C# language construction was used in the implementation of this task: lambda expressions. If you are familiar with C++ or C#, this code part will not seem strange. Lambda expressions can be considered as the same functions, but the main difference from them is the fact that they do not have a traditional declaration. These constructions are widely used in C # and you can read about them here. The callback is performed using ICommand. The next interesting point in the class implementation is the update of the robot parameters when choosing a new robot from the drop-down list of all robots. The method which updates robot parameters is located in the model, while the implementation of this method wrapper for ViewModel is inside ViewModel (the terminal deleting method is also there). Again, we use delegates, but instead of using ICommand place the response to a new robot selection event to the SelectedExpert property setter.
The method updating EA parameters also has specific features, namely: it is asynchronous.
private readonly object botParams_locker = new object();
/// <summary>
/// Get and fill robot parameters
/// </summary>
/// <param name="fullExpertName"> Full EA name in relation to folder ~/Experts</param>
/// <param name="Terminal">ID of the terminal</param>
private async void FillInBotParams(string fullExpertName, string Terminal)
{
    await System.Threading.Tasks.Task.Run(() =>
    {
        lock (botParams_locker)
        {
            model.LoadBotParams(fullExpertName, Terminal, out OptimisationInputData? optimisationData);
            if (!optimisationData.HasValue)
                return;

            IsSaveInModel = false;
            TestLogin = optimisationData.Value.Login;
            IsVisual = optimisationData.Value.IsVisual;
            ForvardDate = optimisationData.Value.ForvardDate;
            CurrencyList.SelectedIndex = optimisationData.Value.CurrencyIndex;
            Deposit.SelectedIndex = optimisationData.Value.DepositIndex;
            ExecutionList.SelectedIndex = optimisationData.Value.ExecutionDelayIndex;
            LaverageList.SelectedIndex = optimisationData.Value.LaverageIndex;
            ModelList.SelectedIndex = optimisationData.Value.ModelIndex;
            OptimisationCriteriaList.SelectedIndex = optimisationData.Value.OptimisationCriteriaIndex;
            IsSaveInModel = true;
        }
    });


    OnPropertyChanged("BotParams");
}
C# has an easy-to-write asynchronous programming model: Async Await, which we used in this case. Presented code snippet starts an asynchronous operation and then awaits the completion of its implementation. After the operation is completed, the Onpropertychanged event is called, which notifies View of a change in the table with a list of robot parameters. To understand the specific feature, let us consider an example of an asynchronous application using Async Await technology.
class Program
{
    static void Main(string[] args)
    {
        Console.WriteLine($"Main before Method() = {Thread.CurrentThread.ManagedThreadId}");
        Method();
        Console.WriteLine($"Main after Method() = {Thread.CurrentThread.ManagedThreadId}");

        Console.ReadLine();
    }
    private static async void Method()
    {
        Console.WriteLine($"Before Await = {Thread.CurrentThread.ManagedThreadId}");
        await Task.Run(() => { Thread.Sleep(100); Console.WriteLine($"In Avait 1 = {Thread.CurrentThread.ManagedThreadId}"); });
        Console.WriteLine($"After Await 1 = {Thread.CurrentThread.ManagedThreadId}");
      Thread.Sleep(100);

            await Task.Run(() => { Console.WriteLine($"In Avait 2 = {Thread.CurrentThread.ManagedThreadId}"); });
            Console.WriteLine($"After Await 2 = {Thread.CurrentThread.ManagedThreadId}");
        }

    }
The purpose of this simple console application is to demonstrate the behavior of threads and to provide a brief explanation of asynchrony. In the Main method we first display the ID of the thread in which the Main method is running, and then we start the asynchronous method and display ID of the Main thread again. In the asynchronous method, we again display ID of the thread in which this method is running, and then print one by one IDs of asynchronous threads and the ID of the thread in which operations will be performed after the asynchronous thread starts. The most interesting output of this program:
Main before Method() = 1
Before Await = 1
Main After Method() = 1
In Await 1 = 3
After Await 1 = 3
In Await 2 = 4
After Await 2 = 4
As can be seen from the above, the Main thread and the very first output from the asynchronous Method() have the same IDs. This means that Method() is not completely asynchronous. The asynchrony of this method starts after the call of the asynchronous operation using the static Task.Run() method. If Method() were completely synchronous, the next event again showing the ID of the main thread would be called after the output of the next four messages.
Now let's look at asynchronous outputs. The first asynchronous output returns ID = 3, which is expected. But the next operation waits for the completion of the asynchronous operation (through the use of 'await') and also returns ID = 3. The same picture is observed with the second asynchronous operation. Also, despite the delay of 100 milliseconds which was added after the output of the thread ID used after the first asynchronous operation, the order does not change although the second operation starts on the other thread separate from the first one.
These are the specific features of the Async Await model and of asynchrony in general. All actions in our method are performed in the context if the secondary thread and there is a chance that the method will be called twice, which can cause an error. The lock(locker_object){} construct is used for this purpose. This design creates something like a call execution queue similarly to the example. In contrast to the test example, where the queue is formed independently through C# mechanisms, here we use a shared resource that serves as a switch. If it is used in the lock() construct, then any other method call will get stuck at the shared resource stage until it is released. Thus we avoid the double method call error.
Now let's consider the creation of data sources for optimizer parameters settings. The code is shown below:
#region Optimization and Test settings

/// <summary>
/// The login visible to the robot during tests (it is required if there is limitation by login)
/// </summary>
private uint? _tertLogin;
public uint? TestLogin
{
    get => _tertLogin;
    set
    {
        _tertLogin = value;

        OnPropertyChanged("TestLogin");
        CB_Action(GetSetActionType.Set_Index);
    }
}
/// <summary>
/// Order execution delay
/// </summary>
public ComboBoxItems<string> ExecutionList { get; }
/// <summary>
/// Type of used quotes (every tick, OHLC, 1M ...)
/// </summary>
public ComboBoxItems<string> ModelList { get; }
/// <summary>
/// Optimization criterion
/// </summary>
public ComboBoxItems<string> OptimisationCriteriaList { get; }
/// <summary>
/// Deposits
/// </summary>
public ComboBoxItems<int> Deposit { get; }
/// <summary>
/// Profit calculation currency
/// </summary>
public ComboBoxItems<string> CurrencyList { get; }
/// <summary>
/// Leverage
/// </summary>
public ComboBoxItems<string> LaverageList { get; }
/// <summary>
/// Forward test start date
/// </summary>
private DateTime _DTForvard = DateTime.Now;
public DateTime ForvardDate
{
    get => _DTForvard;
    set
    {
        _DTForvard = value;

        OnPropertyChanged("ForvardDate");
        CB_Action(GetSetActionType.Set_Index);
    }
}
/// <summary>
/// Indication of tester start in the graphical mode
/// </summary>
private bool _isVisualMode = false;
/// <summary>
/// Indication of tester start in the visual mode
/// </summary>
public bool IsVisual
{
    get => _isVisualMode;
    set
    {
        _isVisualMode = value;

        OnPropertyChanged("IsVisual");
        CB_Action(GetSetActionType.Set_Index);
    }
}
/// <summary>
/// a hidden variable which stores the IsSaveInModel flag value
/// </summary>
private bool isSaveInModel = true;
/// <summary>
/// Shared resource for asynchronous access to the IsSaveInModel property
/// </summary>
private readonly object SaveModel_locker = new object();
/// <summary>
/// Flag; if True - if tester parameters are changed, they will be saved
/// </summary>
private bool IsSaveInModel
{
    get
    {
        lock (SaveModel_locker)
            return isSaveInModel;
    }
    set
    {
        lock (SaveModel_locker)
            isSaveInModel = value;
    }
}
/// <summary>
/// Callback saving changes in tester parameters
/// </summary>
/// <param name="actionType"></param>
private void CB_Action(GetSetActionType actionType)
{
    if (actionType == GetSetActionType.Set_Index && IsSaveInModel)
    {
        model.UpdateTerminalOptimisationsParams(new OptimisationInputData
        {
            Login = TestLogin,
            IsVisual = IsVisual,
            ForvardDate = ForvardDate,
            CurrencyIndex = CurrencyList.SelectedIndex,
            DepositIndex = Deposit.SelectedIndex,
            ExecutionDelayIndex = ExecutionList.SelectedIndex,
            LaverageIndex = LaverageList.SelectedIndex,
            ModelIndex = ModelList.SelectedIndex,
            OptimisationCriteriaIndex = OptimisationCriteriaList.SelectedIndex,
            Deposit = Deposit.ItemSource[Deposit.SelectedIndex],
            Currency = CurrencyList.ItemSource[CurrencyList.SelectedIndex],
            Laverage = LaverageList.ItemSource[LaverageList.SelectedIndex]
        });
    }
}
#endregion
Another important moment is the implementation of optimizer parameters. Within this model, an individual instance of tester settings is stored for each robot. This enables individual tester configuration of each selected terminal. The appropriate CB_Action method is called in each setter and thus provides instant saving of results in the model upon any changes in the parameters. I also created the ComboBoxItems<T> class to store data for the drop-down lists. It is actually a context for ComboBox with which it is connected. Here is the class implementation:
/// <summary>
/// Class - a wrapper for ComboBox list data
/// </summary>
/// <typeparam name="T">Data type stored in ComboBox</typeparam>
class ComboBoxItems<T> : INotifyPropertyChanged
{
    /// <summary>
    /// Collection of list items
    /// </summary>
    private List<T> items;
    public List<T> ItemSource
    {
        get
        {
            OnAction(GetSetActionType.Get_Value);
            return items;
        }
        set
        {
            items = value;
            OnAction(GetSetActionType.Set_Value);
        }
    }
    /// <summary>
    /// Selected index in the list
    /// </summary>
    int selectedIndex = 0;
    public int SelectedIndex
    {
        get
        {
            OnAction(GetSetActionType.Get_Index);
            return selectedIndex;
        }
        set
        {
            selectedIndex = value;
            OnAction(GetSetActionType.Set_Index);
        }
    }

    public event Action<GetSetActionType> Action;
    public event PropertyChangedEventHandler PropertyChanged;

    private void OnAction(GetSetActionType type)
    {
        switch (type)
        {
            case GetSetActionType.Set_Value:
                PropertyChanged?.Invoke(this, new PropertyChangedEventArgs("ItemSource"));
                break;
            case GetSetActionType.Set_Index:
                PropertyChanged?.Invoke(this, new PropertyChangedEventArgs("SelectedIndex"));
                break;
        }
        Action?.Invoke(type);
    }
}
enum GetSetActionType
{
    Get_Value,
    Set_Value,
    Get_Index,
    Set_Index
}
Its specific feature is the event, which is called every time when one of its events is edited or data is received in its events. Another feature is the automated update of View about its property change. Thus it is able to notify both ViewModel and View about a change in its properties. Thus, in ViewModel we update data in the model, concerning the changed properties of optimizer settings and call auto saving. This also makes the code easier-to-read, because we add to ViewModel two properties of each ComboBox (the index of the selected element and the list of all elements). Without this class, the ExtentionGUI_VM class code would be even bigger.
In conclusion, let us see how to instantiate the model of our add-on and how to run the GUI in the MetaTrader 5 terminal. The data model class must be independent from ViewModel, as well as the ViewModel is independent from View. This, for the testing possibility we will implement the model via the IExtentionGUI_M interface. The structure and implementation of this interface will be considered together with the description of the data model. Now note that the ExtentionGUI_VM class does not know about the specific implementation of the data model - instead it works with the IExtentionGUI_M interface, and the model class is instantiated in the following way:
private readonly IExtentionGUI_M model = ModelCreator.Model;
This instantiation process uses a static factory. The ModelCreator class is a factory and is implemented as follows:
/// <summary>
/// Factory for substituting a model in a graphical interface
/// </summary>
class ModelCreator
{
    /// <summary>
    /// Model
    /// </summary>
    private static IExtentionGUI_M testModel;
    /// <summary>
    /// Property returning either a model (if it has not been substitutes) or a substitutes model (for tests)
    /// </summary>
    internal static IExtentionGUI_M Model => testModel ?? new ExtentionGUI_M(new MainTerminalCreator(),
                                                                             new MainConfigCreator(),
                                                                             new MainReportReaderCreator(),
                                                                             new MainSetFileManagerCreator(),
                                                                             new OptimisationExtentionWorkingDirectory("OptimisationManagerExtention"),
                                                                             new MainOptimisatorSettingsManagerCreator(),
                                                                             new TerminalDirectory(Path.Combine(Environment.GetFolderPath(Environment.SpecialFolder.ApplicationData), "MetaQuotes", "Terminal")));

    /// <summary>
    /// Model substitution method substitutes a test model so that you can test the graphics separately from the logic
    /// </summary>
    /// <param name="model">test model - substituted from the outside</param>
    [System.Diagnostics.Conditional("DEBUG")]
    public static void SetModel(IExtentionGUI_M model)
    {
        testModel = model;
    }
}
This class has a private field, types by the data model interface. The field is initially equal to null. We used this feature when writing a static property which received the requested model. A check is performed in the above code: of testModel is now equal to null, instantiate and return the implementation of the model, which contains the business logic; if testModel is not equal to null (we have substituted the model), return the substituted model, the one which is stored in testModel. The static method SetModel is used to substitute the model. This method id decorated by the [System.Diagnostics.Conditional("DEBUG")] attribute, which prohibits its use in the Release version of this program.
The GUI launch process is similar to running graphics from a dll, which was described in the aforementioned article. The public MQLConnector class was written to implement connection with MetaTrader.
/// <summary>
/// Class for connecting the graphical interface with MetaTrader
/// </summary>
public class MQL5Connector
{
    /// <summary>
    /// Field containing a pointer to a running graphical interface
    /// </summary>
    private static View.ExtentionGUI instance;
    /// <summary>
    /// Method that launches the graphical interface.
    /// Only one interface is launched from one robot.
    /// During launch a check is performed if the GUI has already been started.
    /// If yes, the new one is not started
    /// </summary>
    /// <param name="pathToTerminal">Path to the terminal's mutable folder</param>
    public static void Instance(string terminalID)
    {
        // check if the GUI has already been started
        if (instance == null)
        {
            // Variable of the secondary thread - the GUI thread (graphics are launched in the secondary thread)
            // Its instantiation and passing a lambda expression describing the order of graphics start
            Thread t = new Thread(() =>
            {
                // Instantiation of the GUI class and its display (launch of graphics)
                instance = new View.ExtentionGUI();
                instance.Show();
                // Subscribe to the graphics window closing event - if the window is closed then
                // the field in which the link to the HUI was stored is assigned the null value
                instance.Closed += (object o, EventArgs e) => { instance = null; };

                // Launch GUI thread dispatcher
                Dispatcher.Run();
            });
            MainTerminalID = terminalID;

            // Start secondary thread
            t.SetApartmentState(System.Threading.ApartmentState.STA);
            t.Start();
        }
    }
    /// <summary>
    /// Gets data on whether the window is active
    /// </summary>
    /// <returns>true if active and false if closed</returns>
    public static bool IsWindowActive() => instance != null;
    /// <summary>
    /// Main Terminal ID
    /// </summary>
    internal static string MainTerminalID { get; private set; }
    internal static Dispatcher CurrentDispatcher => ((instance == null) ? Dispatcher.CurrentDispatcher : instance.Dispatcher);
}
This class must be marked with the public access modifier - this makes it accessible from a robot in MetaTrader. Also, the methods to be used in the terminal must be static and have a public access modifier, because the terminal allows the use of only static methods. This class also has 2 properties with an Internal access modifier. This access modifier hides them from the terminal, since they are intended for use only inside the created dll. As you can see from the implementation, our window is supposed to be stored in a private static field. Thus it can be accessed from other properties and methods. This solution also ensures that only one application instance can be created in one robot on this terminal. The Instance method instantiates graphics and opens a window. First a check is performed of whether the window was instantiated earlier. If yes, the attempt should be ignored. Then the secondary thread is created for running the graphics. Separation of threads for the graphics and the running program is used to avoid freezes in the terminal and graphical interface. After writing the window loading, subscribe to the window closing event and assign the null value for the proper operation of the window loading scheme. Then we need to launch the dispatcher, otherwise the dispatcher will not be launched for the thread in which the graphics is called. The Dispatcher class was created to solve multithreading issues in WPF applications. The fact is that all elements of the graphics window belong to the graphics window thread. When we try to change the value of any of the graphics elements from another thread, we will get a 'cross thread exception' error. The Dispatcher class starts the operation passed to it via a delegate in the graphic interface thread and thus avoids the error. After completing the description of the lambda expression for graphics launch, we need to configure the thread as a Single Threaded Apartment and run it, thus running the graphics. Prior to this it is necessary to store the value of the passed current terminal ID.
Why do we need this? This allows us to debug graphics separately from the logic. We have created a graphical interface. However, in order to debug it we need a class representing the model. The model ha a number of specific implementation features and thus it should be debugged separately from the graphics. Now that we have a method to substitute a test data model, we can implement a test data model class and substitute it in the ViewModel through a static factory. As a result, we get the opportunity to debug the graphics using the test data, to run the GUI and to check the reaction of callbacks, design and other nuances. I did it as follows. First, we need to create a console application in the current Solution in order to run graphics directly from VisualStudio: this will provide access to debugging tools.
Call it "Test" and add a link to our dll, which we write for MetaTrader. As a result, we get a console application which can use the public classes of our dll. However, there is only one public class in our dll, i.e. the MQL5Connector class/ However, in addition to it we need to create a fake data model and substitute it in the ViewModel as described earlier. To do this, we need to access classes that are available only inside the dll. There is a solution for that. To do this, ass the following attribute in any place of our dll:
[assembly: InternalsVisibleTo("Test")]
It makes all internal classes of our dll available in the Test build (i.e. in our test console application). Thus we can create a fake model and use it to launch our application. As a result, our console application should have the following implementation:
 class Program
 {
    static void Main(string[] args)
    {
        ModelCreator.SetModel(new MyTestModel());

        MQL5Connector.Instance("ID of the main terminal");
    }
}

class MyTestModel : IExtentionGUI_M
{
    // Implementation of the IExtentionGUI_M interface
}
Now we can run the graphics separately from the logic, debug it and visually analyze it.
Conclusion and attachments
We have examined the most important and interesting points in creating the graphic application layer and its connector class (ViewModel). At this stage, we have implemented the graphics that can be opened and clicked, as well as created a linking class that describes data sources for the graphic layer and its behavior (reaction to button presses, etc.). Further we will discuss the model class and its components, which will describe the logic of the add-on and the methods of interaction with the files, terminal, and computer directories.