How to Install and Use OpenCL for Calculations
MetaQuotes | 1 July, 2013
OpenCL in the MetaTrader 5 Client Terminal
It has been over a year since it became possible to write programs for OpenCL in MQL5. Entries of any OpenCL devices found can now be seen in the Journal at the MetaTrader 5 terminal launch, as shown below.

In this case, the MetaTrader 5 terminal has detected 4 methods available to launch OpenCL directly from an MQL5 program: a graphics card from NVIDIA (OpenCL 1.1) and one from AMD (OpenCL 1.2), as well as two Intel Core-i7 CPU utilization options, depending on the driver installed. If your computer already has a suitable OpenCL device version 1.1 or higher, you can safely skip the description part and proceed directly to Performance Comparison to be able to see for yourself the performance gain for tasks that allow parallel computing.
OpenCL is Fascinating!
However not many users have taken the advantage of using parallel computing in their Expert Advisors, indicators or scripts as they are not aware of the new possibilities offered and do not have the required knowledge.
The thing is that launching of any MQL5 program that uses OpenCL requires appropriate software to be installed. That's why a lot of users were simply not able to run the Mandelbrot set script, as well as many other programs available in the MQL5.community forum.
In this article, we will show you how to install OpenCL on your computer so you can see first-hand the advantages of using parallel computing in MQL5. We are not going to consider the particulars of writing programs for OpenCL in MQL5 as the website already features two great articles that cover this subject:
What is OpenCL?
OpenCL is the open standard for parallel programming developed by the Khronos Group consortium in 2008. This standard allows you to develop applications that could be run in parallel on GPUs or CPUs with different architecture in a heterogeneous system.
In other words, OpenCL makes it possible to utilize all CPU cores or GPU's enormous computing capacity when calculating a task, thus reducing program execution time. Use of OpenCL is therefore very beneficial when dealing with tasks associated with laborious and resource consuming computations.
For example, speaking of MQL5, performance gain can be very rewarding when handling a certain script (indicator or Expert Advisor) that performs a complex and lengthy analysis of historical data by several symbols and time frames (it should be noted here that a MQL5 program that is intended to employ parallel execution should be written in a special way using OpenCL API).
OpenCL Support
Support for OpenCL in MQL5 is provided starting with version 1.1 released in June 2010. So, in order to use parallel computing, you need to have a relatively new software and hardware appropriate for the standard.
That said, it should be noted that to start using OpenCL it does not really matter whether or not you have a graphics card on your PC - a CPU will do. This means that OpenCL is available to virtually each user who wants to reduce the execution time of their MQL5 programs.
CPUs are definitely far behind their graphical rivals in terms of distributed computing speed. However, a good multi-core CPU should do just fine in achieving a significant speed increase. But let's go back to the subject of our discussion.
As already mentioned earlier, you can use both graphics cards and CPUs for parallel computing. There are three major manufacturers of the relevant devices in the market: Intel, AMD and NVidia. The following table provides information on devices and operating systems that support OpenCL 1.1 for each of the three manufacturers:
| Manufacturer | Devices | Operating Systems |
|---|---|---|
| Intel | CPUs: Core i3, i5, i7 - for PCs; Xeon - for servers; Xeon Phi - for coprocessors (read more). |
Windows 7, 8; openSUSE; Red Hat. |
| AMD | Graphics Cards: AMD Radeon HD Graphics from 6400 series and up; ATI Radeon HD Graphics from 5400 series and up; ATI FirePro Graphics A300, S, W, V series; ATI Mobility Radeon HD from 5400 series and up; ATI FirePro M7820 M5800 (read more). CPUs based on K8 architecture and later: Opteron, Athlon 64, Athlon 64 FX, Athlon 64 X2, Sempron, Turion 64, Turion 64 X2, Phenom, Phenom II (read more). APU (hybrid CPU/GPU processor): CPU series A, C, E, E2, G, R. |
Windows Vista SP2, 7, 8; openSUSE 11.x; Ubuntu 11.04; Red Hat 6.x. |
| NVidia | GPUs (with CUDA Architecture): Tesla, Quadro, GeForce (read more). |
Windows XP, Vista, 7, 8 Linux and Mac OS (read more) |
Make sure that you have at least one device (CPU or GPU) available on your computer and check whether that device, as well as the operating system installed support OpenCL 1.1. If these requirements are met, you can safely move to the next section that describes how to set up OpenCL, depending on the manufacturer of the hardware.
Setting up OpenCL
If you have the required hardware and software installed on your computer, all you need to do to start using parallel computing in MetaTrader 5 is to set up OpenCL for one of your devices.
The OpenCL setup procedure varies, depending on the hardware you intend to use - GPU or CPU. If the MetaTrader 5 terminal has found a graphics card with OpenCL support, you just need to update its drivers to the latest version.
You will be required to install a SDK for the CPU only if your computer does not have the appropriate graphics card.
Important: If you already have a graphics card with OpenCL support installed, you do not need to install a software version for OpenCL emulation on CPU!
Unless it is required for experiments as graphics cards for OpenCL offer indisputable advantages.
The following paragraphs describe the OpenCL setup procedure, depending on the manufacturer. You can go to the relevant setup instructions by using the corresponding link:
1. Intel
To be able to use OpenCL on Intel CPUs, you need to download and install Intel SDK for OpenCL Applications. To do this, go to the official developer's download page.
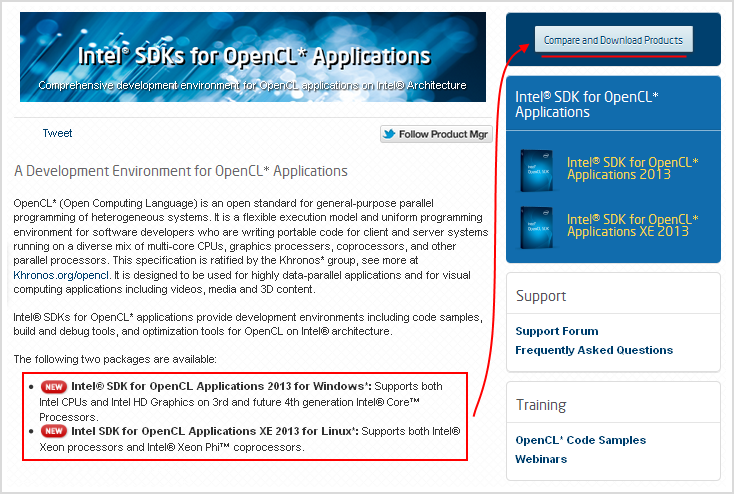
Fig. 1.1. Intel SDK for OpenCL download page.
Here, you can find general information on OpenCL, as well as a list of products available for download. To download the available products, click on the Compare and Download Products button in the top right corner of the page.
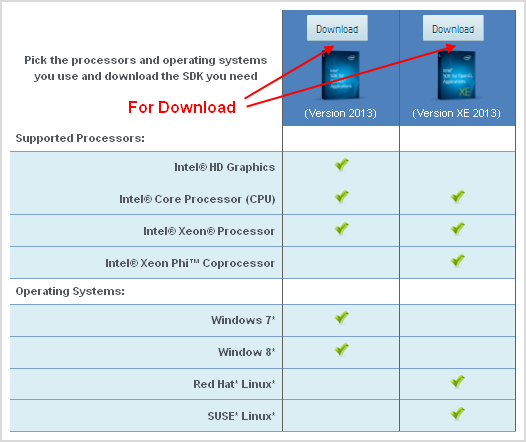
Fig. 1.2. Information on available products and installation requirements.
After clicking, you will see a window with information on the product requirements as to supported processor types and operating systems. Select and download a suitable product by clicking the Download button above the product's icon.
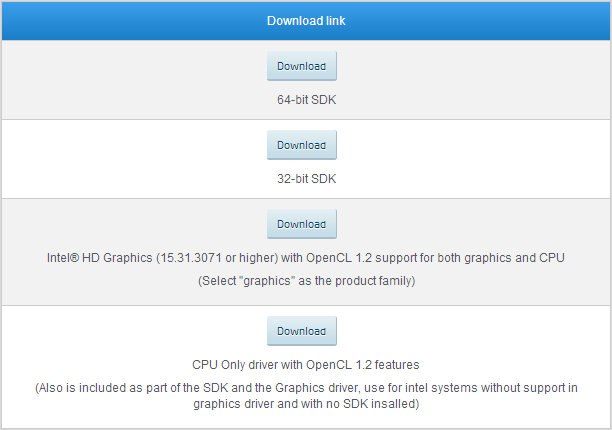
Fig. 1.3. SDK download links
Another window will pop up with download links. Select and download either the 32-bit or 64-bit SDK. Wait for a couple of minutes and run the obtained file when the download is complete. Confirm the installation of SDK components and extract the files in one of the folders.
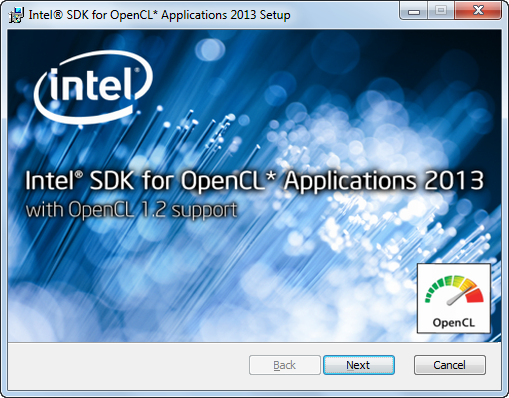
Fig. 1.4. Starting the installation of Intel SDK for OpenCL.
You will see the installation window saying Intel SDK for OpenCL Applications with OpenCL 1.2 support. Click Next and follow the installation instructions.
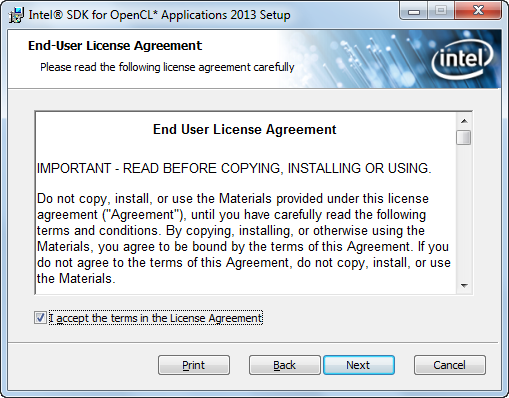
Fig. 1.5. Acceptance of the End User License Agreement.
Accept the terms and conditions of the License Agreement. Following this the components to be installed will be displayed in the window - click Next to continue.
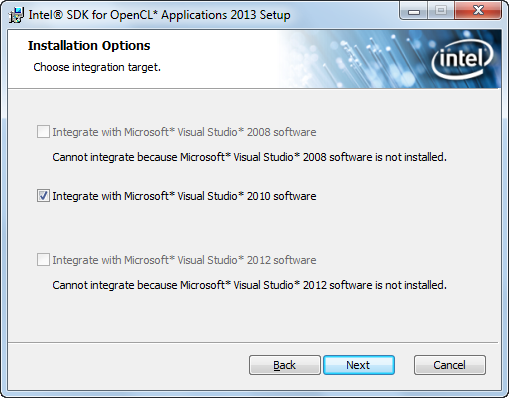
Fig. 1.6. Integration of SDK with Visual Studio.
If Microsoft Visual Studio 2008 software (or later versions) is already available on your PC, you will be prompted to integrate with it for OpenCL purposes. Then you will only need to select users who will be able to access the installed components, specify the SDK install location and click Install.
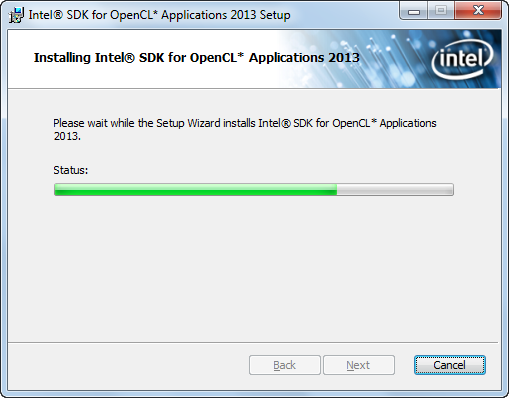
Fig. 1.7. Installation.
The installation will take a couple of minutes. Once it has been successfully completed, you will see the result on the screen. Click Finish to finish the installation process.
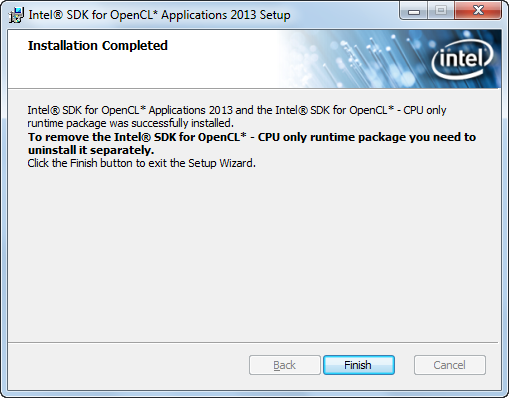
Fig. 1.8. Finishing the installation.
2.1. AMD Graphics Cards and APU
To install OpenCL for an AMD graphics card, let's update its driver to the latest version available. This can be done from the driver download page.
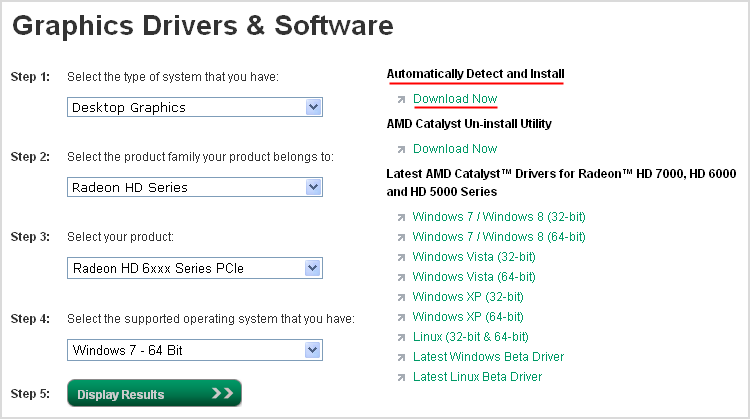
Fig. 2.1.1. AMD driver download page.
If you know your graphics card specifications, the driver can easily be found by filling up a form on the left hand side of the page. Once you have selected the necessary options in all the form fields, click on Display Results to find the appropriate driver.
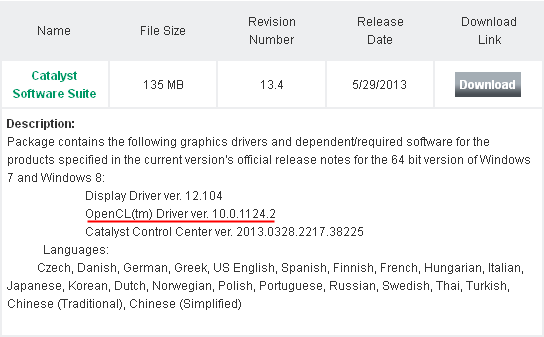
Fig. 2.1.2. AMD Catalyst download.
The system will offer a few drivers in Catalyst Software Suite, including the OpenCL driver. Download Catalyst and run the obtained file.
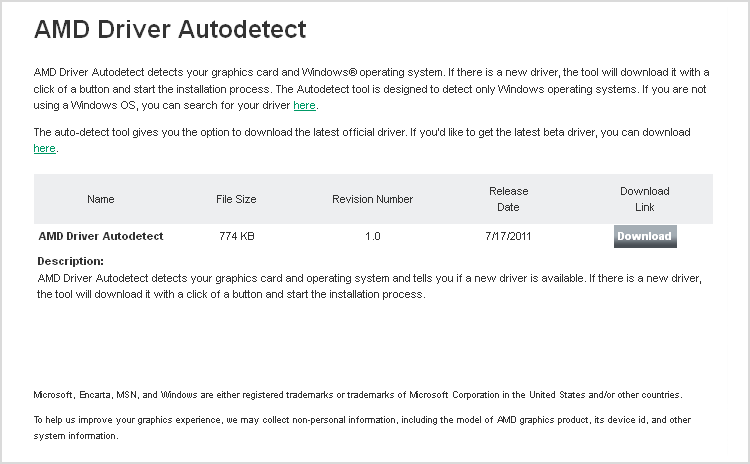
Fig. 2.1.3. Application download page for identification of graphics card type and driver version.
You can also use the Driver Autodetect system by clicking on the corresponding link in the top right corner of the page (Fig. 2.1.1.). You will be prompted to download the AMD Driver Autodetect application - do so and start it.
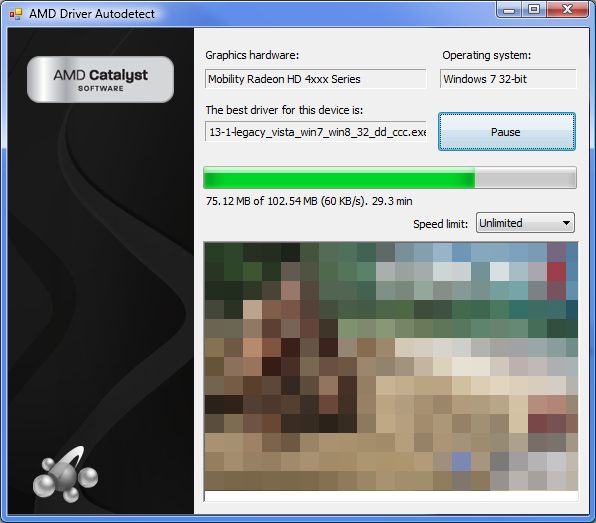
Fig. 2.1.4. Application for detection and download of the appropriate driver.
The application will analyze the system and offer you to download the appropriate graphics card driver. Download it and run the obtained file. The Install Manager will ask you to select the folder to unpack the files - select and click Install.
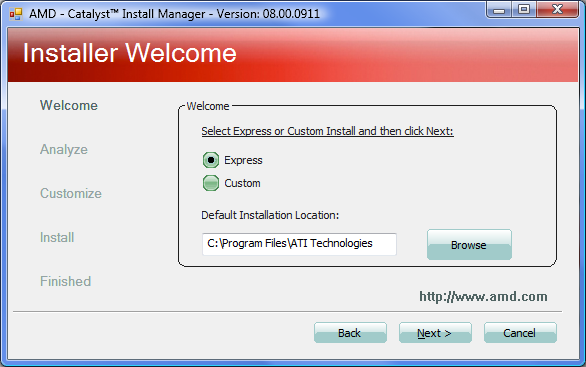
Fig. 2.1.5. AMD Catalyst Install Manager.
The End User License Agreement will appear in a pop up window. We need to accept its terms and conditions. We further select Express installation, specify AMD Catalyst install location and click Next.
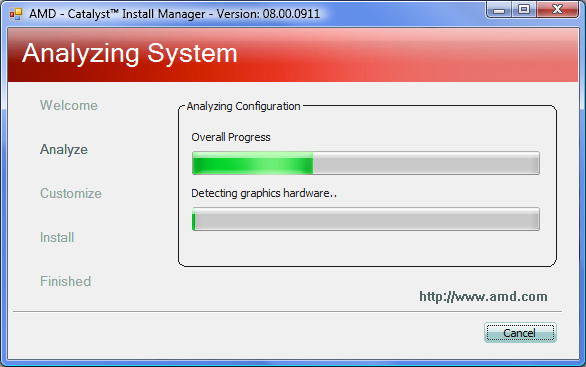
Fig. 2.1.6. Installation.
The installation will take a couple of minutes. Once it has been completed, you will see the relevant message on the screen.
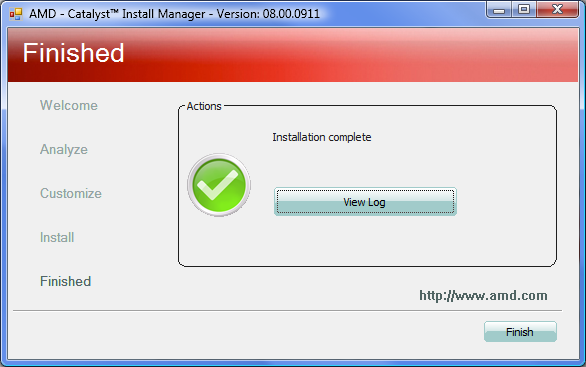
Fig. 2.1.7. Finishing the installation.
2.2. AMD CPUs
To install OpenCL for an AMD CPU, we need to download and install the latest version of AMD APP SDK. For this purpose, go to the following page on the official website of the developer.
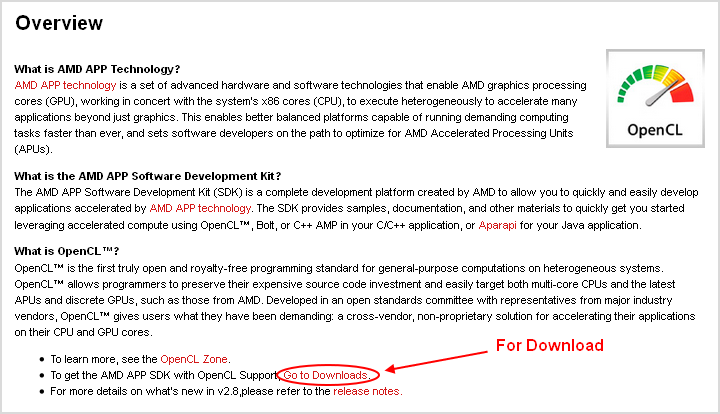
Fig. 2.2.1. AMD APP SDK download page.
This page provides some information on SDK as such and gives an idea of OpenCL. What we need here is to find and click on the Go to Downloads link below the description.
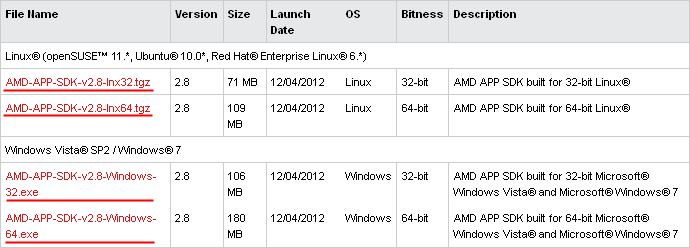
Fig. 2.2.2. Table of SDKs available for download.
At the bottom of the page, you will see a table with a list of the latest SDK versions for various operating systems, either 32-bit or 64-bit, as well as download links. Select the required version by clicking on the relevant link. You will be directed to the page with the End User License Agreement. Accept it to initiate downloading.
After running the downloaded installer, you will be prompted to extract the installation files to some folder. This will be followed by the installation of the above described AMD Catalyst containing AMD APP SDK for your CPU. The Catalyst installation procedure is displayed in Fig. 2.1.5 - 2.1.7 of section 2.1. above.
3. NVidia
If you have a NVidia graphics card, you need to update its driver to the latest version to be able to install OpenCL. You can download it from the driver download page on the developer's website.
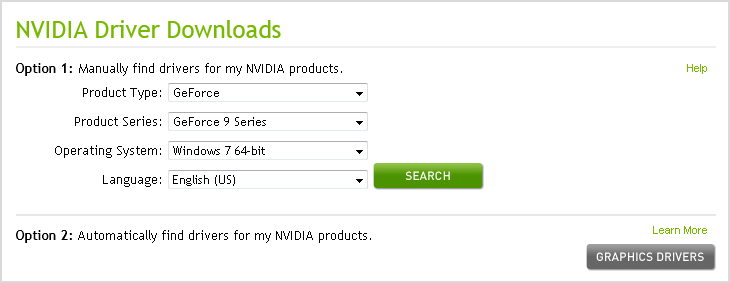
Fig. 3.1. NVidia driver download page.
This page offers you options to either find the required driver manually or automatically. Using the manual option, you need to select the product type, series, operating system and click Search. The system will find the latest driver suitable for your graphics card and prompt you to download it.

Fig. 3.2. Selected driver download.
If you opt for Option 2, you need to click on Graphics Drivers whereby you will be asked to scan your system using GPU_Reader Java application.
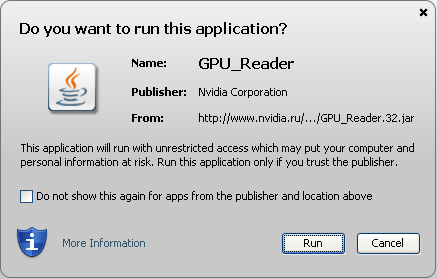
Fig. 3.3. Running the application to identify the graphics card type and driver version.
Run the application by clicking Run. Wait for a few seconds to be able to see the information on the graphics card, current version of the installed driver and the latest recommended driver version. Click Download to be directed to the download page shown in Fig. 3.2.
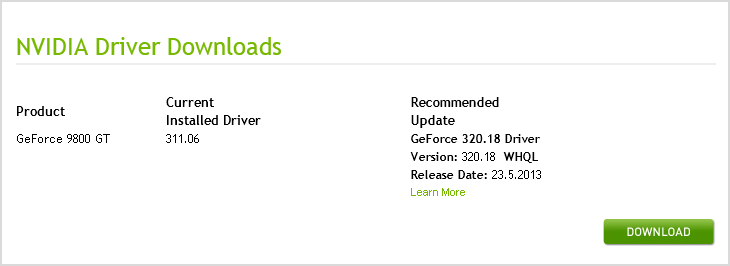
Fig. 3.4. Results of automatic identification of the graphics card type and driver version.
Click Download Now and accept the NVidia Software License Agreement by clicking on the Agree and Download button.

Fig. 3.5. Acceptance of the License Agreement and downloading the driver.
Thus, we get the latest driver version for the graphics card. Then we run the obtained file - you will be asked to extract the driver installation files in one of the folders. The installation will start after unpacking the files. First, you need to accept the terms and conditions of the NVidia Software License Agreement once again.
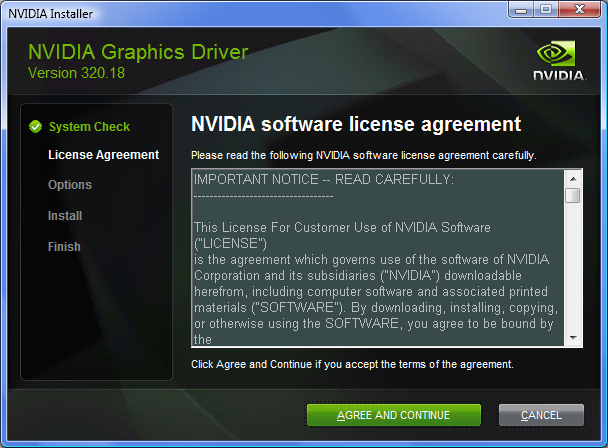
Fig. 3.6. Acceptance of the License Agreement at the first installation stage.
Then select Express install option and click Next. Additionally, you will be offered to install NVidia Experience add-in program which is optional.
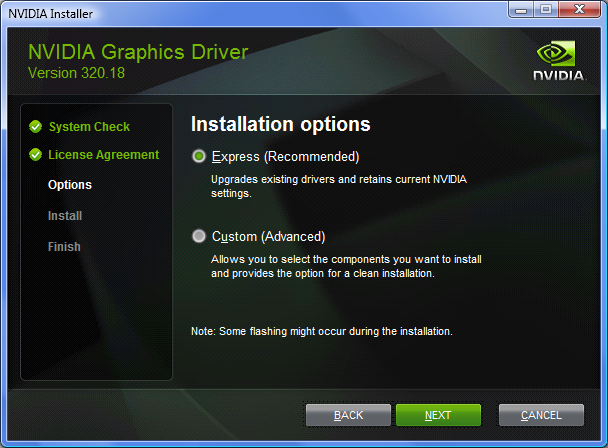
Fig. 3.7. Selecting the install option.
The driver installation will start immediately after that, accompanied with the advertisement of NVidia's latest developments.
Fig. 3.8. Installation.
That's it. The driver has been installed and we only need to restart the system to be able to use OpenCL in the MetaTrader 5 terminal.
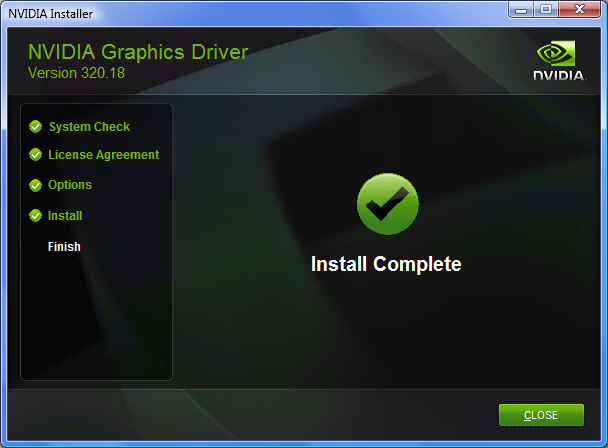
Fig. 3.9. Finishing the installation.
Performance Comparison
OpenCL_Sample.mq5 has been written to demonstrate the advantages of using OpenCL in MQL5. It calculates values of the function of two variables at some set and displays results in the chart window using a graphical label (OBJ_BITMAP_LABEL). Calculations are done in two ways - using and without using OpenCL. These blocks are implemented in the form of the WithOpenCL() and WithoutOpenCL() functions, respectively:
//+------------------------------------------------------------------+
//| Script program start function                                    |
//+------------------------------------------------------------------+
void OnStart()
  {
//...
   Print("\nCalculations without OpenCL:");
   WithoutOpenCL(values1,colors1,w,h,size,const_1,const_2);
//--- calculations with OpenCL
   Print("\nCalculations with OpenCL:");
   WithOpenCL(values2,colors2,w,h,size,const_1,const_2);
//...
  }
//+------------------------------------------------------------------+
//| Calculations without using  OpenCL                               |
//+------------------------------------------------------------------+
void WithoutOpenCL(float &values[],uint &colors[],const uint w,const uint h,
                   const uint size,const uint const_1,const uint const_2)
  {
//--- store the calculation start time
   uint x=GetTickCount();
//--- calculation of function values
   for(uint i=0;i<h;i++)
      for(uint j=0;j<w;j++)
         values[i*w+j]=Func(InpXStart+i*InpXStep,InpYStart+j*InpYStep);
//--- print the function calculation time
   Print("Calculation of function values = "+IntegerToString(GetTickCount()-x)+" ms");
//--- determine the minimum value and the difference between
//--- the minimum and maximum values of points in the set
   float min,dif;
   GetMinAndDifference(values,size,min,dif);
//--- store the calculation start time
   x=GetTickCount();
//--- calculate paint colors for the set
   uint a;
   for(uint i=0;i<size;i++)
     {
      a=(uint)MathRound(255*(values[i]-min)/dif);
      colors[i]=const_1*(a/16)+const_2*(a%16);
     }
//--- print the paint color calculation time
   Print("Calculation of paint colors = "+IntegerToString(GetTickCount()-x)+" ms");
  }
//+------------------------------------------------------------------+
//| Calculations using OpenCL                                        |
//+------------------------------------------------------------------+
void WithOpenCL(float &values[],uint &colors[],const uint w,const uint h,
                const uint size,const uint const_1,const uint const_2)
  {
//--- variables for using OpenCL
   int cl_ctx;
   int cl_prg;
   int cl_krn_1;
   int cl_krn_2;
   int cl_mem_1;
   int cl_mem_2;
//--- create context for OpenCL (selection of device)
   if((cl_ctx=CLContextCreate(CL_USE_ANY))==INVALID_HANDLE)
     {
      Print("OpenCL not found");
      return;
     }
//--- create a program based on the code in the cl_src line
   if((cl_prg=CLProgramCreate(cl_ctx,cl_src))==INVALID_HANDLE)
     {
      CLContextFree(cl_ctx);
      Print("OpenCL program create failed");
      return;
     }
//--- create a kernel for calculation of values of the function of two variables
   if((cl_krn_1=CLKernelCreate(cl_prg,"Func"))==INVALID_HANDLE)
     {
      CLProgramFree(cl_prg);
      CLContextFree(cl_ctx);
      Print("OpenCL kernel_1 create failed");
      return;
     }
//--- kernel for painting points of the set in the plane
   if((cl_krn_2=CLKernelCreate(cl_prg,"Grad"))==INVALID_HANDLE)
     {
      CLKernelFree(cl_krn_1);
      CLProgramFree(cl_prg);
      CLContextFree(cl_ctx);
      Print("OpenCL kernel_2 create failed");
      return;
     }
//--- OpenCL buffer for function values
   if((cl_mem_1=CLBufferCreate(cl_ctx,size*sizeof(float),CL_MEM_READ_WRITE))==INVALID_HANDLE)
     {
      CLKernelFree(cl_krn_2);
      CLKernelFree(cl_krn_1);
      CLProgramFree(cl_prg);
      CLContextFree(cl_ctx);
      Print("OpenCL buffer create failed");
      return;
     }
//--- OpenCL buffer for point colors
   if((cl_mem_2=CLBufferCreate(cl_ctx,size*sizeof(uint),CL_MEM_READ_WRITE))==INVALID_HANDLE)
     {
      CLBufferFree(cl_mem_1);
      CLKernelFree(cl_krn_2);
      CLKernelFree(cl_krn_1);
      CLProgramFree(cl_prg);
      CLContextFree(cl_ctx);
      Print("OpenCL buffer create failed");
      return;
     }
//--- store the calculation start time
   uint x=GetTickCount();
//--- array sets indices at which the calculation will start
   uint offset[2]={0,0};
//--- array sets limits up to which the calculation will be performed
   uint work[2];
   work[0]=h;
   work[1]=w;
//--- calculation of function values
//--- pass the values to the kernel
   CLSetKernelArg(cl_krn_1,0,InpXStart);
   CLSetKernelArg(cl_krn_1,1,InpYStart);
   CLSetKernelArg(cl_krn_1,2,InpXStep);
   CLSetKernelArg(cl_krn_1,3,InpYStep);
   CLSetKernelArgMem(cl_krn_1,4,cl_mem_1);
//--- start the execution of the kernel
   CLExecute(cl_krn_1,2,offset,work);
//--- read the obtained values to the array
   CLBufferRead(cl_mem_1,values);
//--- print the function calculation time
   Print("Calculation of function values = "+IntegerToString(GetTickCount()-x)+" ms");
//--- determine the minimum value and the difference between
//--- the minimum and maximum values of points in the set
   float min,dif;
   GetMinAndDifference(values,size,min,dif);
//--- store the calculation start time
   x=GetTickCount();
//--- set the calculation limits
   uint offset2[1]={0};
   uint work2[1];
   work2[0]=size;
//--- calculation of paint colors for the set
//--- pass the values to the kernel
   CLSetKernelArg(cl_krn_2,0,min);
   CLSetKernelArg(cl_krn_2,1,dif);
   CLSetKernelArg(cl_krn_2,2,const_1);
   CLSetKernelArg(cl_krn_2,3,const_2);
   CLSetKernelArgMem(cl_krn_2,4,cl_mem_1);
   CLSetKernelArgMem(cl_krn_2,5,cl_mem_2);
//--- start the execution of the kernel
   CLExecute(cl_krn_2,1,offset2,work2);
//--- read the obtained values to the array
   CLBufferRead(cl_mem_2,colors);
//--- print the paint color calculation time
   Print("Calculation of paint colors = "+IntegerToString(GetTickCount()-x)+" ms");
//--- delete OpenCL objects
   CLBufferFree(cl_mem_1);
   CLBufferFree(cl_mem_2);
   CLKernelFree(cl_krn_1);
   CLKernelFree(cl_krn_2);
   CLProgramFree(cl_prg);
   CLContextFree(cl_ctx);
  }
After executing the script, for a few seconds you will be able to see the painted set of function values in the chart window. Each of them corresponds to one of the tones of the color selected in the input parameters (red, green or blue).

Script execution results for the set of points in the plane from -22 to 22 at step 0.1.
In addition to the image itself, the function calculation time for both methods is displayed in the "Expert Advisors" journal so you can clearly see the advantages and practical value of using OpenCL in MQL5. Increase the step value and get the script execution results:
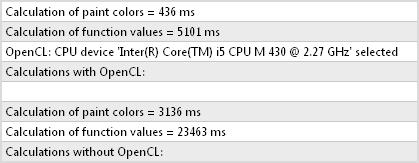
Results of function calculation and painting color values using two methods.
The total time of function calculation on the CPU using OpenCL has appeared to be more than 5 times less and this is far from being the limit! It is well known that calculations on advanced GPUs with OpenCL support are a lot faster than on CPUs. You can find a clear proof of this fact in the results of the script execution on different OpenCL devices, as shown in the table below:
| OpenCL device |
Time of execution without using OpenCL, ms |
Time of execution using OpenCL, ms |
Performance gain |
|---|---|---|---|
| AMD Radeon HD 7970 | 20,361 ms |
171 ms |
119.07 times |
| NVidia GeForce GT 630 |
24,742 ms |
578 ms |
42.8 times |
| Intel Core i5 430M |
27,222 ms |
5,428 ms |
5.01 times |
| AMD Athlon X2 Dual-Core QL-65 |
45,723 ms |
9,516 ms | 4.8 times |
As can be seen, the use of OpenCL on the top-of-the-range AMD graphics card has resulted in a 100-fold reduction in calculation time! Significant results have also been achieved on the slightly older GeForce GT 630 of 2011, with a 42-fold reduction in time. The CPUs from Intel and AMD have come last. However performance gain achieved on them will also be very beneficial when dealing with complex calculations.
That's about it. The table of comparisons demonstrates a clear advantage of using parallel computing in bulk data processing. All you should do is install the appropriate driver for your graphics card or CPU.