Secrets of MetaTrader 4 Client Terminal: Alerting System
Tatyana | 13 September, 2006
System Events
Open the "Tools -> Options" menu and go to the "Events" tab. By default, a WAV file is used to alert about one of eleven events.
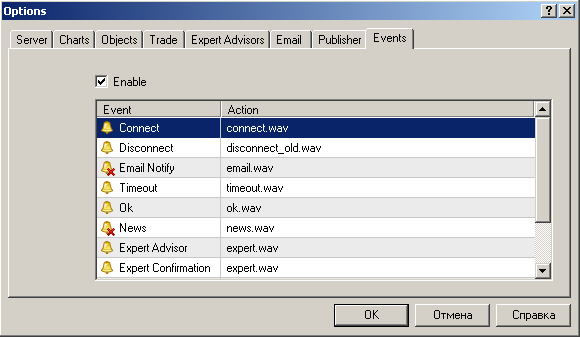
These files can be found in the \MetaTrader 4\sounds\ directory of the Client Terminal. The alert can be modified as desired. To do so, open the popup list in the "Action" column by double-clicking with the left mouse button on the selected line.
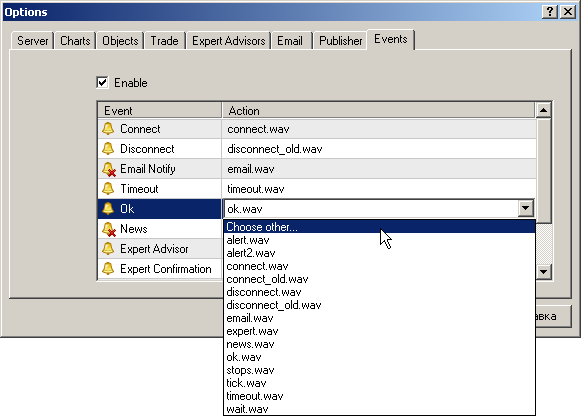
The alert can be both a WAV file and an executable file ("EXE", "VBS", "BAT").
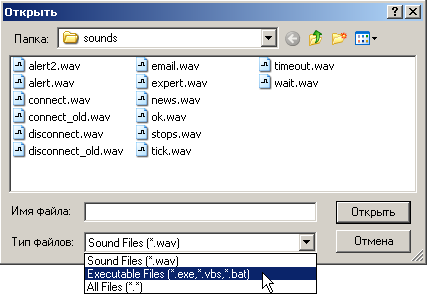
If a file of another type is chosen for alerting, the application related to this file type will be launched. After having selected an action, press Enter to confirm the choice. The event alert can be disabled by double-clicking with the left mouse button on the line in the "Event" column.
User-Defined Events
Custom events can be of two types:
- the price reaches the pre-defined value for the desired symbol;
- the pre-defined timeout is reached.

To set up alert, you have to go to the "Alerts" tab in the "Terminal" window and press Insert.
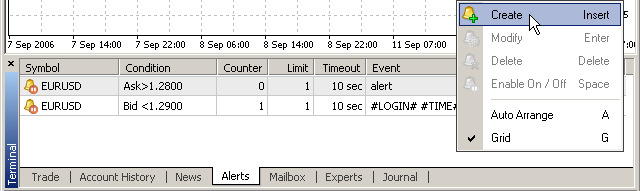
The alerts can be enabled/disabled by pressing Space, and modified by pressing Enter.
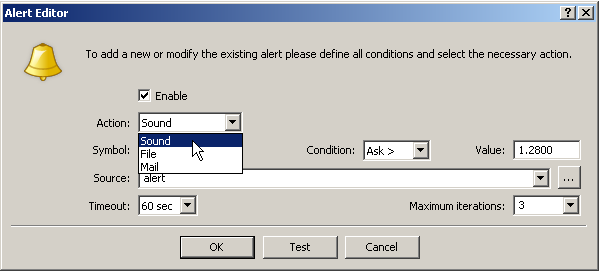
Alerts can be of three types: a sound alert, an executable file, an emailed message. For all alert types, it is necessary to specify the "Symbol" and conditions (fields "Condition" and "Value"), at meeting of which the alert will trigger. In the fields named "Timeout" and "Maximum iterations", it should be specified how many times and with what regularity the alert will trigger.
Sound Alerts
Both files stored in the \MetaTrader 4\sounds\ directory of the Client Terminal and any other files can be used as sound alerts: "WAV", "MP3", "WMI". If a file in the "MP3" or "WMI" format is chosen, the application related to these file types will be launched at alert triggering.
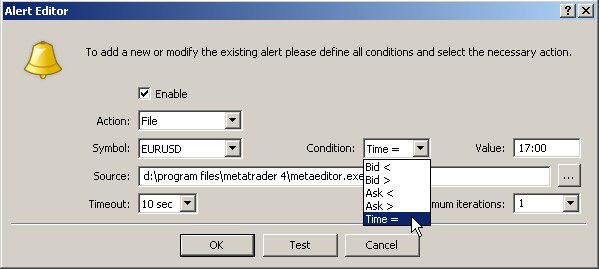
Executable Files
Executable files can be in formats of "EXE", "VBS", "BAT". If a file of any other format has been chosen, the application related to these file types will be launched at alert triggering.
Emailed Messages
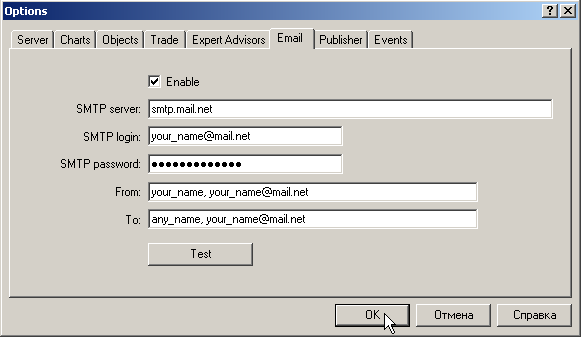
To get alert messages via email, it is necessary to make presettins in the "Email" tab of the "Tools -> Options" menu. Check the "Enable" field and enter your email server settings in the corresponding fields. In each field, you can see red prompts about the data format to be entered.
- SMTP server – address of your mailing server when accessed via SMTP. Please do not forget to specify the port number separated by a colon. It is usually port 25. Example: smtp.mail.ru:25
- SMTP login – it is usually your email address. Example: your_name@mail.ru
- SMTP password – a password used to access to your mailbox.
- From: – you should enter the login ("Your name") and your email address on the same server, the SMTP of which you would like to use. As a rule, the login coincides with the first part of the email address, but it can be skipped. Example: your_name, your_name@mail.ru
- To: – email address you would like to send alerts to. The "Your name" part of the address can be skipped. In general, the "To:" field should be filled out with any real email address. Example: any_name, your_name@mail.ru
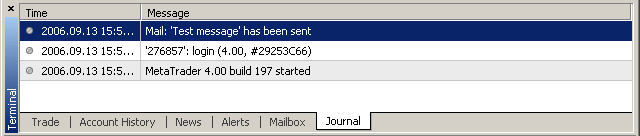
Click on the "Test" button and check whether the message has been delivered to the email address you have specified in the "To:" field. If all settings have been written correctly, the message: "Mail: 'Test message' has been sent" must appear in the "Journal".
For sms messages to be sent, you have to specify the email address provided by your cellular operator in the "To:" field. To use the operator's SMTP server as such, you have to verify its settings on the operator's website or at the accounts department. At that, please keep in mind that not all cellular operators permit to use their SMTP servers without calling to POP3 servers.
Then the alert as such can be created. To do so, press Insert in the "Alerts" tab in the "Terminal" window. Fill out all the fields:
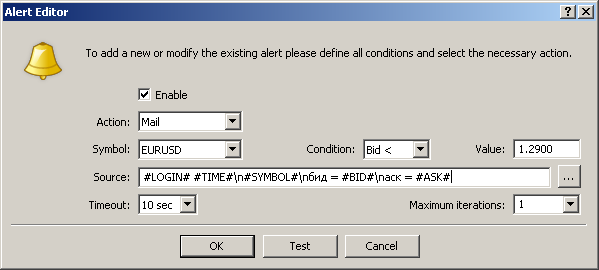
To create the message text, click on the  button near the "Source" line. Enter the subject and the body of the message. Both in the subject and in the message body, you can use "Macros". The list of macros is available from the context menu.
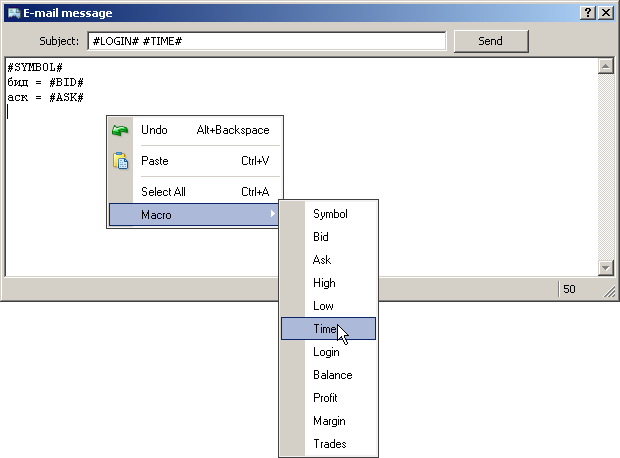
After this, click on the "Send" button.
Having filled out other fields, click on the "Test" button and check whether the alert has income at your mailbox. If the message has been sent successfully, the corresponding record will appear in the "Journal":
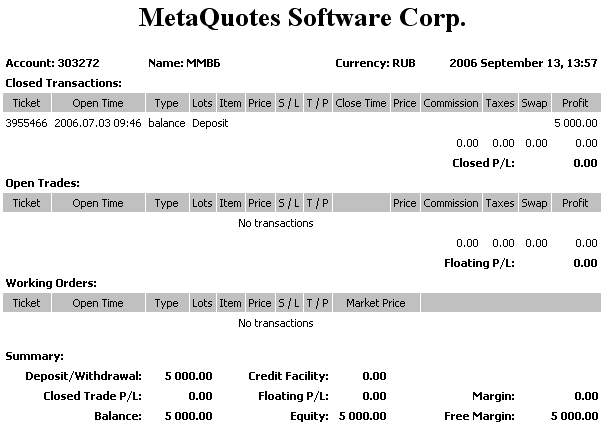
Publishing of Reports on FTP Server
The terminal allows publishing in internet reports about the account status on a periodic predetermined base.
For this, it is necessary to set up connection to the internet via FTP. Open the "Tools -> Options" menu and go to the "Publisher" tab.
The red color specifies the format to be used for entering the data.
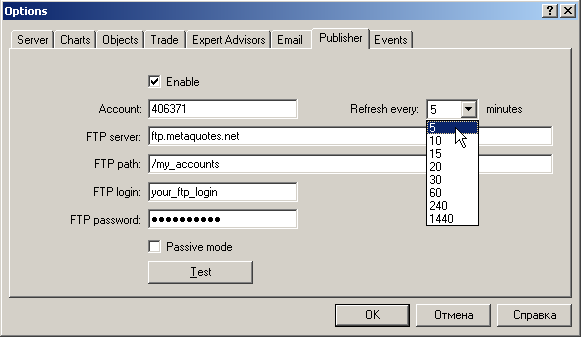
The data transfer can be performed in either active or passive mode. The main deifference between them is the side that opens connection to transfer data. In the active mode, the FTP server initiates connection, and in the passive one, the customer does.
Periodicity is the minimal time intervalб with which the report will be published. At that, if a trading position or order changes in the terminal, the report will be forcedly and immediately published. This mechanism provides data accuracy (except for the current market price and the profit) in the report.
After all settings have been made, click on the "Test" button. If the report has been successfully sent, the corresponding line will appear in the "Journal".
