DoEasy. Controls (Part 27): Working on ProgressBar WinForms object

Contents
Concept
In the current article, I will continue the development of the ProgressBar control that I started to implement in the previous article. This element consists of two components - the underlay and the progress bar. In the future, it will be possible to place other design elements on the underlay in additino to the progress bar - texts, images, etc. At the moment, this control is a static WinForms object. Today I will develop the functionality for programmatically controlling the progress bar of the object. Thus, we will make it possible to use it in our programs to indicate the progress of any operations that require a significant number of identical actions.
If we pay attention to similar progress bars in the Windows environment, we will notice the glare moving along the progress bar or some other visual effects when it is filled. Besides the fact that they animate the program interface making it more attractive, the visual effects on the progress bar also carry the function of an additional indication of the process completion. If the number of operations displayed by the progress bar is large enough, then the progress bar is filled not on each completed operation, but after a certain number of them. Thus, even if the progress bar is full, operations can still continue. In such a situation, if visual effects continue to be displayed on the progress bar, then a process has not yet been completed. Once the process is complete, the progress bar will no longer display visual effects.
Usually, when the process ends, the ProgressBar control is also hidden, so the indication described above is not visible. But if the progress bar is created in a separate window, which, upon completion of all operations, should be closed manually, then the indication of the process completion/non-completion can be observed using visual effects on the progress bar. Alternatively, if there are several progress bars at the same time, which display one process divided into subprocesses, the progress bars of already completed processes will be displayed until the overall process is completed. On the ProgressBar controls that display subprocesses, we can also observe the double indication - if the progress bar is completely filled, but visual effects continue to be displayed on it, then this subprocess has not yet completely completed.
Implementing the visual effects functionality for the ProgressBar control will give us the ability to use its concept in other controls in the library. Each object that should have visual effects will be placed in the list of active elements. The library will see this list and call the timer event handlers of each of the objects placed in this list in turn in the timer. The necessary functionality will be implemented in the objects themselves, namely in their timer handler.
In addition, I will slightly refine the drawing of predefined icons. In the last article, I mentioned the strange behavior of anti-aliased lines when drawing them with transparency. Indeed, all graphical primitives drawn using smoothing methods of the Standard Library are not drawn normally if set to transparent. This means, we cannot achieve a smooth appearance or disappearance of such lines. But we can use the following trick: if the color opacity is set to a certain value for the line, for example, from 128 to 255, then we need to draw using the anti-aliasing method. If the opacity is set from 127 to 0, then we draw such a line using the usual method without smoothing. This approach will give the visual effect of a smooth appearance/disappearance of the drawn graphical primitives, and the semi-transparency will hide the "roughness" of the lines drawn without anti-aliasing.
Improving library classes
While creating a glare object in the previous article, I assumed that it would be created on the basis of a shadow object - it would be derived from the shadow object in order to use the blur methods available in that class. However, as practice has shown, this approach has not justified itself - in addition to the fact that it complicates the addition of visual effects to any object, the use of a glare as the successor of a shadow object limits its use within the framework of an already created concept.
So let's do the following: the glare object will be derived from the base object class of all WinForms objects of the CWinFormBase library and will be in the list of auxiliary objects. Then I can easily add it with just one line of code in the class where it should be used. I have already implemented handlers for active objects. This approach will save us from the routine addition of functionality, identical to the functionality of the shadow object processing, to different library classes. We will simply use the ready-made methods for adding bound objects and processing them.
In \MQL5\Include\DoEasy\Defines.mqh, move the glare object ID string from the section of graphical objects to the section of auxiliary library controls:
//+-----------------------------------------------+
//| The list of graphical element types           |
//+-----------------------------------------------+
enum ENUM_GRAPH_ELEMENT_TYPE
  {
   GRAPH_ELEMENT_TYPE_STANDARD,                       // Standard graphical object
   GRAPH_ELEMENT_TYPE_STANDARD_EXTENDED,              // Extended standard graphical object
   GRAPH_ELEMENT_TYPE_SHADOW_OBJ,                     // Shadow object

   GRAPH_ELEMENT_TYPE_ELEMENT,                        // Element
   GRAPH_ELEMENT_TYPE_FORM,                           // Form
   GRAPH_ELEMENT_TYPE_WINDOW,                         // Window
   //--- WinForms
   GRAPH_ELEMENT_TYPE_WF_UNDERLAY,                    // Panel object underlay
   GRAPH_ELEMENT_TYPE_WF_BASE,                        // Windows Forms Base
   //--- 'Container' object types are to be set below
   GRAPH_ELEMENT_TYPE_WF_CONTAINER,                   // Windows Forms container base object
   GRAPH_ELEMENT_TYPE_WF_PANEL,                       // Windows Forms Panel
   GRAPH_ELEMENT_TYPE_WF_GROUPBOX,                    // Windows Forms GroupBox
   GRAPH_ELEMENT_TYPE_WF_TAB_CONTROL,                 // Windows Forms TabControl
   GRAPH_ELEMENT_TYPE_WF_SPLIT_CONTAINER,             // Windows Forms SplitContainer
   //--- 'Standard control' object types are to be set below
   GRAPH_ELEMENT_TYPE_WF_COMMON_BASE,                 // Windows Forms base standard control
   GRAPH_ELEMENT_TYPE_WF_LABEL,                       // Windows Forms Label
   GRAPH_ELEMENT_TYPE_WF_BUTTON,                      // Windows Forms Button
   GRAPH_ELEMENT_TYPE_WF_CHECKBOX,                    // Windows Forms CheckBox
   GRAPH_ELEMENT_TYPE_WF_RADIOBUTTON,                 // Windows Forms RadioButton
   GRAPH_ELEMENT_TYPE_WF_ELEMENTS_LIST_BOX,           // Base list object of Windows Forms elements
   GRAPH_ELEMENT_TYPE_WF_LIST_BOX,                    // Windows Forms ListBox
   GRAPH_ELEMENT_TYPE_WF_CHECKED_LIST_BOX,            // Windows Forms CheckedListBox
   GRAPH_ELEMENT_TYPE_WF_BUTTON_LIST_BOX,             // Windows Forms ButtonListBox
   GRAPH_ELEMENT_TYPE_WF_TOOLTIP,                     // Windows Forms ToolTip
   GRAPH_ELEMENT_TYPE_WF_PROGRESS_BAR,                // Windows Forms ProgressBar
   //--- Auxiliary elements of WinForms objects
   GRAPH_ELEMENT_TYPE_WF_LIST_BOX_ITEM,               // Windows Forms ListBoxItem
   GRAPH_ELEMENT_TYPE_WF_TAB_HEADER,                  // Windows Forms TabHeader
   GRAPH_ELEMENT_TYPE_WF_TAB_FIELD,                   // Windows Forms TabField
   GRAPH_ELEMENT_TYPE_WF_SPLIT_CONTAINER_PANEL,       // Windows Forms SplitContainerPanel
   GRAPH_ELEMENT_TYPE_WF_ARROW_BUTTON,                // Windows Forms ArrowButton
   GRAPH_ELEMENT_TYPE_WF_ARROW_BUTTON_UP,             // Windows Forms UpArrowButton
   GRAPH_ELEMENT_TYPE_WF_ARROW_BUTTON_DOWN,           // Windows Forms DownArrowButton
   GRAPH_ELEMENT_TYPE_WF_ARROW_BUTTON_LEFT,           // Windows Forms LeftArrowButton
   GRAPH_ELEMENT_TYPE_WF_ARROW_BUTTON_RIGHT,          // Windows Forms RightArrowButton
   GRAPH_ELEMENT_TYPE_WF_ARROW_BUTTONS_UD_BOX,        // Windows Forms UpDownArrowButtonsBox
   GRAPH_ELEMENT_TYPE_WF_ARROW_BUTTONS_LR_BOX,        // Windows Forms LeftRightArrowButtonsBox
   GRAPH_ELEMENT_TYPE_WF_SPLITTER,                    // Windows Forms Splitter
   GRAPH_ELEMENT_TYPE_WF_HINT_BASE,                   // Windows Forms HintBase
   GRAPH_ELEMENT_TYPE_WF_HINT_MOVE_LEFT,              // Windows Forms HintMoveLeft
   GRAPH_ELEMENT_TYPE_WF_HINT_MOVE_RIGHT,             // Windows Forms HintMoveRight
   GRAPH_ELEMENT_TYPE_WF_HINT_MOVE_UP,                // Windows Forms HintMoveUp
   GRAPH_ELEMENT_TYPE_WF_HINT_MOVE_DOWN,              // Windows Forms HintMoveDown
   GRAPH_ELEMENT_TYPE_WF_BAR_PROGRESS_BAR,            // Windows Forms BarProgressBar
   GRAPH_ELEMENT_TYPE_WF_GLARE_OBJ,                   // Glare object
  };
//+------------------------------------------------------------------+
To draw visual effects (in this case, highlights), we need to set a list of visual effect styles:
//+-----------------------------------------------+
//| List of visual effect styles                  |
//+-----------------------------------------------+
enum ENUM_CANV_ELEMENT_VISUAL_EFF_STYLE
  {
   CANV_ELEMENT_VISUAL_EFF_STYLE_RECTANGLE,           // Rectangle
   CANV_ELEMENT_VISUAL_EFF_STYLE_PARALLELOGRAMM,      // Parallelogram
  };
//+------------------------------------------------------------------+
For now, we will make only two types of glares — a regular rectangle and a parallelogram. Next, you can draw any number of predefined glare shapes and use them to design visual effects. They do not have to be graphical primitives. They can be any images superimposed on objects as effects, especially since these images can be animated, which I am going to do later as an example.
In \MQL5\Include\DoEasy\Data.mqh, add new message indices of the library:
//--- CForm
   MSG_FORM_OBJECT_TEXT_NO_SHADOW_OBJ_FIRST_CREATE_IT,// No shadow object. Create it using the CreateShadowObj() method
   MSG_FORM_OBJECT_TEXT_NO_GLARE_OBJ_FIRST_CREATE_IT, // No glare object. We must first create it using the CreateGlareObj() method
   MSG_FORM_OBJECT_ERR_FAILED_CREATE_SHADOW_OBJ,      // Failed to create new shadow object
   MSG_FORM_OBJECT_ERR_FAILED_CREATE_GLARE_OBJ,       // Failed to create new glare object
   MSG_FORM_OBJECT_ERR_FAILED_CREATE_PC_OBJ,          // Failed to create new pixel copier object
   MSG_FORM_OBJECT_PC_OBJ_ALREADY_IN_LIST,            // Pixel copier object with ID already present in the list
and the text messages corresponding to the newly added indices:
//--- CForm
   {"Отсутствует объект тени. Необходимо сначала его создать при помощи метода CreateShadowObj()","There is no shadow object. You must first create it using the CreateShadowObj() method"},
   {"Отсутствует объект блика. Необходимо сначала его создать при помощи метода CreateGlareObj()","There is no glare object. You must first create it using the CreateGlareObj() method"},
   {"Не удалось создать новый объект для тени","Failed to create new object for shadow"},
   {"Не удалось создать новый объект для блика","Failed to create new object for glare"},
   {"Не удалось создать новый объект-копировщик пикселей","Failed to create new pixel copier object"},
   {"В списке уже есть объект-копировщик пикселей с идентификатором ","There is already a pixel copier object in the list with ID "},
Move the "Glare object" message index to the group of standard WinForms objects:
   MSG_GRAPH_ELEMENT_TYPE_ELEMENT,                    // Element
   MSG_GRAPH_ELEMENT_TYPE_SHADOW_OBJ,                 // Shadow object

   MSG_GRAPH_ELEMENT_TYPE_FORM,                       // Form
   MSG_GRAPH_ELEMENT_TYPE_WINDOW,                     // Window

   MSG_GRAPH_ELEMENT_TYPE_WF_BAR_PROGRESS_BAR,        // BarProgressBar control
   MSG_GRAPH_ELEMENT_TYPE_WF_PROGRESS_BAR,            // ProgressBar control
   MSG_GRAPH_ELEMENT_TYPE_WF_GLARE_OBJ,               // Glare object
//---
   MSG_GRAPH_ELEMENT_TYPE_WF_WRONG_TYPE_PASSED,       // Incorrect control type
Move the message text in the same way:
   {"Элемент","Element"},
   {"Объект тени","Shadow object"},

   {"Форма","Form"},
   {"Окно","Window"},

   {"Элемент управления BarProgressBar","Control element \"BarProgressBar\""},
   {"Элемент управления ProgressBar","Control element \"ProgressBar\""},
   {"Объект блика","Glare object"},

   {"Передан не правильный тип элемента управления","Wrong control type passed"},
In \MQL5\Include\DoEasy\GraphINI.mqh, where the parameters of various color schemes are set, add the property to specify the opacity value for the glare. Increase the total number of properties to 12:
//+-----------------------------------------------+
//| List of form style parameter indices          |
//+-----------------------------------------------+
enum ENUM_FORM_STYLE_PARAMS
  {
   //--- CForm
   FORM_STYLE_FRAME_GLARE_OPACITY,              // Glare opacity
   FORM_STYLE_FRAME_SHADOW_OPACITY,             // Shadow opacity
   FORM_STYLE_FRAME_SHADOW_BLUR,                // Shadow blur
   FORM_STYLE_DARKENING_COLOR_FOR_SHADOW,       // Form shadow color darkening
   FORM_STYLE_FRAME_SHADOW_X_SHIFT,             // Shadow X axis shift
   FORM_STYLE_FRAME_SHADOW_Y_SHIFT,             // Shadow Y axis shift
   FORM_STYLE_GRADIENT_V,                       // Vertical gradient filling flag
   FORM_STYLE_GRADIENT_C,                       // Cyclic gradient filling flag
   //--- CPanel
   FORM_STYLE_FRAME_WIDTH_LEFT,                 // Panel frame width to the left
   FORM_STYLE_FRAME_WIDTH_RIGHT,                // Panel frame width to the right
   FORM_STYLE_FRAME_WIDTH_TOP,                  // Panel frame width on top
   FORM_STYLE_FRAME_WIDTH_BOTTOM,               // Panel frame width below
  };
#define TOTAL_FORM_STYLE_PARAMS        (12)     // Number of form style parameters
//+------------------------------------------------------------------+
Set the default values of glare opacity to the array of properties for two color schemes that are currently in the library:
//+-----------------------------------------------+
//| Array containing form style parameters        |
//+-----------------------------------------------+
int array_form_style[TOTAL_FORM_STYLES][TOTAL_FORM_STYLE_PARAMS]=
  {
//--- "Flat form" style parameters
   {
      //--- CForm
      40,                                       // Glare opacity
      80,                                       // Shadow opacity
      4,                                        // Shadow blur
      80,                                       // Form shadow color darkening
      2,                                        // Shadow X axis shift
      2,                                        // Shadow Y axis shift
      false,                                    // Vertical gradient filling flag
      false,                                    // Cyclic gradient filling flag
      //--- CPanel
      3,                                        // Panel frame width to the left
      3,                                        // Panel frame width to the right
      3,                                        // Panel frame width on top
      3,                                        // Panel frame width below
   },
//--- "Embossed form" style parameters
   {
      //--- CForm
      40,                                       // Glare opacity
      80,                                       // Shadow opacity
      4,                                        // Shadow blur
      80,                                       // Form shadow color darkening
      2,                                        // Shadow X axis shift
      2,                                        // Shadow Y axis shift
      true,                                     // Vertical gradient filling flag
      false,                                    // Cyclic gradient filling flag
      //--- CPanel
      3,                                        // Panel frame width to the left
      3,                                        // Panel frame width to the right
      3,                                        // Panel frame width on top
      3,                                        // Panel frame width below
   },
  };
//+------------------------------------------------------------------+
In the future, I will radically change and supplement the composition of these property values for different color schemes when I start implementing them.
Since I have changed the category of the glare graphical element, in \MQL5\Include\DoEasy\Objects\Graph\GBaseObj.mqh of the base object class of all library graphical objects, namely in its method that returns the description of the graphical element type, move handling the "glare object" type passed to the method from its previous location to the appropriate place:
//+------------------------------------------------------------------+
//| Return the description of the graphical element type             |
//+------------------------------------------------------------------+
string CGBaseObj::TypeElementDescription(const ENUM_GRAPH_ELEMENT_TYPE type)
  {
   return
     (
      type==GRAPH_ELEMENT_TYPE_STANDARD                  ? CMessage::Text(MSG_GRAPH_ELEMENT_TYPE_STANDARD)                 :
      type==GRAPH_ELEMENT_TYPE_STANDARD_EXTENDED         ? CMessage::Text(MSG_GRAPH_ELEMENT_TYPE_STANDARD_EXTENDED)        :
      type==GRAPH_ELEMENT_TYPE_ELEMENT                   ? CMessage::Text(MSG_GRAPH_ELEMENT_TYPE_ELEMENT)                  :
      type==GRAPH_ELEMENT_TYPE_SHADOW_OBJ                ? CMessage::Text(MSG_GRAPH_ELEMENT_TYPE_SHADOW_OBJ)               :

      type==GRAPH_ELEMENT_TYPE_FORM                      ? CMessage::Text(MSG_GRAPH_ELEMENT_TYPE_FORM)                     :
      type==GRAPH_ELEMENT_TYPE_WINDOW                    ? CMessage::Text(MSG_GRAPH_ELEMENT_TYPE_WINDOW)                   :
      //--- WinForms
      type==GRAPH_ELEMENT_TYPE_WF_UNDERLAY               ? CMessage::Text(MSG_GRAPH_ELEMENT_TYPE_WF_UNDERLAY)              :
      type==GRAPH_ELEMENT_TYPE_WF_BASE                   ? CMessage::Text(MSG_GRAPH_ELEMENT_TYPE_WF_BASE)                  :
      //--- Containers
      type==GRAPH_ELEMENT_TYPE_WF_CONTAINER              ? CMessage::Text(MSG_GRAPH_ELEMENT_TYPE_WF_CONTAINER)             :
      type==GRAPH_ELEMENT_TYPE_WF_GROUPBOX               ? CMessage::Text(MSG_GRAPH_ELEMENT_TYPE_WF_GROUPBOX)              :
      type==GRAPH_ELEMENT_TYPE_WF_PANEL                  ? CMessage::Text(MSG_GRAPH_ELEMENT_TYPE_WF_PANEL)                 :
      type==GRAPH_ELEMENT_TYPE_WF_TAB_CONTROL            ? CMessage::Text(MSG_GRAPH_ELEMENT_TYPE_WF_TAB_CONTROL)           :
      type==GRAPH_ELEMENT_TYPE_WF_SPLIT_CONTAINER        ? CMessage::Text(MSG_GRAPH_ELEMENT_TYPE_WF_SPLIT_CONTAINER)       :
      //--- Standard controls
      type==GRAPH_ELEMENT_TYPE_WF_COMMON_BASE            ? CMessage::Text(MSG_GRAPH_ELEMENT_TYPE_WF_COMMON_BASE)           :
      type==GRAPH_ELEMENT_TYPE_WF_LABEL                  ? CMessage::Text(MSG_GRAPH_ELEMENT_TYPE_WF_LABEL)                 :
      type==GRAPH_ELEMENT_TYPE_WF_CHECKBOX               ? CMessage::Text(MSG_GRAPH_ELEMENT_TYPE_WF_CHECKBOX)              :
      type==GRAPH_ELEMENT_TYPE_WF_RADIOBUTTON            ? CMessage::Text(MSG_GRAPH_ELEMENT_TYPE_WF_RADIOBUTTON)           :
      type==GRAPH_ELEMENT_TYPE_WF_BUTTON                 ? CMessage::Text(MSG_GRAPH_ELEMENT_TYPE_WF_BUTTON)                :
      type==GRAPH_ELEMENT_TYPE_WF_ELEMENTS_LIST_BOX      ? CMessage::Text(MSG_GRAPH_ELEMENT_TYPE_WF_ELEMENTS_LIST_BOX)     :
      type==GRAPH_ELEMENT_TYPE_WF_LIST_BOX               ? CMessage::Text(MSG_GRAPH_ELEMENT_TYPE_WF_LIST_BOX)              :
      type==GRAPH_ELEMENT_TYPE_WF_LIST_BOX_ITEM          ? CMessage::Text(MSG_GRAPH_ELEMENT_TYPE_WF_LIST_BOX_ITEM)         :
      type==GRAPH_ELEMENT_TYPE_WF_CHECKED_LIST_BOX       ? CMessage::Text(MSG_GRAPH_ELEMENT_TYPE_WF_CHECKED_LIST_BOX)      :
      type==GRAPH_ELEMENT_TYPE_WF_BUTTON_LIST_BOX        ? CMessage::Text(MSG_GRAPH_ELEMENT_TYPE_WF_BUTTON_LIST_BOX)       :
      type==GRAPH_ELEMENT_TYPE_WF_TOOLTIP                ? CMessage::Text(MSG_GRAPH_ELEMENT_TYPE_WF_TOOLTIP)               :
      type==GRAPH_ELEMENT_TYPE_WF_PROGRESS_BAR           ? CMessage::Text(MSG_GRAPH_ELEMENT_TYPE_WF_PROGRESS_BAR)          :
      //--- Auxiliary control objects
      type==GRAPH_ELEMENT_TYPE_WF_TAB_HEADER             ? CMessage::Text(MSG_GRAPH_ELEMENT_TYPE_WF_TAB_HEADER)            :
      type==GRAPH_ELEMENT_TYPE_WF_TAB_FIELD              ? CMessage::Text(MSG_GRAPH_ELEMENT_TYPE_WF_TAB_FIELD)             :
      type==GRAPH_ELEMENT_TYPE_WF_ARROW_BUTTON           ? CMessage::Text(MSG_GRAPH_ELEMENT_TYPE_WF_ARROW_BUTTON)          :
      type==GRAPH_ELEMENT_TYPE_WF_ARROW_BUTTON_UP        ? CMessage::Text(MSG_GRAPH_ELEMENT_TYPE_WF_ARROW_BUTTON_UP)       :
      type==GRAPH_ELEMENT_TYPE_WF_ARROW_BUTTON_DOWN      ? CMessage::Text(MSG_GRAPH_ELEMENT_TYPE_WF_ARROW_BUTTON_DOWN)     :
      type==GRAPH_ELEMENT_TYPE_WF_ARROW_BUTTON_LEFT      ? CMessage::Text(MSG_GRAPH_ELEMENT_TYPE_WF_ARROW_BUTTON_LEFT)     :
      type==GRAPH_ELEMENT_TYPE_WF_ARROW_BUTTON_RIGHT     ? CMessage::Text(MSG_GRAPH_ELEMENT_TYPE_WF_ARROW_BUTTON_RIGHT)    :
      type==GRAPH_ELEMENT_TYPE_WF_ARROW_BUTTONS_UD_BOX   ? CMessage::Text(MSG_GRAPH_ELEMENT_TYPE_WF_ARROW_BUTTONS_UD_BOX)  :
      type==GRAPH_ELEMENT_TYPE_WF_ARROW_BUTTONS_LR_BOX   ? CMessage::Text(MSG_GRAPH_ELEMENT_TYPE_WF_ARROW_BUTTONS_LR_BOX)  :
      type==GRAPH_ELEMENT_TYPE_WF_SPLIT_CONTAINER_PANEL  ? CMessage::Text(MSG_GRAPH_ELEMENT_TYPE_WF_SPLIT_CONTAINER_PANEL) :
      type==GRAPH_ELEMENT_TYPE_WF_SPLITTER               ? CMessage::Text(MSG_GRAPH_ELEMENT_TYPE_WF_SPLITTER)              :
      type==GRAPH_ELEMENT_TYPE_WF_HINT_BASE              ? CMessage::Text(MSG_GRAPH_ELEMENT_TYPE_WF_HINT_BASE)             :
      type==GRAPH_ELEMENT_TYPE_WF_HINT_MOVE_LEFT         ? CMessage::Text(MSG_GRAPH_ELEMENT_TYPE_WF_HINT_MOVE_LEFT)        :
      type==GRAPH_ELEMENT_TYPE_WF_HINT_MOVE_RIGHT        ? CMessage::Text(MSG_GRAPH_ELEMENT_TYPE_WF_HINT_MOVE_RIGHT)       :
      type==GRAPH_ELEMENT_TYPE_WF_HINT_MOVE_UP           ? CMessage::Text(MSG_GRAPH_ELEMENT_TYPE_WF_HINT_MOVE_UP)          :
      type==GRAPH_ELEMENT_TYPE_WF_HINT_MOVE_DOWN         ? CMessage::Text(MSG_GRAPH_ELEMENT_TYPE_WF_HINT_MOVE_DOWN)        :
      type==GRAPH_ELEMENT_TYPE_WF_BAR_PROGRESS_BAR       ? CMessage::Text(MSG_GRAPH_ELEMENT_TYPE_WF_BAR_PROGRESS_BAR)      :
      type==GRAPH_ELEMENT_TYPE_WF_GLARE_OBJ              ? CMessage::Text(MSG_GRAPH_ELEMENT_TYPE_WF_GLARE_OBJ)             :
      "Unknown"
     );
  }
//+------------------------------------------------------------------+
Technically, there is no difference in the order of checking, but for the sake of order, let's move it to the "correct" place. There is, of course, a difference in access speed, since the if-else check is organized here and, if some type is checked more often than others but is located closer to the end of the list of checks, then the access time will increase, at least theoretically, within the framework of the CPU cycles. However, in order for access to any element to be the same, we need to do all such checks in the library methods using the switch operator which will be done later — at the very end of the creation of the library.
It was previously planned (and was done in the previous article) that the highlight object would be derived from the shadow object. The reason was the presence of Gaussian blur methods in the shadow object methods. Now I have abandoned this idea, since I do not need to use blur to implement glares. Besides, using a shadow object as a parent for a glare object will greatly complicate its addition to other graphical elements as part of the objects attached to them. Therefore, the glare object will be an independent auxiliary WinForms object. But to be able to use blur in the necessary objects (not just in the shadow object), I will move the blur methods from the shadow object to the graphical element object. From there, these methods will be available for all graphical elements of the library.
From the \MQL5\Include\DoEasy\Objects\Graph\ShadowObj.mqh file, remove inclusion of the AlgLib library, remove declaration of blur methods and remove implementation codes of these two methods:
//+------------------------------------------------------------------+
//|                                                    ShadowObj.mqh |
//|                                  Copyright 2021, MetaQuotes Ltd. |
//|                             https://mql5.com/en/users/artmedia70 |
//+------------------------------------------------------------------+
#property copyright "Copyright 2021, MetaQuotes Ltd."
#property link      "https://mql5.com/en/users/artmedia70"
#property version   "1.00"
#property strict    // Necessary for mql4
//+-----------------------------------------------+
//| Include files                                 |
//+-----------------------------------------------+
#include "GCnvElement.mqh"
#include <Math\Alglib\alglib.mqh>
//+-----------------------------------------------+
//| Shadows object class                          |
//+-----------------------------------------------+
class CShadowObj : public CGCnvElement
  {
private:
   color             m_color;                         // Shadow color
   uchar             m_opacity;                       // Shadow opacity
   uchar             m_blur;                          // Blur
//--- Draw the object shadow form
   void              DrawShadowFigureRect(const int w,const int h);
protected:
//--- Gaussian blur
   bool              GaussianBlur(const uint radius);
//--- Return the array of weight ratios
   bool              GetQuadratureWeights(const double mu0,const int n,double &weights[]);
//--- Protected constructor with object type, chart ID and subwindow
                     CShadowObj(const ENUM_GRAPH_ELEMENT_TYPE type,
                                CGCnvElement *main_obj,CGCnvElement *base_obj,
                                const long chart_id,
                                const int subwindow,
                                const string descript,
                                const int x,
                                const int y,
                                const int w,
                                const int h);
public:
In \MQL5\Include\DoEasy\Objects\Graph\GCnvElement.mqh, set inclusion of the AlgLib library and declare the methods for the blur implementation in the protected section:
//+------------------------------------------------------------------+
//|                                                  GCnvElement.mqh |
//|                                  Copyright 2021, MetaQuotes Ltd. |
//|                             https://mql5.com/en/users/artmedia70 |
//+------------------------------------------------------------------+
#property copyright "Copyright 2021, MetaQuotes Ltd."
#property link      "https://mql5.com/en/users/artmedia70"
#property version   "1.00"
#property strict    // Necessary for mql4
//+-----------------------------------------------+
//| Include files                                 |
//+-----------------------------------------------+
#include "GBaseObj.mqh"
#include <Math\Alglib\alglib.mqh>
//+-----------------------------------------------+
//| Class of the graphical element object         |
//+-----------------------------------------------+
class CGCnvElement : public CGBaseObj
  {
protected:
   CGCnvElement     *m_element_main;                           // Pointer to the initial parent element within all the groups of bound objects
   CGCnvElement     *m_element_base;                           // Pointer to the parent element within related objects of the current group
   CCanvas           m_canvas;                                 // CCanvas class object
   CPause            m_pause;                                  // Pause class object
   bool              m_shadow;                                 // Shadow presence
   color             m_chart_color_bg;                         // Chart background color
   uint              m_duplicate_res[];                        // Array for storing resource data copy
   color             m_array_colors_bg[];                      // Array of element background colors
   color             m_array_colors_bg_dwn[];                  // Array of control background colors when clicking on the control
   color             m_array_colors_bg_ovr[];                  // Array of control background colors when hovering the mouse over the control
   bool              m_gradient_v;                             // Vertical gradient filling flag
   bool              m_gradient_c;                             // Cyclic gradient filling flag
   int               m_init_relative_x;                        // Initial relative X coordinate
   int               m_init_relative_y;                        // Initial relative Y coordinate
   color             m_array_colors_bg_init[];                 // Array of element background colors (initial color)

//--- Create (1) the object structure and (2) the object from the structure
   virtual bool      ObjectToStruct(void);
   virtual void      StructToObject(void);
//--- Copy the color array to the specified background color array
   void              CopyArraysColors(color &array_dst[],const color &array_src[],const string source);

//--- Return the number of graphical elements (1) by type, (2) by name and type
   int               GetNumGraphElements(const ENUM_GRAPH_ELEMENT_TYPE type) const;
   int               GetNumGraphElements(const string name,const ENUM_GRAPH_ELEMENT_TYPE type) const;
//--- Create and return the graphical element name by its type
   string            CreateNameGraphElement(const ENUM_GRAPH_ELEMENT_TYPE type);

//--- Gaussian blur
   bool              GaussianBlur(const uint radius);
//--- Return the array of weight ratios
   bool              GetQuadratureWeights(const double mu0,const int n,double &weights[]);

private:
Outside the class body, add the implementation of the blur methods removed from the CShadowObj class:
//+-----------------------------------------------+
//| Gaussian blur                                 |
//| https://www.mql5.com/en/articles/1612#chapter4|
//+-----------------------------------------------+
bool CGCnvElement::GaussianBlur(const uint radius)
  {
//---
   int n_nodes=(int)radius*2+1;
//--- Read graphical resource data. If failed, return false
   if(!CGCnvElement::ResourceStamp(DFUN))
      return false;
//--- Check the blur amount. If the blur radius exceeds half of the width or height, return 'false'
   if((int)radius>=this.Width()/2 || (int)radius>=this.Height()/2)
     {
      ::Print(DFUN,CMessage::Text(MSG_SHADOW_OBJ_IMG_SMALL_BLUR_LARGE));
      return false;
     }

//--- Decompose image data from the resource into a, r, g, b color components
   int  size=::ArraySize(this.m_duplicate_res);
//--- arrays for storing A, R, G and B color components
//--- for horizontal and vertical blur
   uchar a_h_data[],r_h_data[],g_h_data[],b_h_data[];
   uchar a_v_data[],r_v_data[],g_v_data[],b_v_data[];

//--- Change the size of component arrays according to the array size of the graphical resource data
   if(::ArrayResize(a_h_data,size)==-1)
     {
      CMessage::ToLog(DFUN,MSG_LIB_SYS_FAILED_ARRAY_RESIZE);
      ::Print(DFUN_ERR_LINE,": \"a_h_data\"");
      return false;
     }
   if(::ArrayResize(r_h_data,size)==-1)
     {
      CMessage::ToLog(DFUN,MSG_LIB_SYS_FAILED_ARRAY_RESIZE);
      ::Print(DFUN_ERR_LINE,": \"r_h_data\"");
      return false;
     }
   if(::ArrayResize(g_h_data,size)==-1)
     {
      CMessage::ToLog(DFUN,MSG_LIB_SYS_FAILED_ARRAY_RESIZE);
      ::Print(DFUN_ERR_LINE,": \"g_h_data\"");
      return false;
     }
   if(ArrayResize(b_h_data,size)==-1)
     {
      CMessage::ToLog(DFUN,MSG_LIB_SYS_FAILED_ARRAY_RESIZE);
      ::Print(DFUN_ERR_LINE,": \"b_h_data\"");
      return false;
     }
   if(::ArrayResize(a_v_data,size)==-1)
     {
      CMessage::ToLog(DFUN,MSG_LIB_SYS_FAILED_ARRAY_RESIZE);
      ::Print(DFUN_ERR_LINE,": \"a_v_data\"");
      return false;
     }
   if(::ArrayResize(r_v_data,size)==-1)
     {
      CMessage::ToLog(DFUN,MSG_LIB_SYS_FAILED_ARRAY_RESIZE);
      ::Print(DFUN_ERR_LINE,": \"r_v_data\"");
      return false;
     }
   if(::ArrayResize(g_v_data,size)==-1)
     {
      CMessage::ToLog(DFUN,MSG_LIB_SYS_FAILED_ARRAY_RESIZE);
      ::Print(DFUN_ERR_LINE,": \"g_v_data\"");
      return false;
     }
   if(::ArrayResize(b_v_data,size)==-1)
     {
      CMessage::ToLog(DFUN,MSG_LIB_SYS_FAILED_ARRAY_RESIZE);
      ::Print(DFUN_ERR_LINE,": \"b_v_data\"");
      return false;
     }
//--- Declare the array for storing blur weight ratios and,
//--- if failed to get the array of weight ratios, return 'false'
   double weights[];
   if(!this.GetQuadratureWeights(1,n_nodes,weights))
      return false;

//--- Set components of each image pixel to the color component arrays
   for(int i=0;i<size;i++)
     {
      a_h_data[i]=GETRGBA(this.m_duplicate_res[i]);
      r_h_data[i]=GETRGBR(this.m_duplicate_res[i]);
      g_h_data[i]=GETRGBG(this.m_duplicate_res[i]);
      b_h_data[i]=GETRGBB(this.m_duplicate_res[i]);
     }

//--- Blur the image horizontally (along the X axis)
   uint XY; // Pixel coordinate in the array
   double a_temp=0.0,r_temp=0.0,g_temp=0.0,b_temp=0.0;
   int coef=0;
   int j=(int)radius;
   //--- Loop by the image width
   for(int Y=0;Y<this.Height();Y++)
     {
      //--- Loop by the image height
      for(uint X=radius;X<this.Width()-radius;X++)
        {
         XY=Y*this.Width()+X;
         a_temp=0.0; r_temp=0.0; g_temp=0.0; b_temp=0.0;
         coef=0;
         //--- Multiply each color component by the weight ratio corresponding to the current image pixel
         for(int i=-1*j;i<j+1;i=i+1)
           {
            a_temp+=a_h_data[XY+i]*weights[coef];
            r_temp+=r_h_data[XY+i]*weights[coef];
            g_temp+=g_h_data[XY+i]*weights[coef];
            b_temp+=b_h_data[XY+i]*weights[coef];
            coef++;
           }
         //--- Save each rounded color component calculated according to the ratios to the component arrays
         a_h_data[XY]=(uchar)::round(a_temp);
         r_h_data[XY]=(uchar)::round(r_temp);
         g_h_data[XY]=(uchar)::round(g_temp);
         b_h_data[XY]=(uchar)::round(b_temp);
        }
      //--- Remove blur artifacts to the left by copying adjacent pixels
      for(uint x=0;x<radius;x++)
        {
         XY=Y*this.Width()+x;
         a_h_data[XY]=a_h_data[Y*this.Width()+radius];
         r_h_data[XY]=r_h_data[Y*this.Width()+radius];
         g_h_data[XY]=g_h_data[Y*this.Width()+radius];
         b_h_data[XY]=b_h_data[Y*this.Width()+radius];
        }
      //--- Remove blur artifacts to the right by copying adjacent pixels
      for(int x=int(this.Width()-radius);x<this.Width();x++)
        {
         XY=Y*this.Width()+x;
         a_h_data[XY]=a_h_data[(Y+1)*this.Width()-radius-1];
         r_h_data[XY]=r_h_data[(Y+1)*this.Width()-radius-1];
         g_h_data[XY]=g_h_data[(Y+1)*this.Width()-radius-1];
         b_h_data[XY]=b_h_data[(Y+1)*this.Width()-radius-1];
        }
     }

//--- Blur vertically (along the Y axis) the image already blurred horizontally
   int dxdy=0;
   //--- Loop by the image height
   for(int X=0;X<this.Width();X++)
     {
      //--- Loop by the image width
      for(uint Y=radius;Y<this.Height()-radius;Y++)
        {
         XY=Y*this.Width()+X;
         a_temp=0.0; r_temp=0.0; g_temp=0.0; b_temp=0.0;
         coef=0;
         //--- Multiply each color component by the weight ratio corresponding to the current image pixel
         for(int i=-1*j;i<j+1;i=i+1)
           {
            dxdy=i*(int)this.Width();
            a_temp+=a_h_data[XY+dxdy]*weights[coef];
            r_temp+=r_h_data[XY+dxdy]*weights[coef];
            g_temp+=g_h_data[XY+dxdy]*weights[coef];
            b_temp+=b_h_data[XY+dxdy]*weights[coef];
            coef++;
           }
         //--- Save each rounded color component calculated according to the ratios to the component arrays
         a_v_data[XY]=(uchar)::round(a_temp);
         r_v_data[XY]=(uchar)::round(r_temp);
         g_v_data[XY]=(uchar)::round(g_temp);
         b_v_data[XY]=(uchar)::round(b_temp);
        }
      //--- Remove blur artifacts at the top by copying adjacent pixels
      for(uint y=0;y<radius;y++)
        {
         XY=y*this.Width()+X;
         a_v_data[XY]=a_v_data[X+radius*this.Width()];
         r_v_data[XY]=r_v_data[X+radius*this.Width()];
         g_v_data[XY]=g_v_data[X+radius*this.Width()];
         b_v_data[XY]=b_v_data[X+radius*this.Width()];
        }
      //--- Remove blur artifacts at the bottom by copying adjacent pixels
      for(int y=int(this.Height()-radius);y<this.Height();y++)
        {
         XY=y*this.Width()+X;
         a_v_data[XY]=a_v_data[X+(this.Height()-1-radius)*this.Width()];
         r_v_data[XY]=r_v_data[X+(this.Height()-1-radius)*this.Width()];
         g_v_data[XY]=g_v_data[X+(this.Height()-1-radius)*this.Width()];
         b_v_data[XY]=b_v_data[X+(this.Height()-1-radius)*this.Width()];
        }
     }

//--- Set the twice blurred (horizontally and vertically) image pixels to the graphical resource data array
   for(int i=0;i<size;i++)
      this.m_duplicate_res[i]=ARGB(a_v_data[i],r_v_data[i],g_v_data[i],b_v_data[i]);
//--- Display the image pixels on the canvas in a loop by the image height and width from the graphical resource data array
   for(int X=0;X<this.Width();X++)
     {
      for(uint Y=radius;Y<this.Height()-radius;Y++)
        {
         XY=Y*this.Width()+X;
         this.m_canvas.PixelSet(X,Y,this.m_duplicate_res[XY]);
        }
     }
//--- Done
   return true;
  }
//+------------------------------------------------------------------+
//| Return the array of weight ratios                                |
//| https://www.mql5.com/en/articles/1612#chapter3_2                 |
//+------------------------------------------------------------------+
bool CGCnvElement::GetQuadratureWeights(const double mu0,const int n,double &weights[])
  {
   CAlglib alglib;
   double  alp[];
   double  bet[];
   ::ArrayResize(alp,n);
   ::ArrayResize(bet,n);
   ::ArrayInitialize(alp,1.0);
   ::ArrayInitialize(bet,1.0);
//---
   double out_x[];
   int    info=0;
   alglib.GQGenerateRec(alp,bet,mu0,n,info,out_x,weights);
   if(info!=1)
     {
      string txt=(info==-3 ? "internal eigenproblem solver hasn't converged" : info==-2 ? "Beta[i]<=0" : "incorrect N was passed");
      ::Print("Call error in CGaussQ::GQGenerateRec: ",txt);
      return false;
     }
   return true;
  }
//+------------------------------------------------------------------+
The methods are simply moved from one class to another.
I have already mentioned above that it is necessary to refine the methods for drawing predefined graphical primitives and images. Since the methods of drawing primitives with anti-aliasing do not work very well when drawing semi-transparent lines, I need to replace the drawing of smoothed primitives with unsmoothed ones if the transparency of the line has exceeded the set threshold - half of the full opacity value.
Let's take a look at the improved methods. In case the opacity value of the drawn graphical primitive exceeds 127, the primitive is drawn by the method with anti-aliasing. Otherwise, draw using the method without anti-aliasing:
//+-----------------------------------------------+
//| Draw the Info icon                            |
//+-----------------------------------------------+
void CGCnvElement::DrawIconInfo(const int coord_x,const int coord_y,const uchar opacity)
  {
   int x=coord_x+8;
   int y=coord_y+8;
   this.DrawCircleFill(x,y,7,C'0x00,0x77,0xD7',opacity);
   if(opacity>127)
      this.DrawCircleWu(x,y,7.5,C'0x00,0x3D,0x8C',opacity);
   else
      this.DrawCircle(x,y,8,C'0x00,0x3D,0x8C',opacity);
   this.DrawRectangle(x,y-5,x+1,y-4, C'0xFF,0xFF,0xFF',opacity);
   this.DrawRectangle(x,y-2,x+1,y+4,C'0xFF,0xFF,0xFF',opacity);
  }
//+-----------------------------------------------+
//| Draw the Warning icon                         |
//+-----------------------------------------------+
void CGCnvElement::DrawIconWarning(const int coord_x,const int coord_y,const uchar opacity)
  {
   int x=coord_x+8;
   int y=coord_y+1;
   this.DrawTriangleFill(x,y,x+8,y+14,x-8,y+14,C'0xFC,0xE1,0x00',opacity);
   if(opacity>127)
      this.DrawTriangleWu(x,y,x+8,y+14,x-7,y+14,C'0xFF,0xB9,0x00',opacity);
   else
      this.DrawTriangle(x,y,x+8,y+14,x-7,y+14,C'0xFF,0xB9,0x00',opacity);
   this.DrawRectangle(x,y+5,x+1,y+9,  C'0x00,0x00,0x00',opacity);
   this.DrawRectangle(x,y+11,x+1,y+12,C'0x00,0x00,0x00',opacity);
  }
//+-----------------------------------------------+
//| Draw the Error icon                           |
//+-----------------------------------------------+
void CGCnvElement::DrawIconError(const int coord_x,const int coord_y,const uchar opacity)
  {
   int x=coord_x+8;
   int y=coord_y+8;
   this.DrawCircleFill(x,y,7,C'0xF0,0x39,0x16',opacity);
   if(opacity>127)
     {
      this.DrawCircleWu(x,y,7.5,C'0xA5,0x25,0x12',opacity);
      this.DrawLineWu(x-3,y-3,x+3,y+3,C'0xFF,0xFF,0xFF',opacity);
      this.DrawLineWu(x+3,y-3,x-3,y+3,C'0xFF,0xFF,0xFF',opacity);
     }
   else
     {
      this.DrawCircle(x,y,8,C'0xA5,0x25,0x12',opacity);
      this.DrawLine(x-3,y-3,x+3,y+3,C'0xFF,0xFF,0xFF',opacity);
      this.DrawLine(x+3,y-3,x-3,y+3,C'0xFF,0xFF,0xFF',opacity);
     }
  }
//+------------------------------------------------------------------+
Of course, I am simply hiding the problem, but here it is justified: when the opacity decreases from 255 to 128, the smoothed line looks more or less normal, then it starts to break and crumble into pixels instead of becoming more transparent. Replacing drawing a line with drawing without anti-aliasing is completely invisible here - the line is already semi-transparent and in this state its pixelated appearance is not noticeable, which is not the case if we draw an unsmoothed line completely opaque.
The rest of the predefined shape drawing methods in this class also use anti-aliasing drawing methods. But I have not yet tested how it will look when changing the transparency. If there are also visual artifacts in those methods, then I will refine them in exactly the same way.
Since now the glare object is not a separate isolated type (like a shadow object), but belongs to the list of auxiliary WinForms objects, the inclusion of the class file of this object now needs to be done in the class file of the panel object. This object is a container object the files of all WinForms library objects are connected to.
From the \MQL5\Include\DoEasy\Objects\Graph\WForms\WinFormBase.mqh file, remove the connection string of the glare object class:
//+------------------------------------------------------------------+
//|                                                  WinFormBase.mqh |
//|                                  Copyright 2022, MetaQuotes Ltd. |
//|                             https://mql5.com/en/users/artmedia70 |
//+------------------------------------------------------------------+
#property copyright "Copyright 2022, MetaQuotes Ltd."
#property link      "https://mql5.com/en/users/artmedia70"
#property version   "1.00"
#property strict    // Necessary for mql4
//+-----------------------------------------------+
//| Include files                                 |
//+-----------------------------------------------+
#include "GlareObj.mqh"
#include "..\Form.mqh"
#include "..\..\..\Services\Select.mqh"
//+------------------------------------------------------------------+
and set inclusion of the glare object class file in \MQL5\Include\DoEasy\Objects\Graph\WForms\Containers\Panel.mqh of the panel object class:
//+------------------------------------------------------------------+
//|                                                        Panel.mqh |
//|                                  Copyright 2022, MetaQuotes Ltd. |
//|                             https://mql5.com/en/users/artmedia70 |
//+------------------------------------------------------------------+
#property copyright "Copyright 2022, MetaQuotes Ltd."
#property link      "https://mql5.com/en/users/artmedia70"
#property version   "1.00"
#property strict    // Necessary for mql4
//+-----------------------------------------------+
//| Include files                                 |
//+-----------------------------------------------+
#include "Container.mqh"
#include "..\Helpers\TabField.mqh"
#include "..\Helpers\ArrowUpButton.mqh"
#include "..\Helpers\ArrowDownButton.mqh"
#include "..\Helpers\ArrowLeftButton.mqh"
#include "..\Helpers\ArrowRightButton.mqh"
#include "..\Helpers\ArrowUpDownBox.mqh"
#include "..\Helpers\ArrowLeftRightBox.mqh"
#include "..\Helpers\HintMoveLeft.mqh"
#include "..\Helpers\HintMoveRight.mqh"
#include "..\Helpers\HintMoveUp.mqh"
#include "..\Helpers\HintMoveDown.mqh"
#include "GroupBox.mqh"
#include "TabControl.mqh"
#include "SplitContainer.mqh"
#include "..\..\WForms\Common Controls\ListBox.mqh"
#include "..\..\WForms\Common Controls\CheckedListBox.mqh"
#include "..\..\WForms\Common Controls\ButtonListBox.mqh"
#include "..\..\WForms\Common Controls\ToolTip.mqh"
#include "..\..\WForms\Common Controls\ProgressBar.mqh"
#include "..\..\WForms\GlareObj.mqh"
//+-----------------------------------------------+
//| Panel object class of WForms controls         |
//+-----------------------------------------------+
class CPanel : public CContainer
Now the glare object will be available in all container objects, from which it will be possible to create it and include it to the lists of attached objects in any other graphical element of the library. Since any independent GUI window is a priori a container, we can add a glare object (and subsequently a visual effect object) to any control attached to this window.
In \MQL5\Include\DoEasy\Objects\Graph\WForms\Containers\Container.mqh file of the container object class, in its method setting the parameters for the bound object, add a code block at the end to set the parameters of the newly created glare object:
//+-----------------------------------------------+
//| Set parameters for the attached object        |
//+-----------------------------------------------+
void CContainer::SetObjParams(CWinFormBase *obj,const color colour)
  {
//--- Set the text color of the object to be the same as that of the base container
   obj.SetForeColor(this.ForeColor(),true);
//--- If the created object is not a container, set the same group for it as the one for its base object
   if(obj.TypeGraphElement()<GRAPH_ELEMENT_TYPE_WF_CONTAINER || obj.TypeGraphElement()>GRAPH_ELEMENT_TYPE_WF_SPLIT_CONTAINER)
      obj.SetGroup(this.Group());
//--- Depending on the object type
   switch(obj.TypeGraphElement())
     {
      //--- For the Container, Panel and GroupBox WinForms objects
      case GRAPH_ELEMENT_TYPE_WF_CONTAINER            :
      case GRAPH_ELEMENT_TYPE_WF_PANEL                :
      case GRAPH_ELEMENT_TYPE_WF_GROUPBOX             :
        obj.SetBorderColor(obj.BackgroundColor(),true);
        break;
      //--- For "Label", "CheckBox" and "RadioButton" WinForms objects

      //---...
      //---...

      //--- For ProgressBar WinForms object
      case GRAPH_ELEMENT_TYPE_WF_PROGRESS_BAR         :
        obj.SetBackgroundColor(CLR_DEF_CONTROL_PROGRESS_BAR_BACK_COLOR,true);
        obj.SetBorderColor(CLR_DEF_CONTROL_PROGRESS_BAR_BORDER_COLOR,true);
        obj.SetForeColor(CLR_DEF_CONTROL_PROGRESS_BAR_FORE_COLOR,true);
        obj.SetBorderStyle(FRAME_STYLE_SIMPLE);
        break;
      //--- For "GlareObj" WinForms object
      case GRAPH_ELEMENT_TYPE_WF_GLARE_OBJ            :
        obj.SetBackgroundColor(CLR_CANV_NULL,true);
        obj.SetBorderColor(CLR_CANV_NULL,true);
        obj.SetForeColor(CLR_CANV_NULL,true);
        obj.SetBorderStyle(FRAME_STYLE_NONE);
        break;
      default:
        break;
     }
   obj.Crop();
  }
//+------------------------------------------------------------------+
After creating any of the graphical controls attached to the container, this method is called, which sets the minimum properties for the object for it to function properly.
Let's finalize the glare object class in \MQL5\Include\DoEasy\Objects\Graph\WForms\GlareObj.mqh.
Now the class will derive the class of the base WinForms object. Include its file to the glare object class file and change the parent class:
//+------------------------------------------------------------------+
//|                                                     GlareObj.mqh |
//|                                  Copyright 2022, MetaQuotes Ltd. |
//|                             https://mql5.com/en/users/artmedia70 |
//+------------------------------------------------------------------+
#property copyright "Copyright 2022, MetaQuotes Ltd."
#property link      "https://mql5.com/en/users/artmedia70"
#property version   "1.00"
#property strict    // Necessary for mql4
//+-----------------------------------------------+
//| Include files                                 |
//+-----------------------------------------------+
#include "WinFormBase.mqh"
//+-----------------------------------------------+
//| Glare object class                            |
//+-----------------------------------------------+
class CGlareObj : public CWinFormBase
  {
   //---...
In the private section, declare the variable for storing the glare style and change the glare drawing methods by declaring yet another one:
class CGlareObj : public CWinFormBase
  {
private:
   ENUM_CANV_ELEMENT_VISUAL_EFF_STYLE m_style;        // Glare style
   color             m_color;                         // Glare color
   uchar             m_opacity;                       // Glare opacity
   uchar             m_blur;                          // Blur
//--- Draw the object glare form
   void              DrawGlareFigure(void);
   void              DrawFigureRectangle(void);
   void              DrawFigureParallelogram(void);
protected:
The glare style will determine which method should be called to draw it. The DrawGlareFigure() method will call the drawing methods corresponding to the specified style. There will be no formal parameters in the glare drawing methods - there is nothing to specify yet for the correct rendering of an image on a graphical element with a predefined size. The color and opacity of the glare being drawn will be set in advance by the appropriate methods. The blur will not be used yet.
In the public section of the class, declare the methods for drawing a glare, redrawing it, setting opacity and initializing properties, as well as implement the methods for setting and getting some object properties:
public:
//--- Constructor indicating the main and base objects, chart ID and subwindow
                     CGlareObj(CGCnvElement *main_obj,CGCnvElement *base_obj,
                               const long chart_id,
                               const int subwindow,
                               const string descript,
                               const int x,
                               const int y,
                               const int w,
                               const int h);

//--- Supported object properties (1) integer, (2) real and (3) string ones
   virtual bool      SupportProperty(ENUM_CANV_ELEMENT_PROP_INTEGER property) { return true; }
   virtual bool      SupportProperty(ENUM_CANV_ELEMENT_PROP_DOUBLE property)  { return true; }
   virtual bool      SupportProperty(ENUM_CANV_ELEMENT_PROP_STRING property)  { return true; }

//--- Draw the object glare
   void              Draw(void);
//--- Redraw the object
   virtual void      Redraw(bool redraw);
//--- Set the element opacity
   virtual void      SetOpacity(const uchar value,const bool redraw=false);
//--- Initialize the properties
   void              Initialize(void);

//+------------------------------------------------------------------+
//| Methods of simplified access to object properties                |
//+------------------------------------------------------------------+
//--- (1) Set and (2) return the glare color
   void              SetColor(const color colour)                             { this.m_color=colour;     }
   color             Color(void)                                        const { return this.m_color;     }
//--- (1) Set and (2) return the opacity of the drawn glare
   void              SetOpacityDraw(const uchar opacity)                      { this.m_opacity=opacity;  }
   uchar             OpacityDraw(void)                                  const { return this.m_opacity;   }
//--- (1) Set and (2) return the glare blur
   void              SetBlur(const uchar blur)                                { this.m_blur=blur;        }
   uchar             Blur(void)                                         const { return this.m_blur;      }
//--- (1) Set and (2) return the glare visual effect
   void              SetVisualEffectStyle(const ENUM_CANV_ELEMENT_VISUAL_EFF_STYLE style)
                       { this.m_style=style;                                                             }
   ENUM_CANV_ELEMENT_VISUAL_EFF_STYLE VisualEffectStyle(void)           const { return this.m_style;     }
//--- Set the glare visual effect style as (1) rectangle and (2) parallelogram
   void              SetStyleRectangle(void)
                       { this.SetVisualEffectStyle(CANV_ELEMENT_VISUAL_EFF_STYLE_RECTANGLE);             }
   void              SetStyleParallelogramm(void)
                       { this.SetVisualEffectStyle(CANV_ELEMENT_VISUAL_EFF_STYLE_PARALLELOGRAMM);        }
  };
//+------------------------------------------------------------------+
The block of methods for simplified access to object properties features the methods, in which the values passed to the method are set for private variables and the values from these variables are returned.
In the class constructors, replace the CShadowObj parent class initialization with CWinFormBase and add calling the variable initialization method:
//+-----------------------------------------------+
//| Protected constructor with an object type,    |
//| chart ID and subwindow                        |
//+-----------------------------------------------+
CGlareObj::CGlareObj(const ENUM_GRAPH_ELEMENT_TYPE type,
                     CGCnvElement *main_obj,CGCnvElement *base_obj,
                     const long chart_id,
                     const int subwindow,
                     const string descript,
                     const int x,
                     const int y,
                     const int w,
                     const int h) : CWinFormBase(type,main_obj,base_obj,chart_id,subwindow,descript,x-OUTER_AREA_SIZE,y-OUTER_AREA_SIZE,w+OUTER_AREA_SIZE*2,h+OUTER_AREA_SIZE*2)
  {
//--- Set the specified graphical element type for the object and assign the library object type to the current object
   this.SetTypeElement(type);
   this.m_type=OBJECT_DE_TYPE_GGLARE;
   this.Initialize();
  }
//+------------------------------------------------------------------+
//| Constructor indicating the main and base objects,                |
//| chart ID and subwindow                                           |
//+------------------------------------------------------------------+
CGlareObj::CGlareObj(CGCnvElement *main_obj,CGCnvElement *base_obj,
                     const long chart_id,
                     const int subwindow,
                     const string descript,
                     const int x,
                     const int y,
                     const int w,
                     const int h) : CWinFormBase(GRAPH_ELEMENT_TYPE_WF_GLARE_OBJ,main_obj,base_obj,chart_id,subwindow,descript,x,y,w,h)
  {
   this.m_type=OBJECT_DE_TYPE_GGLARE;
   this.Initialize();
  }
//+------------------------------------------------------------------+
Now, instead of writing in each constructor the initialization strings for each variable (the same for both constructors), we simply call the object property initialization method:
//+-----------------------------------------------+
//| Initialize the properties                     |
//+-----------------------------------------------+
void CGlareObj::Initialize(void)
  {
   CGCnvElement::SetBackgroundColor(CLR_CANV_NULL,true);
   CGCnvElement::SetActive(false);
   this.SetBlur(4);
   this.SetColor(clrWhite);
   this.SetOpacity(127);
   this.m_shadow=false;
   this.SetVisibleFlag(false,false);
   this.SetVisualEffectStyle(CANV_ELEMENT_VISUAL_EFF_STYLE_RECTANGLE);
   this.SetDisplayState(CANV_ELEMENT_DISPLAY_STATE_NORMAL);
   this.SetDisplayed(false);
  }
//+------------------------------------------------------------------+
The method sets default values for object properties. The blur is set to 4, the blur color is white. Opacity is set equal to 127 — a semi-transparent object, no shadow. Set the object invisibility flag, the visual effect type is a rectangular glare. The display state is normal (the object is hidden), while the display flag is reset — the object should not be shown on the displayed parent object.
The method setting the element opacity:
//+-----------------------------------------------+
//| Set the element opacity                       |
//+-----------------------------------------------+
void CGlareObj::SetOpacity(const uchar value,const bool redraw=false)
  {
   CGCnvElement::SetOpacity(0,false);
   this.SetOpacityDraw(value>(uchar)CLR_DEF_SHADOW_OPACITY ? (uchar)CLR_DEF_SHADOW_OPACITY : value);
   this.m_canvas.Update(redraw);
  }
//+------------------------------------------------------------------+
The method is identical to the shadow object method of the same name. Here the complete transparency is set for the underlay the glare is drawn on, while the value passed to the method is set for the glare color. If the opacity value passed to the method is greater than the default shadow opacity value, then the default value is used. Otherwise, the value passed to the method is applied. This is done so that the object is never completely opaque. I use the default value for the shadow because it is quite suitable for these purposes.
Glare drawing method:
//+-----------------------------------------------+
//| Draw the object glare                         |
//+-----------------------------------------------+
void CGlareObj::Draw(void)
  {
   if(!this.IsVisible())
      return;
//--- Draw the glare
   this.DrawGlareFigure();
  }
//+------------------------------------------------------------------+
If the object is hidden, nothing should be drawn. Leave the method.
Next, call the method, in which the drawing method is set:
//+-----------------------------------------------+
//| Draw the object glare form                    |
//+-----------------------------------------------+
void CGlareObj::DrawGlareFigure()
  {
   switch(this.VisualEffectStyle())
     {
      case CANV_ELEMENT_VISUAL_EFF_STYLE_RECTANGLE       : this.DrawFigureRectangle();       break;
      case CANV_ELEMENT_VISUAL_EFF_STYLE_PARALLELOGRAMM  : this.DrawFigureParallelogram();   break;
      default:
        break;
     }
  }
//+------------------------------------------------------------------+
Depending on the type of the glare being drawn, we call the appropriate method, which actually draws the glare shape.
The method that draws the rectangular shape of an object glare:
//+-----------------------------------------------+
//| Draw the rectangle object glare form          |
//+-----------------------------------------------+
void CGlareObj::DrawFigureRectangle(void)
  {
   CGCnvElement::DrawRectangleFill(0,0,this.Width()-1,this.Height()-1,this.m_color,this.OpacityDraw());
   CGCnvElement::Update();
  }
//+------------------------------------------------------------------+
A filled rectangle is drawn here over the entire size of the object with the object color and drawing opacity set.
The method that draws the shape of the object glare in the form of a parallelogram:
//+------------------------------------------------------------------+
//| Draw the shape of the object glare as a parallelogram            |
//+------------------------------------------------------------------+
void CGlareObj::DrawFigureParallelogram(void)
  {
   int array_x[]={6,this.Width()-1,this.Width()-1-6,0};
   int array_y[]={0,0,this.Height()-1,this.Height()-1};
   CGCnvElement::DrawPolygonFill(array_x,array_y,this.m_color,this.OpacityDraw());
   CGCnvElement::Update();
  }
//+------------------------------------------------------------------+
A "skewed" triangle is drawn here. First, declare arrays of X and Y coordinates of the polygon vertices, and then, using the vertices specified in the arrays, draw a filled polygon in the form of a skewed rectangle - a parallelogram with the color and drawing opacity set for the object.
If I simply draw an object once and then move it, then the glare object remains visible when the moved object goes beyond the boundaries of the progress bar (namely, the object will move along it in this case). Visually, it looks like the glare "jumps" out of the progress bar and is drawn on the panel the ProgressBar control is attached to. To avoid this, we need to redraw the object while cropping the parts that go beyond their container. To do this, we need the object redrawing method.
The method redrawing an object:
//+-----------------------------------------------+
//| Redraw the object                             |
//+-----------------------------------------------+
void CGlareObj::Redraw(bool redraw)
  {
   CGCnvElement::Erase(false);
   this.Draw();
   this.Crop();
   this.Update(redraw);
  }
//+------------------------------------------------------------------+
Here we first completely clear the object filled it with color and opacity. Since the transparent color is set as the background color, while the opacity value is zero, the object becomes completely transparent. Next, call the previously discussed method of drawing the installed glare shape, crop the areas that protrude outside the object area container and update the canvas.
Now we only need to call the method when moving the object along the progress bar and the glare will not go beyond its container.
Let's develop the functionality of the ProgressBar object.
To display the progress of a certain process, we need to increase the width of the BarProgressBar object by the amount of the progress bar increase step. In general, all progress bar width values will be relative - as a percentage of the width of the ProgressBar object and as a percentage of the maximum value of the progress bar Value parameter. The progress bar can change its values within the limits set in the Minimum and Maximum parameters. But these values should not be set in pixels, but as a percentage of the object width. Then the Value of 100 will be 100 pixels wide when the ProgressBar is of the same width, but will be 200 when the ProgressBar is 200 pixels wide. In this case, if the Value is 50, then this will correspond to the values of 50 and 100 pixels for the above object width values.
In order for us to simply control the values of the progress bar, let's make it so that before using the object before the start of the cycle, whose process needs to be displayed, we will set the minimum and maximum values of the limits and set the step, by which the value of the progress bar width should be increased. After completion of the next action in the tracked cycle, we just need to call the PerformStep() method of the ProgressBar object, and the width of the progress bar will be increased in accordance with the specified increase step. Thus, we should always act like this: knowing the number of iterations of the tracked loop, we set the necessary values to the ProgressBar object, and inside the loop, when the next iteration is completed, we call the PerformStep() method, which will cause the progress bar to change by one step.
In \MQL5\Include\DoEasy\Objects\Graph\WForms\Common Controls\ProgressBar.mqh, namely in its private section, declare the variables for storing progress bar values and the method for calculating the progress bar width:
//+------------------------------------------------------------------+
//| ArrowLeftRightBox object class of WForms controls                |
//+------------------------------------------------------------------+
class CProgressBar : public CContainer
  {
private:
   int               m_progress_bar_max;  // Maximum progress bar width
   int               m_value_by_max;      // Value relative to Maximum
   int               m_steps_skipped;     // Number of skipped steps of increasing the width of the progress bar
//--- Create a new graphical object
   virtual CGCnvElement *CreateNewGObject(const ENUM_GRAPH_ELEMENT_TYPE type,
                                          const int element_num,
                                          const string descript,
                                          const int x,
                                          const int y,
                                          const int w,
                                          const int h,
                                          const color colour,
                                          const uchar opacity,
                                          const bool movable,
                                          const bool activity);
//--- Create the progress bar object
   void              CreateProgressBar(void);
//--- Calculate the progress bar width
   int               CalculateProgressBarWidth(void);
//--- Initialize the element properties
   void              Initialize(void);

protected:
Move the implementation SetValue() public method outside the class body leaving only its declaration in the body:
//--- (1) Set and (2) return the progress bar increment to redraw it
   void              SetStep(const int value)
                       {
                        this.SetProperty(CANV_ELEMENT_PROP_PROGRESS_BAR_STEP,value);
                        CBarProgressBar *bar=this.GetProgressBar();
                        if(bar!=NULL)
                           bar.SetStep(value);
                       }
   int               Step(void)                          const { return (int)this.GetProperty(CANV_ELEMENT_PROP_PROGRESS_BAR_STEP);    }

//--- (1) Set and (2) return the current value of the progress bar in the range from Min to Max
   void              SetValue(const int value);
   int               Value(void)                         const { return (int)this.GetProperty(CANV_ELEMENT_PROP_PROGRESS_BAR_VALUE);   }

//--- (1) Set and (2) return the upper bound of the ProgressBar operating range
   void              SetMaximum(const int value)               { this.SetProperty(CANV_ELEMENT_PROP_PROGRESS_BAR_MAXIMUM,value);       }
   int               Maximum(void)                       const { return (int)this.GetProperty(CANV_ELEMENT_PROP_PROGRESS_BAR_MAXIMUM); }
Declare more methods:
//--- Return the pointer to the progress bar object
   CBarProgressBar  *GetProgressBar(void)                { return this.GetElementByType(GRAPH_ELEMENT_TYPE_WF_BAR_PROGRESS_BAR,0);     }

//--- Resets the progress bar values to the set minimum
   void              ResetProgressBar(void)              { this.SetValue(this.Minimum());    }
//--- Set the element width
   virtual bool      SetWidth(const int width);
//--- Initialize values for handling in PerformStep
   void              SetValuesForProcessing(const int minimum,const int maximum,const int step,const int steps_skipped);
//--- Increase the current position of the progress bar by the step value
   void              PerformStep();

//--- Supported object properties (1) integer, (2) real and (3) string ones
   virtual bool      SupportProperty(ENUM_CANV_ELEMENT_PROP_INTEGER property) { return true; }
   virtual bool      SupportProperty(ENUM_CANV_ELEMENT_PROP_DOUBLE property)  { return true; }
   virtual bool      SupportProperty(ENUM_CANV_ELEMENT_PROP_STRING property)  { return true; }
The ResetProgressBar() method is implemented directly in the body of the class and sets the Value of the progress bar to the one set in the Minimum property. This allows us to return the progress bar to its original state.
In the default value initialization method, set Value of the progress bar to 50% of the object width and calculate the maximum width in pixels for the BarProgressBar object and calculate Value in % of the object width:
//+-----------------------------------------------+
//| Initialize the element properties             |
//+-----------------------------------------------+
void CProgressBar::Initialize(void)
  {
   this.SetBorderSizeAll(1);
   this.SetBorderStyle(FRAME_STYLE_SIMPLE);
   this.SetBackgroundColor(CLR_DEF_CONTROL_PROGRESS_BAR_BACK_COLOR,true);
   this.SetBorderColor(CLR_DEF_CONTROL_PROGRESS_BAR_BORDER_COLOR,true);
   this.SetForeColor(CLR_DEF_CONTROL_PROGRESS_BAR_FORE_COLOR,true);
   this.SetMarqueeAnimationSpeed(10);
   this.SetMaximum(100);
   this.SetMinimum(0);
   this.SetValue(50);
   this.SetStep(10);
   this.SetStyle(CANV_ELEMENT_PROGRESS_BAR_STYLE_CONTINUOUS);
   this.m_progress_bar_max=this.Width()-this.BorderSizeLeft()-this.BorderSizeRight();
   this.m_value_by_max=this.Value()*100/this.Maximum();
   this.m_steps_skipped=0;
  }
//+------------------------------------------------------------------+
The maximum width of the progress bar object should be no more than the width of the background minus the size of its frame on the left and right, so that the progress bar can fit within the frame drawn on the background and not go beyond it.
In the method that creates the progress bar object, set the width of the created object from the value calculated by the CalculateProgressBarWidth() method and add the glare object creation:
//+-----------------------------------------------+
//| Create the progress bar object                |
//+-----------------------------------------------+
void CProgressBar::CreateProgressBar(void)
  {
//--- Set the length of the progress bar equal to the object Value()
//--- The height of the progress bar is equal to the height of the object minus the top and bottom frame sizes
   int w=this.CalculateProgressBarWidth();
   int h=this.Height()-this.BorderSizeTop()-this.BorderSizeBottom();
//--- Create the progress bar object
   this.CreateNewElement(GRAPH_ELEMENT_TYPE_WF_BAR_PROGRESS_BAR,0,0,w,h,clrNONE,255,false,false);
//--- Create the glare object
   this.CreateNewElement(GRAPH_ELEMENT_TYPE_WF_GLARE_OBJ,0,0,w,h,CLR_CANV_NULL,0,true,false);
//--- Add the current CProgressBar object to the list of active elements of the collection
   this.AddObjToListActiveElements();
  }
//+------------------------------------------------------------------+
The method logic is described in the code comments. Here all is simple: we calculate the width of the progress bar and create an object with the calculated width. The default is 50% of the width of the ProgressBar object. Then we create a glare object and add the current object to the list of active objects. All objects in the list of active elements are processed in the library timer and can perform some independent actions implemented in the timer handler of these objects. For this control, the timer will handle the appearance of a glare on the progress bar.
The method that initializes the values to be processed in PerformStep:
//+-----------------------------------------------+
//| Initialize values for handling in PerformStep |
//+-----------------------------------------------+
void CProgressBar::SetValuesForProcessing(const int minimum,const int maximum,const int step,const int steps_skipped)
  {
   this.SetMinimum(minimum<0 ? 0 : minimum);
   this.SetMaximum(maximum<this.Minimum() ? this.Minimum() : maximum);
   this.SetStep(step<0 ? 0 : step);
   this.m_steps_skipped=steps_skipped;
  }
//+------------------------------------------------------------------+
Here: the values of the minimum and maximum limits are passed to the method, within which the Value, the step of change and the number of skipped steps can change. Next, the values of the minimum, maximum and step are checked for correctness and the value of the skipped steps is set in the variable. Since the Value of the progress bar is calculated as a percentage of the width of the ProgressBar object, then, most likely, the value of the skipped steps will not be used - this will be clear from a series of object tests after it is ready. In the current implementation, this value is not used anywhere.
The method that sets the current value of the progress bar:
//+-----------------------------------------------+
//| Set the current value of the progress bar     |
//+-----------------------------------------------+
void CProgressBar::SetValue(const int value)
  {
//--- Correct the value passed to the method and set it to the object property
   int v=(value<this.Minimum() ? this.Minimum() : value>this.Maximum() ? this.Maximum() : value);
   this.SetProperty(CANV_ELEMENT_PROP_PROGRESS_BAR_VALUE,v);
//--- Get the progress bar object
   CBarProgressBar *bar=this.GetProgressBar();
   if(bar!=NULL)
     {
      //--- Set 'value' for the progress bar
      bar.SetValue(v);
      //--- Calculate the width of the progress bar object
      int w=this.CalculateProgressBarWidth();
      //--- If the calculated width is greater than the maximum possible value, set the maximum width
      if(w>this.m_progress_bar_max)
         w=this.m_progress_bar_max;
      //--- If the width is less than 1, then
      if(w<1)
        {
         //--- hide the progress bar and redraw the chart to display changes immediately
         bar.Hide();
         ::ChartRedraw(bar.ChartID());
        }
      //--- If the width value is not less than 1
      else
        {
         //--- If the progress bar is hidden, display it and
         if(!bar.IsVisible())
            bar.Show();
         //--- change its size according to the received width
         bar.Resize(w,bar.Height(),true);
        }
     }
  }
//+------------------------------------------------------------------+
The method logic is fully described in the code comments. If, when calculating the width of an object, its width turns out to be less than one pixel, then such a value cannot be set for the object. Therefore, it is given a width of one pixel, and the object is hidden, thereby simulating a zero-width progress bar.
The method that increases the current position of the progress bar by the step value:
//+----------------------------------------------------------------------+
//| Increase the current position of the progress bar by the step value  |
//+----------------------------------------------------------------------+
void CProgressBar::PerformStep(void)
  {
   this.SetValue(this.Value()+this.Step());
  }
//+------------------------------------------------------------------+
Here we simply set the Value property of the object to its past value plus the previously specified value of the increment of this value. Thus, with each subsequent call to this method, the value of Value will increase by the increment recorded in Step.
The method that calculates the width of the progress bar:
//+-----------------------------------------------+
//| Calculate the width of the progress bar       |
//+-----------------------------------------------+
int CProgressBar::CalculateProgressBarWidth(void)

  {
   this.m_value_by_max=this.Value()*100/this.Maximum();
   return this.m_progress_bar_max*this.m_value_by_max/100;
  }
//+------------------------------------------------------------------+
Here we first calculate the Value as a percentage of the maximum possible one and then return the relative width of the maximum width of the progress bar as a percentage of the value calculated above.
The method setting the new object width:
//+-----------------------------------------------+
//| Set a new width                               |
//+-----------------------------------------------+
bool CProgressBar::SetWidth(const int width)
  {
   if(!CGCnvElement::SetWidth(width))
      return false;
   this.m_progress_bar_max=this.Width()-this.BorderSizeLeft()-this.BorderSizeRight();
   CBarProgressBar *bar=this.GetProgressBar();
   if(bar==NULL)
      return false;
   int w=this.CalculateProgressBarWidth();
   bar.SetWidth(w);
   return true;
  }
//+------------------------------------------------------------------+
Here we first set the new underlay width, then calculate the maximum width of the progress bar in pixels.
Next, get the relative width in % of the progress bar and set it to the CBarProgressBar object.
All visual effects that appear on the progress bar should be processed in the timer of the BarProgressBar object. The glare should run along the progress bar after some pause: pause — glare — pause — glare, etc. To implement this behavior, we need to set some values for the properties the objects already have. We set such properties to implement the smooth appearance/disappearance of tooltips in previous articles. These properties are also suitable for the glare object.
To the \MQL5\Include\DoEasy\Objects\Graph\WForms\Helpers\BarProgressBar.mqh file of the progress bar object class, include the glare object file. In its private section, write the methods for setting/returning the delay and declare the method of initializing the object properties:
//+------------------------------------------------------------------+
//|                                               BarProgressBar.mqh |
//|                                  Copyright 2022, MetaQuotes Ltd. |
//|                             https://mql5.com/en/users/artmedia70 |
//+------------------------------------------------------------------+
#property copyright "Copyright 2022, MetaQuotes Ltd."
#property link      "https://mql5.com/en/users/artmedia70"
#property version   "1.00"
#property strict    // Necessary for mql4
//+-----------------------------------------------+
//| Include files                                 |
//+-----------------------------------------------+
#include "..\WinFormBase.mqh"
#include "..\GlareObj.mqh"
//+------------------------------------------------------------------+
//| BarProgressBar object class of the ProgressBar control           |
//+------------------------------------------------------------------+
class CBarProgressBar : public CWinFormBase
  {
private:
//--- (1) Set and (2) return a pause before displaying the effect
   void              SetShowDelay(const long delay)               { this.SetProperty(CANV_ELEMENT_PROP_TOOLTIP_RESHOW_DELAY,delay);             }
   ulong             ShowDelay(void)                              { return this.GetProperty(CANV_ELEMENT_PROP_TOOLTIP_RESHOW_DELAY);            }
//--- Initialize the properties
   void              Initialize(void);
protected:
In both class constructors, instead of the similar property setting strings, implement the call of the method for setting the properties:
//+------------------------------------------------------------------+
//| Protected constructor with an object type,                       |
//| chart ID and subwindow                                           |
//+------------------------------------------------------------------+
CBarProgressBar::CBarProgressBar(const ENUM_GRAPH_ELEMENT_TYPE type,
                                 CGCnvElement *main_obj,CGCnvElement *base_obj,
                                 const long chart_id,
                                 const int subwindow,
                                 const string descript,
                                 const int x,
                                 const int y,
                                 const int w,
                                 const int h) : CWinFormBase(type,main_obj,base_obj,chart_id,subwindow,descript,x,y,w,h)
  {
//--- Set the specified graphical element type for the object and assign the library object type to the current object
   this.SetTypeElement(type);
   this.m_type=OBJECT_DE_TYPE_GWF_HELPER;
   this.Initialize();
  }
//+------------------------------------------------------------------+
//| Constructor indicating the main and base objects,                |
//| chart ID and subwindow                                           |
//+------------------------------------------------------------------+
CBarProgressBar::CBarProgressBar(CGCnvElement *main_obj,CGCnvElement *base_obj,
                                 const long chart_id,
                                 const int subwindow,
                                 const string descript,
                                 const int x,
                                 const int y,
                                 const int w,
                                 const int h) : CWinFormBase(GRAPH_ELEMENT_TYPE_WF_BAR_PROGRESS_BAR,main_obj,base_obj,chart_id,subwindow,descript,x,y,w,h)
  {
   this.SetTypeElement(GRAPH_ELEMENT_TYPE_WF_BAR_PROGRESS_BAR);
   this.m_type=OBJECT_DE_TYPE_GWF_HELPER;
   this.Initialize();
  }
//+------------------------------------------------------------------+
Move property initialization strings removed from constructors to the initialization method:
//+-----------------------------------------------+
//| Initialize the properties                     |
//+-----------------------------------------------+
void CBarProgressBar::Initialize(void)
  {
   this.SetPaddingAll(0);
   this.SetMarginAll(0);
   this.SetBorderSizeAll(0);
   this.SetBackgroundColor(CLR_DEF_CONTROL_PROGRESS_BAR_BAR_COLOR,true);
   this.SetBorderColor(CLR_DEF_CONTROL_PROGRESS_BAR_BAR_COLOR,true);
   this.SetForeColor(CLR_DEF_CONTROL_PROGRESS_BAR_FORE_COLOR,true);
   this.SetShowDelay(2000);
  }
//+------------------------------------------------------------------+
In addition to the moved strings, here I have added the implementation of a two-second pause between glares on the progress bar.
Previously, in the object timer, we simply sent the value from the GetTickCount() function to the chart in the comment.
Now let's write a full-fledged handler.
Timer event handler:
//+-----------------------------------------------+
//| Timer                                         |
//+-----------------------------------------------+
void CBarProgressBar::OnTimer(void)
  {
   CWinFormBase *base=this.GetBase();
   if(base==NULL)
      return;
   CWinFormBase *glare=base.GetElementByType(GRAPH_ELEMENT_TYPE_WF_GLARE_OBJ,0);
   if(glare==NULL)
      return;

//--- If the object is in the normal state (hidden)
   if(glare.DisplayState()==CANV_ELEMENT_DISPLAY_STATE_NORMAL)
     {
      //--- set the state of waiting for fading in to the object (in our case, waiting for a shift along the progress bar),
      //--- set the waiting duration and set the countdown time
      glare.SetDisplayState(CANV_ELEMENT_DISPLAY_STATE_WAITING_FADE_IN);
      this.m_pause.SetWaitingMSC(this.ShowDelay());
      this.m_pause.SetTimeBegin();
      //--- If the right edge of the glare object is to the right of the left edge of the progress bar object
      if(glare.RightEdge()>=this.CoordX())
        {
         //--- Hide the glare object and move it beyond the right edge of the progress bar
         glare.Hide();
         if(glare.Move(this.CoordX()-glare.Width(),this.CoordY()))
           {
            //--- Set the relative coordinates of the glare object
            glare.SetCoordXRelative(glare.CoordX()-this.CoordX());
            glare.SetCoordYRelative(glare.CoordY()-this.CoordY());
            //--- and its visibility scope equal to the entire object
            glare.SetVisibleArea(0,0,glare.Width(),glare.Height());
           }
        }
      return;
     }
//--- If the object is in the state of waiting for fading in (in our case, waiting for a shift along the progress bar)
   if(glare.DisplayState()==CANV_ELEMENT_DISPLAY_STATE_WAITING_FADE_IN)
     {
      //--- If the waiting time has not yet passed, leave
      if(this.m_pause.Passed()<this.ShowDelay())
         return;
      //--- Set the state of the object being in the process of shifting along the progress bar and
      //---  set the process start countdown time
      glare.SetDisplayState(CANV_ELEMENT_DISPLAY_STATE_PROCESS_FADE_IN);
      this.m_pause.SetTimeBegin();
      return;
     }
//--- If the object is in the state of a shift along the progress bar
   if(glare.DisplayState()==CANV_ELEMENT_DISPLAY_STATE_PROCESS_FADE_IN)
     {
      //--- If the glare object X coordinate still has not gone beyond the right edge of the progress bar
      if(glare.CoordX()<=this.RightEdge())
        {
         //--- set the display flag and show the object
         if(!glare.Displayed())
            glare.SetDisplayed(true);
         if(!glare.IsVisible())
            glare.Show();
         //--- bring the highlight object to the foreground
         glare.BringToTop();
         //--- Shift the highlight by 16 pixels to the right
         if(glare.Move(glare.CoordX()+16,this.CoordY()))
           {
            //--- Set the relative coordinates of the highlight object and redraw it
            glare.SetCoordXRelative(glare.CoordX()-this.CoordX());
            glare.SetCoordYRelative(glare.CoordY()-this.CoordY());
            glare.Redraw(true);
           }
         return;
        }
      //--- Set the completion state of the shift along the progress bar
      glare.SetDisplayState(CANV_ELEMENT_DISPLAY_STATE_COMPLETED_FADE_IN);
     }
//--- If the object is in the state of completion of shifting along the progress bar
   if(glare.DisplayState()==CANV_ELEMENT_DISPLAY_STATE_COMPLETED_FADE_IN)
     {
      //--- set the object to its normal state (invisible),
      //--- hide the object and set its invisibility flag
      glare.SetDisplayState(CANV_ELEMENT_DISPLAY_STATE_NORMAL);
      glare.Hide();
      glare.SetDisplayed(false);
      return;
     }
  }
//+------------------------------------------------------------------+
The logic of the method is fully described in the comments to the code and is identical to the timer event handler I implemented for the tooltip objects in the previous article. This is just a more cropped down version. In tooltip objects, we wait for the object to start appearing (here too), then the object fades in (here it runs along the progress bar), then waits for it to fade out and fades out (not in the current case). That is the whole difference. But for the glare to appear and run along the progress bar, we use the same values of the ENUM_CANV_ELEMENT_DISPLAY_STATE enumeration as in the tooltip objects:
//+-----------------------------------------------+
//| List of control display states                |
//+-----------------------------------------------+
enum ENUM_CANV_ELEMENT_DISPLAY_STATE
  {
   CANV_ELEMENT_DISPLAY_STATE_NORMAL,                 // Normal
   CANV_ELEMENT_DISPLAY_STATE_WAITING_FADE_IN,        // Wait for fading in
   CANV_ELEMENT_DISPLAY_STATE_PROCESS_FADE_IN,        // Fading in
   CANV_ELEMENT_DISPLAY_STATE_COMPLETED_FADE_IN,      // Fading in end
   CANV_ELEMENT_DISPLAY_STATE_WAITING_FADE_OUT,       // Wait for fading out
   CANV_ELEMENT_DISPLAY_STATE_PROCESS_FADE_OUT,       // Fading out
   CANV_ELEMENT_DISPLAY_STATE_COMPLETED_FADE_OUT,     // Fading out end
   CANV_ELEMENT_DISPLAY_STATE_COMPLETED,              // Complete processing
  };
//+------------------------------------------------------------------+
The constants of this enumeration are universal enough to be used to handle different events in different objects. If necessary, it will be possible to add constants, describing some possible further events, to this list.
Everything is ready for a test.
Test
To perform the test, I will use the EA from the previous article and save it in \MQL5\Experts\TestDoEasy\Part127\ as TestDoEasy127.mq5.
We have previously created a static ProgressBar object on the second bar of the SplitContainer control located on the first tab of the TabControl. Now we need to get a pointer to the ProgressBar object and first increase its size in a loop to visually see how this changes the relative size of the progress bar set to 50% of the ProgressBar width. Then, again, in a loop, increase the value of the progress bar using the PerformStep method. For the method to work, set the necessary parameters in advance: minimum = 0, maximum = 350, step = 1. After both loops are completed, we get a pointer to the glare object and set display parameters for it.
To implement all this, set the following code block at the end of the OnInit() handler:
//--- Display and redraw all created panels
   for(int i=0;i<FORMS_TOTAL;i++)
     {
      //--- Get the panel object
      pnl=engine.GetWFPanel("WinForms Panel"+(string)i);
      if(pnl!=NULL)
        {
         //--- display and redraw the panel
         pnl.Show();
         pnl.Redraw(true);
         //--- Get the TabControl object from the panel
         CTabControl *tc=pnl.GetElementByType(GRAPH_ELEMENT_TYPE_WF_TAB_CONTROL,0);
         //--- Get the SplitContainer object from the first tab of the TabControl object
         CSplitContainer *sc=tc.GetTabElementByType(0,GRAPH_ELEMENT_TYPE_WF_SPLIT_CONTAINER,0);
         //--- Get the second panel from the SplitContainer object
         CSplitContainerPanel *scp=sc.GetPanel(1);
         //--- Get the ProgressBar object from the received panel
         CProgressBar *pb=scp.GetElementByType(GRAPH_ELEMENT_TYPE_WF_PROGRESS_BAR,0);
         //--- Wait for 1/10 of a second
         Sleep(100);
         //--- Get the width of the ProgressBar object
         int w=pb.Width();
         //--- In the loop, increase the width of the ProgressBar by 180 pixels with a delay of 1/50
         for(int n=0;n<180;n++)
           {
            Sleep(20);
            pb.Resize(w+n,pb.Height(),true);
           }
         //--- Set the values for PerformStep of the ProgressBar object
         pb.SetValuesForProcessing(0,350,1,0);
         //--- Reset ProgressBar to minimum
         pb.ResetProgressBar();
         //--- Wait for 1/5 second
         Sleep(200);
         //--- In the loop from the minimum to the maximum value of ProgressBar
         for(int n=0;n<=pb.Maximum();n++)
           {
            //--- call the method for increasing the progress bar by a given step with a wait of 1/5 second
            pb.PerformStep();
            Sleep(20);
           }
         //--- Get the glare object
         CGlareObj *gl=pb.GetElementByType(GRAPH_ELEMENT_TYPE_WF_GLARE_OBJ,0);
         if(gl!=NULL)
           {
            //--- Set the glare type - rectangle, opacity 40, color - white
            gl.SetStyleRectangle();
            gl.SetOpacity(40);
            gl.SetColor(clrWhite);
           }
        }
     }

//---
   return(INIT_SUCCEEDED);
  }
//+------------------------------------------------------------------+
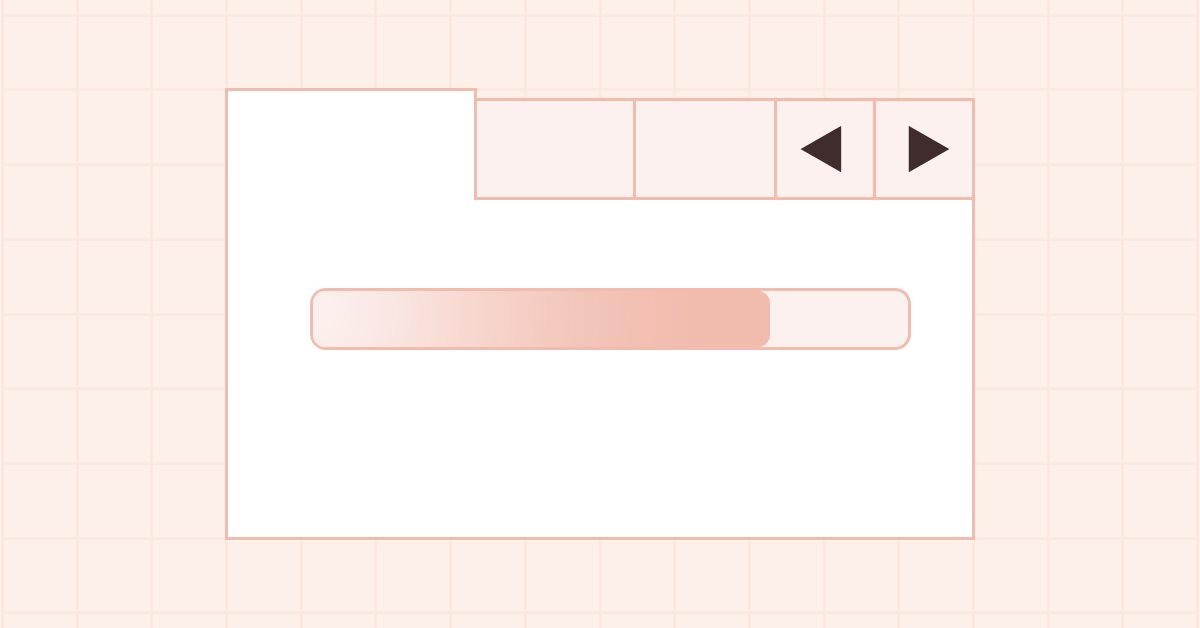
Compile and launch the EA on the chart:
In the first loop, we see how the width of the ProgressBar object increases, and the width of the progress bar also increases proportionally. At the same time, the Value is initially set to 50, and it remains so, since the width of the progress bar is set in relative values.
In the second loop, we call the PerformStep method each time, which at each step increments the (relative) Value by the value of the increment step. Although there are 350 increments, we can see that the progress bar is growing by more than 1 pixel at a time. This is due to the fact that all values are relative and are calculated as a percentage of the width of the ProgressBar. This is correct since it is impossible to increment one pixel at each step. If the ProgressBar width is 100 pixels and the number of steps is 1000, then we have 10 increment steps per pixel. They are skipped when calculating relative values.
When the progress bar increment loop completes, we see a glare run through it every two seconds. This is enough for demonstration. However, this is insufficient for normal appearance. First, the glare should run along the moving progress bar, and not along the completed one, and second, the "effect" has turned out to be too simple. I will gradually improve all this.
The icons of the tooltip objects now fade out normally.
What's next?
In the next article, I will continue working on the WinForms library objects and the ProgressBar object.
*Previous articles within the series:
DoEasy. Controls (Part 20): SplitContainer WinForms object
DoEasy. Controls (Part 21): SplitContainer control. Panel separator
DoEasy. Controls (Part 22): SplitContainer. Changing the properties of the created object
DoEasy. Controls (Part 23): Improving TabControl and SplitContainer WinForms objects
DoEasy. Controls (Part 24): Hint auxiliary WinForms object
DoEasy. Controls (Part 25): Tooltip WinForms object
DoEasy. Controls (Part 26): Finalizing the ToolTip WinForms object and moving on to ProgressBar development
Translated from Russian by MetaQuotes Ltd.
Original article: https://www.mql5.com/ru/articles/11764
- Free trading apps
- Over 8,000 signals for copying
- Economic news for exploring financial markets
You agree to website policy and terms of use